EASY 1 Carb Protein Waffles

EASY 1 Carb Protein Waffles

I love waffles just as much as the next brunch-loving New Yorker, but I never get them because I just can’t justify all of those carbs (and, real talk, there are so many cheat meal options out there that I never settle on waffles).  I’m on a life mission to master the art of healthy eating, and this means giving in to our cravings sometimes.  That’s why I love finding and making recipes with healthier ingredients that mimic the epic cheat meals we REALLY want to be eating.  I’m not sure if this one was inspired by my southern road trip (where I shamelessly experienced arguably the best waffles ever), but I think I have perfected the protein waffle, and I’m so excited to share it with you!

Final 1

Let me preface with the following disclaimer: this will NOT be lightest, fluffiest, most delicious waffle you ever have.  Actually, it’s quite dense, and will taste mostly like the protein powder flavor you use to make it.  It is, however, a warm, tasty, and satisfying alternative to the monster that is a real official waffle.  It’s also a way better alternative to frozen waffles, in my opinion.  And it takes literally less than 10 minutes to make.  Ok, now that we’ve been completely honest with each other, let’s get started!

Ingredients:

  1. 1 scoop protein powder (I used PEScience in this recipe because it mixes the best of all other proteins I have used, but I also love using Rootz Nutrition as well!)
  2. 1 whole egg (You can add an additional white to achieve desired consistency)
  3. 1/8 tsp baking powder
  4. Water, for desired consistency
  5. Cinnamon (optional)
  6. Coconut oil (or whatever oil you want to use to coat the waffle iron)

Ingredients 2

Instructions:

  1. Start heating up your waffle iron.
  2. Mix the protein powder into a bowl with the baking powder and cinnamon.  You can just use a fork to mix.  Add the egg, and start to mix until the egg becomes dry.  Note that your egg will become dry before all protein powder is incorporated.  This is fine; queue water for consistency.
  3. Add water, one tbsp at a time, until the batter becomes waffle consistency.  This means that it will be runny, but not watery.  I usually add 3 tbsp of water for this desired consistency.
  4. Oil your waffle iron with coconut oil.  I use a cooking paintbrush to do this.
  5. Pour batter into the heated waffle iron, starting in the middle, and once you’re out of batter use a silicon spatula or the back of a spoon to smooth out the batter until the waffle iron is coated pretty evenly.  Work fairly quickly, because the bottom of your waffle is cooking!
  6. Close the iron, and cook according to your iron’s instructions.  Since these waffles have different ingredients than a traditional waffle, it might take a shorter amount of time than suggested.  Mine usually cooks within a minute or minute and a half.
  7. Open up the iron once it’s done, use a fork to carefully remove the waffle, and dress it up however you fancy!

How many times did I just say ‘iron’ and ‘waffle’?

Warning: the next few photos will not be cute, because it’s difficult to make protein powder mixed with eggs and water look nice. Consider yourself warned.  But persevere, because stats for this waffle are below 🙂

ingredients 1

Making 1

Making 2

Making 3

Stats (this recipe makes 1 serving): Protein – 30g; Carbs – 1; Fat – 6; Calories – 180.

When I made this waffle, I ate it plain because it was just a quick snack before the gym.  I do strongly recommend, however, adding toppings because otherwise it’s dense and dry.  My favorite is to add sunnyside eggs.  You can also add fruit, whipped cream, chocolate sauce, nuts, nut butter, etc.  Get creative with it!  You can even play around with the protein powder flavors you use to complement your favorite toppings (peanut butter waffle topped with banana and chocolate sauce anyone?)

I hope you guys try out this super easy protein-packed recipe.  These waffles are tasty, satisfying, and make a simple snack into something a bit more fun and interesting.  I would love to see what amazing waffle creations you made with this simple recipe, so tag me @liftinluxe #liftinluxe in your photos!

Stay fit and fab, all!

Final 2

With egg 2

Homemade Tacos

Homemade Tacos

I immediately lose trust in someone if they say they don’t like tacos.  Ok, I’m exaggerating, but seriously who doesn’t love a good taco?  Mexican food is actually a huge weakness of mine, and I have a love-hate relationship with Mexican restaurants because there’s so much potential for tag-along calories with your delicious Mexican meal.  How easy is it to fill up on guac and chips while you’re waiting for your tacos, then knock back your whole plate of tacos cause they’re just so damned delicious?!  Was there guac on the tacos too?  A creamy drizzle?  Sour cream?  Probably all of the above.  Then there’s the cheese, tortilla, and tag-along fats that come with cooking the meats and veggies. How about that side of rice and beans, though?  Are you salivating yet?  I know I am.

I thought that there must be a better way to enjoy tacos on the reg without having to make it my cheat meal every single week.  And alas, there was!  I made my own tortillas, slashing the carbs down significantly, and my own avocado sauce to drizzle, cutting down the fats by a whole lot.  Also, a solid benefit of making my own tacos at home was that I got to choose what to make on the side – AKA, no rice and beans sitting inches away from my fork to tempt me!

First, I’ll start with the taco recipe.  It was so so so easy.

Ingredients:

  1. 1/4 cup coconut flour
  2. 3 eggs
  3. 1 cup almond milk
  4. Coconut oil

Instructions:

  1. Whisk together the coconut flour, eggs, and almond milk until well combined.  Let the batter sit for a minute or two to thicken.  The batter should be runny, so add additional egg/almond milk in equal parts if need be to get it to a nice pourable consistency (I didn’t have to add anything extra when I made them).
  2. Heat a pan or skillet on the stove over medium heat and grease lightly with coconut oil
  3. Pour about 1/4 cup of batter into your pan or skillet and immediately swirl the batter around by tilting the pan to spread it out evenly.
  4. Cover the pan for about 2-3 minutes while the tortilla cooks.  When it’s golden and curled up a little on the edges, it’s ready to flip.  It should come up easily and should also be nicely golden on its pan side.  If it doesn’t come up easily when you try to flip it, it’s not done.
  5. Cook for another 2 minutes on the other side (or until golden brown)
  6. Keep going until you’ve used up all the batter.

This recipe made about 6 tortillas, and the leftovers stayed really well in the fridge until the next day.

1

Now for the fillings.  I cooked up some chicken and beef seasoned with cumin, smoked paprika, chipotle pepper powder, and pepper and set it aside.  Then, I cut up some tomatoes, onion, and cilantro and combined it in a bowl.  I took an oz of goat cheese out of the fridge and set that aside.  I washed some lettuce and set that aside as well.  Lastly, I made the most bomb avocado lime dressing to put on my tacos (and to save as a salad dressing for the rest of the week).

Ingredients:

  1. 100g avocado
  2. Juice from 2 limes
  3. Salt
  4. A splash of apple cider vinegar
  5. 1/2 cup greek yogurt
  6. 1 cup almond milk

Instructions:

  1. Blend all of the ingredients in a food processor or blender
  2. Store in an airtight container.  The top layer will get brown after a day, but it will stay fine in your fridge for at least four days.

This recipe yielded 1 cup of dressing, and I decided that a serving would be 2 tbsp (1/8 of the entire recipe.)  The macros for a serving of the dressing are: P – 2; C – 2; F – 2.5.  40 calories! If you want a thicker dressing, use less of the liquid ingredients.

3

Once all of this was prepared, I assembled my tacos and then devoured them!  They were honestly just as satisfying as the real deal.  And didn’t leave me overstuffed and bloated like a typical trip to my favorite Mexican restaurant.

Added bonus, I used the leftover tortillas the next day and made a really delicious dessert by spreading greek yogurt, honey, and cinnamon on them and rolling them up.  It was almost like a crepe, and it was an equally as delicious way to enjoy those homemade tortillas.

Stay fit and fiesta, all!

2

Tips for Buying Lunch at Work

Tips for Buying Lunch at Work

Try as you might, are you still finding it difficult to prep your meals in advance for the week?  Or maybe you just really hate cooking and want to do it as little as possible.  Whatever the reason may be, I understand that preparing every meal of every day in advance isn’t a lifestyle that suits everyone.  To each their own!  If buying lunch is something that you do regularly, it’s so important to make well-informed and smart decisions to stay on track with  your goals.  I’ve been out of the buying lunch game for a while now, so I decided that for a week I would buy my lunch instead of bringing one from home, and use my experiences to come up with some tips and tricks for you on buying lunch.

As an extra little side experiment, I didn’t tell my team at work about my lunch-buying research, and wanted to see if/when they would become alarmed and concerned by my sudden change in routine.  I didn’t have to wait very long – it happened on Tuesday.

 So for my week of buying lunch, I tried to go to places that are chains, and places that are typical lunch spots. I wanted my experiences to be able to translate into general guidelines for you, but also provide specific and relevant examples.  Here’s what I wound up munching on this week for lunch:

  1. Poke (I went to a spot near my job, but all poke places are pretty similar so my tips here can be applied wherever it’s convenient for you)
  2. Sweetgreen
  3. Chipotle
  4. Stamina Grill (Ok so this one isn’t a chain, but it looked so good I had to try it)
  5. Buffet style deli (again, I went to a spot near my job, but my tips here can be applied to any buffet style deli)

Before I get into the details of each individual day, here’s a few things that I learned as general notes:

First, this might seem silly to even mention because it’s pretty obvious, but it’s so much easier to plan out your day when your lunch spot posts its nutrition facts online.  It’s important to assess the accuracy of the facts posted once you actually get your meal and can see what’s in it, but it’s so much easier to estimate when you have a starting point.  Also, don’t automatically assume that a place doesn’t have macro information online.  I am pleasantly surprised at the amount of restaurants lately that post nutrition information.  Best practice would be to Google ‘[Eatery name] nutrition information’ for any place you’re interested in eating at.  You might be surprised at which of your favorite restaurants actually post information!

Second, when you are estimating the calories/macros in a meal, break it down by each individual ingredient or component of the dish, rather than just trying to place a guesstimated number on the dish as a whole. When estimating, you’re already by default not really getting an accurate number, so by taking a general high level assessment of a dish as a whole and slapping a number on it, you’re almost positively going to be pretty far off.  Also, taking each ingredient/component individually ensures that you don’t accidentally leave something out in your consideration.

Third, keep the blinders ON at the checkout line.  I know there’s a ton of good stuff on those impulse shelves just begging to be purchased while you wait patiently on line to get rung up.  I fell victim to these impulsive purchases this week too…sometimes they’re so hard to resist!  If it’s not something you would normally eat, or if it’s not something you would have brought from home to go with your lunch, then don’t impulsively grab it while you’re waiting on line.

Fourth, when you’re at an eatery that offers ‘signature’ dishes as well as ‘build-your-own,’ it’s almost always better to make your own.  The signature dishes always have more ingredients than you’d have thought to order on your own and probably use dressings and sauces that you wouldn’t have otherwise selected.  Although they’re delicious, they have a ton of extra calories as opposed to if you were to build your own.  Best practice would be to skip directly to the build your own portion of the menu so you aren’t tempted by the signature dishes.

Fifth, on a similar note, best practice is that bowls are always better than wraps or burritos.  The wrap/tortilla adds a lot of avoidable carbs and fills you up with fairly empty calories.  I personally much rather get a bowl and fill it with protein and veggies instead.

Sixth, another best practice – plan your dinners in advance so you know exactly what macros you need to hit on lunch in order to meet your goals for the day.  Since lunches are going to be spontaneous on a day-to-day basis, dinners will need to be well planned.

Seventh, even if you’re buying lunch, you can always bring certain components from home to make it the most ideal meal.  For example, if you make your own salad dressings or dipping sauces, bring them with you and add your own flair to your store-bought lunch!  Also, if you’re having trouble hitting your protein, which was often a struggle for me this week, you can always bring some extra protein from home to supplement.

Eighth, check the restaurant’s menu prior to your arrival, and preferably right after you eat breakfast, so that you can settle on what you’ll order at a time that you’re not starving.  They say you’re not supposed to go the grocery store hungry, otherwise you’ll blow your life savings in one shop getting one of everything because you’re so excited to eat.  This follows that same idea.  Once you get to the eatery and smell all the delicious flavors in there, it’s going to be really difficult to settle on one of the more healthy options.  So check the menu early, and stick with your original decision once you get there.  It helped me to log into my macro tracking app in advance the lunch that I chose, because then it felt like a more final decision that would require more math and planning if I wanted to change it. And who has time for that, right?

Lastly, choose a solid rotation of 5-6 eateries that you like, and try to generally stick to those same places.  The more you eat at the same place, the better you will get at estimating the macros in your meal.  You’ll be able to track patterns about a certain place based on how your body reacts to its food over time.  To take an extreme example, if you eat at the same lunch spot every single day and are tracking your macros at a deficit but you aren’t losing body fat, it’s safe to assume that you’re underestimating for lunch.

Ok, with those general observations out of the way, let’s get to each day’s meals!
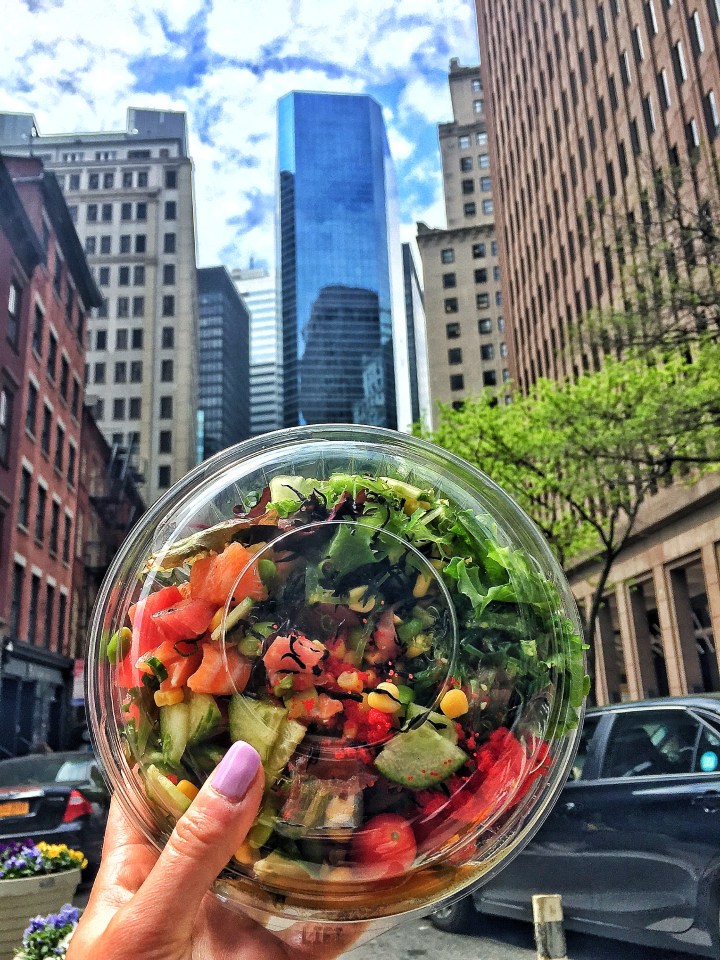
Monday – Pokegreen

poke 1

poke 3

I absolutely love sushi in general.  It’s really refreshing, especially now that it’s starting to get warmer out, and I like the fact that all ingredients are raw and visible.  The way sushi will get you, though, is with the rice and the sauces.  When I order my poke bowls, I always skip the rice and have them put my mix-ins over a bed of lettuce instead.  Also, instead of getting one of the mayo-based dressings, I will get Ponzu sauce, or plain soy sauce.

On this day, I ordered a bowl with lettuce as the base instead of rice, salmon and tuna as my proteins, and the following mix-ins: cucumber, edamame, corn, seaweed, and roe.  I chose Ponzu sauce as the dressing (but I even recommend soy sauce, which is equally as delicious and essentially free of calories).  I generally try to order as many low-cal veggies that a place like this has to offer, such as cucumber, celery, tomato, etc. And I will choose a maximum of two higher carb mix-ins like corn and edamame.   Once I got back to work, I googled each of the ingredients in my bowl to get an estimate on the nutrition facts of each.  I also estimated that they gave me a full serving of each fish (about 3 oz), and that an ice cream scoop (which is what they used for the mix-ins) is 1/4 cup.  After taking each ingredient into consideration, my meal came out to P – 71, C – 52, and F – 29.  It was a whopping 750 calories, which is almost double what I usually eat at lunch, so needless to say I was pretty full after.  Retrospectively, I thought about how I could have changed my order to have a more favorable spread of macros.  I decided that I could have done double tuna instead of half tuna half salmon, which would have saved a lot of fats.  I also could have done without the corn, which has a lot of carbs.  Lastly, I could have done soy sauce instead of the Ponzu.  Had I made those three simple alterations to my order, I’d have saved about 200 calories.

Tuesday – Sweetgreen

Sweet green

After yesterday’s accidental huge lunch, I decided to play it ‘safe’ and get a salad on Tuesday.  Believe it or not, I actually had never tried Sweetgreen before.  In general, the salad was tasty and the ingredients were fresh, but my experience here wasn’t the most ideal.  Maybe I had gone at an off-hour, but a bunch of popular ingredients weren’t restocked so I had to wait quite a bit of time for my salad to get made.  Also, maybe I’m spoiled but I really wish they had chopped the salad.  Either way, I enjoyed it and will go back again before jumping to any conclusions, since it was my first time trying it out.

I know I just mentioned that I wish Sweetgreen had chopped my salad.  When you read that, I’ll bet you said out loud, excitedly, ‘but Madeline, there’s a place specifically KNOWN for chopping their salads – you HAVE to try it!’  Let me take just an extra minute of your time here to talk about Chop’t.  I used to be an avid Chop’t goer, a few years back.  When I started counting my macros, though, I educated myself on the nutrition facts and ingredients in their salads, I had a really hard time getting any of their signature bowls to fit my diet plan.  I still wanted to go there, though, so I decided to just build my own salad, and it came out to literally $17.  That was my last time going to Chop’t.

I actually forget the exact ingredients I ordered in my salad since I didn’t write them down immediately afterwards.  I do remember that after looking up the nutritional information of corn yesterday, I decided to do without it in my salad.  For protein, I got chicken and an egg, and as dressing I just got a squeeze of fresh lime.  I estimated this lunch at P – 30, C – 20, and F – 12.

Wednesday – Chipotle

chipotle

This might come as a surprise to you, as it did for me when my fitness guru told me, but Chipotle is a macro counter’s heavenly dream.  The food is delicious, obviously, and you can walk out of there with literally any spread of macros that your heart desires.  It’s a great option for grabbing a quick bite out, and you don’t even need to plan much ahead of time for it since it’s so customizable.  If you aren’t aware of all of the customizable options at Chipotle, you’re absolutely doing it wrong.  If you remember one thing only from reading this post, I hope it’s the following customizability hacks at Chipotle that can totally save your macros:

  1. I’ll start small.  Omit any ingredient you don’t want.  Low carb day?  Skip the rice and beans altogether.
  2. Customizable scoop sizes!  I know it’s difficult to tell exactly how much is in each spoonful of goodness that goes into your plate, but you can request baby scoops, half scoops, large scoops, and double scoops of any ingredient you want.  The price of your lunch might vary, but at least you’ll be getting a meal you’re comfortable with.
  3. Unlimited veggies!  I don’t know why, but I always forget about the fajita veggies until my bowl has already passed along to the next assemblyman behind the counter, and then I have to ask them to go all the way back to the beginning of the process just to get me my veggies.  I’m the worst.  But seriously, don’t skip those veggies.  They’re really tasty, filling, and add some greens to your day.

I ordered my typical Chipotle order – burrito bowl, no rice, 1/2 scoop beans, double chicken, double fajita veggies, tomato salsa, corn salsa, and lettuce.  P – 75, C – 45, F – 17.  633 calories total, but they’re 633 calories I’m totally fine with.

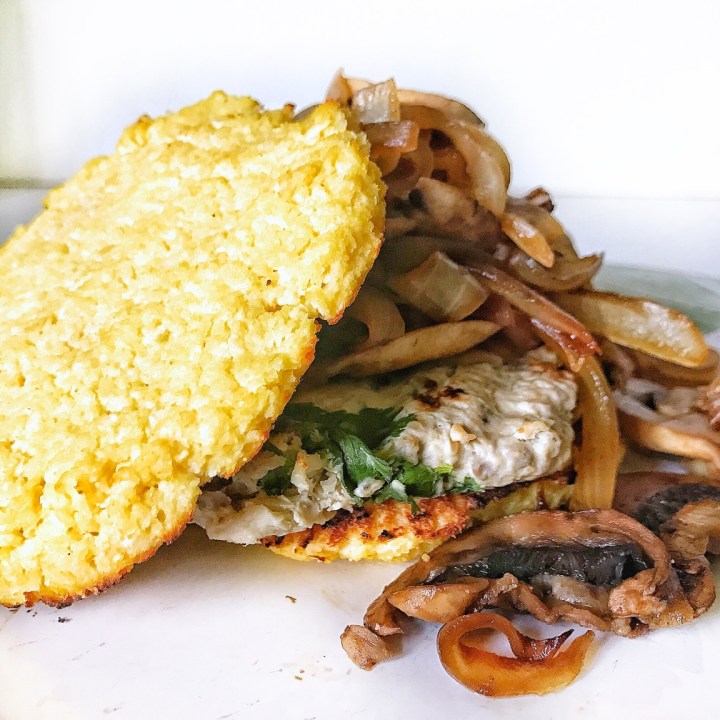
Thursday – Stamina Grill

stamina grill

So if you’re not in this specific area, you unfortunately can’t go to the Stamina Grill.  This place was very cool.  Everything is made to order using fresh ingredients.  For wraps, the tortillas are whole wheat and low carb, and the french fries are baked instead of fried.  They also do juices and smoothies, but I didn’t get one of those so I can’t speak about them from experience.  On this day, I got the Stamina Wrap (chicken, spinach, and egg whites), and I added low-fat mozzarella cheese.  I used the internet to estimate the macros for the low carb whole wheat wrap and the lowfat mozzarella, and I eyeballed the chicken and egg whites once I got the wrap in order to try to get the portions right.  I settled on P – 45, C – 19, and F – 14 for the whole wrap.

Friday – Essen Deli

essen 2

Essen 3

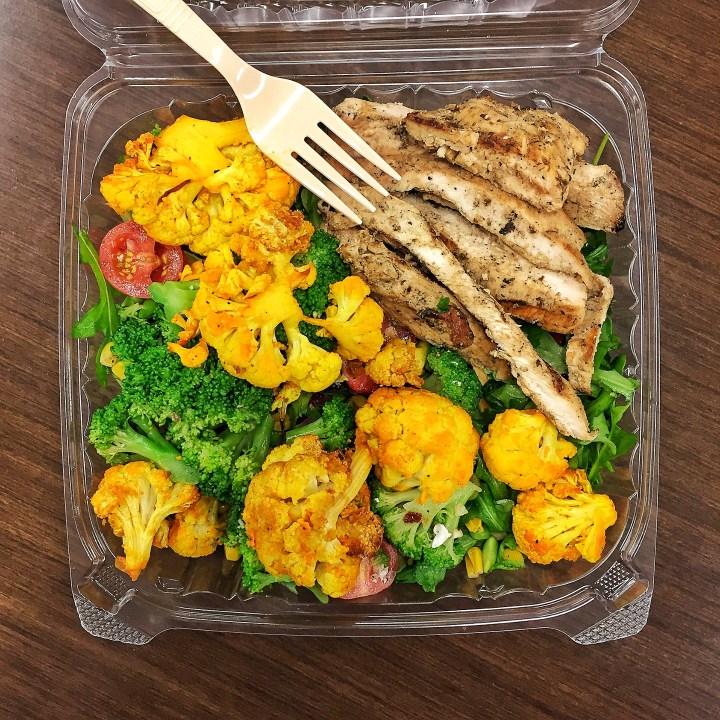
I both love and hate buffet style deli lunches, mostly because they’re so hit-or-miss.  Generally speaking, they’re pretty good because you get to pick and choose exactly what you want to fill your plate with.  The downside is that you never really know what’s in each dish and how it’s prepared.  I was a little bit disappointed when I walked into this particular Essen location and perused the hot and cold buffet because there wasn’t any option that wasn’t already pre-seasoned and pre-dressed.  Usually at these buffet spreads, there’s at least something that’s steamed, and at least one salad option that you get to dress yourself.  Not here, though.  I definitely had the most difficulty on this day because it was just really difficult to estimate my macros.  A little trick that I do when trying to decide which options to choose when at these types of eateries is to take the serving spoon and move aside all the food in a plate until I can see the bottom.  If there’s a pool of oil down there, chances are the food is also covered in it.

I wound up choosing a salad as a base to my dish that was dressed with a sweet dressing and tossed with strawberries, almond slivers, and dried cranberries.  It was definitely a high carb/sugar salad, but I chose it because it was the only salad option that didn’t have a creamy salad dressing.  croutons, or a visible pool of oil in it.  I topped my salad with a generous portion of grilled chicken, and roasted cauliflower.  All of the veggies had oil on them, so I accounted for about 2 servings of olive oil for the veggies alone.  Overall this meal was really tasty, but probably the highest calorie salad I’ve had in years.

Let’s recap.

Buying lunch out definitely has its pros and cons.  The pros include that the food is certainly tasty, and you can have a nice variety every day.  Also, if you pack your lunch the night before like I do (instead of preparing every single container for the week at once) it does save a lot of time and energy spent cutting things up and planning/packaging a meal every night.  Oh, and so much time saved not washing dishes.  Lastly, there’s the social aspect of it.  I joked around earlier that my team was concerned with my sudden behavior change, but kidding aside it was really nice spending that extra 20-30 minutes with them while we walked to lunch and waited on line together.

The cons, though.  Buying lunch every day is way more expensive than prepping it yourself.  It also prevents you from being accurate in tracking your macros.  Lastly, buying food out is very high in sodium.  I rarely cook with any salt, so I was very aware of the amount of sodium in the lunches that I bought.

Overall, I enjoyed this experience.  And while I’ll never be the type of person at work to buy lunch every day, I will definitely remember that there are viable options out there if I do want to buy lunch occasionally but don’t want to totally blow my macros.

I hope this post was helpful!  What are your favorite lunch spots?  Do you run into the same difficulties I ran into this week?  I’d love to hear your experiences!

Stay fit and fueled, all!

essen 1

Three of my Favorite Skillet Recipes

Three of my Favorite Skillet Recipes

There’s nothing that seems more official to me in the kitchen than cooking on the stove in your cast iron skillet, and then throwing it in the oven to roast.  I don’t know why, but the whole process reminds me of being on a fast-paced cooking show.

Cast iron skillets are an extremely versatile tool to use in the kitchen, and I just purchased my first one last weekend.  They’re a little bit high maintenance, because you do have to keep up with oiling it regularly and seasoning it occasionally, and you can’t exactly just leave it in the drain board to dry (nor can you put it in the dishwasher), but I still think it’s worth having one.  The whole thing is a great conductor of heat, so it cooks your food fast and evenly, and offers the opportunity for a picture perfect sear.

Here are my top three favorite meals I made this week using my brand new skillet (no other pots/pans necessary!). Also note that I cooked each of these recipes in a 10 inch skillet, and each recipe made two servings.

I. Stuffed Chicken

FullSizeRender_2

Ingredients

  1. Two chicken breasts
  2. Prosciutto (2 slices)
  3. Raw whole spinach leaves
  4. Goat Cheese (2 oz)
  5. Salt/Pepper/Spices of Choice
  6. Coconut oil

FullSizeRender

Instructions

  1. Preheat your oven to 400 degrees F.
  2. Take your chicken breasts and cut a slice into them without cutting completely in half (this makes the pocket you will use for the fillings)
  3. Take the goat cheese and spread it along the inside of the pocket (1 oz per chicken breast)
  4. Take the prosciutto (1 slice per chicken breast) and fold it so it fits inside the pocket of the chicken breast, on top of the goat cheese
  5. Take some spinach and stuff the remainder of the chicken breast, using just enough spinach so that you can still close up the chicken
  6. Close up the chicken and use toothpicks to secure the pocket shut.
  7. Heat up your skillet with about 1 tsp coconut oil in it
  8. Place your chicken in the skillet and brown the outside of the chicken (about 5 minutes both sides)
  9. Place the skillet into the oven and cook for another 15-20 minutes (depending on the thickness of the meat).  Cut into the thickest section and make sure the meat is white before removing from the oven.
  10. Once the chicken is cooked, take the skillet out of the oven but allow the meat to rest for about 10 minutes before cutting it.  (Otherwise you’ll lose all the goat cheese on your first slice!)
  11. Slice up the chicken, remove the toothpicks, and serve with whatever sides you like! (A side salad and/or veggies and/or sweet potato would go great with this dish).

FullSizeRender_1


FullSizeRender_3

FullSizeRender_4

FullSizeRender_5

II. Baja Chicken 

FullSizeRender_2 (2)

Ingredients

  1. Two Mangoes
  2. Two Oranges (One used for juice, one used for meat)
  3. Juice from one lemon
  4. Juice from 2 limes
  5. Half of a sweet onion
  6. One cup of black beans
  7. Handful of Cilantro
  8. Chicken (1 or two breasts, about 350g total)
  9. Fresh spinach (for salad)
  10. Coconut Oil

Instructions

  1. Preheat your oven to 400 degrees F.
  2. Heat up your skillet with about 1 tsp of coconut oil in it.
  3. Dice the onion and place it into the skillet and cook until they begin to become transparent.
  4. Place the chicken into the skillet (feel free to season the chicken as you like it prior to placing it in the skillet) and allow to brown on the outsides (about 5 minutes each side)
  5. Juice the lemon and orange and put all of the juice into the skillet, put the beans into the skillet, and place the skillet into the oven.  Allow to cook for about 10 minutes.
  6. While the chicken is cooking, remove the skin of the mango and dice into small cubes, and peel the remaining orange and cut up into chunks. Juice the two limes and pour the juice over the fruit.
  7. Roughly chop the cilantro and put into the bowl with the fruit and mix it all together.
  8. After the chicken has been cooking for about 10 minutes, take half of the fruit mixture and put it in the skillet surrounding the chicken. Let the chicken cook for another 10 minutes, or until no longer pink.
  9. While the chicken finishes cooking, wash some fresh spinach and place it in a bowl as the base of your salad.  Pour the remaining fruit mixture over the spinach, dressing the leaves with the juice of the fruit and the limes.
  10. When the chicken is cooked, take the skillet out of the oven, slice up the chicken breast and place it over your dressed salad.  Use a spoon to take the cooked fruit, onions, and beans from inside the skillet and place that in your salad as well.

FullSizeRender (2)

FullSizeRender_4 (2)

FullSizeRender_5 (2)

FullSizeRender_6

III. Shashuka

FullSizeRender

This is something I’ve been wanting to make for a while now, but had just never gotten around to it.  Now that I’ve done it once, though, I’m totally hooked!  Since the whole thing is basically veggies, it’s fine to eat the whole skillet, right?? Also, the instructions below are pretty vague regarding amounts of spices and timing, but that’s because this is a really easy recipe that you can cook as much or as little as you want, depending on your preferences.  Stick with me to the end on this one, guys – this dish isn’t the most photogenic but I promise you it’s delicious!

Ingredients (I cooked this recipe in a 10 inch skillet, and serves two)

  1. One can of peeled tomatoes
  2. Two red peppers
  3. Half of a sweet onion
  4. One tsp ghee
  5. Four eggs
  6. Paprika
  7. Cumin
  8. Chipotle Chili Pepper seasoning
  9. Chili Pepper seasoning

Instructions

  1. Preheat your oven to 350 degrees F.
  2. Heat up your skillet with ghee in it on medium heat.
  3. Dice the onion and place into the skillet.  Cook until golden in color, fragrant, and starting to become translucent.
  4. Dice the peppers and add to the skillet.  Cook until softened (or whatever texture you enjoy!)
  5. Open the can of tomatoes and pour them into the skillet.  I used whole tomatoes, so I also used my wooden spoon to break them up a bit.  You can also use diced tomatoes if you like.
  6. Add spices to taste.  I find that the paprika and chili pepper seasonings are very strong, so a little goes a long way.  Add a little bit at a time, and taste the sauce as you go to make sure it’s seasoned to your liking!
  7. Cook the sauce for about 20-30 minutes, stirring occasionally.  You can add tomato paste if you want a thicker sauce.
  8. Create little wells in your sauce where you want your eggs to go.  Crack the eggs into the wells, and immediately place the entire skillet into the oven.  BE CAREFUL BECAUSE EVEN THE HANDLE OF THE SKILLET IS VERY HOT!
  9. Bake in the oven until the eggs are as firm or runny as you like them.  I baked mine for about 10-15 minutes.  The whites were no longer clear, but still a bit runny.  They firmed up once I broke the yolk and spread the whites around the rest of the sauce, though.

FullSizeRender_1

FullSizeRender_2

Using my skillet this week was seriously fun, and a great learning experience because I had never used one before!  I hope you guys try out these recipes, and if you do please tag me in your photos 🙂

Stay fit and fab, all!

Milk and Roses – A Healthy and Adorable French Cafe in Brooklyn

Milk and Roses – A Healthy and Adorable French Cafe in Brooklyn

As fun and exciting as it is to explore New York City and all of its wonderful cheat meal opportunities, it’s equally as fun, and certainly more functional, to explore healthy options too.  Last week I ran out of prep by Friday night, so Saturday I had to wing it.  For breakfast I had some Purely Elizabeth cereal with almond milk and then headed to the gym.  Afterwards, I was very ready for lunch and was determined to find a spot in Brooklyn where I could hang out, get some work done, and have a meal that wouldn’t break my macros for the day.  After a bit of research, I decided I would try Milk and Roses, an adorable French bistro in Williamsburg.

3

4

12

When I got there, I was immediately pleased with my choice.  Though I was *slightly* under-dressed in my gym clothes (what else is new, right?), the wait staff didn’t mention it so I walked in and sat down.  The atmosphere was very cozy and comfortable – it felt like I was sitting in my living room (if I lived in a fancy old Victorian home with red leather couches, a grand piano, and walls of bookshelves).  Once I got settled and opened my laptop, though, a waiter came over to me and politely told me that the restaurant adheres to a no laptop policy anytime outside the hours of 9AM-5PM Monday through Friday.  So I wouldn’t be getting any work done over lunch, but maybe that’s for the best anyway.

5

8

It was 1 PM and they were still serving the breakfast/lunch (brunch?) menu, which is exactly what I was looking for.  (P.S. They take breakfast orders until 3:45 PM, like true heroes).  I ordered the avocado toast, greek yogurt with granola and berries, and a decaf latte.  The avo toast came with poached eggs on top, and the greek yogurt came with a heaping serving of fresh berries.  In retrospect, two dishes was too much food for one lunch, but I wanted to have a small variety of things to write about in this post, so #NoRegrets.

The latte was delicious, and perfectly foamy.

6

The avo toast had just the right amount of perfectly seasoned smashed avo, a side salad, and the poached eggs on top, cooked just enough, made this a more nutritious option than plain avocado toast.  The toast was ciabatta, which is a little bit crusty on the edges for my liking, but that’s just a personal preference.  Overall, I highly recommend this dish.

7

The greek yogurt bowl with granola and berries was pretty good too. The greek yogurt was light and fluffy, and the berries (strawberries and blueberries) were very fresh.  The granola was a bit sweet, though, and I opted to not eat all of it.  Overall, this was a tasty choice, but definitely something that you can easily make for yourself at home with more favorable macros.

9

When it came time to pay for the bill, I learned that it’s cash only, but there’s an ATM on the premise, so it wasn’t a huge deal.  When I made my way to the ATM, I noticed that there’s a really cute garden/patio out back with additional seating.

10

I would definitely recommend this spot and I’m so glad I stumbled across it this weekend.  There’s something for everyone on the menu, and the ambience is great for a cozy date, and is casual and accommodating for a larger group as well.  The food and coffee is good, and the wait staff is very friendly.  The prices are also really reasonable.  I can’t wait to go back and try their other brunch items, their dinner menu, and sit on the back patio when the weather is nicer!  If you decide to check it out, let me know what your favorite dishes are!

Stay fit and fun, all!

2

No Buns Challenge

No Buns Challenge

What is the No Buns Challenge, you ask?  It’s a thing that I completely made up whereby I try to eat sandwich/burger items all week without using bread or buns of any variety.

I’m going to immediately follow that description with the disclaimer that I don’t currently have any restrictions on my diet.  I eat dairy, meat, and gluten.  That said, the ‘No Buns’ challenge that I brought upon myself was motivated by a couple of reasons:

  1. I’ve noticed that a lot of you are paleo/gluten-free, and I wanted to gain a little bit of insight into what those diets consist of.  I was by no means completely paleo or gluten-free for the week, but I did learn a lot about these diets, including what’s allowed and what’s restricted, and how difficult it can be to comply.
  2. I am currently in a pre-summer cut (nothing extreme, and I am not competing) which means a low carb and calorie deficit diet temporarily, so the no buns challenge was a fun way for me to out-of-the-box come up with some cool ideas for bread alternatives to help me get my beach bod in order.

In preparation for the challenge, for Sunday’s meal prep I used my George Foreman to grill up a dozen chicken burgers to get me through the week.  *Cue really dramatic photos of chicken burgers*

chick burg 1
These are regular.
chick burg 3
These are spicy.

I also got super into the burger theme for the week, and picked up some Bubbies Sauerkraut, Mother In Law’s kimchi, and pickles to have as sides/toppings for my burgers.  Without further adieu, let’s get into my meals for the week!

‘Bun’ 1 – Portobello Mushroom Buns

portobello 1

portobello 2

Whoever thought to use Portobello mushroom caps as burger buns was a genius.  Unfortunately, it wasn’t me.  All you need to make this into a reality is two portobello mushroom caps.  Simply remove the stems and scrape out the gills from underneath the caps, grill them up (I used my George Foreman again), and you’re ready to go!  I also added a sunny side up egg, swiss cheese, avocado, lettuce, and tomato to the burger, and had some kraut and a pickle on the side.  The really amazing thing about using the portobello mushroom cap as a bun is that it’s so juicy and flavorful that you don’t need any additional sauce or spread to liven up your meal.  The only downside is that this is a messy dish, and I resorted to finishing it up with a fork and knife.

‘Bun’ 2 – Collard Green Wrap

collard wrap 1

collard wrap 2

collard wrap 3

collard wrap 4

Let’s go ahead and add ‘wrapping a collard green leaf wrap’ to the list of things I’m not good at.  I made a huge mess with this one.  As messy as it was, though, it was still really delicious.  The collard greens leaf adds an earthy sweet flavor to the meal, and also gives it really good texture.  It’s also pretty easy to put together (minus the actual wrapping part) because you can use mostly raw veggies to fill it up.  I filled mine with a chicken burger, tomatoes, red peppers, mushrooms, avocado, kraut, kimchi, and goat cheese.

‘Bun’ 3 – Grain Free Cashew Bun 

cashew bun 3

THESE. ARE. AMAZING.  Seriously, I highly recommend.  The cashews in this recipe make for a subtly sweet bun, and the texture really mimics that of actual bread.  You can find my original inspiration for these buns here.

cashew bun.jpg

Ingredients:

  1. 1.5 cups raw cashews
  2. 3 eggs
  3. 3/4 tsp apple cider vinegar
  4. 1/4 cup of milk (any variety of regular or nut milk works)
  5. 4 tblsp melted butter or ghee (or coconut oil)
  6. 1/3 cup coconut flour
  7. 1/4 cup almond flour
  8. 1 tsp salt
  9. 1 tsp baking soda

Instructions:

  1. Preheat your oven to 325 degrees.
  2. Line a baking sheet in parchment paper.
  3. Place the cashews, eggs, vinegar, milk, and butter into a food processor and blend until smooth.
  4. Add the coconut flour, baking soda, almond flour, and salt, and blend again until smooth.
  5. Shape the dough into buns (I made 5 buns roughly the size of regular hamburger buns) using wet hands and place on your parchment lined baking sheet.  Wet hands ensures that the dough doesn’t stick to you, which ensures less mess.
  6. Bake for around 20 minutes.  Check on them around the 15-17 minute mark for firmness, and a golden brown color.  Once they’re firm and they have a nice color, they’re done.

In my recipe, I used skim milk and ghee, and my yield was 5 buns.  The resulting nutrition facts of each bun are as follows:

  • Protein – 13g
  • Carbs – 19g
  • Fats – 32g
  • Calories – 416

cashew bun 2

cashew bun 4

cashew bun 5

Ok, so these buns are fairly high in calories and fat, but the up-side is that they’re full of healthy fats from the cashews, and they have a decent amount of protein.  I’m going to mess around with this recipe to see if I can make it a bit more macro friendly, but as it stands, I still think they’re worth it.  I used one bun and sliced it in half to make a top and bottom.  To this burger, I added lettuce, tomato, kraut, and goat cheese, and had a pickle on the side.  Overall, the cashew bun provided the best flavor and the most similarity in texture and functionality to a regular bun, but was slightly dry.

‘Bun’ 4 – Collard Green Pinwheels 

collard pinwheel.jpg

Since I had so much trouble with the collard green wrap, I figured I would try a similar dish that was easier to assemble.  I layered the leaf with a chicken burger, tomato, peppers, and goat cheese (which was kind of the glue to hold it all together), and wrapped it up almost like a sushi roll. Then I sliced it up to make pinwheels.  The pinwheels were definitely easier to make and eat than the wrap.

‘Bun’ 5 – Paleo Parsnip Buns

parsnip 2

These had me a little bit nervous because when I tasted them, they were very sweet from the parsnips.  When paired with savory items, though, the sweetness actually works really well to balance out the flavors.  I smothered this burger with sautéed mushrooms and onions, and used two separate buns for a top and a bottom (I did not split them like I did the cashew bun).  I would also recommend pairing this with a sharp cheese.  You can find my original inspiration for these buns here.

Parsnip 1

Ingredients:

  1. 1/4 cup coconut flour
  2. about 2.5 oz of parsnips
  3. 1/4 cup any milk variety, or water
  4. 2 eggs
  5. Salt/pepper/seasonings of choice to taste

Directions:

  1. Preheat your oven to 400 degrees, and line a baking sheet with parchment paper.
  2. Use a food processor to blend the parsnips and coconut flour.  Once crumbly, add the remaining ingredients and blend until smooth.
  3. Using damp hands, separate the dough and flatten into rounds on the parchment paper. If you make these too thin they might fall apart.  I made mine about 1/4 inch thick.
  4. Bake for 15 minutes, or until dry on top and slightly browned on the bottom.

In my recipe, I used water, and my yield was 5 buns.  The resulting nutrition facts of each bun are as follows:

  • Protein – 3g
  • Carbs – 7.5g
  • Fats – 1.5g
  • Calories – 56

Overall, these were a close second to the cashew bun in functionality as a bun to hold together my burger, but they did keep the flavor of the parsnips (you can also use carrots), so you have to like that sweet flavor to make these work.  Although, as mentioned earlier, the sweetness of the bun was well-balanced if you put savory ingredients in between.  Or, you can probably play off the sweet flavor and use them in a dessert!

In Conclusion… 

I would consider the no buns challenge to be a success!  My definitive ranking of ‘buns’ from most favorite to least is as follows:

  1. Cashew Bun – Pro: Amazing taste, amazing texture, high functionality, and super filling; Con: High cal
  2. Portobello Bun – Pro: Amazing taste, super juicy, low cal; Con: Very messy
  3. Collard Green Wrap – Pro: Low cal, great crunchy texture; Con: Messy
  4. Paleo Parsnip Bun – Pro: High functionality, makes a nice clean burger; Con: Tastes very much like parsnips
  5. Collard Green Pinwheels – Pro: Low cal, great crunchy texture, less messy than the wrap version; Con: You can’t fit as much stuff into a pinwheel as you can a wrap.

I hope you try these no bun options next time you’re in the mood for a sandwich or a burger!  Tag me in anything you make from my page, I’d love to see what you wind up doing with the inspiration!

Stay fit and fresh, all!

closing image

4 Easy Easter Treats

4 Easy Easter Treats

The Easter holiday has always held a very special place in my heart.  Growing up, it was the one day of the year when I got to see basically my entire huge Italian family because my grandparents would open their home the whole day for anyone who wanted to stop by.  And EVERYONE stopped by.  It was a day full of pigs in a blanket, socializing, and playing out on the lawn despite being in our nicest clothes.  Our Easter celebrations have changed a lot since those days, but the holiday still holds that same nostalgic charm.

Now my parents are the Easter holiday hosts, and we open our home to the rest of the family for our own Easter brunch tradition.  With family time being my favorite part of any holiday, a close second is the unique food traditions involved, and of course, the adorable desserts!  Check out these Easter treats that I tried out this week to share with you guys for the coming holiday!

Carrot Garden Dirt Cups

dirt cup 2

These are really easy to make, super cute, and even include fruit! (OK, the amount of fruit to chocolate in this recipe is negligible, but still..)  Added bonus, these would be a really great activity to do with kids.  With minimal mess and no use of the oven, they’re basically fool proof!

Ingredients:

Dirt Cup ingredients.jpg

  1. Chocolate pudding (I used a pre-made pudding, but feel free to use whatever kind of pudding you prefer)
  2. Chocolate graham crackers (or chocolate cookie of choice as long as you can crumble it up)
  3. Strawberries
  4. White melting chocolate (about a cup will coat 6 strawberries)
  5. Orange food coloring (or red and yellow)

Instructions:

I made the amounts in the ingredient list above pretty vague, because it really depends on the size of your cups and how many you want to make.  2 cups of pudding and 1.5 graham cracker sleeves made 3 dirt cups for me (8 oz glasses).

  1. Using the instructions on the bag, melt the white chocolate.
  2. Using the orange food coloring, color the chocolate to your desired level of pigment you want your carrots to be.  (If you are using red and yellow food coloring, the ratio is 1:2 red to yellow).
  3. Take your strawberry (wash it and dry it really well) and fold up the green leaves at the top carefully.  You want them to remain intact, but you also don’t want to get chocolate on them.
  4. Using a fork, stick straight down into the strawberry, just under the leaves (don’t pierce the very top of the leaves).  This will help you dunk them in the chocolate without getting your hands messy, and without leaving fingerprints on your chocolate carrots.
  5. Dunk the strawberries into the chocolate, being sure to cover as much of the fruit as possible without getting chocolate on the leaves.
  6. Slide the strawberries off the fork onto a parchment lined plate.  Make sure you use the parchment here (or some type of non stick barrier) because otherwise the chocolate will stick to the plate instead of your strawberry.
  7. To make the ridges in the carrot, once all of the carrots are coated, add more orange food coloring to the remaining melted chocolate for contrast.  Then drizzle stripes across the carrots.  Once done, put the strawberries into the fridge or freezer to set.
  8. While the chocolate is setting, it’s time to assemble the dirt cups!  Alternate layering chocolate pudding and crumbled graham cracker into the cups.  The top layer should be the graham cracker crumbles.
  9. Once dirt cups are assembled, take the strawberries out of the fridge (make sure the chocolate has hardened completely) and carefully remove from the parchment paper and place on top of the dirt cups.

dirt cup strawberry.jpg

dirt cup carrots.jpg

dirt cup 3

Keep these refrigerated until ready to serve!

Bunny Butt Sugar Cookies

bunny butt 11.jpg

I can’t even deal with how cute these turned out.  I used my go-to sugar cookie recipe from In Katrina’s Kitchen, and decorated with royal icing.  You can serve these as they are, or you can get creative with them and use them as toppers for cakes or cupcakes.  You can even combine them with the Carrot Garden Dirt Cups recipe by making a garden cake, full of carrots and bunny butts galore!  (If you do this, you can use coconut flakes died with a drop of green food coloring to look like grass!)

Here are the ingredients for the sugar cookie dough, taken directly from In Katrina’s Kitchen:

bunny butt ingredients.jpg

  1.  1 cup of unsalted butter
  2. 1 cup of granulated white sugar
  3. 1 tsp vanilla extract
  4. 1/2 tsp almond extract (this adds a really nice layer of flavor, but I have made this recipe without this ingredient and they turn out just fine)
  5. 1 egg
  6. 2 tsp baking powder
  7. 3 cups of flour

Here are the ingredients for the royal icing:

bunny butt 9.jpg

  1. 2 egg whites
  2. 4 cups confectioners sugar
  3. 2 tsp vanilla extract
  4. Red (or pink) food coloring (or whatever color you want to make your bunny butts!)

Directions to make the cookies:

  1. Preheat your oven to 350 degrees.
  2. Using a mixer or hand mixer, cream the butter and sugar until smooth (at least 3 minutes)
  3. Beat in the extracts and egg
  4. In a separate bowl, combine the baking powder with the flour and add a little bit at a time to the wet ingredients.  Once all of the dry ingredients have been added to the wet, you might have to knead the dough by hand to get it all combined.  Be patient with this dough because it’s very stiff, but it’s the best sugar cookie dough you will ever work with I promise!
  5. Divide up the dough into workable batches (I usually cut it in quarters) and roll it out onto a floured surface (flour the top of the dough as well, the side that is touching the rolling pin).  The dough should be about 1/4 inch thick once rolled out.
  6. Using a medium circle cookie cutter, cut out the circles that will become the bunny butts.
  7. Using a small oval cookie cutter, cut out the ovals that will become the bunny feet.  If you don’t have a small oval cookie cutter (which I didn’t), you can get creative.  I actually used a BCAA scoop that I had in my drawer (lol), and then used a butter knife to shave that small circle into an oval.  Remember you’ll need twice as many little ovals as you do medium circles.
  8. Bake the medium sized cookies for 6-8 minutes, and the smaller ovals in a separate batch for 5-6 minutes.
  9. Allow the cookies to cool on the baking sheet until firm enough to move to a cooling rack, and then allow them to finish cooling on the rack.

bunny butt 5

bunny butt 2

bunny butt 3

bunny butt 4

Directions to decorate:

  1. When the cookies are just about cooled, make the royal icing by manually mixing with a spoon the confectioners sugar into the egg white and vanilla extract.  It might take some time to get it all combined, and it looks pretty unappealing at first, but it all will come together the more you mix and the more sugar you add.  The icing should be fairly thick when you’re done.
  2. Set aside some of the white icing, which will be used for the details of the tail and feet.
  3. Dye the remaining icing the color you want your bunnies to be.
  4. Using a spoon or icing spatula, ice two of the small ovals, and then ice one medium round cookie.  Add two small dollops of icing at the bottom of the circle cookie, and place the two ovals onto those dollops of icing, allowing about 1/3 of the ovals to hang off.  The icing will act as glue to stick the ovals onto the main cookie.  Repeat this process with the rest of the cookies.  Make sure you stick the ovals on the main cookie before the royal icing begins to harden.
  5. Take the white icing that was set aside before and spoon it into a piping bag. Alternatively, you can use a Ziplock or sandwich bag if you don’t have a piping bag.
  6. Using a very skinny tip, pipe a circle at the middle of the main cookie, to be the tail of the bunny.  Then pipe an oval in the middle of the little oval pieces, as well as three dots running along the bottom of the ovals.  These become the feet of the bunny.  Repeat for all of the cookies.

bunny butt 1

bunny butt 6

The decorating possibilities of these cookies are endless! I hope you really get creative with this one and tag me on Instagram with a super cute bunny burrowing carrot garden Easter paradise.

Peanut Butter Pretzel Egg Nests

nest ingredients

This one’s another dessert that also doubles as a craft to do with kids!  These are arguably even easier and more fool proof than the Carrot Garden Dirt Cups.  They are no-bake and even customizable (see below the recipe for additional ingredient ideas that can be incorporated).

Ingredients:

  1. 1 part peanut butter of choice
  2. 1 part butterscotch chips
  3. Pretzel sticks, broken
  4. Mini candy eggs (chocolate ones will taste best)
  5. Cinnamon to taste

Directions:

nests 1

I made the amounts in the ingredient list really vague, because it really depends on how many of these you want to make.  I used about a cup each of butterscotch chips and peanut butter, and 3-4 handfuls of pretzels, and it made about 8 nests.  You can also adjust the peanut butter to butterscotch ratio a bit if you like, but try not to reduce the butterscotch too much because it will help to hold the nests together.

  1. In the microwave (or over the stove) melt together the peanut butter and butterscotch chips (increments of 30 seconds) and stir intermittently until smooth.
  2. Stir in the cinnamon.
  3. Place your pretzel sticks into a large Ziplock bag and using a bowl or rolling pin, break up the pretzels into roughly 1/2 inch pieces.
  4. Add broken pretzels to the peanut butter mixture until all pretzels are completely coated, but there is still a bit of excess peanut butter mixture. (This excess will help the nests to stay together
  5. Stay with me, this is going to get a little messy now.  Using your hands, take a small handful of the coated pretzels and drop them onto a parchment lined baking sheet or serving tray.  Mold them into the desired nest shape that you want, making sure that there are no loose or straggling pretzels, or blaring holes in the nest (you want them to be fairly tight so that they don’t break apart later on).
  6. Press down on the top of each nest to create a well where the candy eggs will sit.
  7. Once all nests have been formed (make sure to wash off your hands because you don’t want the peanut butter mixture to get all over the candy eggs), take the candy eggs and place them on top of the nests.
  8. Place in the fridge to set.  Once hardened, these can be stored at room temperature.

nests 2

My ingredient list above is really the most plain version of these snacks.  You can also add dried fruit, Chex mix, chopped nuts, or oats.

Peanut Butter Eggs

peanut butter egg ingredient

The peanut butter egg is such a classic, how was I not going to include it here? This recipe stands the test of time, because when it’s not Easter you can just shape them like circles and they’re delicious peanut butter snacks!

Ingredients:

  1. 1 cup of peanut butter (your favorite variety)
  2. 1 tbsp coconut flour
  3. 1 tbsp honey (optional)
  4. 1/4 tsp salt (if your peanut butter is unsalted)
  5. 1/2 cup of chocolate of your choice (it can be any variety melting chocolate, or you can melt dark chocolate with 1 tsp coconut oil)

Directions:

  1. Combine the peanut butter, honey, coconut flour, and salt (if applicable) in a bowl.
  2. Using a spoon, scoop 6 balls from the mixture and use your hands to roll and shape them into the desired egg shape.
  3. Place the shaped eggs on a plate lined with parchment paper and place into the freezer to set (20 minutes minimum)
  4. When the peanut butter middles are almost set, begin melting the chocolate.  Either use the directions on the packaging (if you use melting chocolate), or combine dark chocolate and coconut oil and either microwave or melt over the stove.
  5. Once the chocolate is nice and melty, remove the peanut butter eggs from the freezer, carefully remove from the parchment paper, and dunk in the chocolate.  You can use a spoon or fork to move them around to make sure they get evenly coated, and then remove them from the chocolate and place back onto the parchment paper.  NOTE that if you put the eggs directly onto a plate, the chocolate will stick to the plate instead of the peanut butter and your eggs will be RUINED.  Speaking from experience here, so trust me!
  6. Once the eggs are coated, you can decorate them by adding sprinkles or chopped nuts, or drizzling different colored chocolate over the tops.
  7. Once they’re all finished and decorated, place them back into the freezer or fridge to let the chocolate set.  These will be best served directly from the fridge, as they might get messy if they sit out for too long.

peanut butter egg 3

peanut butter egg 2

peanut butter egg 1

I hope you all try one (or two, or all!) of these recipes over the Easter holiday season.  Don’t forget to leave a comment, share my page, and like me on Insta for more recipes and fun fitness stuff!

Stay fit and floppy all!

bunny butt 8

Meal Prep 101

Meal Prep 101

“Don’t you get tired of eating the same thing every single day?” is probably the number one question someone will ask me once they realize how extra I am about prep.  The truth is, there are a lot of common misconceptions about meal prep, and it’s not nearly as difficult or boring as it’s made out to be.  Sundays have actually become my favorite day of the week because I get to catch up on my Well+Good emails (one of the only email subscriptions I actually read), bookmark some cool new recipes and food trends, and plan out my week.

I started meal prepping when I was an intern at my now full time employer, after quickly learning that the ‘go out and buy lunch with the team every day’ lifestyle wasn’t going to work for me.  It started with just lunches, then I slowly started incorporating breakfasts as well.  Fast forward one year to full time employment during my first busy season, and meal prep included breakfast lunch, dinner, and every snack in between.  It was definitely daunting at first, sometimes overwhelming, and consistently time consuming.  But now, after almost three years of experience, the process has become way more efficient and hardly feels like a chore anymore.  It didn’t take long to get to this level of efficiency, and anyone can do it!  This is going to be a long post, so I’m going to split it into three parts:

  1. First, I’m going to clear the air on some of the most common prep myths, by answering the often sarcastic/hypothetical questions people typically ask me when they find out my prep schedule
  2. Second, I’m going to offer a few pro tips that I wished someone had told me a few years ago
  3. Lastly, I’m going to walk you through an example of an entire week’s prep (with pictures galore)

Let’s go!

Myths Debunked

“Don’t you get tired of eating the same thing every single day?”

I love food.  You can ask basically anyone who’s met me more than once – I am the type who lives to eat, not eats to live.  The idea of eating the same exact thing for every meal every day is an absolute nightmare.  Don’t get me wrong, you’re going to be repeating meals and foods, of course.  But prep doesn’t mean filling ten containers with the same exact spread of rice, grilled chicken, and baby carrots.  That said, this question makes the bold assumption that I eat the same thing day-in and day-out, which I definitely don’t.  What I generally try to do is prep two different meats (generally chicken and a fish), and two different veggies.  I don’t box all of my meals for the week on Sunday, but rather I throw all of the like items in separate containers, and box my lunches every night for the next day.  It doesn’t sound like much, but having the option every night to mix and match makes a huge difference.  Also, I always keep salad fixins in my fridge, so that’s basically a third veggie option to add to the rotation.

“Do you ever go out and have any fun?” 

Seriously, these are the things people ask me.  Yes, I go out.  Yes, I have fun.  Yes, I can be spontaneous.  For me, one of the benefits of prepping my meals is that I then have the flexibility in a social setting more than if I had wasted most of my macros for the day on an unnecessarily high-cal lunch.  A lot of purchased meals are full of fats and carbs that can be easily avoided and recycled on something more fulfilling.  Even salads can be deceiving!  (Check the nutrition facts of that Chop’t salad before landing on Chop’t as a healthy lunch option at work).  By making your own lunches (and bfast and dinner), you are controlling exactly what you’re putting into your body, which is ideal for anyone who has fitness and general health goals.

How do you get enough food on Sunday to last the whole week? 

Ok, this question is very valid.  Generally speaking, my cooked chicken or turkey lasts all week without any problems.  If I prepare fish, I will either freeze it to have later in the week, or eat it all within a couple of days of preparing.  Cooked veggies typically last about half the week, so I try to finish those up by the end of Wednesday.  I also usually buy additional veggies that last the full week (aka my salad fixins, alluded to above), like peppers, tomatoes, and cucumbers, so that I can use those once I’m all out of cooked veggies.  Fruit all has differing shelf lives, so I typically eat the more time sensitive fruits earlier in the week (blueberries, strawberries), and save the more resilient for later in the week (bananas, apples, citrus).  It also helps to have things like Greek yogurt, nuts, protein powder, oats, and nut milk on-hand for a quick and satisfying meal in a pinch if all else fails.

Some Pro Tips: 

Figure out a technique you’re good at and stick to it.  Don’t reinvent the wheel every week.  Are you really comfortable with baking your chicken in the oven?  Using a slow cooker?  Grilling it on the stovetop?  Do that every week then.  Obviously you can vary it up sometimes, but by doing something consistently that you are most comfortable with, you will become exponentially more efficient.  The variety in your prep comes with how you season your food, not necessarily the technique you use to prepare it.

Know your kitchen appliances, and make sure you have the proper gear.  I love to make my own nut butters, as well as baked goods as treats for the week, so staple appliances that I use every single week are my KitchenAid hand mixer and food processor.   I also recently got a Black + Decker slow cooker that I absolutely love.  It’s so important to have the proper tools in your kitchen if you want to conduct an efficient prep.

Have your grocery list planned out well in advance, and stick to one main grocer.  I have a note in my phone dedicated to prep ideas and my grocery list that I am incrementally adding to all week.  I have a list of staple items that generally don’t change from week to week (nut milk, Greek yogurt, eggs), and then a list of ideas that I stumbled on during the week that struck my interest to include in my prep.  Come Saturday or Sunday morning, I usually take these ideas, put the recipes side by side, see which ones have a few  main overlapping ingredients, and that’s how I narrow down my ‘ideas’ list into a list that’s reasonably executable.  Also, try to visit the same grocery store every week.  I fly through my grocery shopping in less than 20 minutes because I basically have the floor plan committed to memory.

Last Week’s Prep 

1 - all groceries
Yes, I recycled this image from the top of this post.

Prep officially begins at the grocery store.  The four main categories of necessities for the week are: protein, fruit, veggies, and snacks.  This week, my protein was chicken; my fruits were bananas, apples, oranges, and plums; my veggies were tomatoes, peppers, mushrooms, lettuce, and cucumbers; and my snacks were cashews.  Already in my fridge/pantry were: Greek yogurt, almond milk, limes, and a sweet potato.

The first thing I do is prep my protein, because this generally takes the longest.  This week, I cooked my chicken with tomatoes and portabella mushrooms in my slow cooker.

2 - chicken groceries
Chicken (3.29 lbs), tomatoes, and mushrooms
3 - chicken groceries
It’s all about the angles, right?
4 - cut tomatoes
Quarter the tomatoes…
5 - tomatoes in slow cooker
…and layer them at the bottom of the slow cooker.
6 - chicken in slow cooker
Cube the chicken and layer it on top of the tomatoes.
7 - spices
The spices I used are pink Himalayan salt, cumin, paprika, chipotle chili pepper, and black pepper.
8 - meat spiced
As you can see, I use my spices generously.
9 - liquid aminos
Drizzle liquid aminos to your heart’s content.  (Alternatively, you can use soy sauce and/or sriracha)
10 - mushrooms in slow cooker
Mushrooms go on top.
11 - finished chicken
Five hours later… delicious protein for the entire week! 3.29 lbs of chicken purchased (aka prior to trimming) made 12 roughly 4 oz servings.

While the protein is cooking, I prep my veggies and snacks.  This week, I decided to go with salads, so since there were no veggies to cook, I prepped two snacks.  The first was homemade cashew butter.  The recipe for this is literally just blended cashews, and I was originally going to rewrite the steps here, but I enjoyed reading the how-to article that I found so much that I encourage you to read it as well!

12 - cashews
Beautiful, glorious, raw, unsalted cashews
13 - blended cashews
About 25 minutes later
15 - cashew butter in spoon
Creamy and delicious homemade cashew butter!

My next snack was inspired by the Tastemade Snapchat discover page, and was taught by Jen of @JustEatLife (Twitter) and @JenEatsLife (Instagram).  These candied orange peels were clutch this week, satisfying my sweet tooth in a [possibly delusional] guilt-free way.  Either way, they were absolutely delicious.  Get the recipe here.

16 - oranges17 - orange peels19 - candied peels

And there you have it, a week’s worth of meals.  So, a typical day this week consisted of two servings of chicken and salad; fruit, protein shakes, and Greek yogurt as breakfast/snacks throughout the day; and a few of the candied orange peels after dinner as some dessert.  Easy, right?

Did I answer your questions?  Leave me a comment and let me know!  Head over to my Instagram for even more recipes and advice, and message/comment anything you’d like to see more of 🙂

As always, stay fit and fab all!

18 - orange jar

Banana Avocado Brownies

Banana Avocado Brownies

You’re in the grocery store checking out the banana selection, and the bunch that has the nicest looking fruit has just one or two too many, but you throw it in your basket anyway because what’s too many bananas, right?  Then you move over to the avocados and choose a few of varying ripeness so you’ll have one ready any day of the week you might want one.  Sound familiar so far?  Fast forward to Saturday and you’re frantically Googling ‘recipes to use up overripe avocados and bananas,’ because time is quickly running out for your precious fruit.

Generally speaking, avocados are a great fill-in for fat-based ingredients (like mayonnaise, butter, or oil) in cooking and baking.  Similarly, bananas are a great substitute for sugar.  Since I had both, I decided I would try my luck at creating a recipe that uses them simultaneously.  #efficiency.

1
(All ingredients not pictured here)

Thus, banana avocado brownies were born! I started by mixing together a mashed avocado and a mashed banana, because those were the two ingredients I knew for sure I’d be using.  Then I grabbed my cinnamon and vanilla, which are my go-to spices whenever I’m baking.  I considered adding a little nutmeg for extra flavor, or even something spicy to play up the savory flavor of the avocado to make a faux Mexican brownie.  I wound up keeping it simple, though, since this whole venture was an experiment to begin with.  I added eggs, which help in any baked recipe to bind the ingredients together, and baking powder to help the brownies rise.  And of course, a generous amount of cocoa powder.  I gave the batter a quick taste (eek raw eggs and all, don’t tell Mom!) and realized that one banana wasn’t going to be enough to sweeten the whole batch.  I decided to add honey instead of more banana, because I didn’t want the banana flavor to completely take over.  Since the batter was pretty wet, I also added some almond flour to thicken it up.  Lastly, and certainly not leastly, I added a generous amount of chocolate chips.

3

4

And there you have it, brownies with only 10 ingredients that also incorporate your overripe fruit!  (See full recipe and instruction list below).

5

6

8

Ingredients:

  1. One medium banana, mashed (100g)
  2. One medium avocado, mashed (100g)
  3. 2 large eggs
  4. Cocoa powder (3 tbsp)
  5. Vanilla (1 tbsp)
  6. Baking powder (1 tsp)
  7. Almond flour (1/2 cup)
  8. Honey (3 tbsp)
  9. Cinnamon (to taste)
  10. Chocolate chips (5 tbsp)

Instructions

Preheat your oven to 350 degrees.  Combine all ingredients except for chocolate chips in a medium bowl.  You can use a mixer or mix by hand for this recipe.  Lightly grease a muffin tin (I used a mini-muff tin, which yielded 24).  Once baked, this is a light batter, so you have two options regarding your chocolate chips – if you stir them into the batter prior to baking (which is what I did) you will have to very carefully remove the muffins from your tin later on, as they might break where the chips change the consistency of the batter.  Your second option is to pour the batter into the muffin tins and then place the chips on top.  Bake for 12 minutes, or until a toothpick comes out clean.  Allow to cool completely before removing from the tins.

So you can make whatever size muffin/brownie you want, the macros for the entire batch of batter were: protein – 31; carbs – 141; fat – 66.5.  Just divide those numbers by whatever your recipe yields to get your macros per serving.

The ingredients can definitely be played around with, for example vegan chocolate chips instead of regular ones, or regular flour instead of almond flour. I’d love for you all to try this recipe and even play around with it and let me know what you create!

Stay fit and fresh, all!

7

A Review of Max’s Protein Bars

A Review of Max’s Protein Bars

1

3

4

My biggest passions are fitness and food, and when the two overlap I find myself on a insatiable quest for the most wholesome meals, snacks, and supplements.  Something that I am constantly looking for is a go-to protein bar that I can nom guilt-free and bloat-free.

I recently stumbled upon Max’s Protein Bars on Instagram (@MaxsProteinBars), and I was immediately drawn by the profile headline – ‘Naturally Powered Protein Bar.’  I’m listening, Max.  Tell me more.

In one of his posts, Max explains his frustrating search for a protein bar that would fit his wholesome diet regimen while also delivering enough protein to fuel his active lifestyle.  As a result, Max’s Protein Bars was born.  The ingredients in each of the three available flavors are all unprocessed and recognizable, and the mix of macros very favorable.  I obviously had to try them.

7

Let’s get to it, shall we?

Dark Chocolate and Cranberry

dark choc and cranberry

Macros – P 17; C 23; F 8.  Ingredients – Whey protein concentrate, honey, cranberries, coconut oil, dark cocoa powder, gluten free oats, apple juice concentrate, dates, and flaked almonds.  

When biting into this bar, I first noticed the very rich flavor of the dark chocolate.  The cranberry flavor takes a bit of a back seat to the powerful cocoa, but it’s definitely still noticeable, adding a nice layer of flavor.  There’s also no protein flavor or aftertaste, and you can taste the honey a little bit.  Regarding composition and texture, you can see cranberry bits and the almond flakes dispersed throughout the bar. The bar itself is dense and smooth, and most of the texture in the bar comes from the almond flakes.   I would say it falls right in the middle of a wet bar and a dry/crumbly one.  The bar crumbles a little bit when you bite it, but for the most part holds itself together.  Lastly, you’ll get some coconut oil on your fingers if you touch the bar directly.

Apple Oat and Cinnamon 

apple oat and cinnamon

Macros – P 17. C 23; F 8.  Ingredients – Whey protein concentrate, honey, gluten free oats, coconut oil, dried apples, apple juice concentrate, dates, cinnamon, and flaked almonds. 

I was definitely most excited for this one because it’s a unique flavor that you don’t often see in a protein bar.  The flavor that shines through is primarily apple, with nice undertones of oat and cinnamon.  I think there could be some more cinnamon flavor, but I am also obsessed with cinnamon so I might be slightly biased.  Similar to the first bar, there’s no protein flavor or aftertaste.  This bar had more texture than the dark chocolate and cranberry one, with both almond flakes and apple pieces adding layers of texture.  It is also more chewy, and a little more sticky when chewing it.  The bar is still in between a wet and dry bar, with a slightly crumbly texture.  This one also doesn’t have so much residual oil (but it still has the same fat content as the dark chocolate cranberry).

White Chocolate Raspberry 

white choc raspberry 2

Macros – P 17; C 14; F 10.  Ingredients – Whey protein, Honey, White Chocolate (sugar, cocoa butter, whole milk powder, cocoa mass, emulsifier [soya lecithins], natural vanilla flavor), dates, coconut oil, apple juice concentrate, desiccated coconut, beetroot juice powder, raspbery powder, gluten free oats.  

I was pleasantly surprised when I bit into this one.  It’s probably the sweetest of the three, and the strongest flavor is the rasberry.  You don’t taste much of the white chocolate.  Similar to the other two, there’s no protein flavor or aftertaste.  The texture is similar to the texture in the dark chocolate and cranberry bar – smooth with not a lot of variety.  The coconut is visible, and this adds most of the texture in the bar.  The bar is soft, but not as chewy as the apple one.  The consistency feels similar to the consistency of a cookie or brownie (more cake-y and less dense).

In conclusion… 

Overall, I definitely recommend these bars.  The ingredients are all things that I am comfortable fueling my body with on a regular basis, and the taste is really delicious.  The texture and consistency of all three were similar, and I definitely like the consistency better than most other protein bars – it feels like you’re eating a soft cookie rather than a hunk of dense protein mush.  My favorite was hands-down the white chocolate raspberry one, with apple oat and cinnamon being a close second.  This surprised me because fruity protein bars are usually my least favorite (probably because they usually taste so artificial).  Definitely check out Max’s social media and get yourself a 3-pack sample box so you can try these bars for yourself!

Did I address all of the elements of a protein bar that you find important? Let me know in the comments, and I will answer any of your additional questions!

Stay fit and fueled, all!

6