Cross Country U.S. Road Trip – Part 3 (My Itinerary)

Cross Country U.S. Road Trip – Part 3 (My Itinerary)

In my “Part 1” post, I gave a review of each of the parks I visited on my cross country U.S. road trip this summer, and in my “Part 2” post, I gave all my tips and tricks for planning a road trip and/or hiking trip, and my full packing list. As promised, in this Part 3 post I will detail my full itinerary, and give reviews of each and every hike I did and meal I ate on my trip. I’ll spare ya the long intro and just get right to it!

My Itinerary

Day 1 (Travel Day)

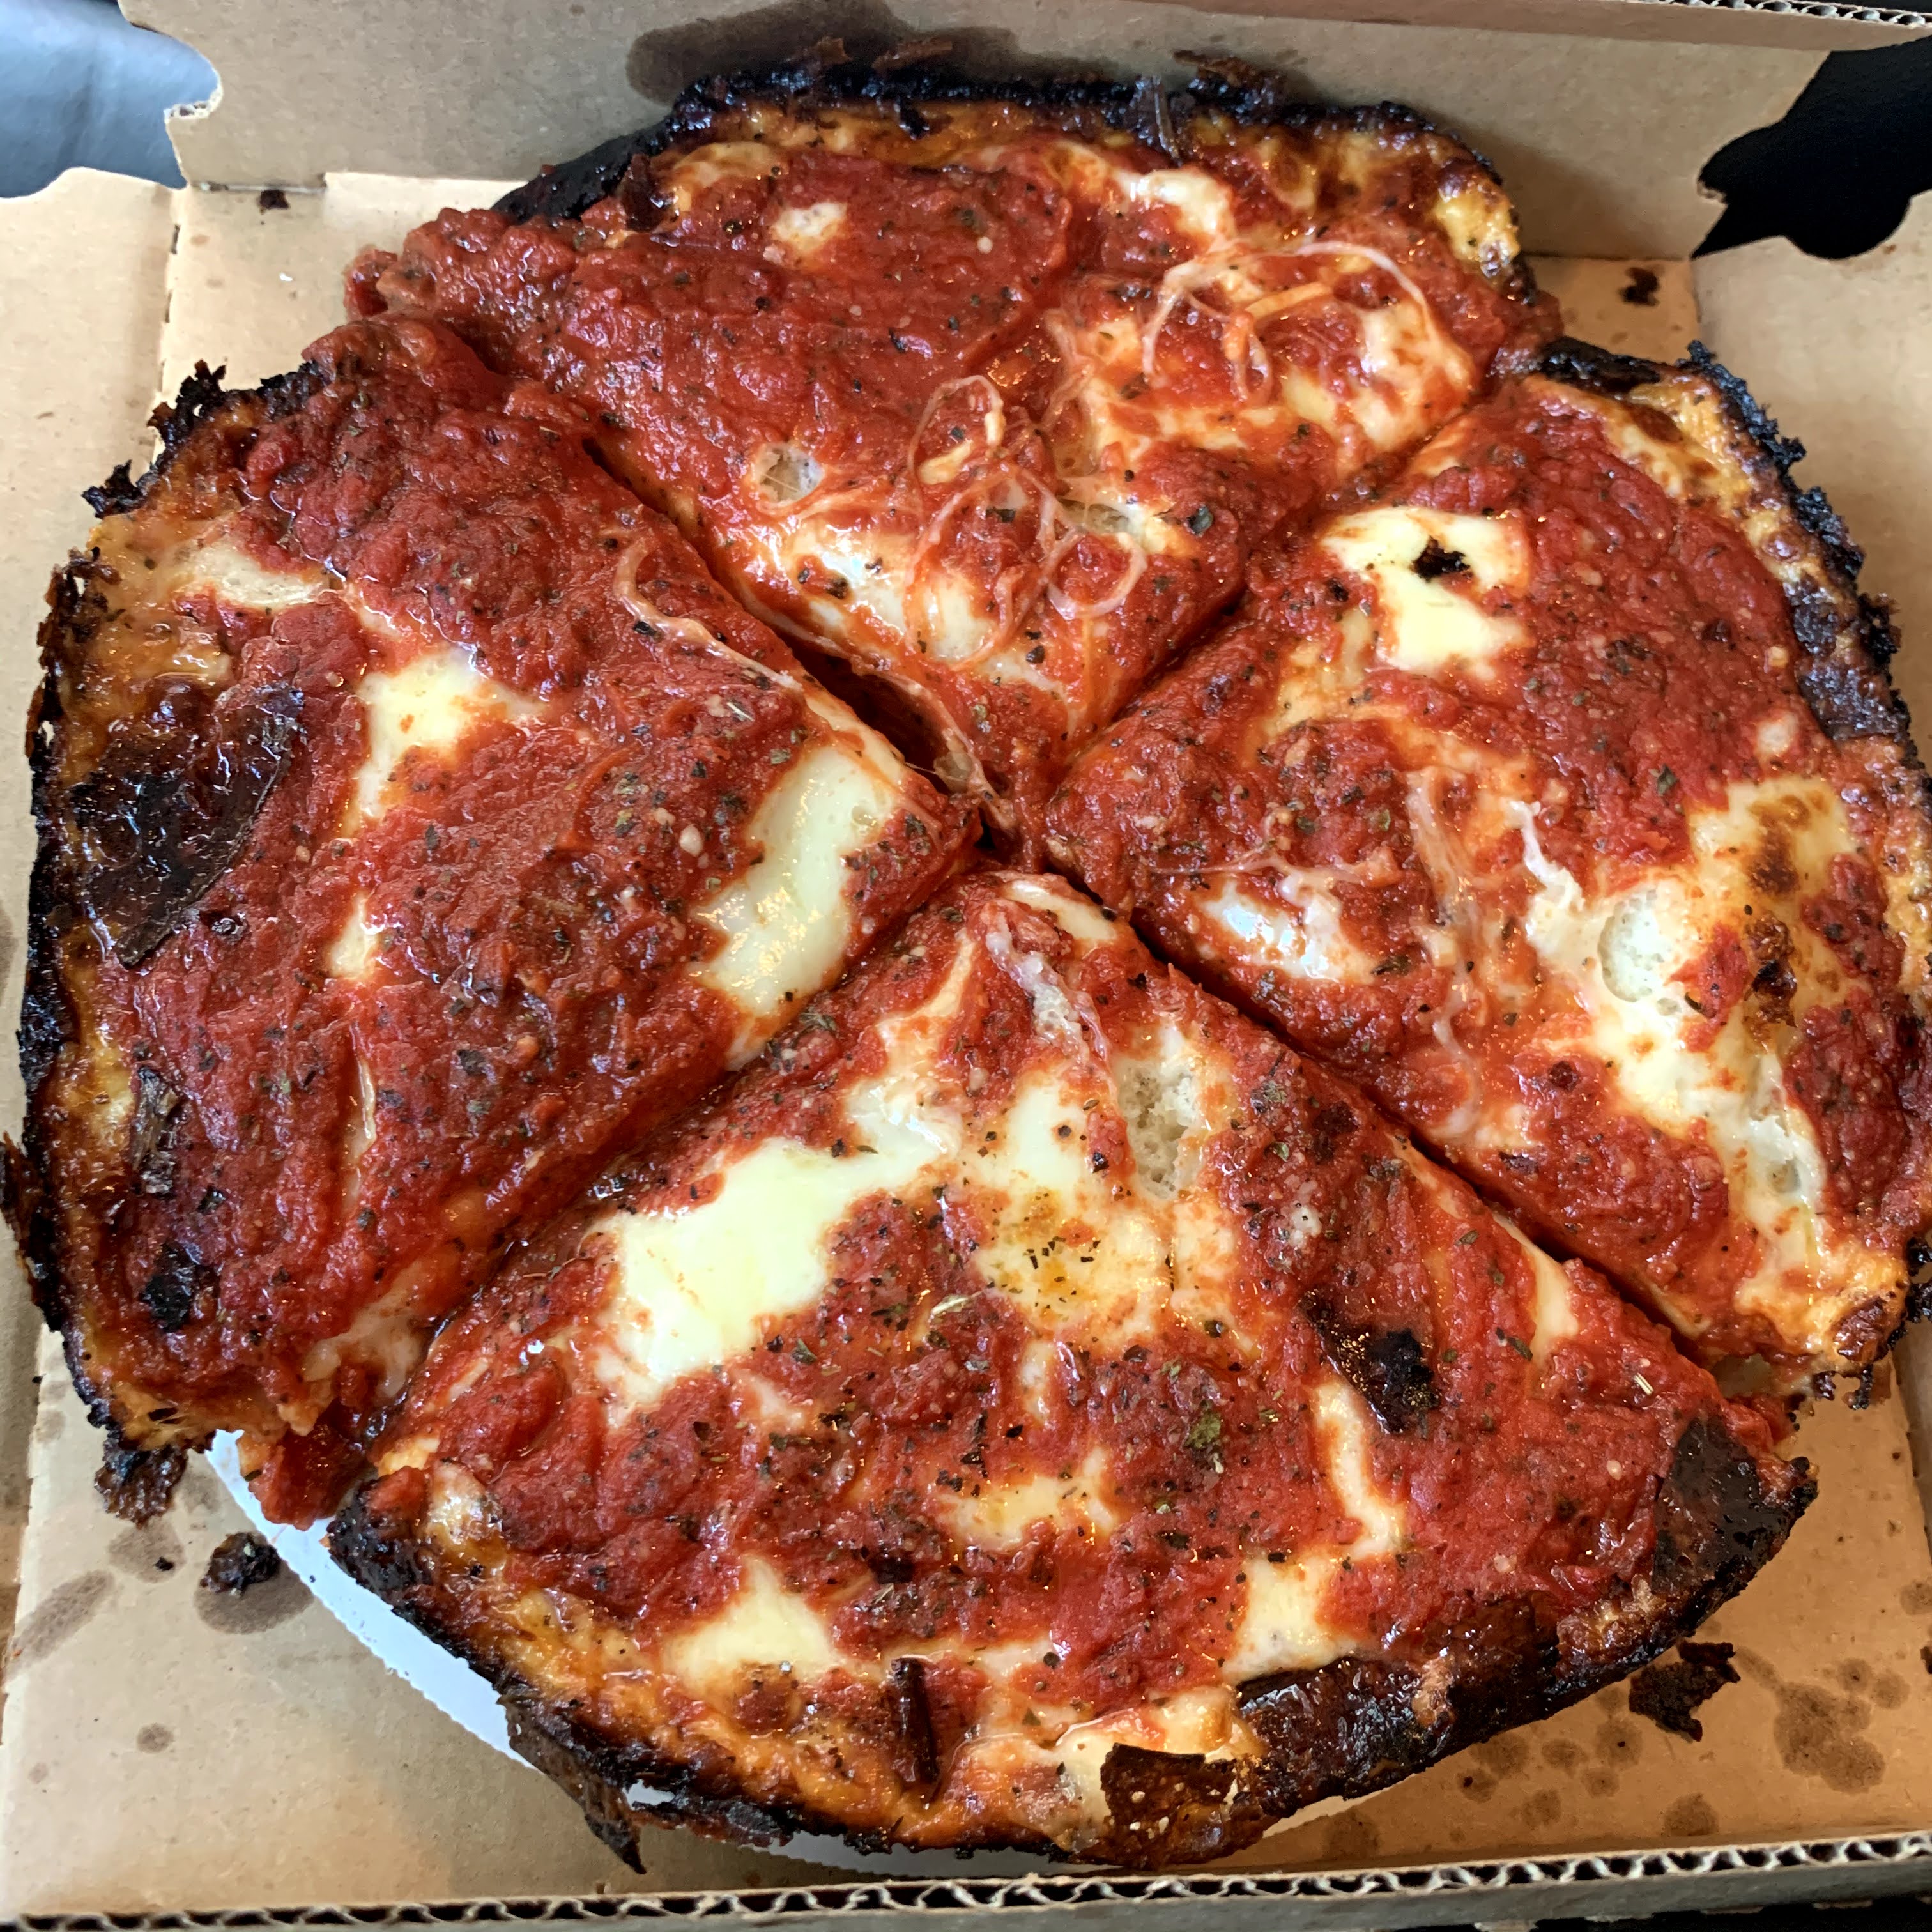
From NYC, we made it to Mauston Wisconsin on the first day of driving. We stopped in Chicago to get some takeout Pequod’s deep dish pizza for dinner. Try to get your hands on some cheese curds while in Wisconsin – they’re famous for it there! At this point, We were in the Central Time Zone (1 hour earlier).

Day 2 (Travel Day)

From Mauston Wisconsin, we made it to Billings Montana on the second day of driving. We grabbed another takeout dinner along the way at Black Iron Grill in Miles City Montana, and it was DELICIOUS (recommend the mushroom swiss burger and the NY strip steak. Full disclosure – driving past so much open land and farms made us really curious about the local meat available at restaurants. We ate more red meat on this trip than I have all year! It was all so yummy.) At this point, we were in the Mountain Time Zone (2 hours earlier).

Day 3 (Travel Day)

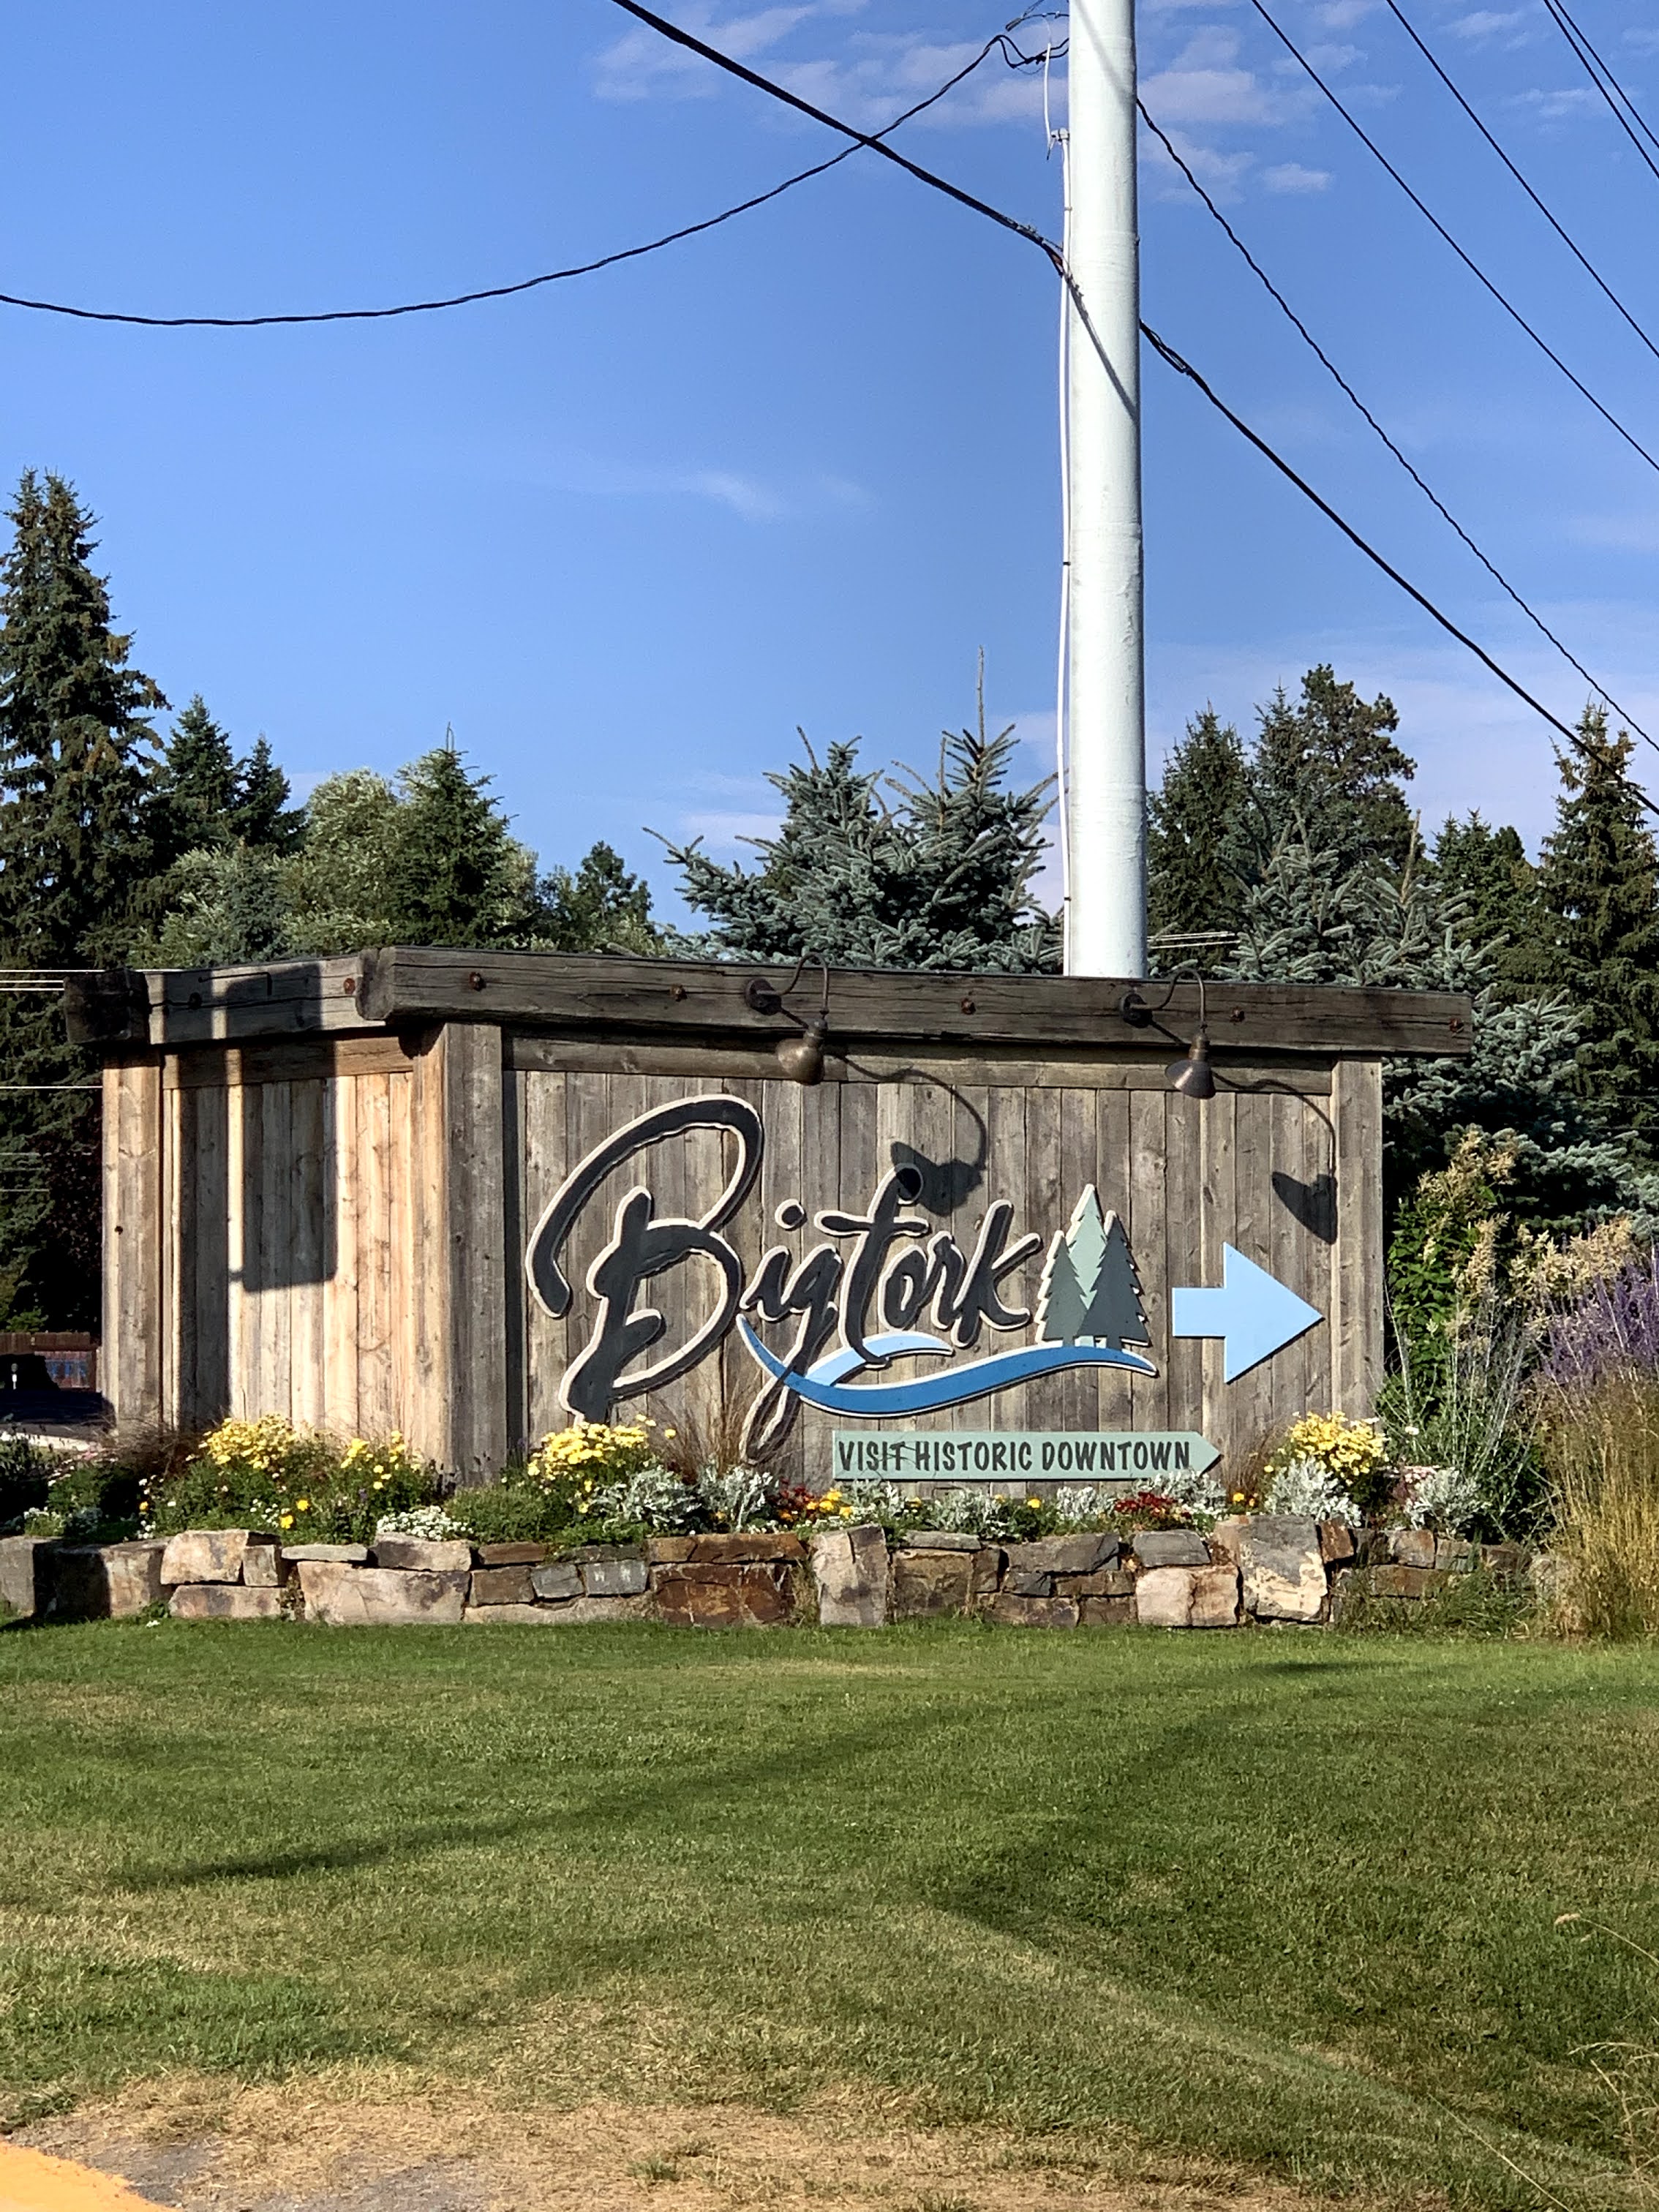
From Billings Montana we made it to our first official destination near Glacier National Park in the afternoon on the third day of driving!

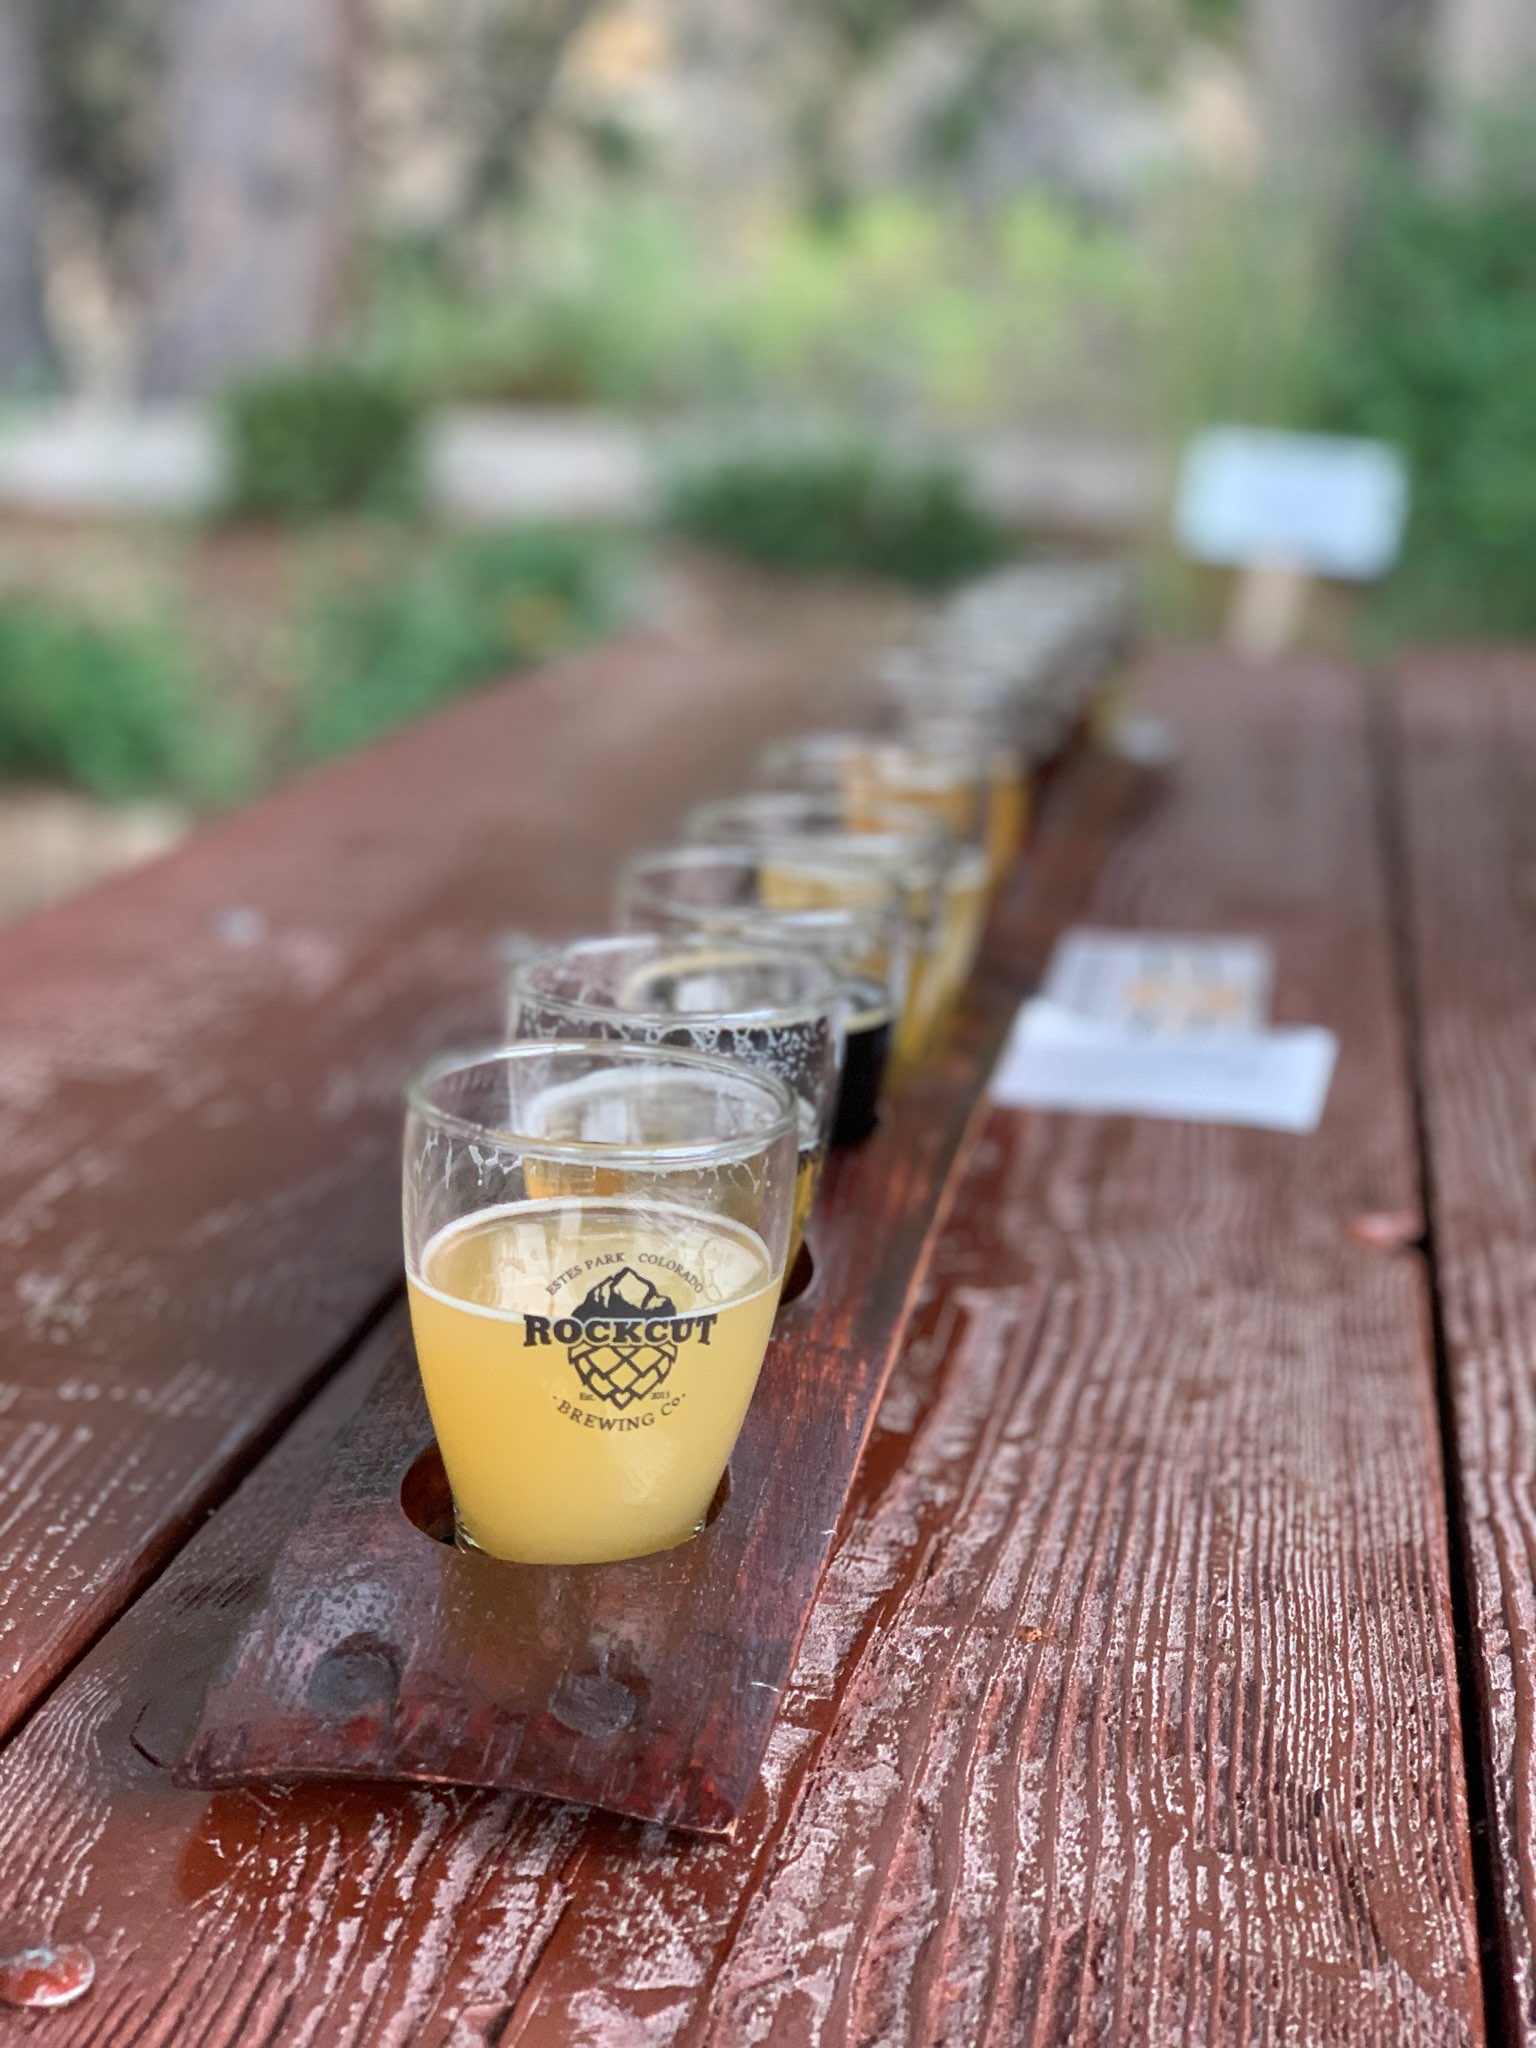
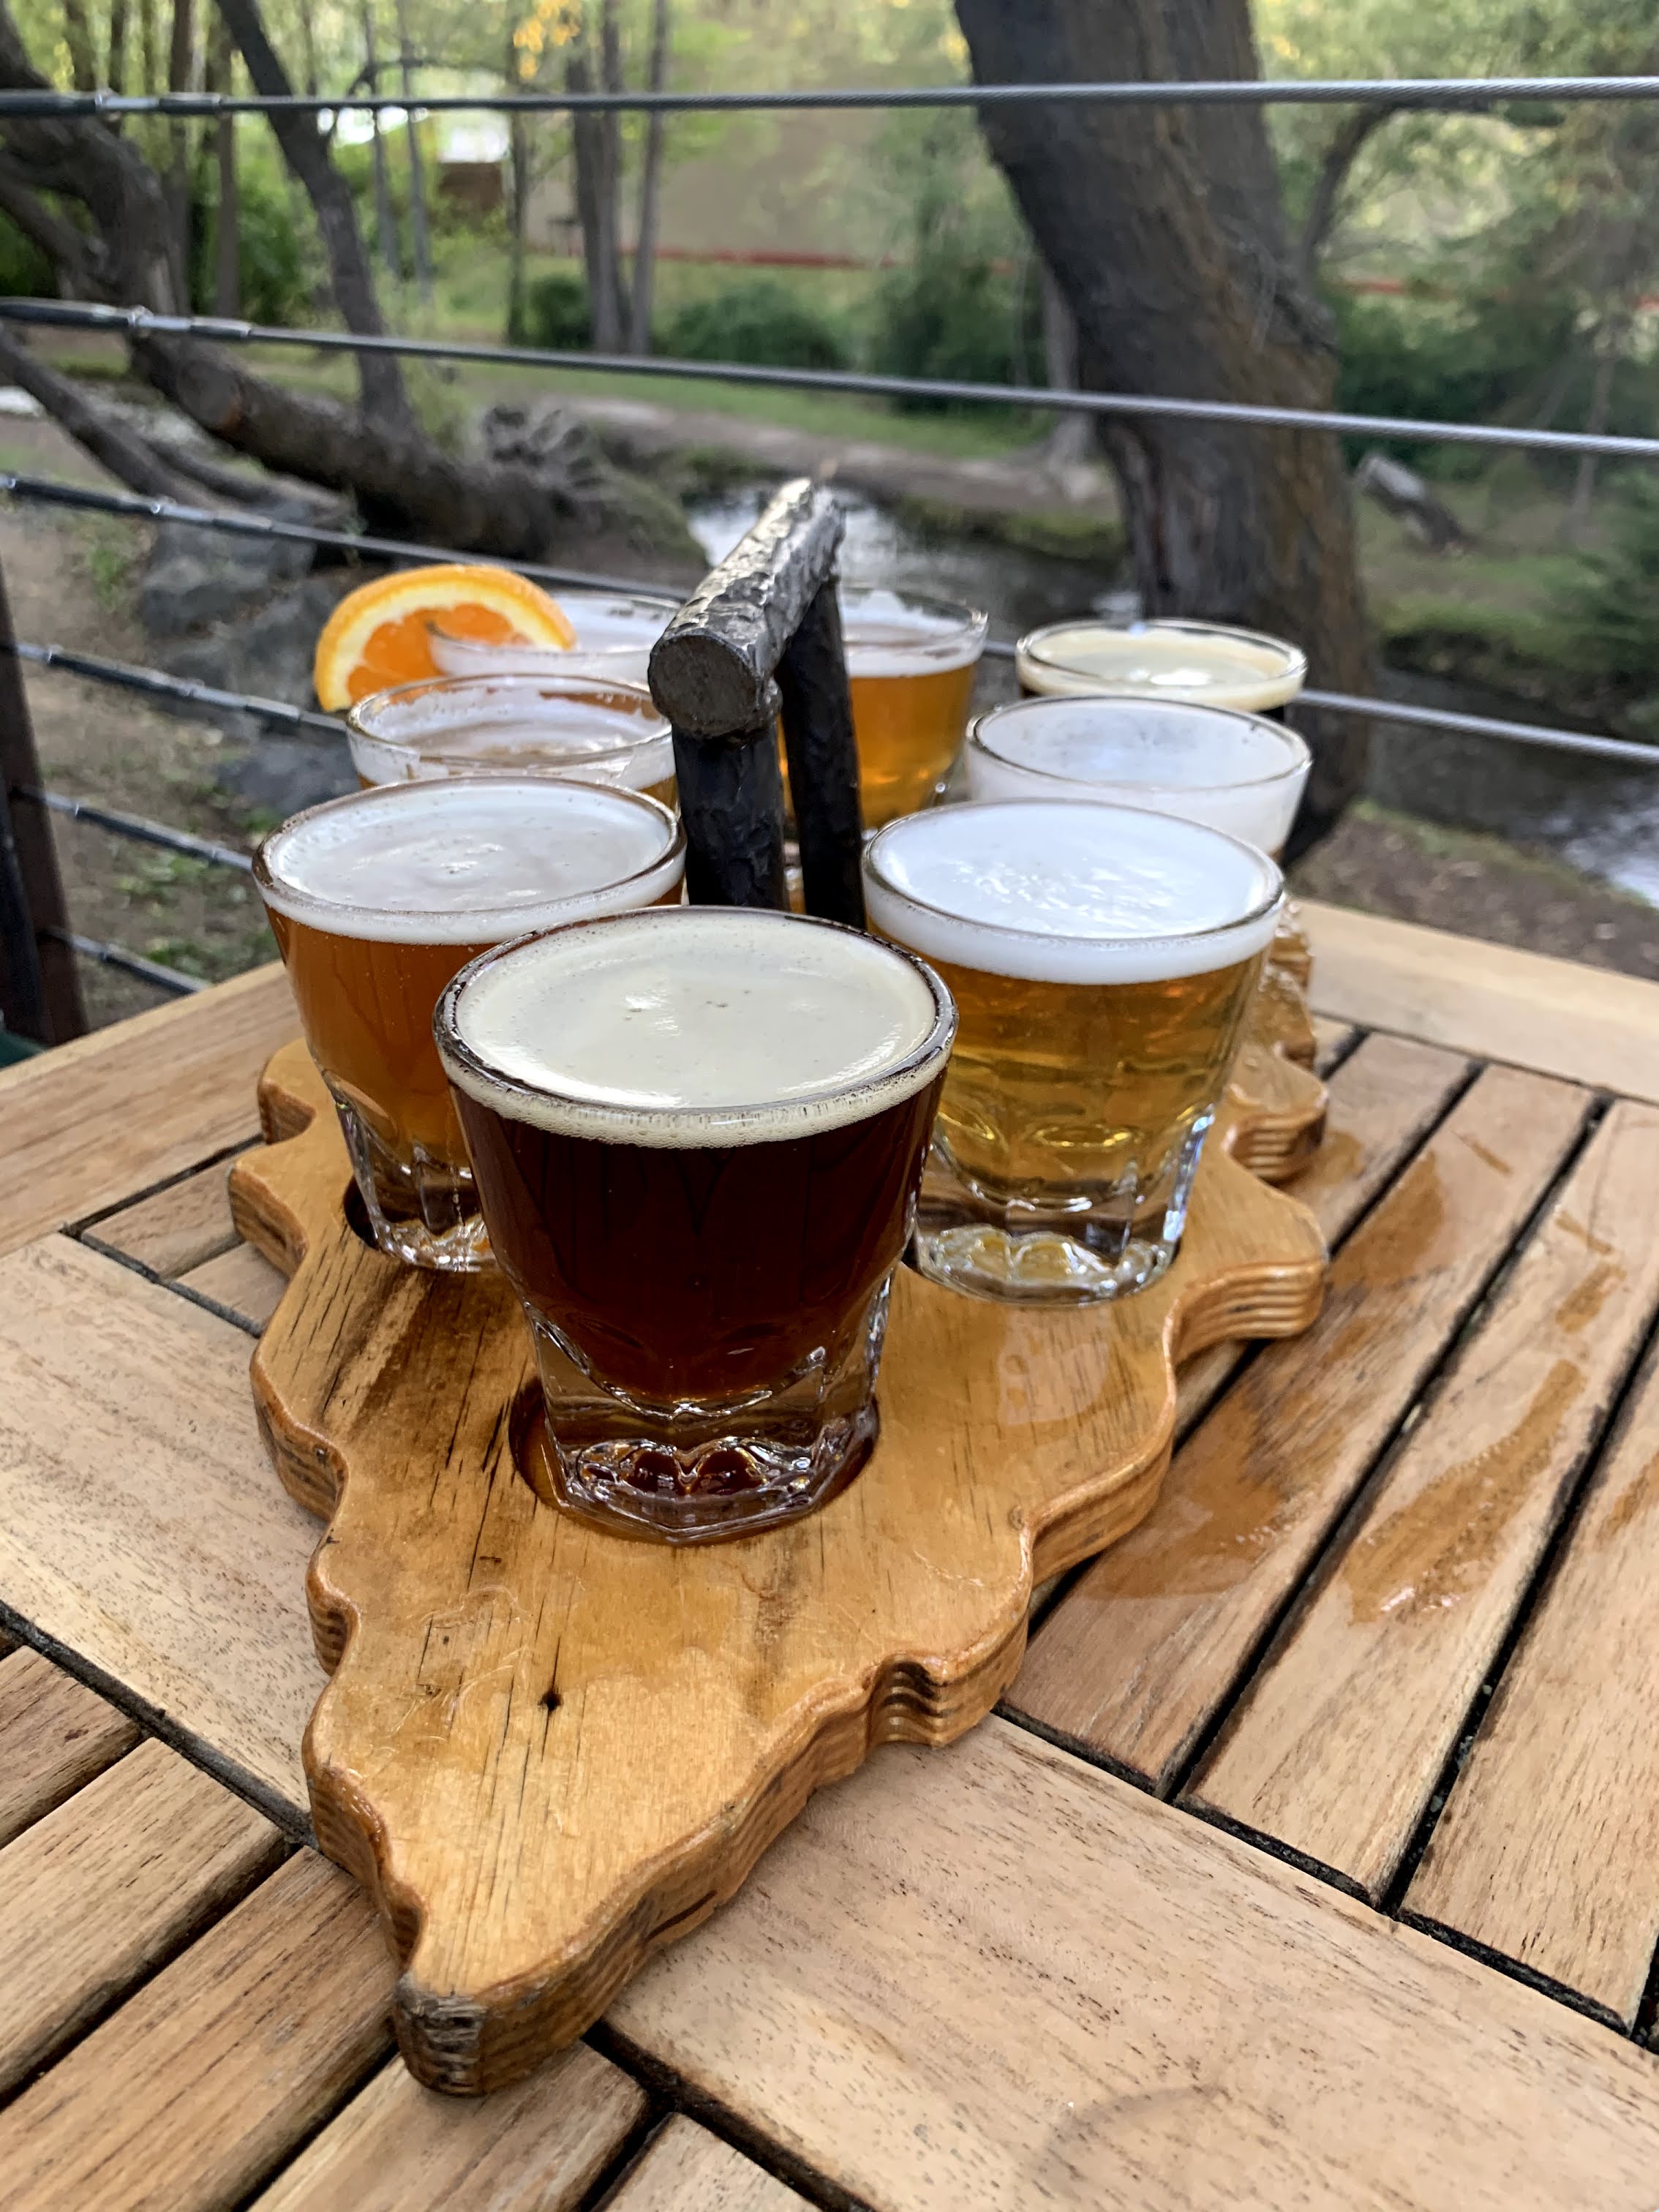
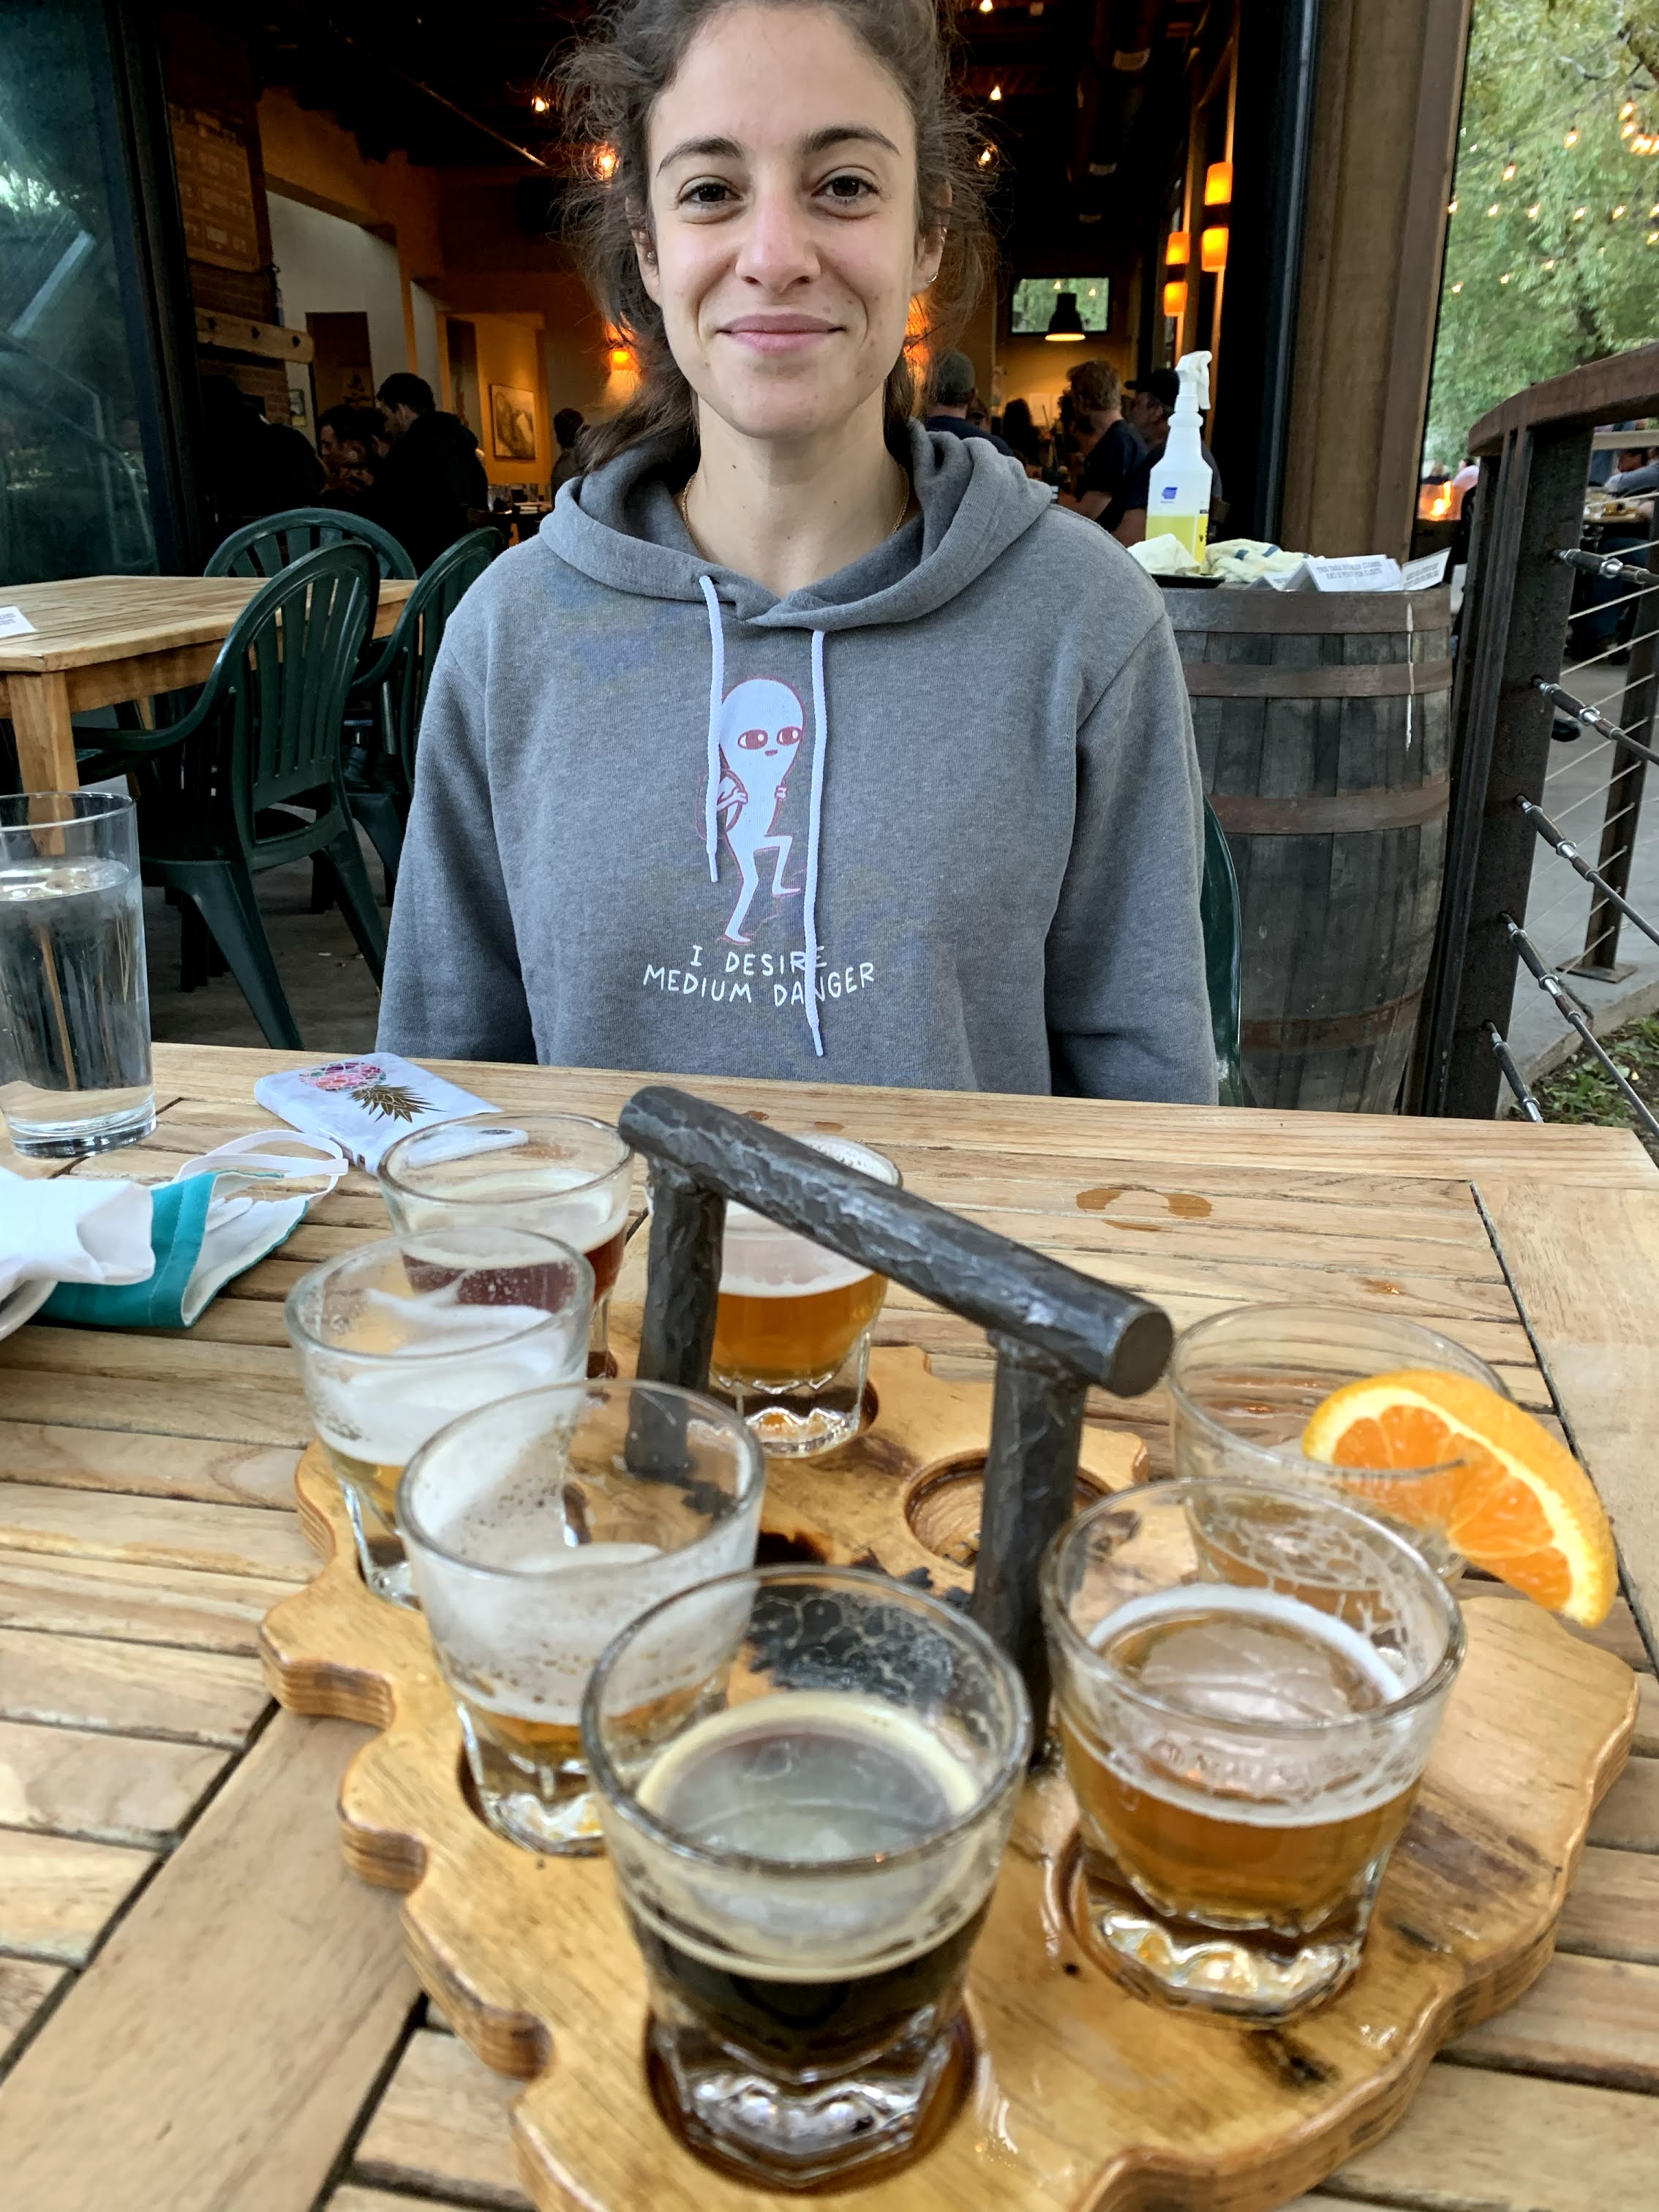
Tamarack Brewery for dinner – This was one of the best meals and atmospheres we experienced on the trip, so I highly recommend this brewery/restaurant. The beer was unique and delicious, and there was outdoor dining! We ordered the bison tacos, bison burger, and the mac and cheese (mandatory for me whenever I see it on a menu).

*Note that this travel itinerary was aggressive. There were two people in the car, so it was possible to switch every few hours to keep things interesting and allow for naps when we needed it. Plan for an additional day of travel if 10-14 hour days in the car isn’t really your jive, or if you are doing the drive alone.

**We did not have hotels booked for our travel days in advance. We drove all day until we felt as though we didn’t want to anymore. About an hour or two before we wanted to stop driving, we looked for hotels in upcoming towns. We liked the Hotel Tonight app for quick and easy searching of affordable last minute hotels.

Day 4 (Glacier National Park, Montana)

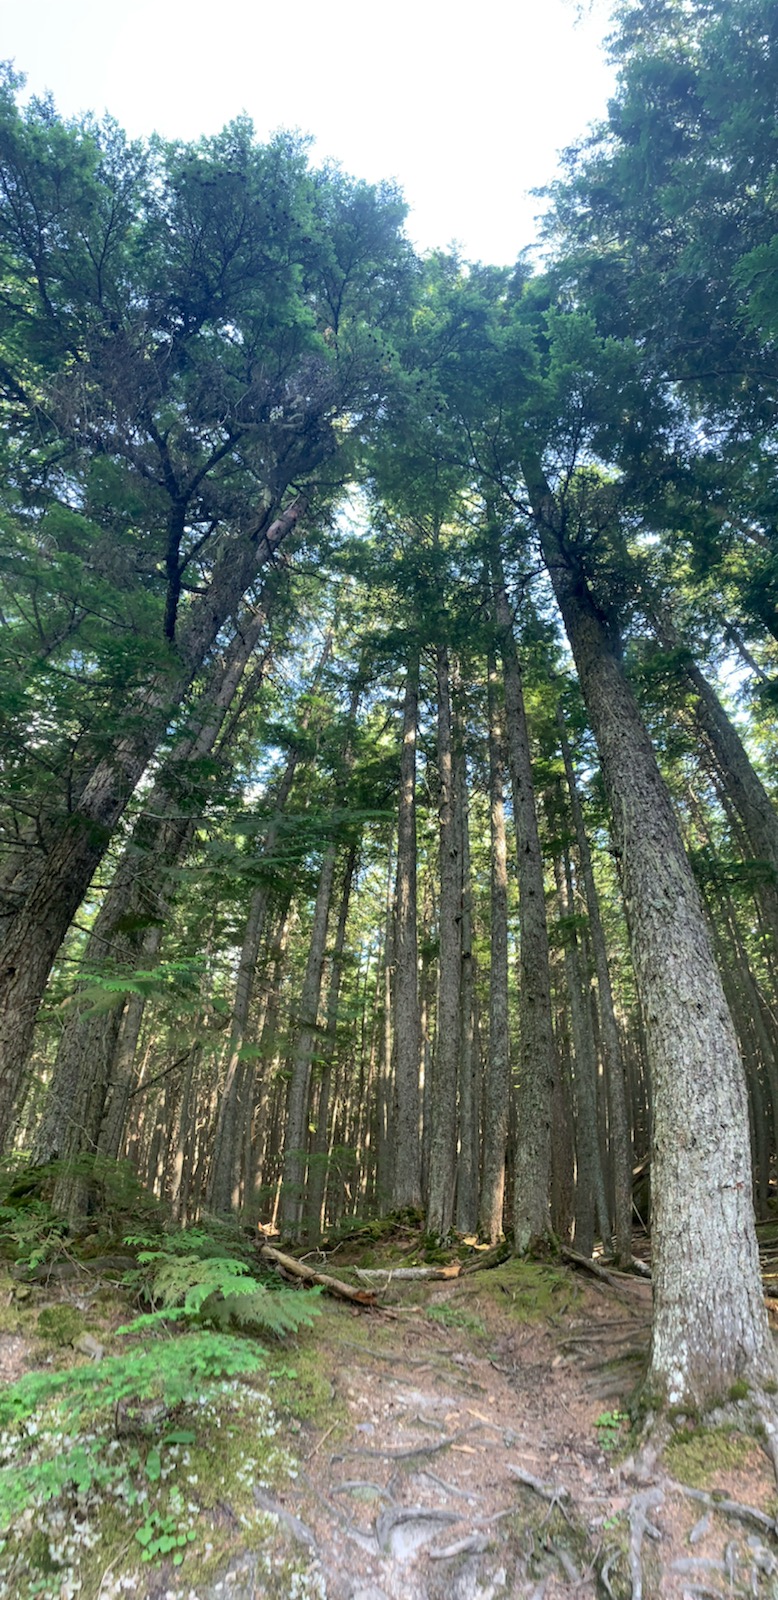
Avalanche Lake via Trail of the Cedars (5.7 miles in and out) – We did this as a late afternoon hike, since we worked in the morning. Trail of the Cedars was a very pretty and easy nature walk. It led into the Avalanche Lake trail, which was more of a hike. There was some uphill through the forest, nothing too crazy, which led you to a beautiful lake that you could swim in (though the water was pretty cold). This trail was one of the best ways to experience the crystal clear water at this park – this was one of the only opportunities to really see it up close and personal and take a dip. On most of the longer hikes, you get more so views of the lakes instead of experiencing them from ground level.

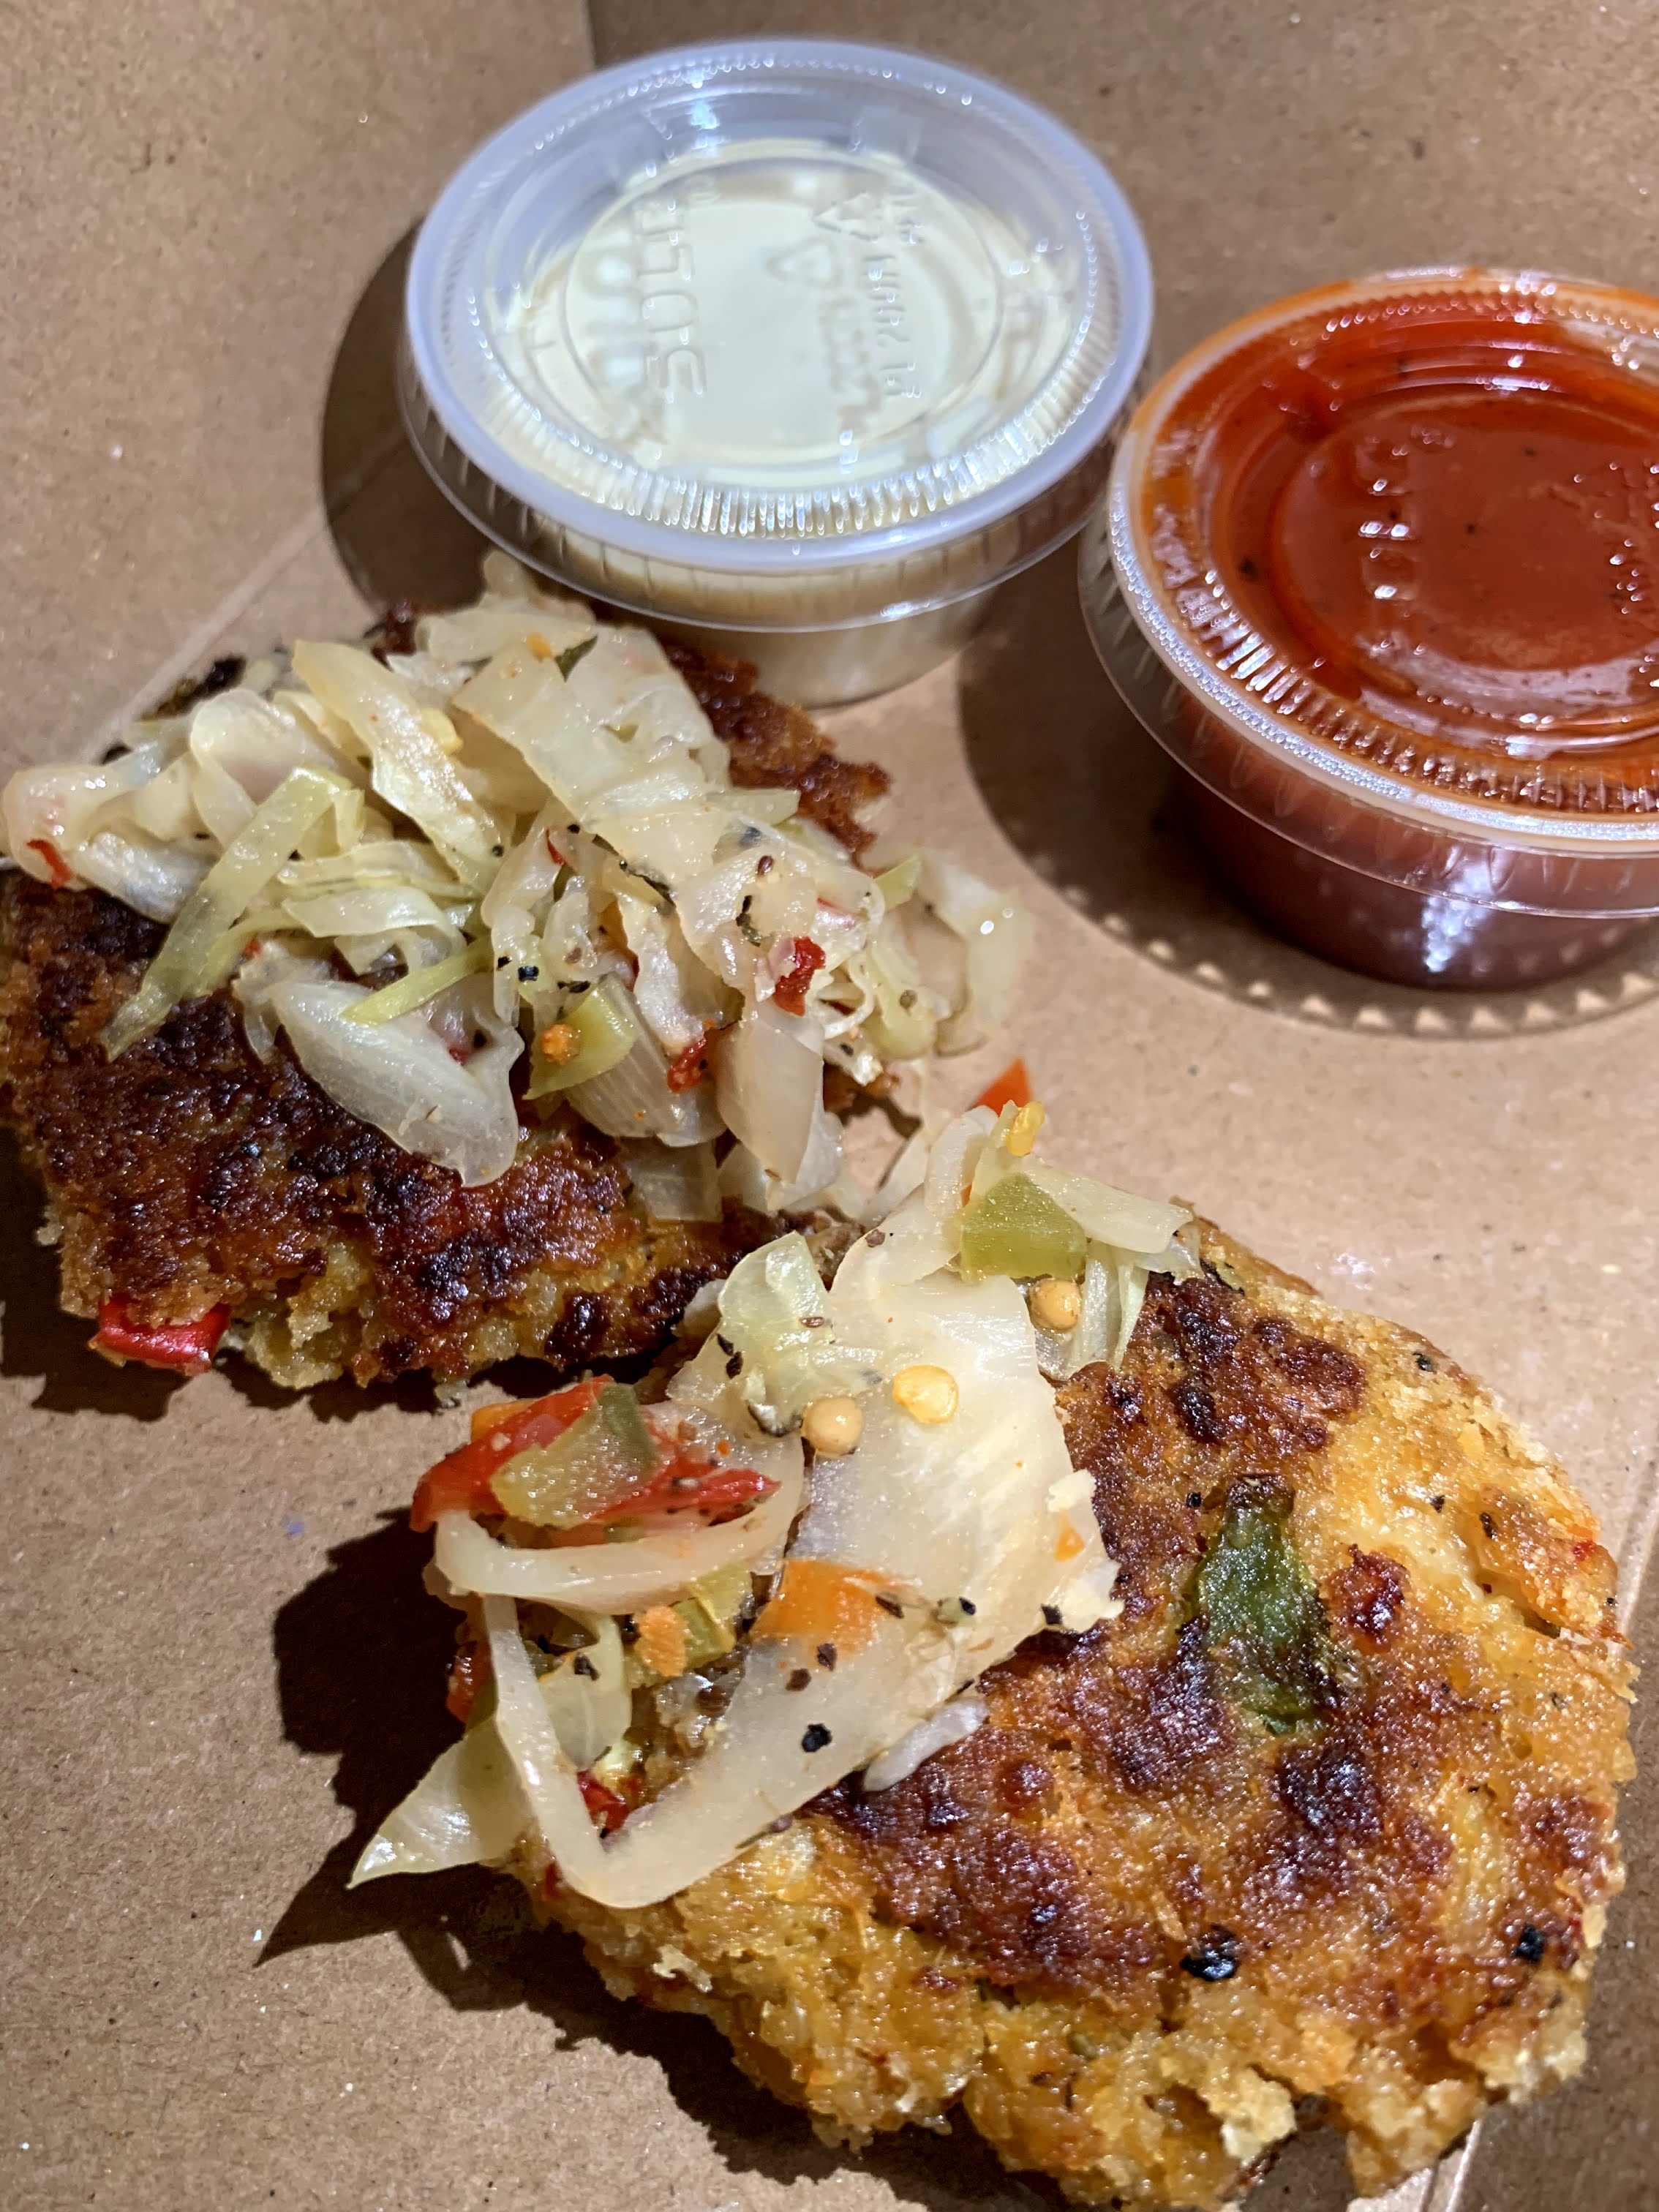
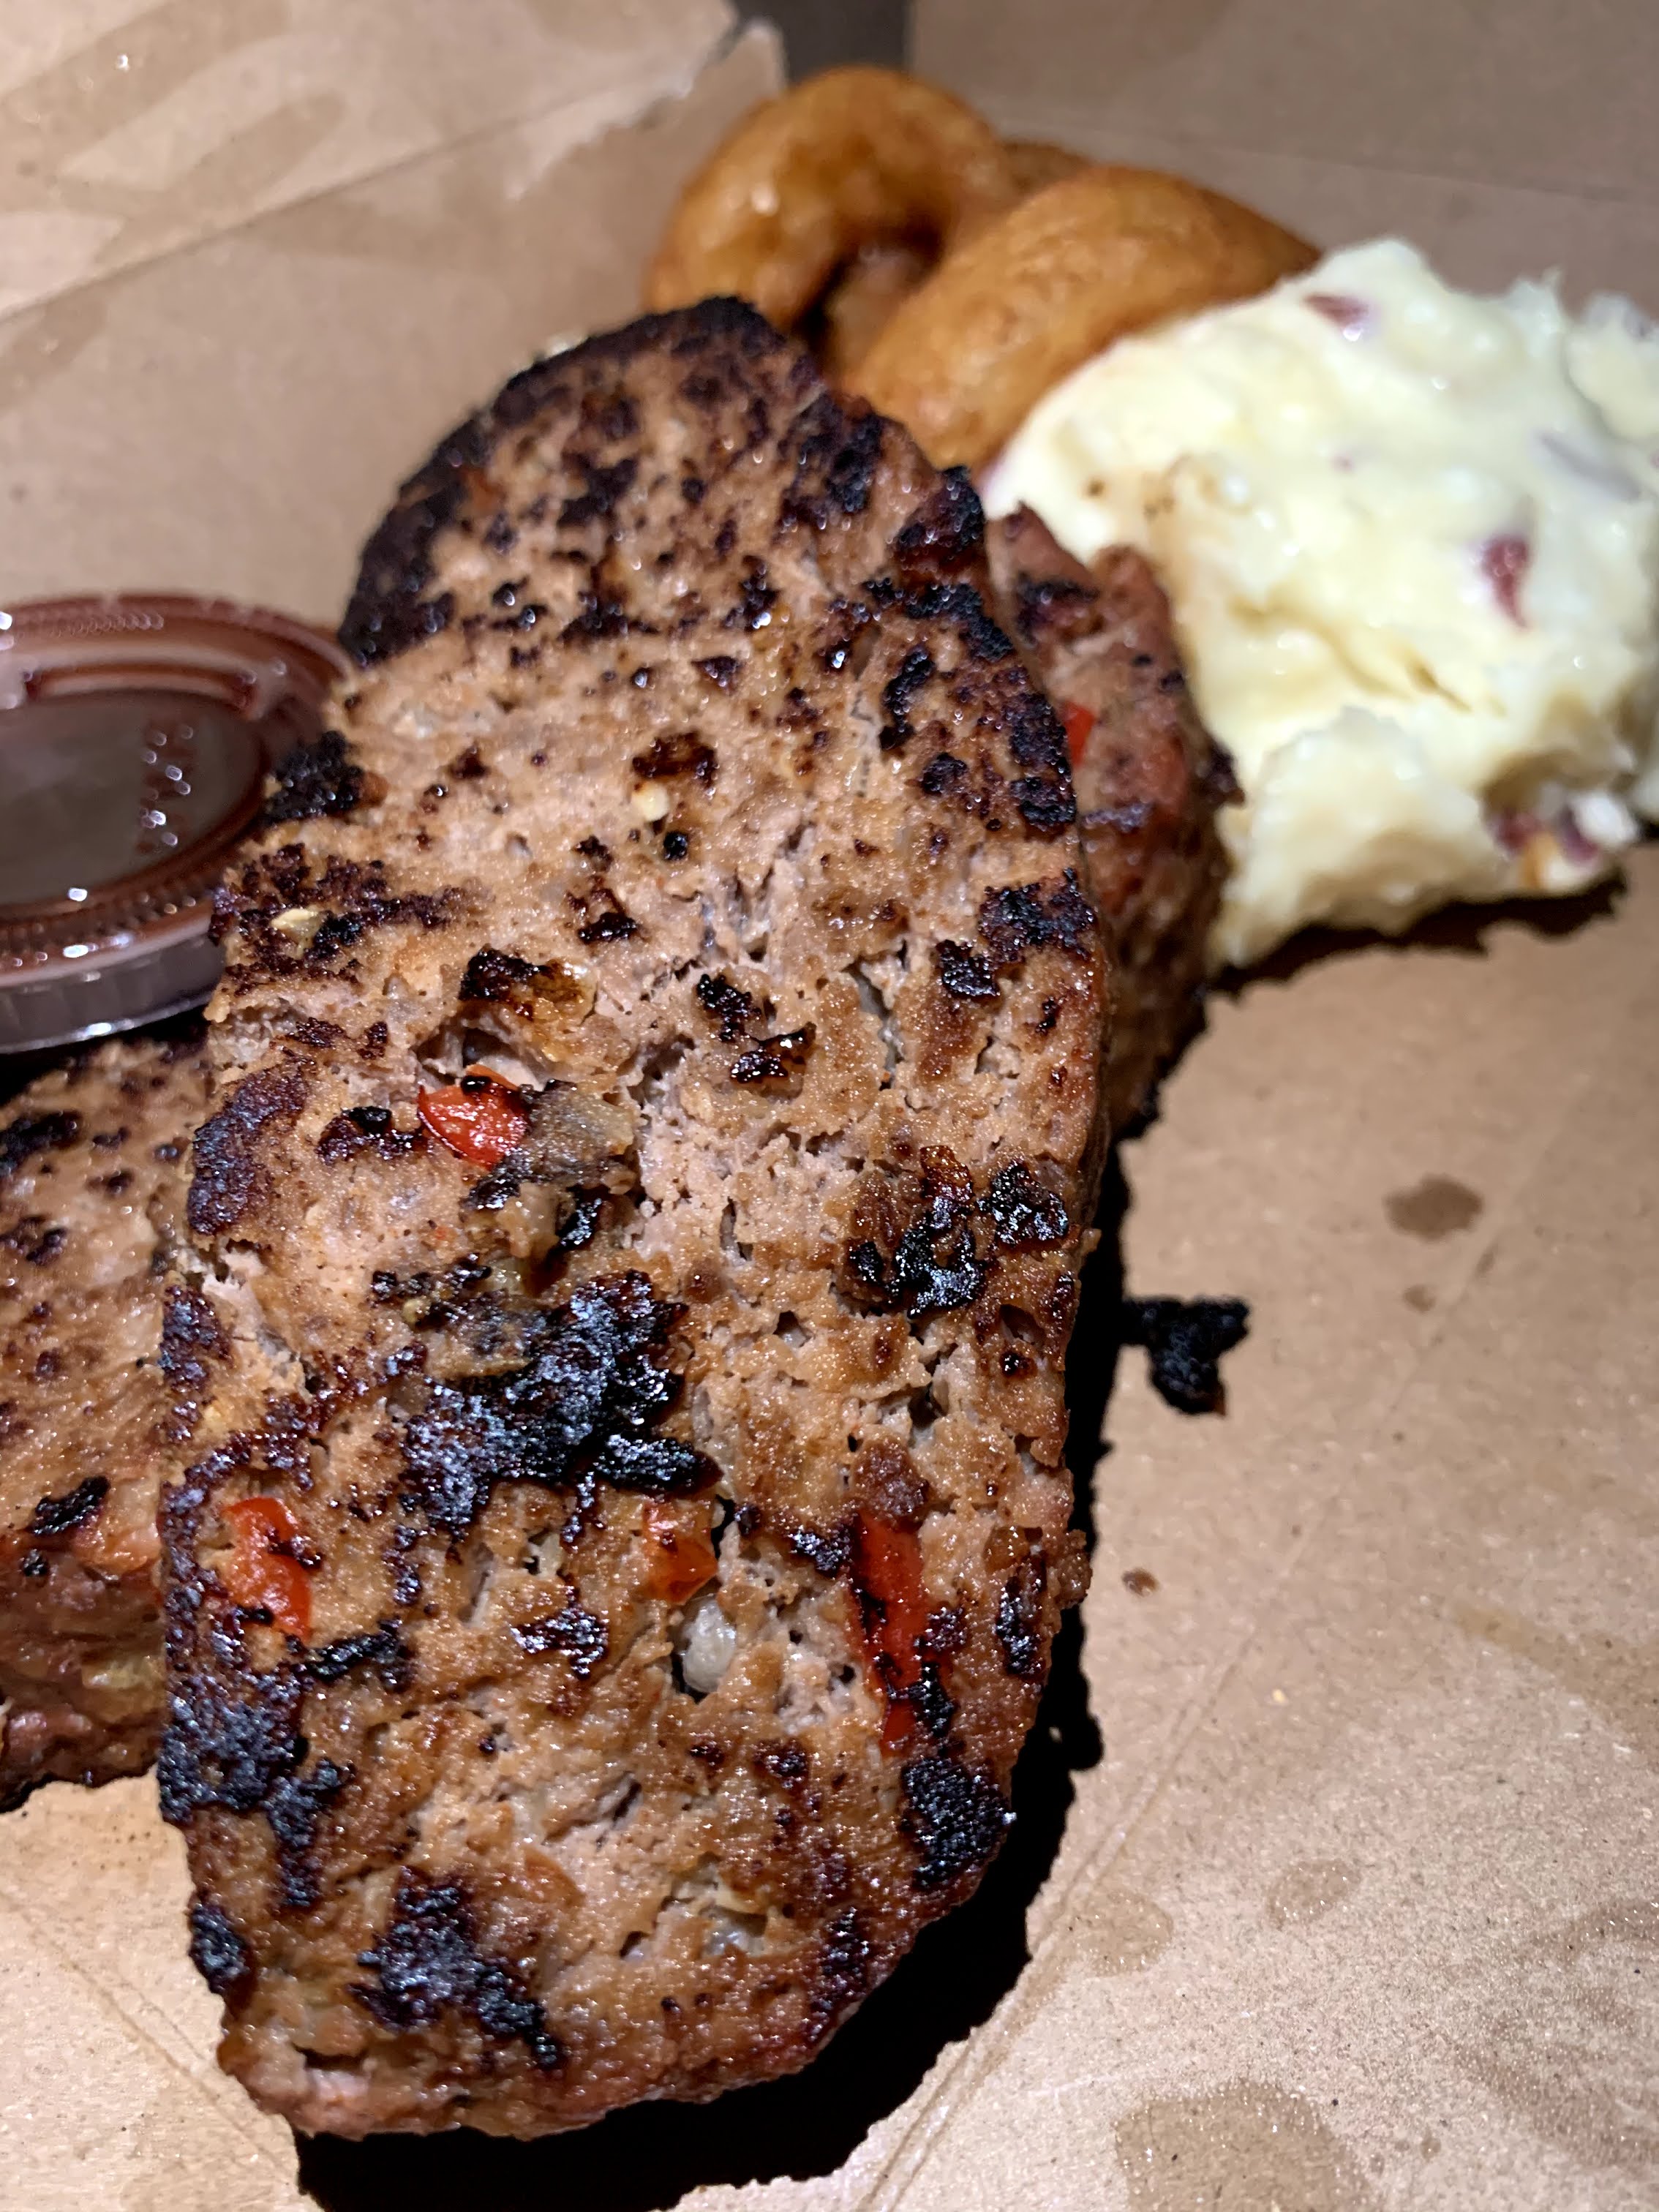
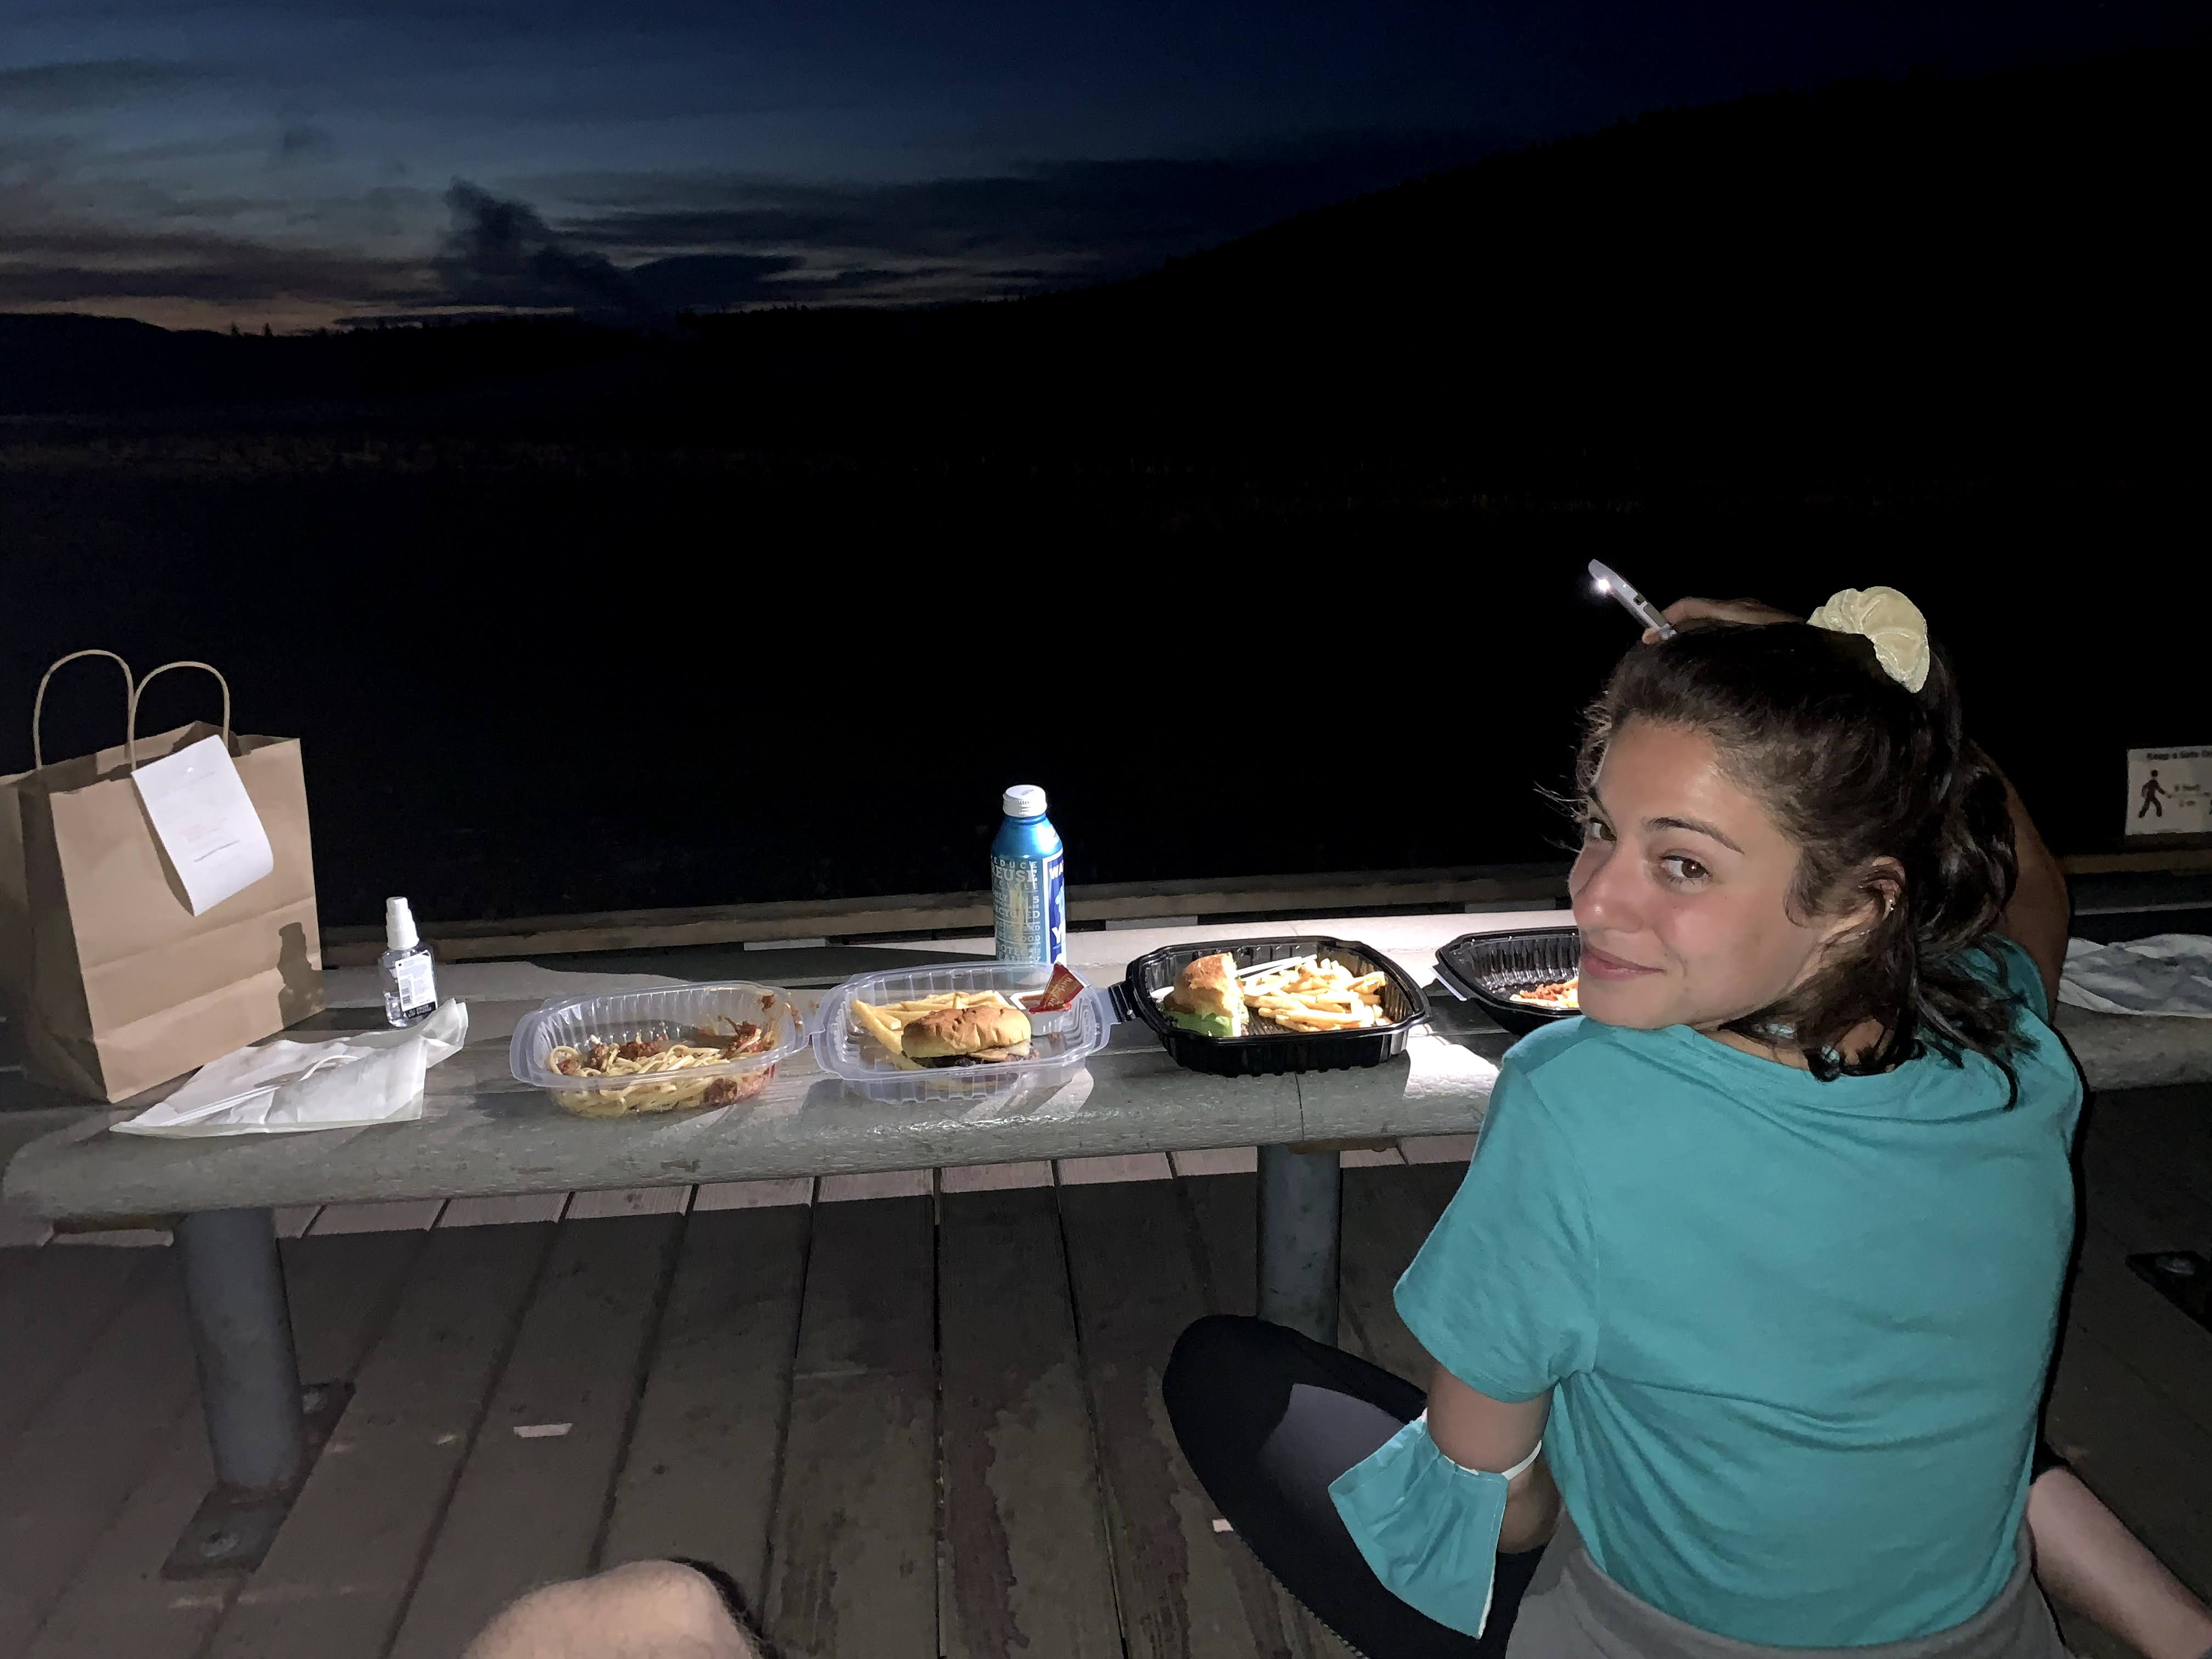
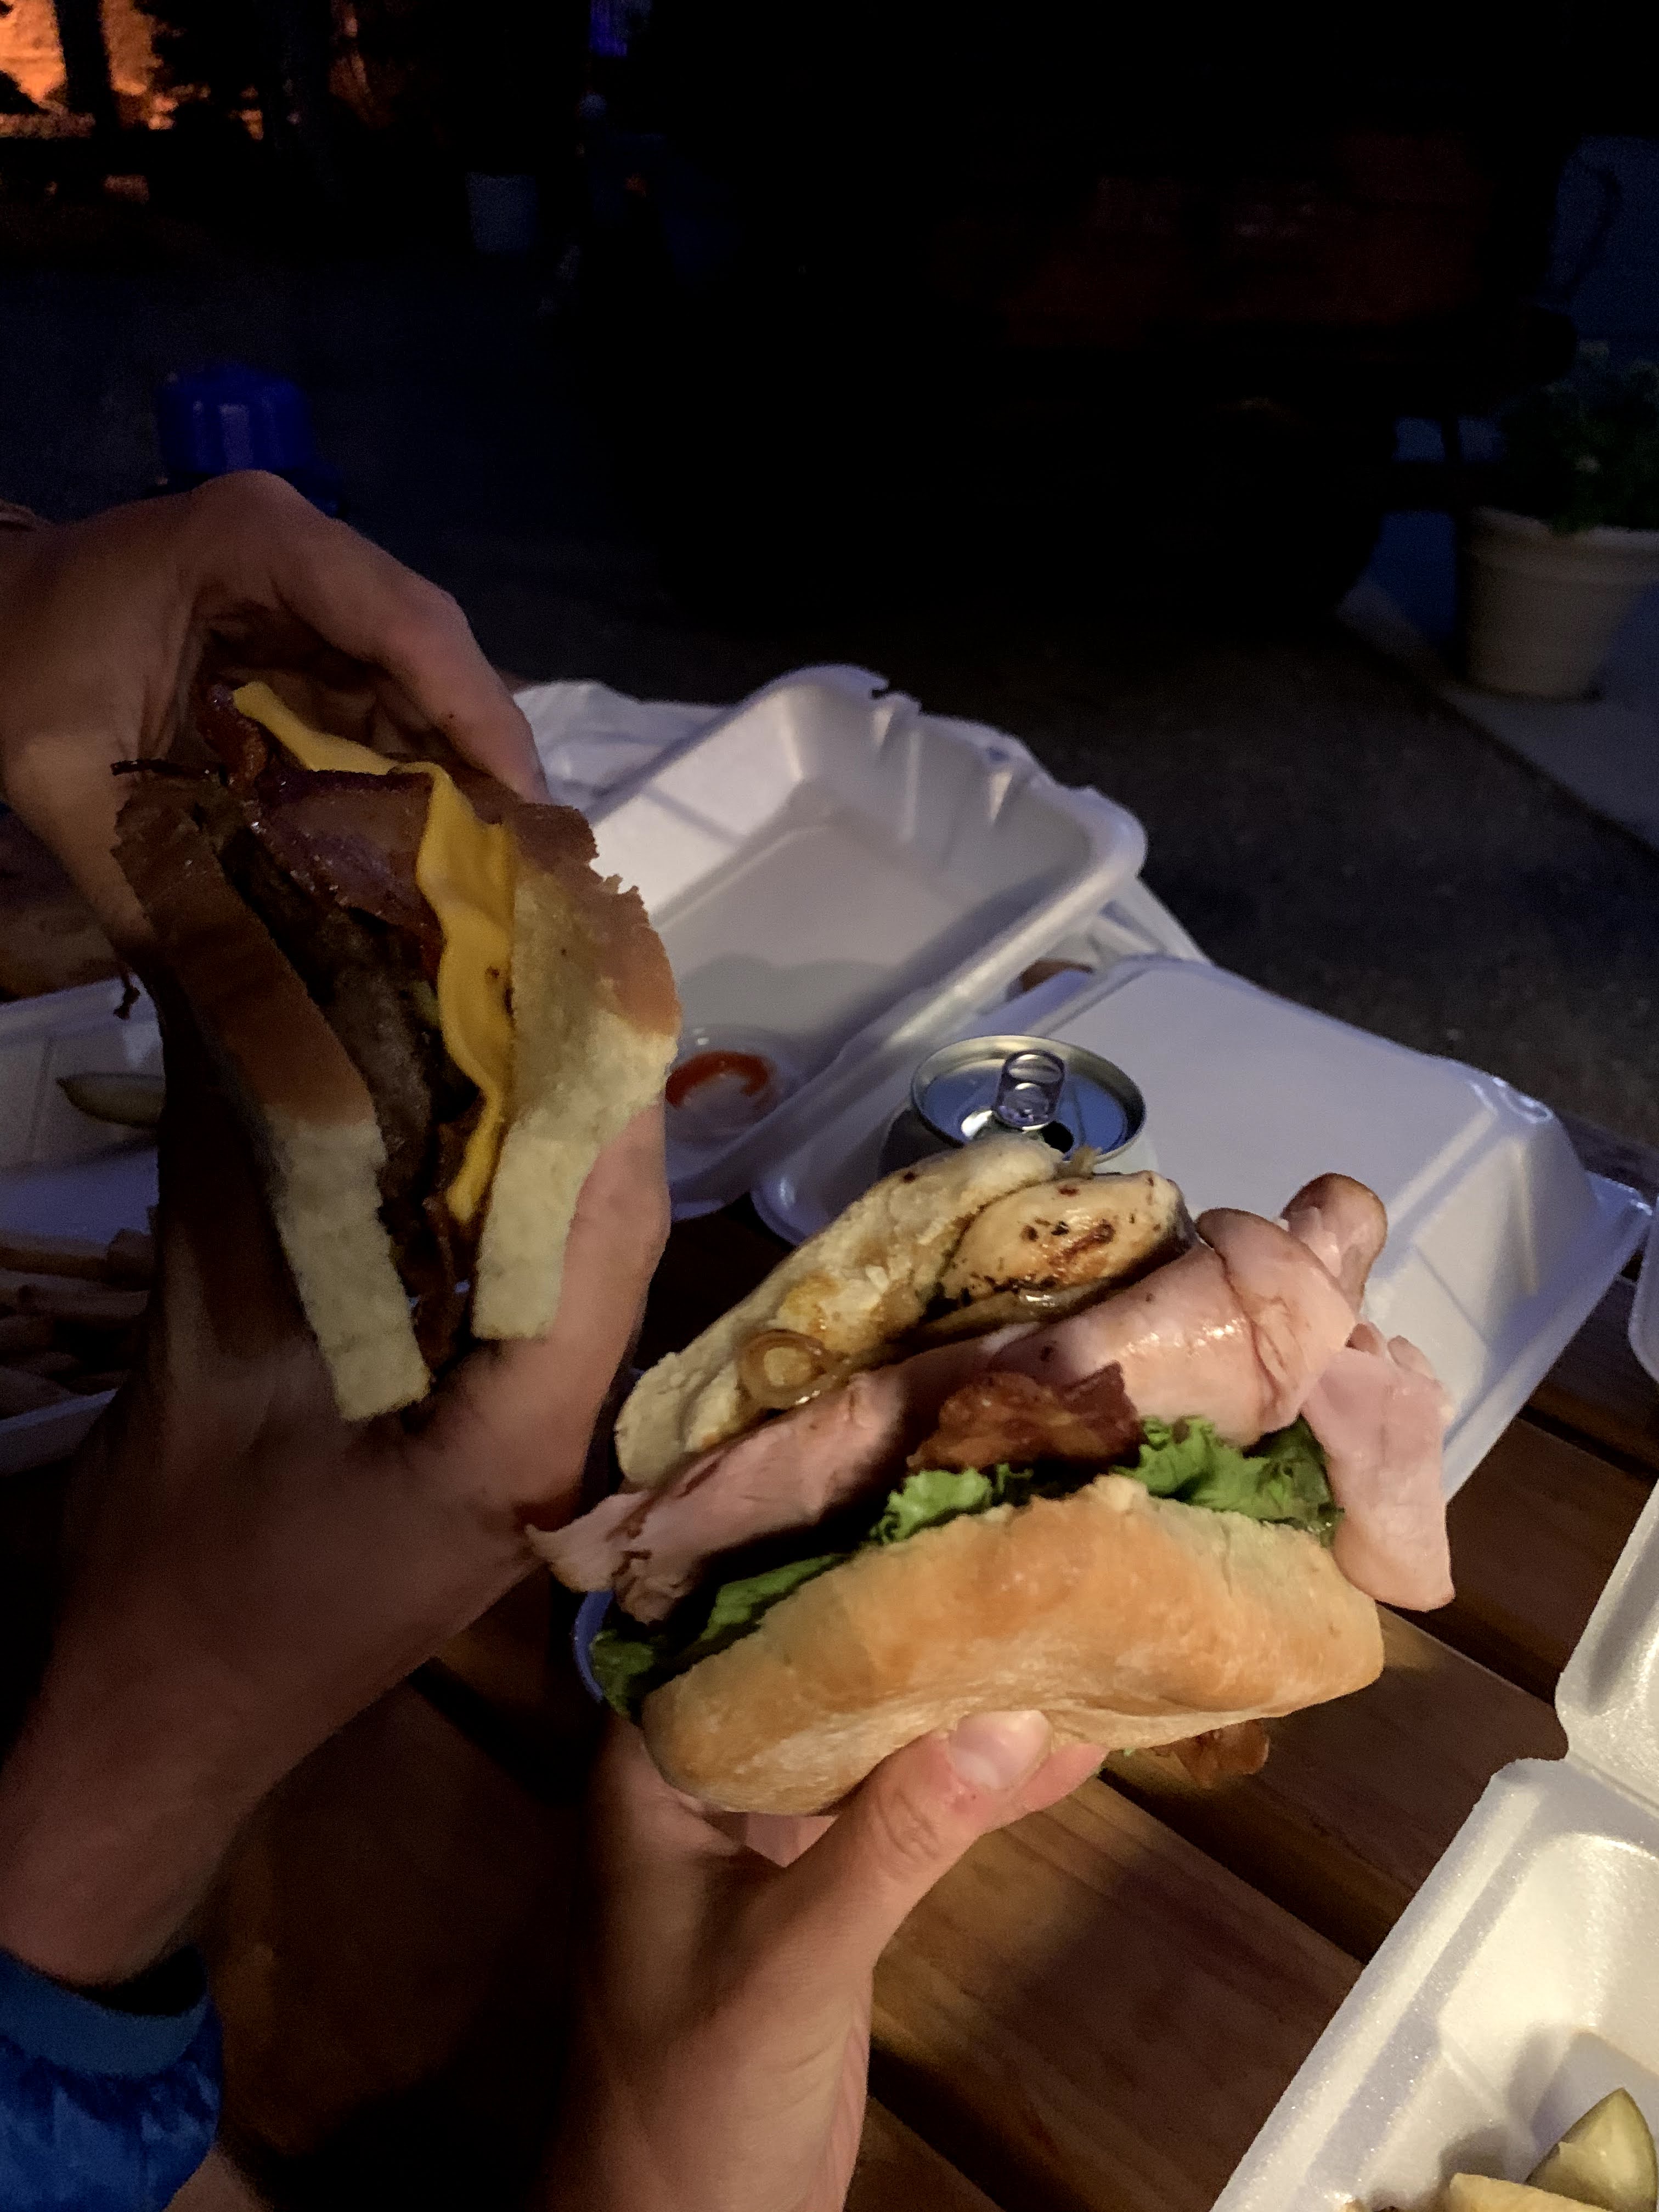
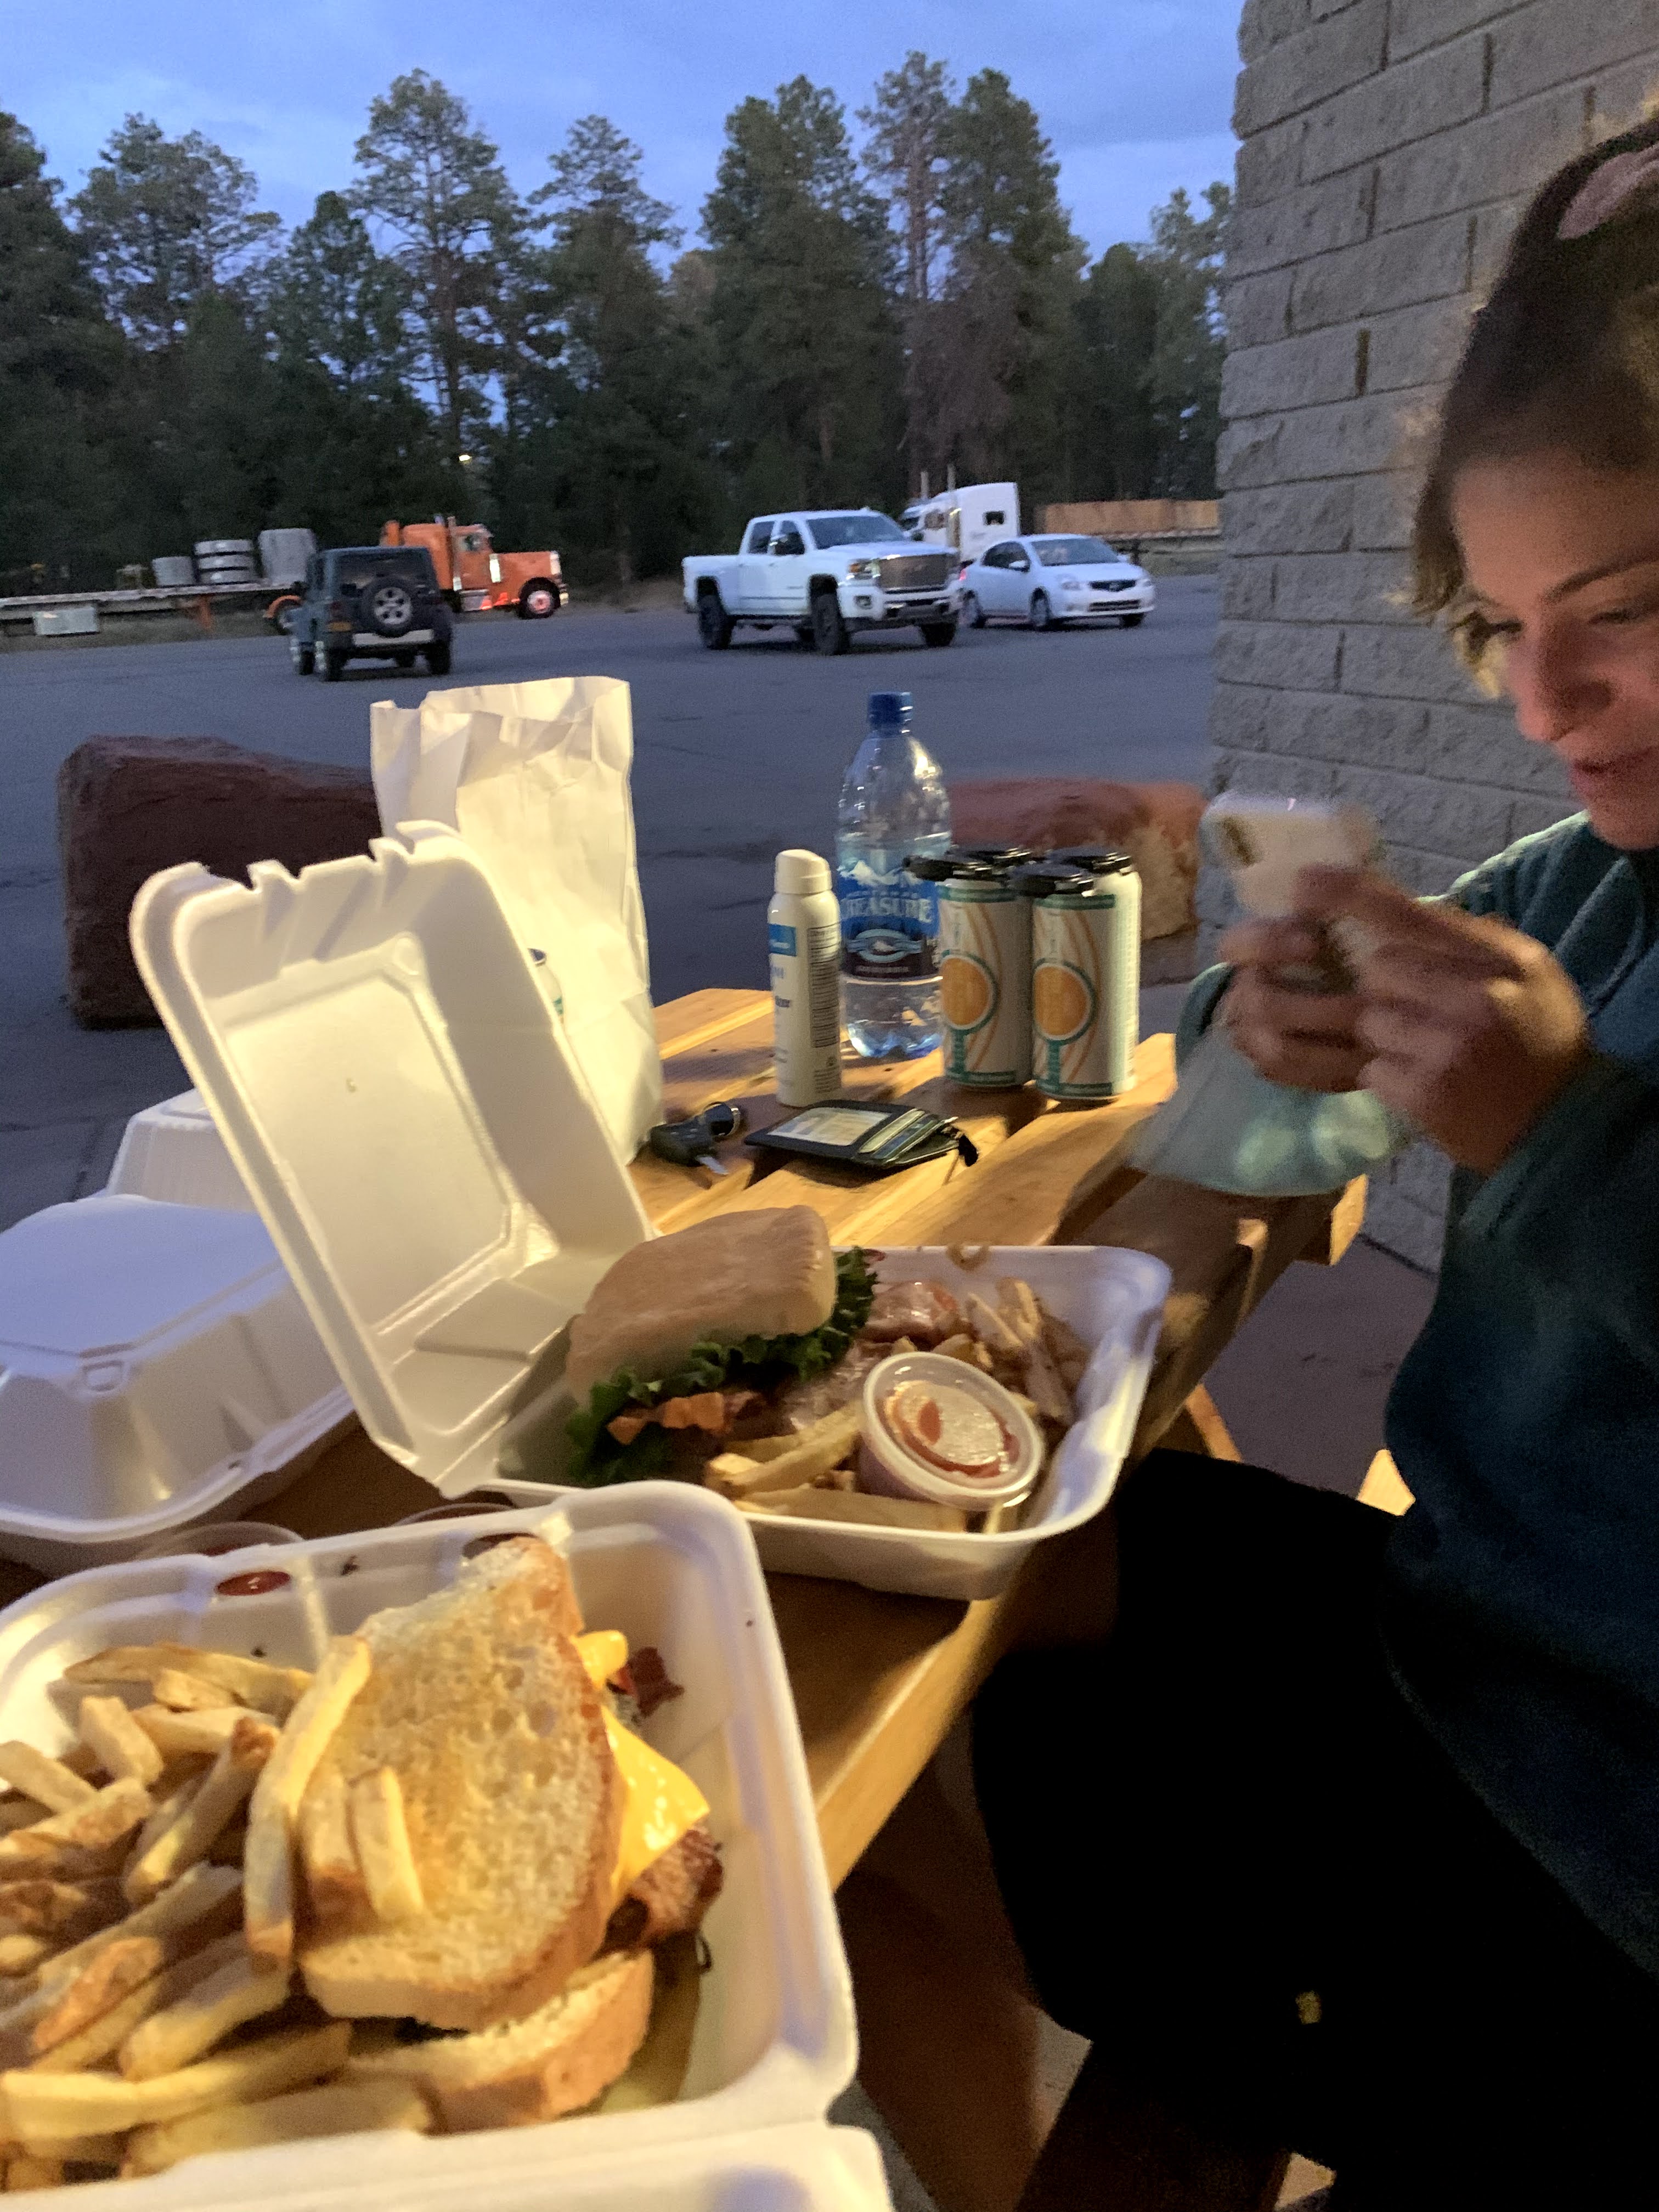
Tupelo Grille for dinner, for takeout since they didn’t have outdoor seating. The food was great, but I think a sit down dining experience would have been better for this menu. We got the shrimp and crawfish crab cakes, the elk meatloaf, and the bison filet. The elk meatloaf we got because we were so curious about elk, but the bison filet stole the show. The fish cakes were tasty, but again, not very conducive to takeout. Sorry for the terrible photos! It was the best I could do at a park bench in the dark…

Day 5 (Glacier National Park, Montana)

Grinnell Glacier Overlook via the Granite Park Trail (11.4 miles in and out) – We were at the parking lot at 7:20 AM and grabbed literally the very last spot in the lot. The hiking in this park is no joke, and the hikers are far from amateur – everyone means business, which means you will be competing with the early birds for parking. Honestly, it was a little bit rough getting out there so early, but it is worth it to beat the crowds and the heat on the trails. The park fills up quickly, and the mid-day sun is BRUTAL. The last 1.5 miles of the Grinnell Overlook hike is a narrow cliffside path, and the final 1/4 mile is very steep, narrow, and rocky. We did see rams along this path, which was exciting, but I personally was pretty frightened along the steep and narrow cliffside portion of this hike.

*The first four miles of this trail (the Granite Park portion) is along the mountain and then through the forest, and brings you to a resting point at the “Chalet.” From here you can choose to stop entirely (there is a pretty view), or you can connect to other trails. This is where the trailhead for the remaining 1.5 miles of Grinnell Overlook begins.

Switfcurrent Pass to Swiftcurrent Lookout (4 miles in and out from the Chalet) – The trailhead for this hike also begisn at the Chalet. This hike gets you to a full 360 degree view of the park with visibility of 14+ miles in every direction. The hike itself is short, technically, but is very steep up the mountain and is not pretty. This hike is a means to an end, but a beautiful end to say the absolute least. Look out for marmots along this trail! They are a cute mix between a gopher and a squirrel, and as you get further up the mountain they get to be pretty big!

*Alternative – doing a small portion of the beginning of the Mini Glacier trail instead at the junction where you can start the Swiftcurrent Lookout will get you an alternative beautiful view of the lakes that are visible at Swiftcurrent. We didn’t do this.

**Note that it was ambitious to do both the Grinnell Glacier Overlook and the Swiftcurrent Pass trails in the same day. If you select one, I would recommend the Swiftcurrent Pass. While the hike itself was less pretty, the views are better, and the hike was overall more enjoyable (mostly because of how scared I was on the Grinnell hike). Don’t forget that you still have the four miles back through the forest and down the mountain (Granite Park Trail) before your day is over, so take this into consideration before deciding to do multiple hikes up at the Chalet.

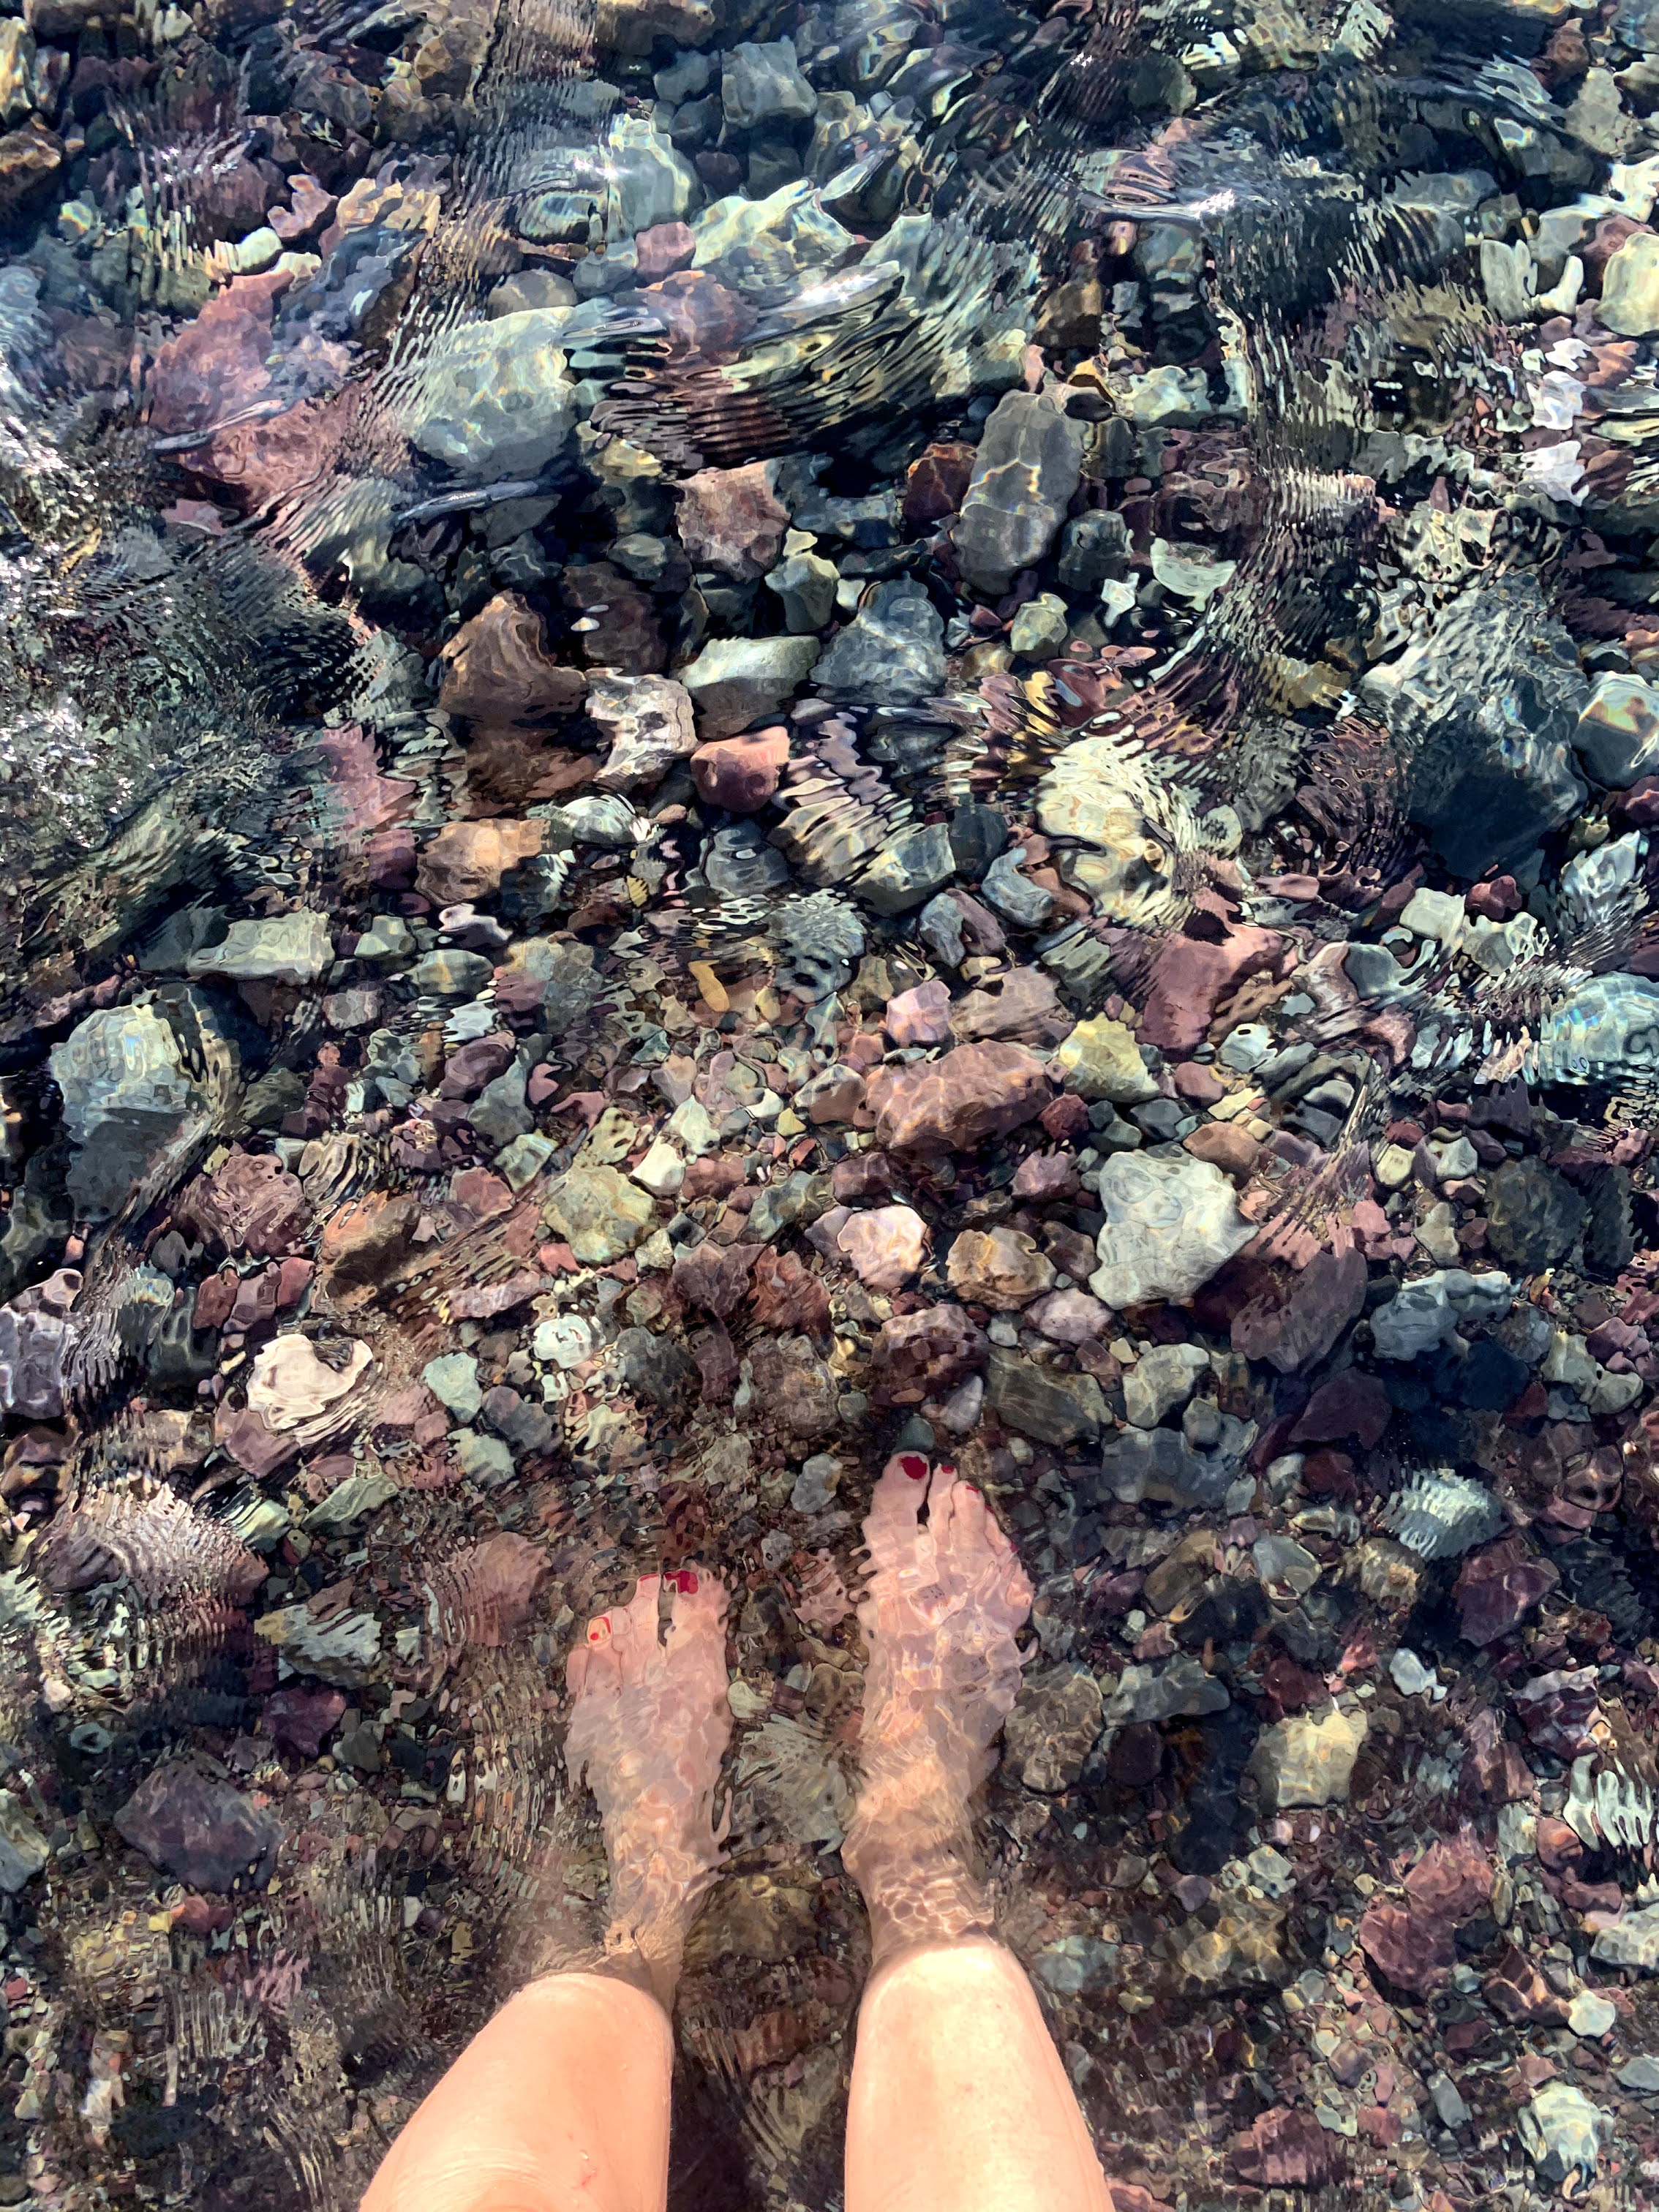
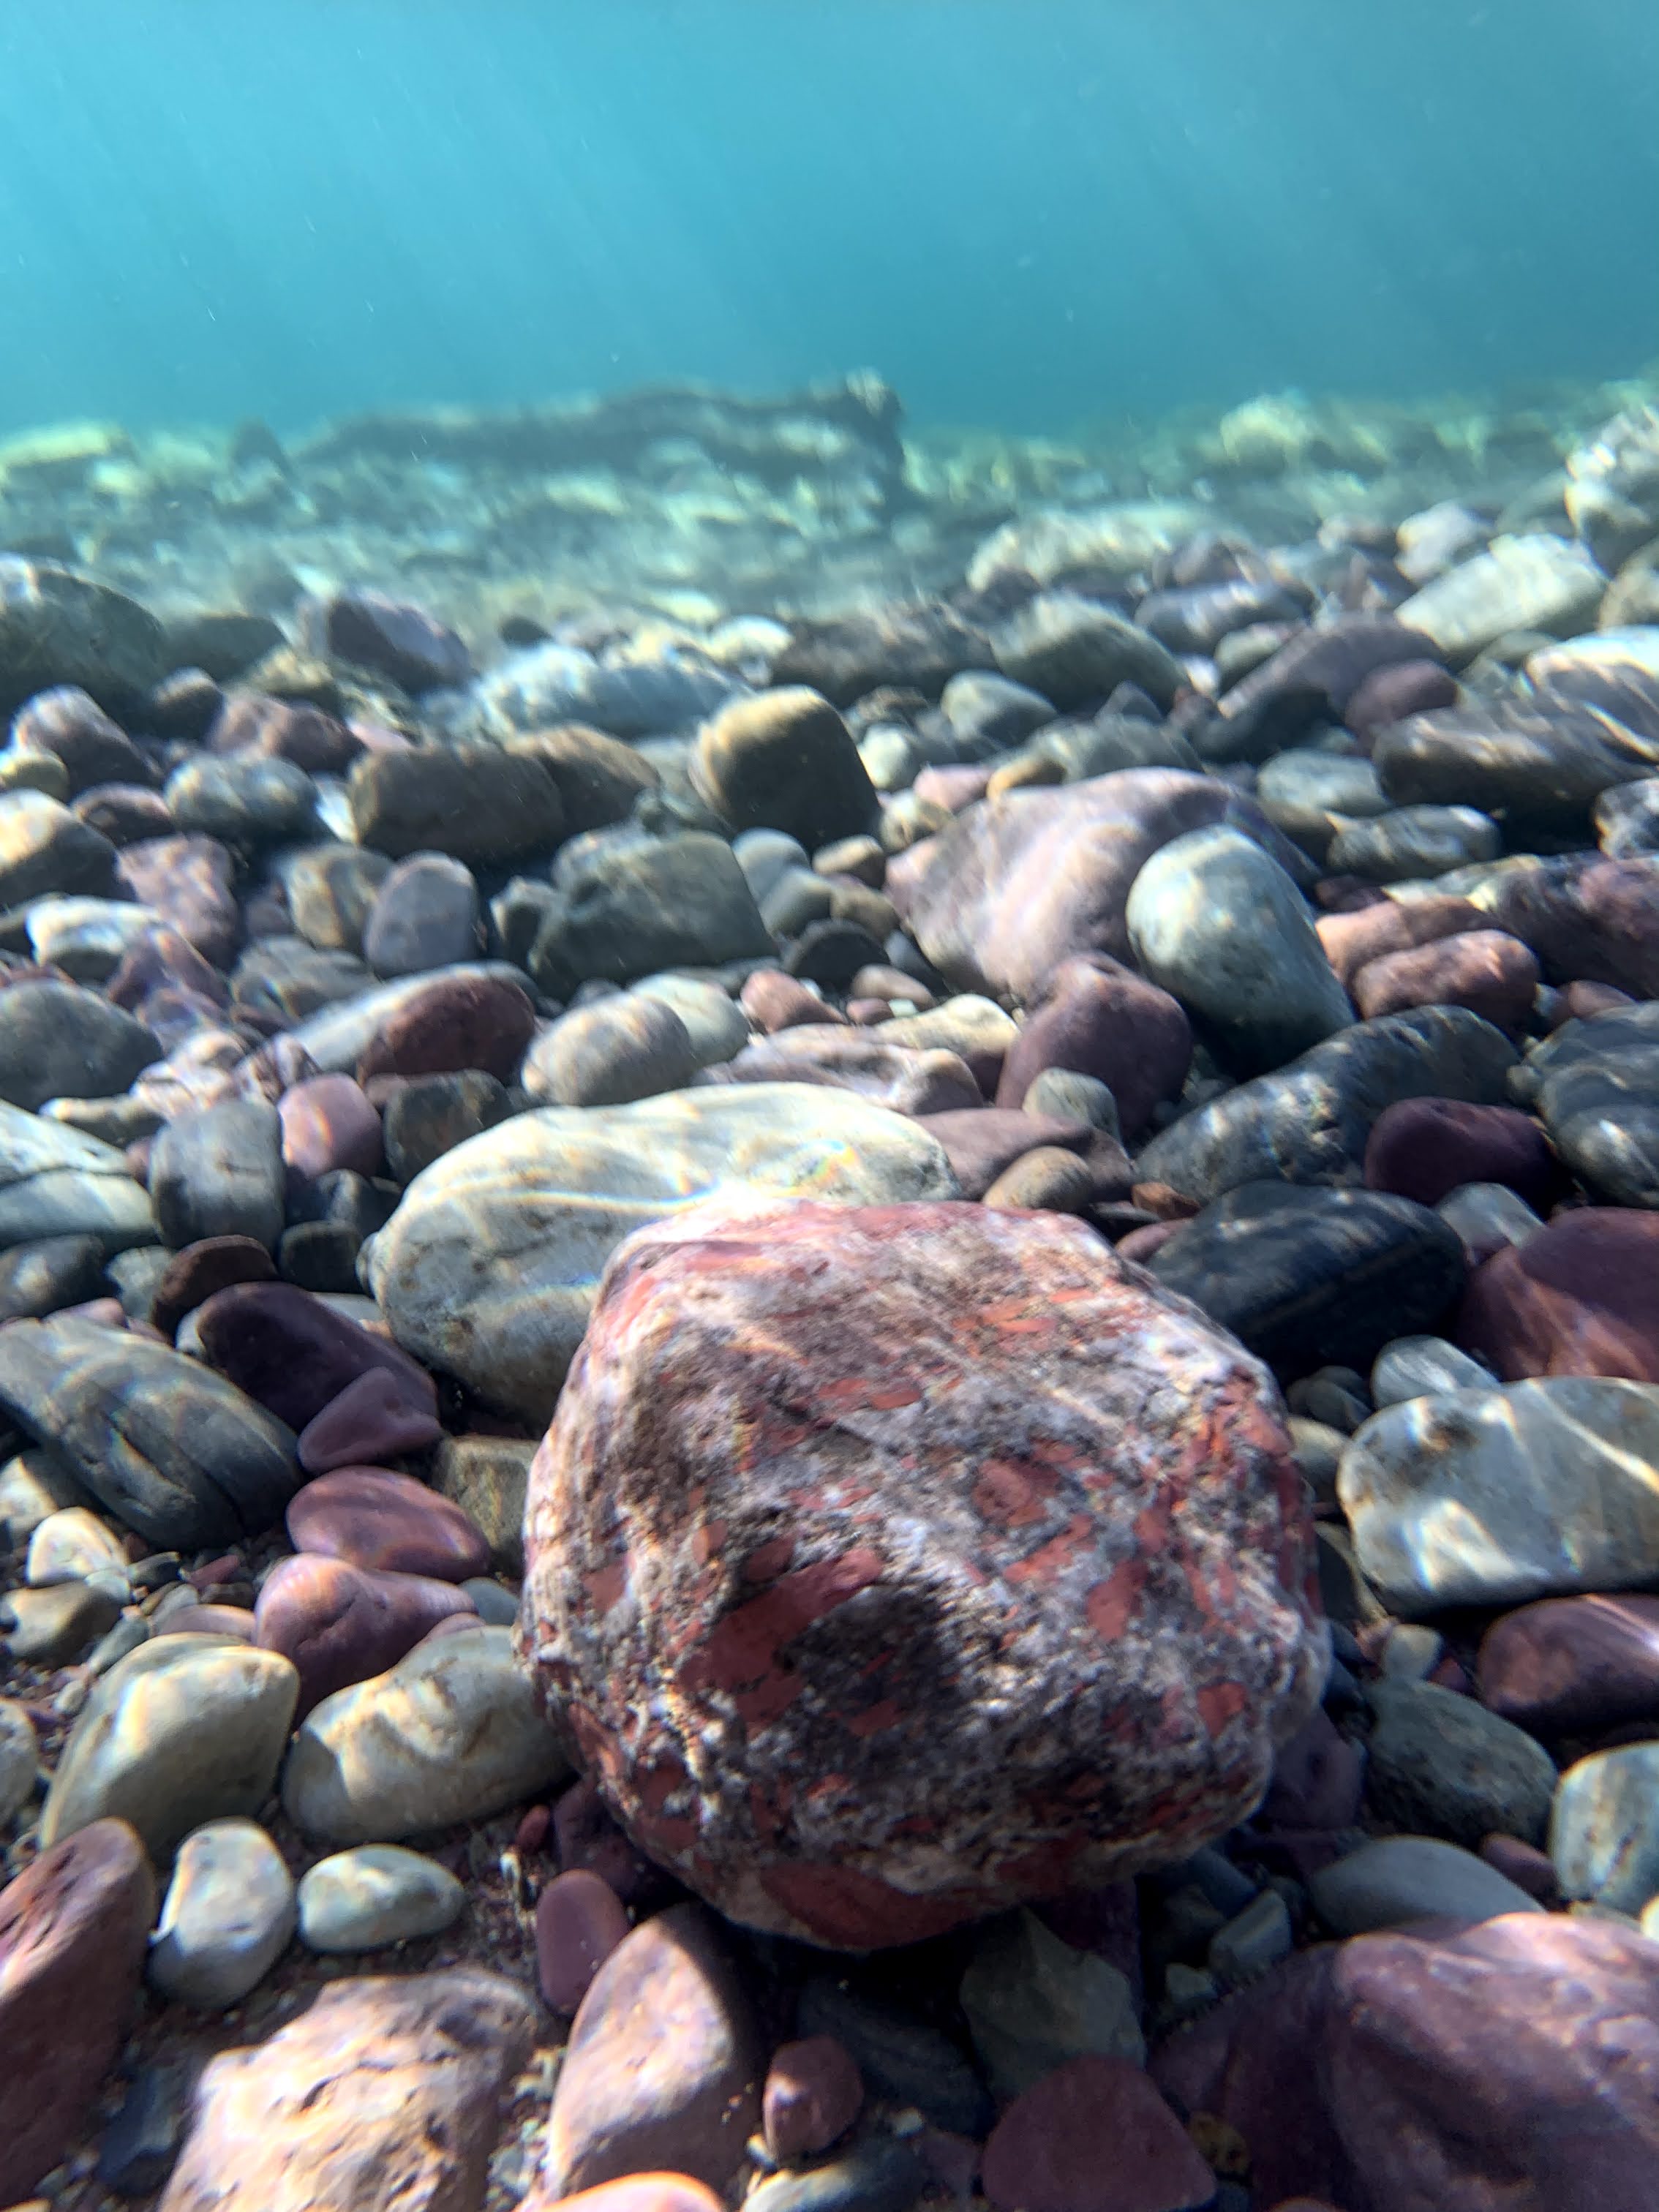
Lake McDonald – You can drive right to the lake, so no more hiking for the day! The water is crystal clear and the rocks around the lake are beautiful colors. The water was cold, but a dip in this lake was a nice way to cool down and recover from the 19 miles of hiking done this day.

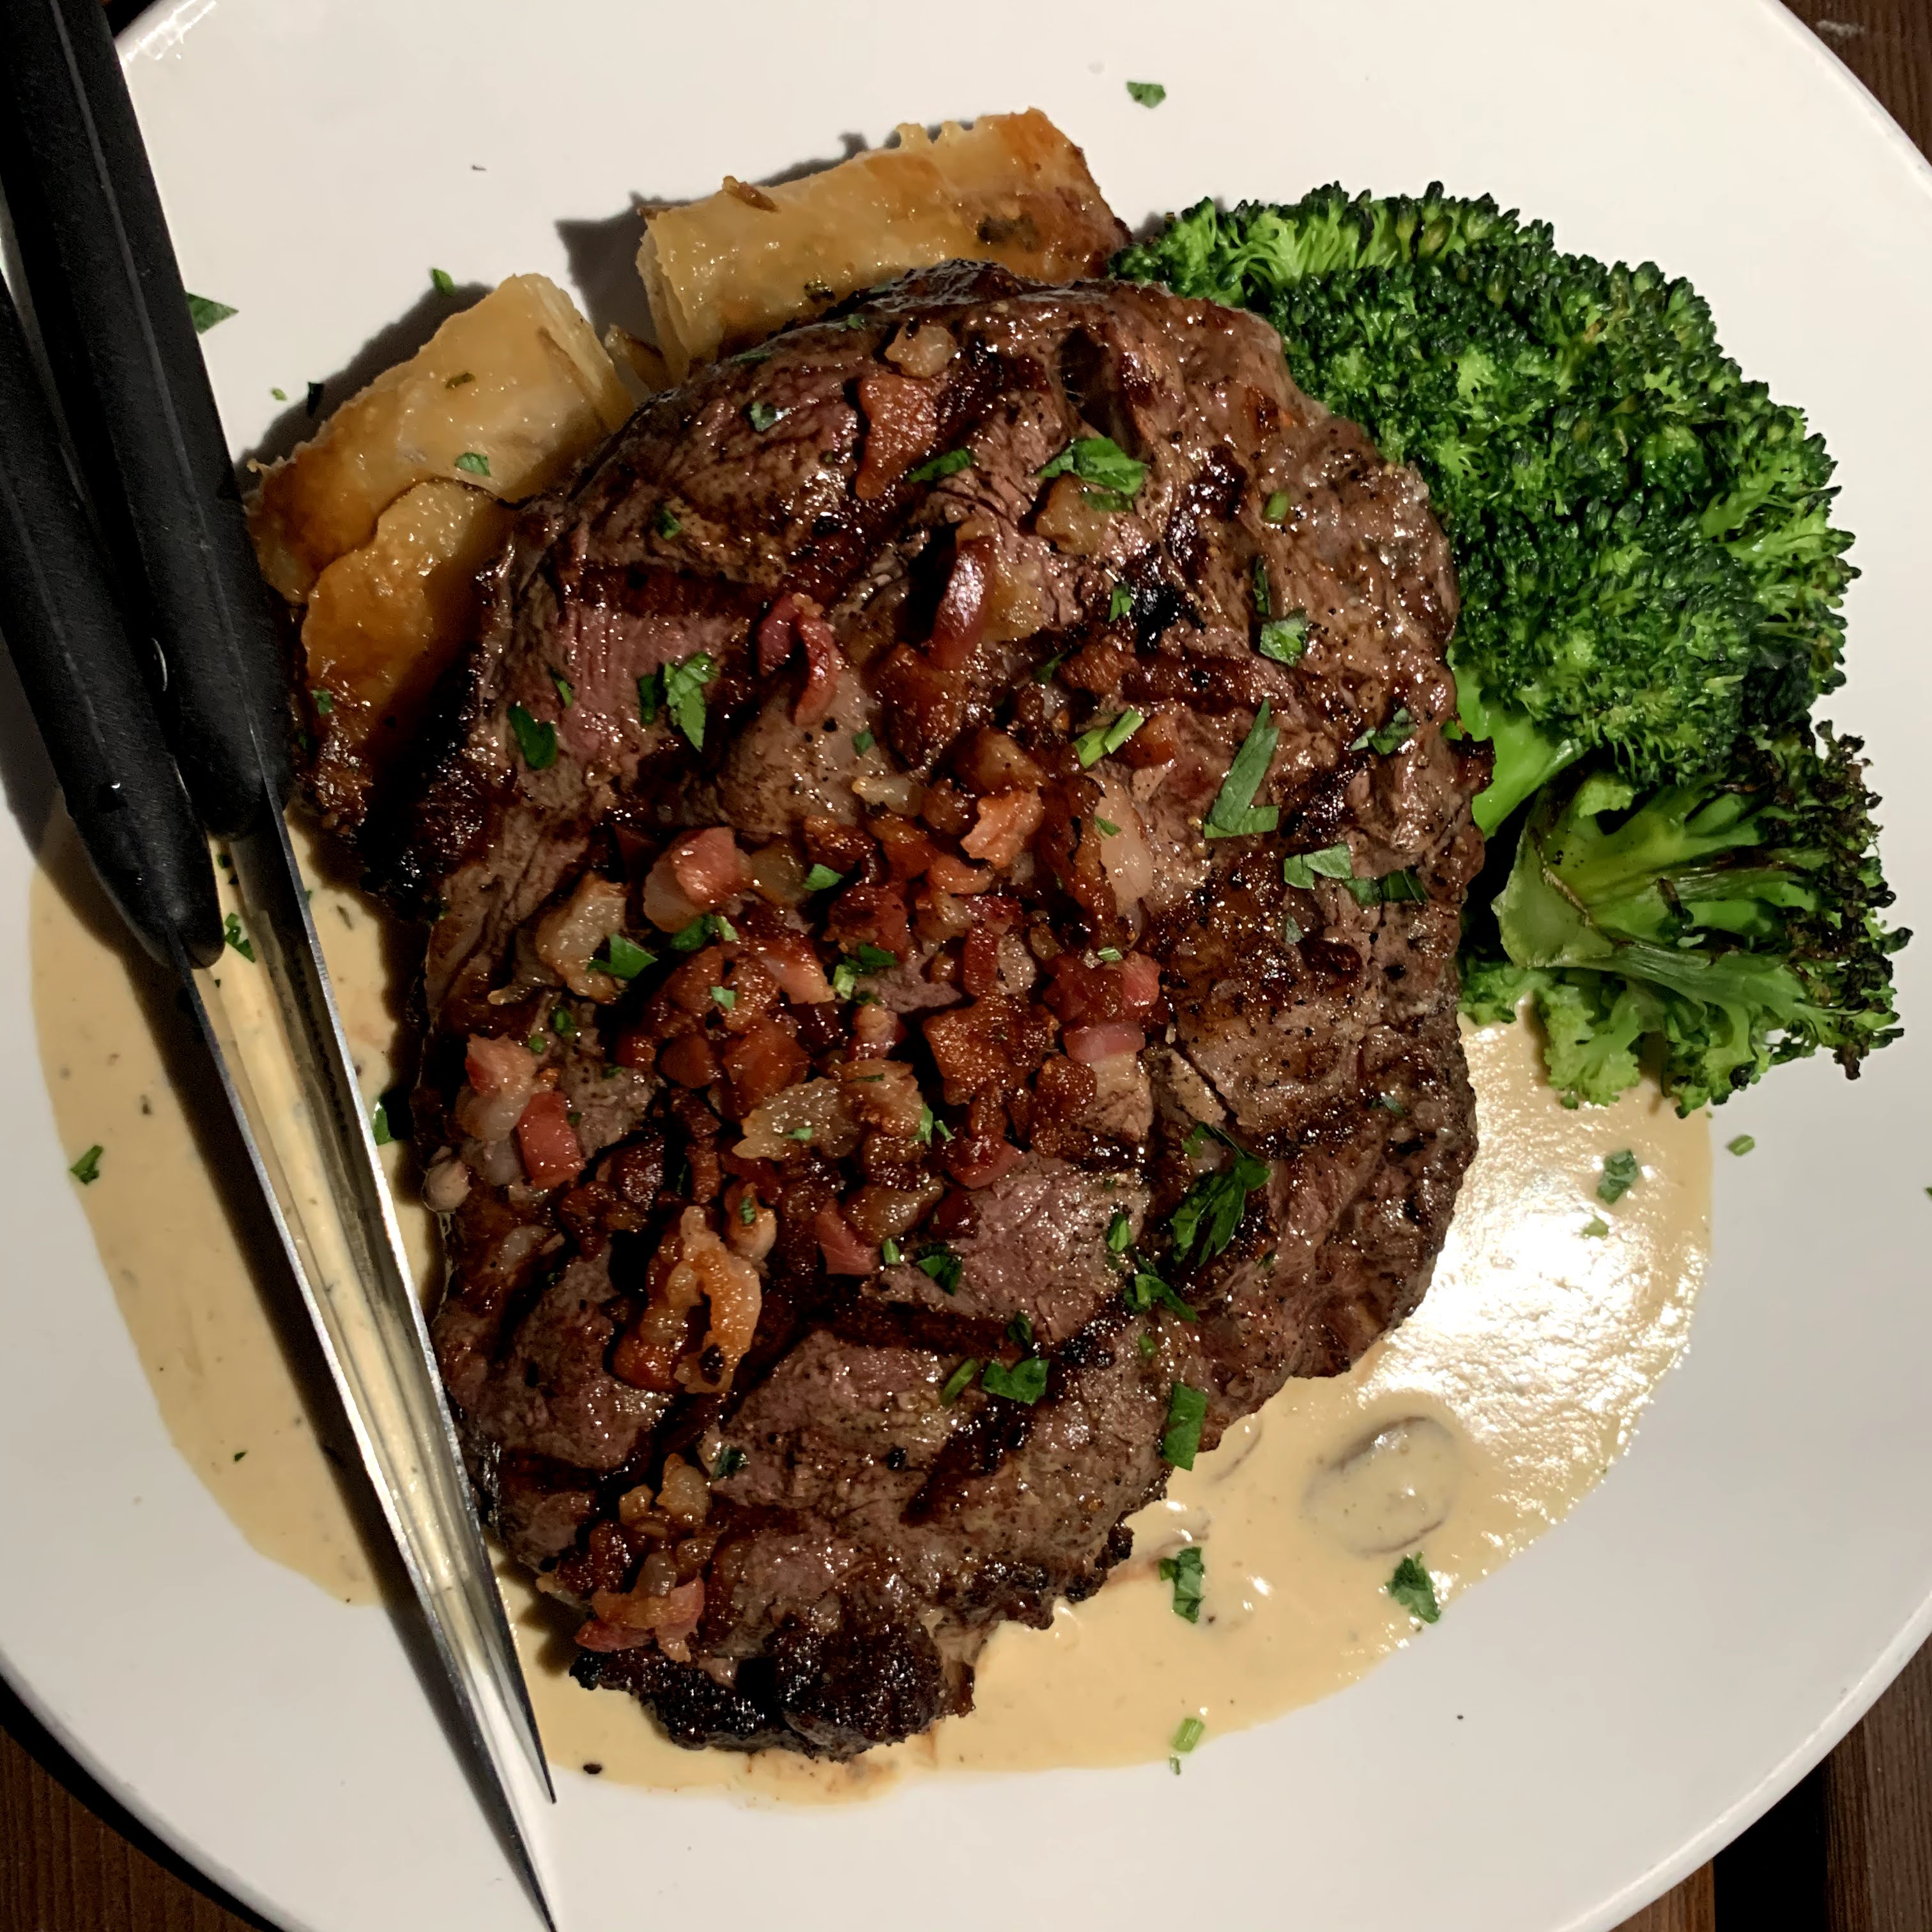
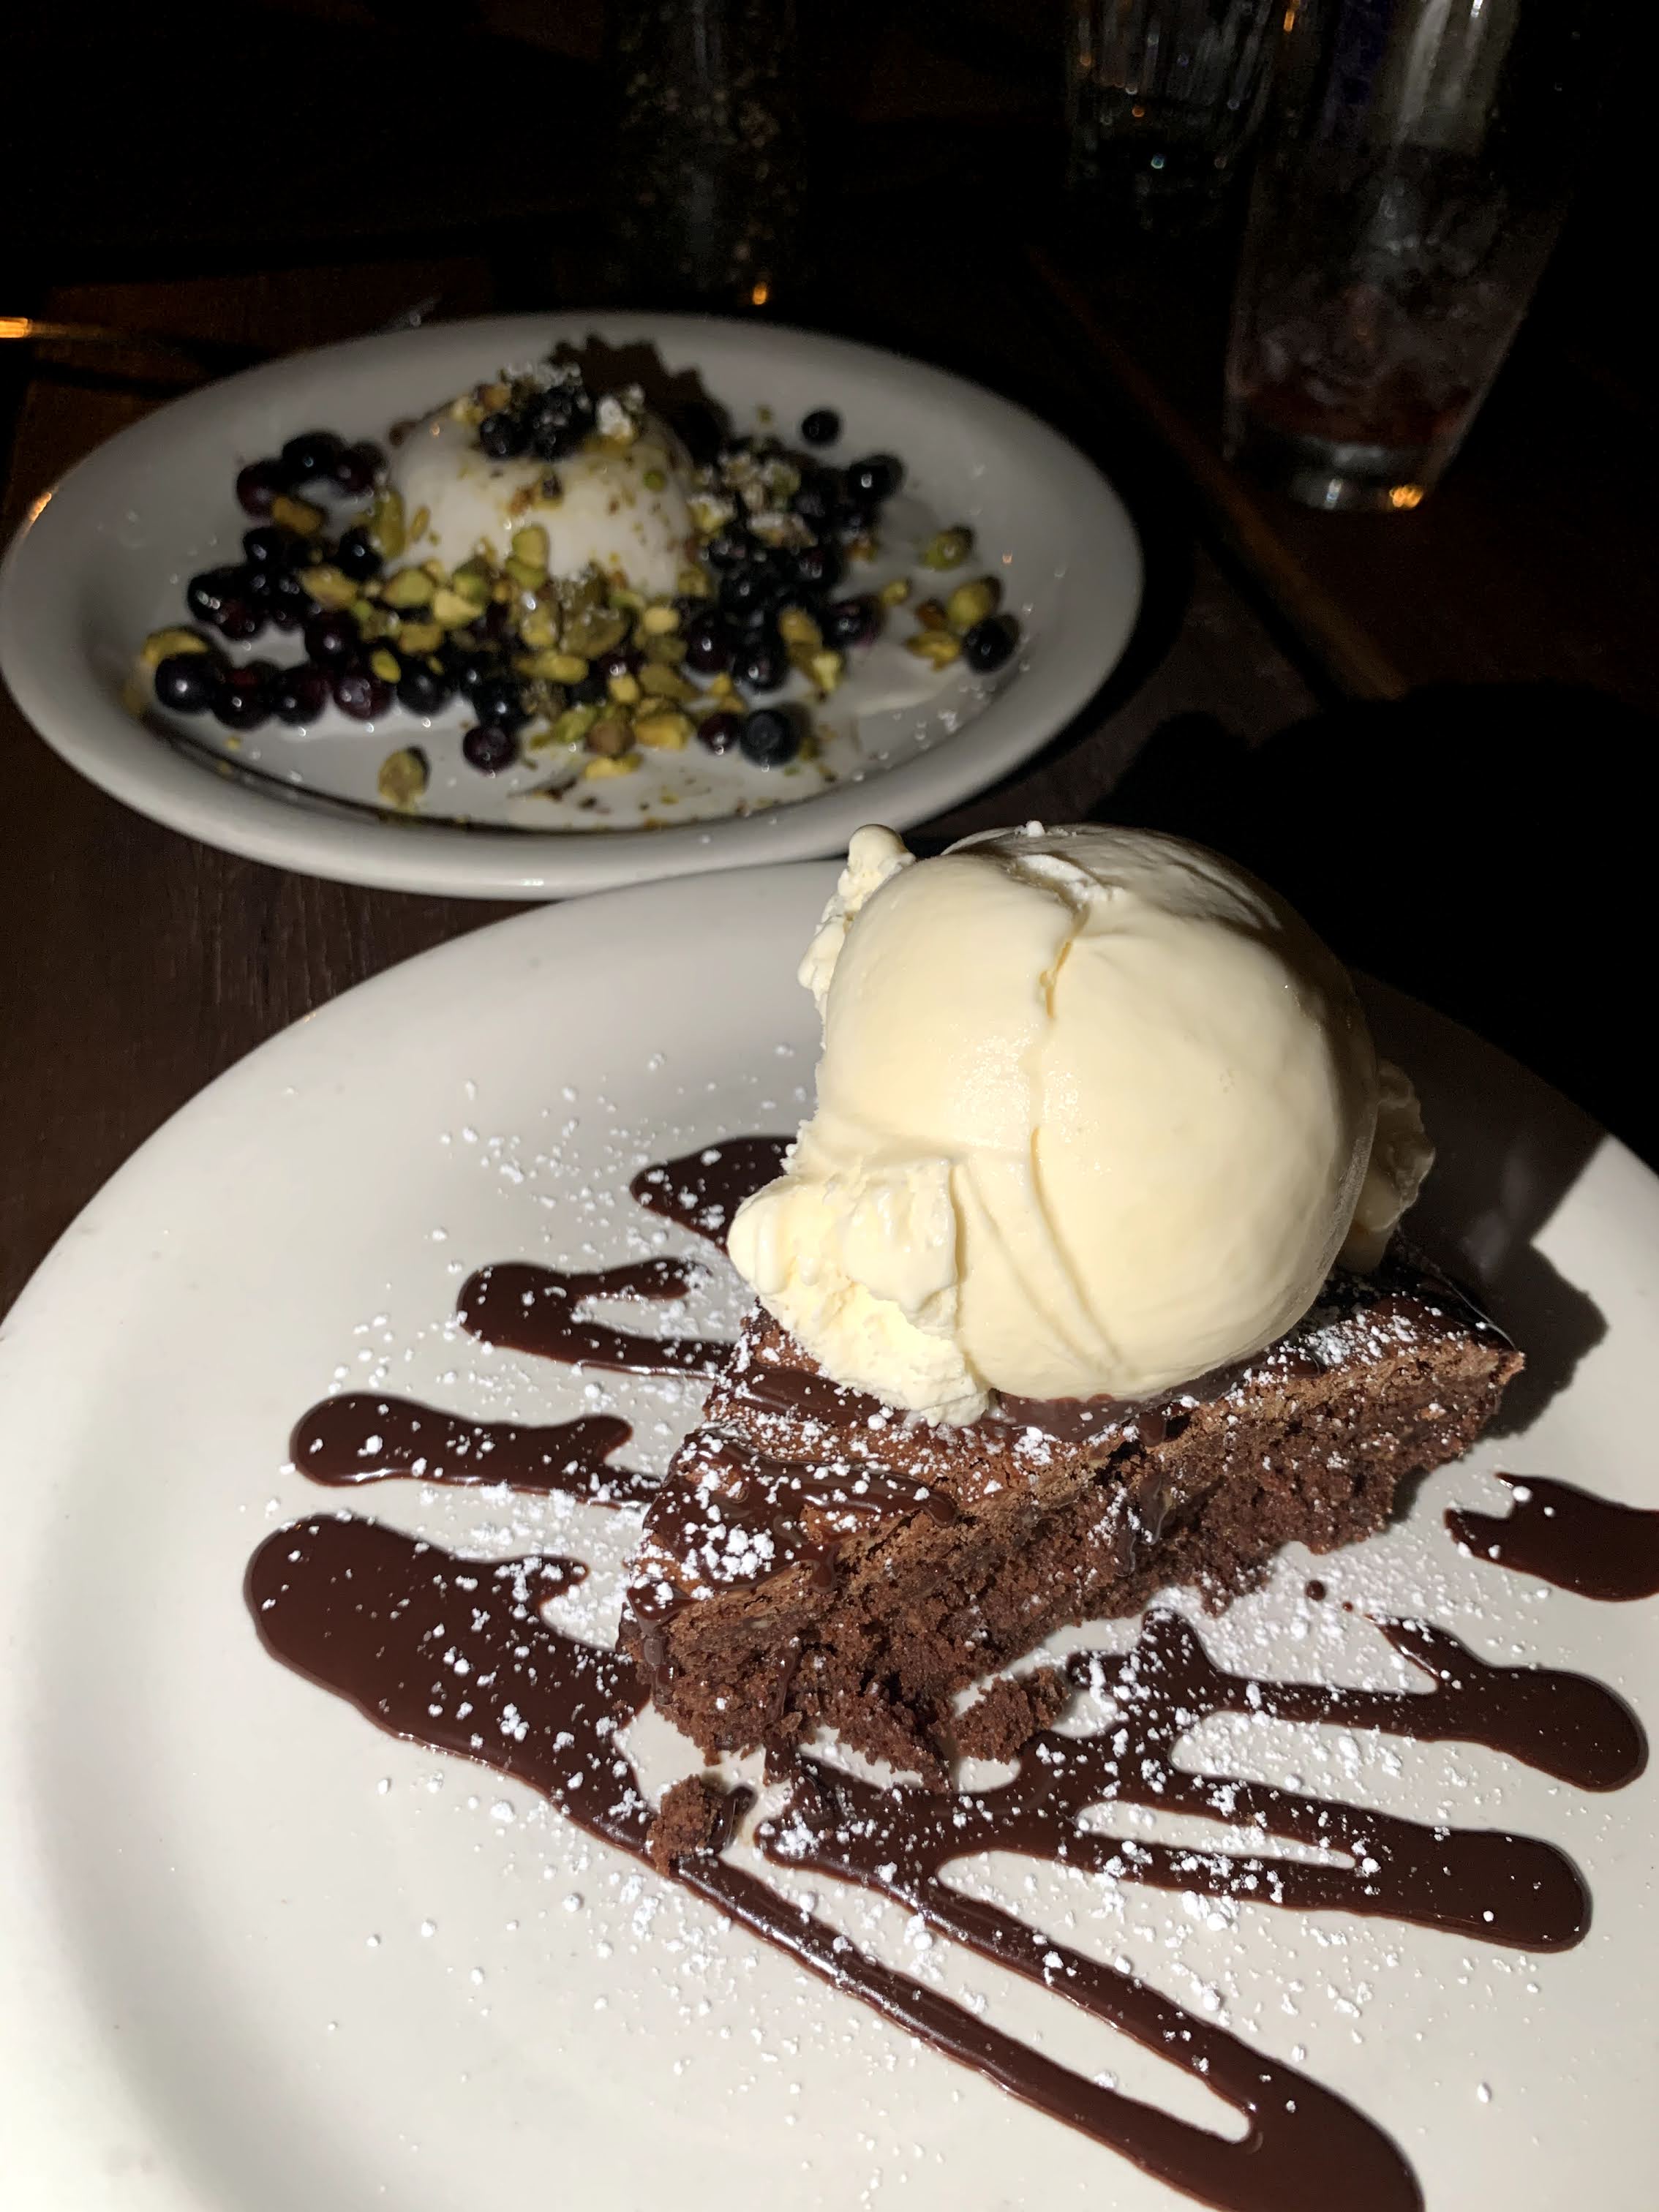
Three Fork Grill for dinner (they had outdoor dining!) We got the elk pasta dish, and two specials of the day for dinner. If you go here, definitely consider the special of the day, whatever it might be, because the chef and staff here are passionate about food, and the dishes are thoughtfully constructed. The specials and the desserts were superb (flourless chocolate torte and huckleberry panna cotta).

Day 6 (Yellowstone National Park, Wyoming)

Today was a full day of travel from Glacier to Yellowstone. We went straight to the park before checking into our hotel, and got takeout for dinner from one of the restaurants in the park.

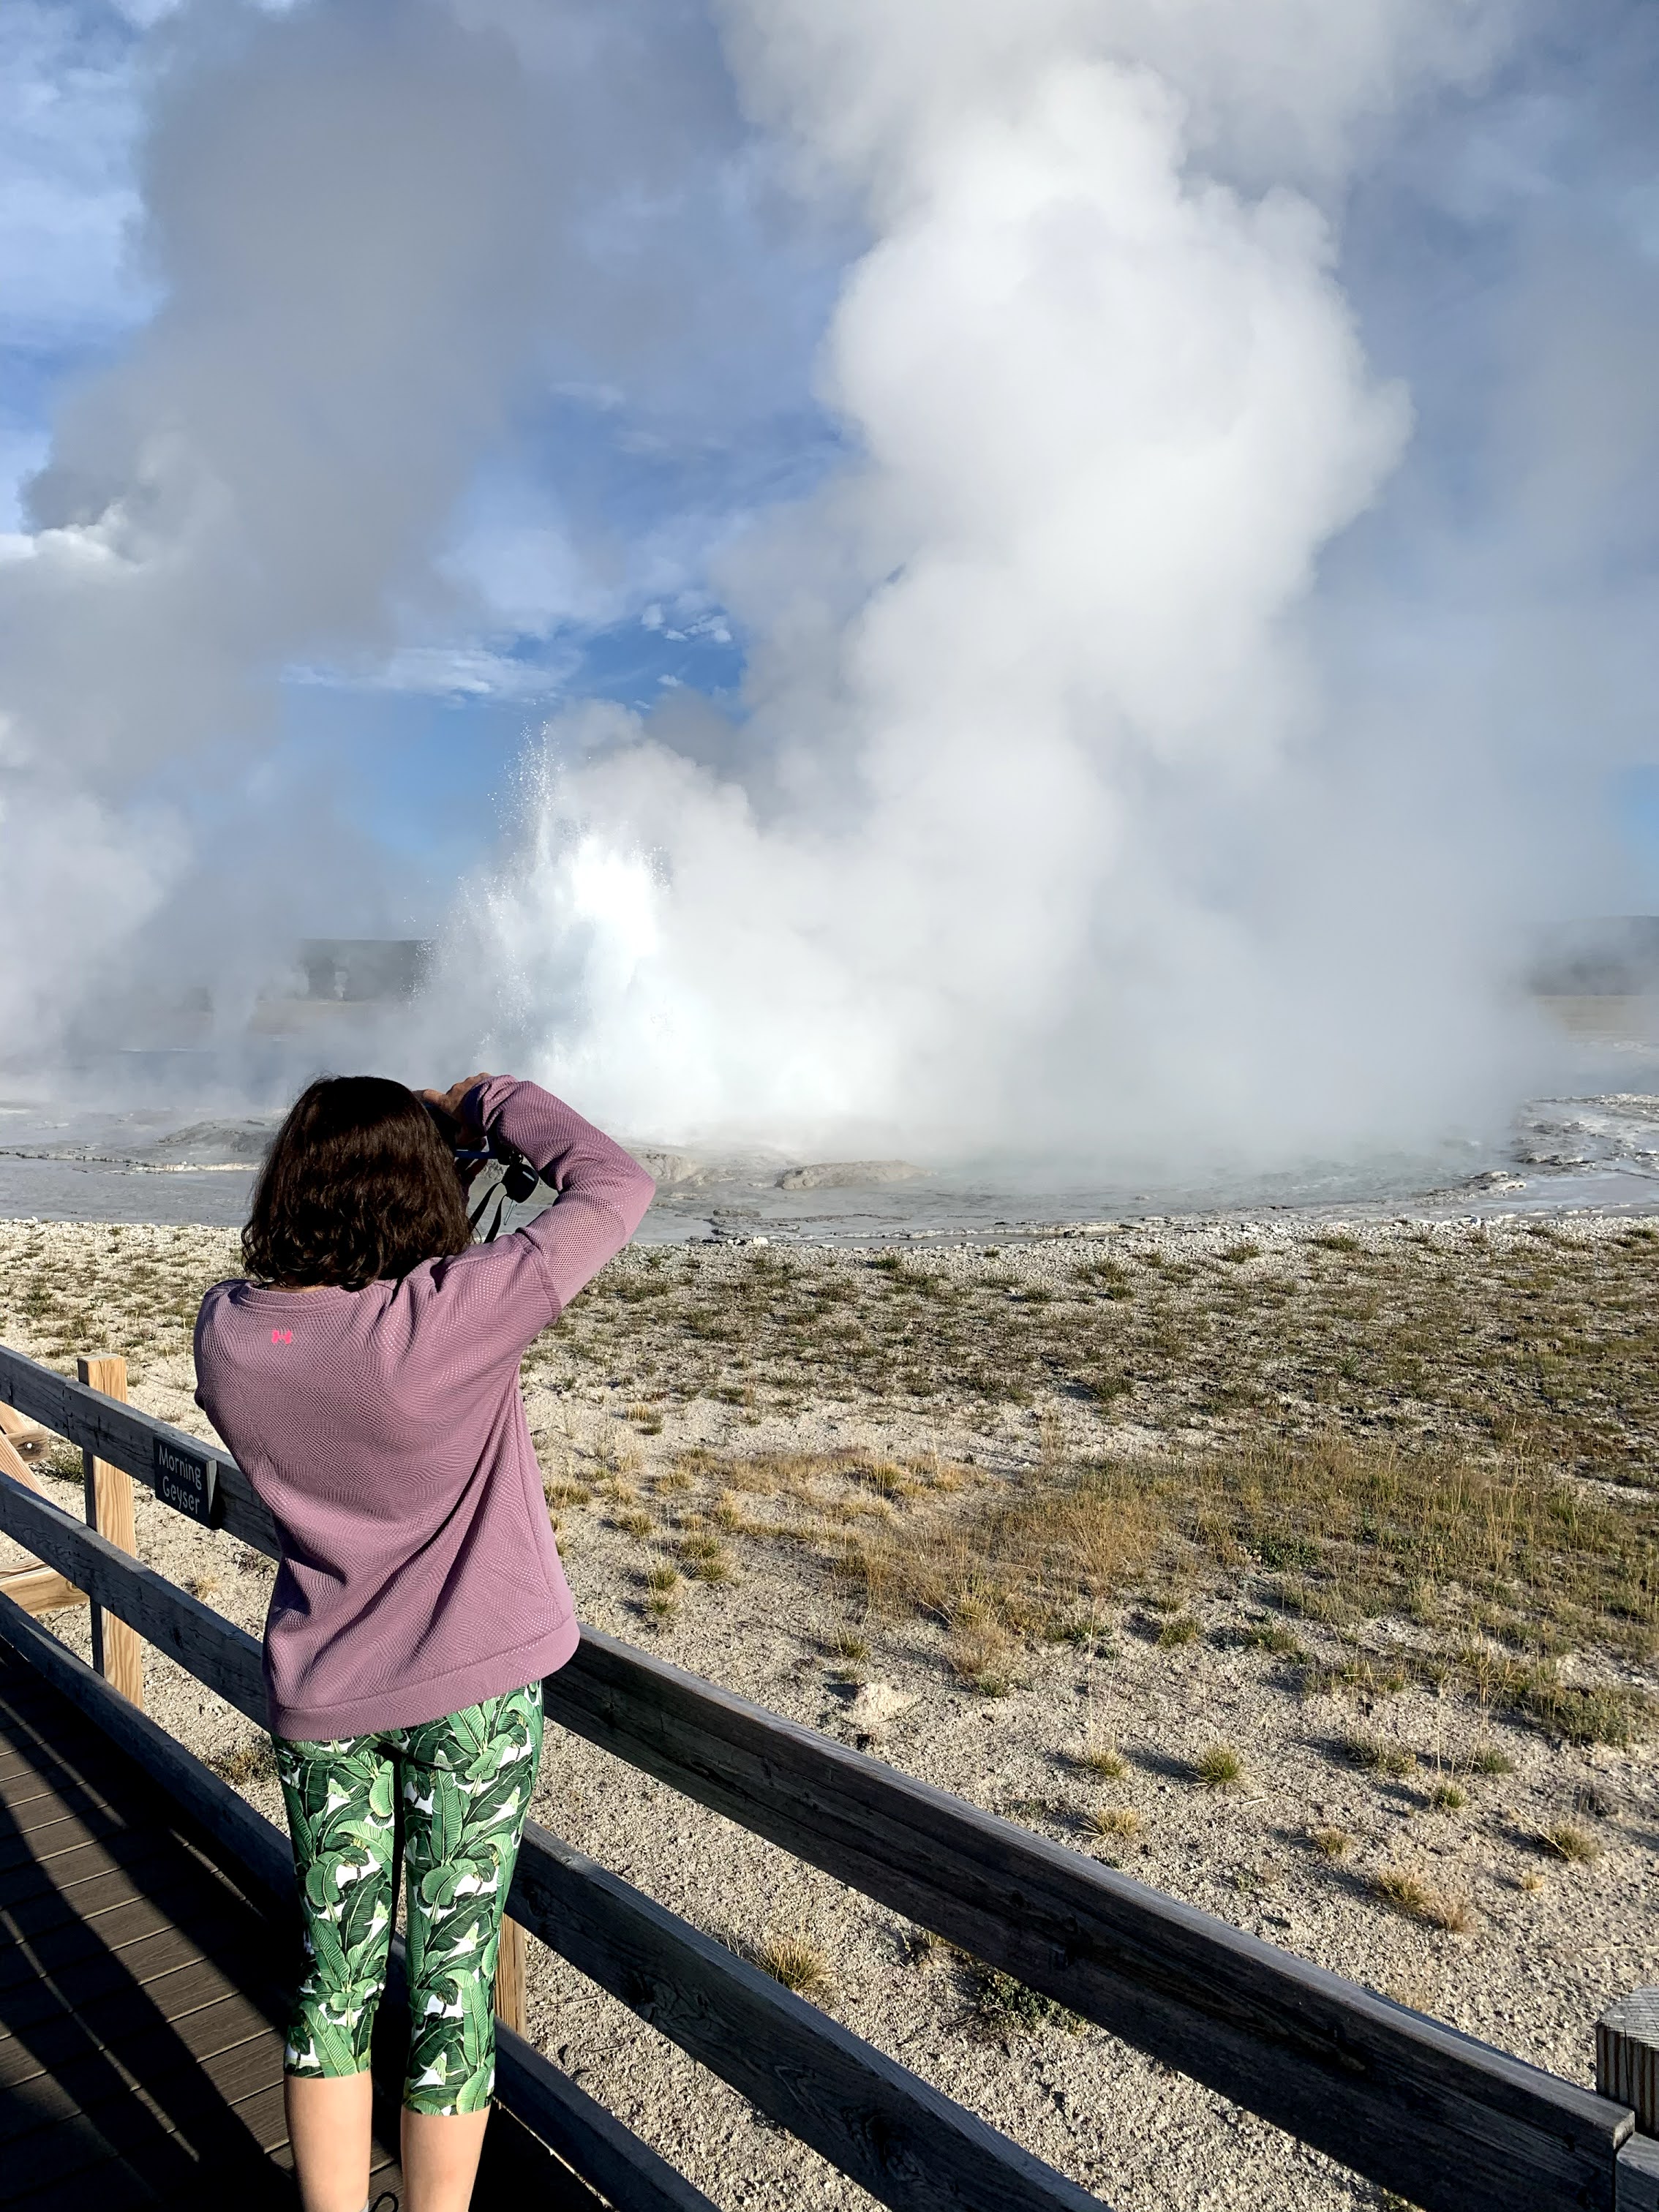
Old Faithful – We ran immediately into the park in the hopes of catching the next eruption of the Old Faithful Geyser. This Geyser is HUGE, and erupts pretty regularly every 90 minutes. Call ahead of time or check their website for information to determine the next eruption prediction to try to time this correctly – we had JUST missed the last eruption before sunset, so the one we saw was in the dark. It was still cool, but a bit difficult to see, so catching one in the daylight would be a great experience.

Day 7 (Yellowstone National Park, Wyoming)

“Lower Loop” – Begin to drive in the park, and you will essentially be driving from exhibit to exhibit (each has a parking lot) until you loop the whole lower section of the park. If you take a look at a map of the park, this will make a lot more sense.

1 – Firehole Canyon Drive – Turn onto this dead end road when you see the sign, and walk the boardwalk for the best views.

2 – Fountain Paint Pot – Park your car and walk the boardwalk

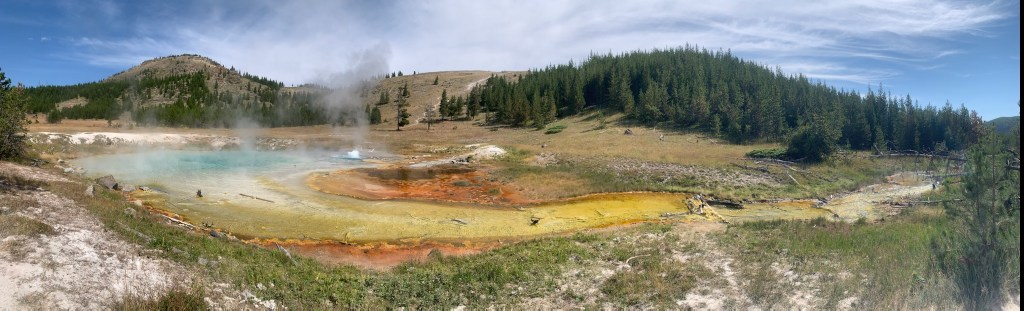
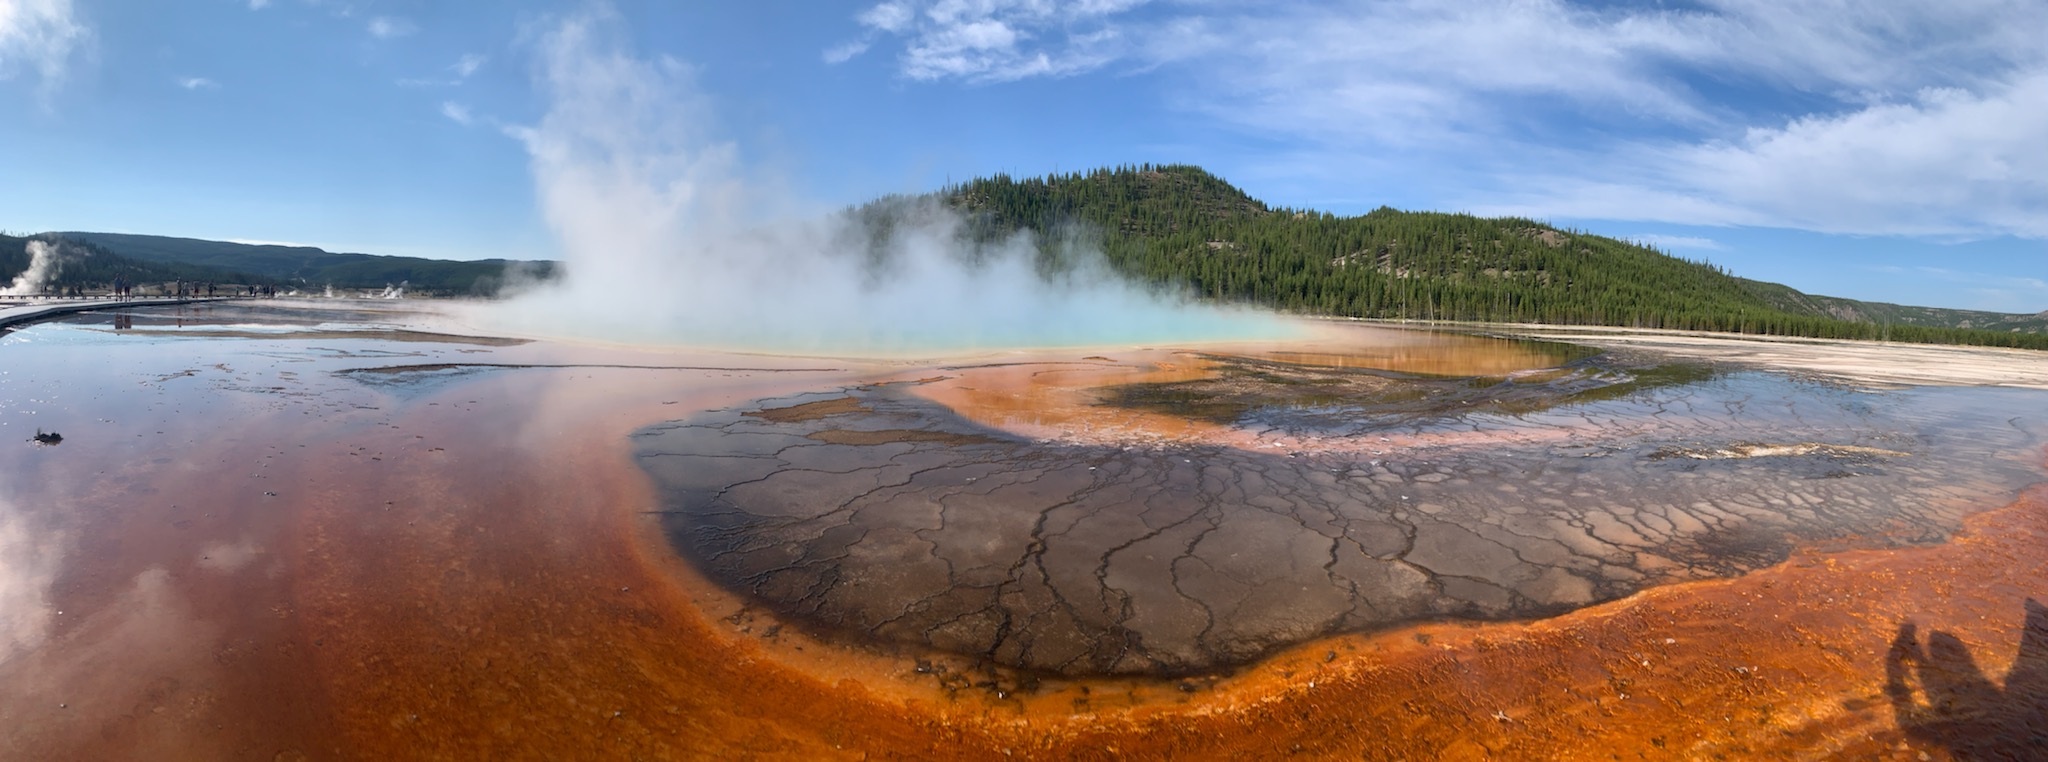
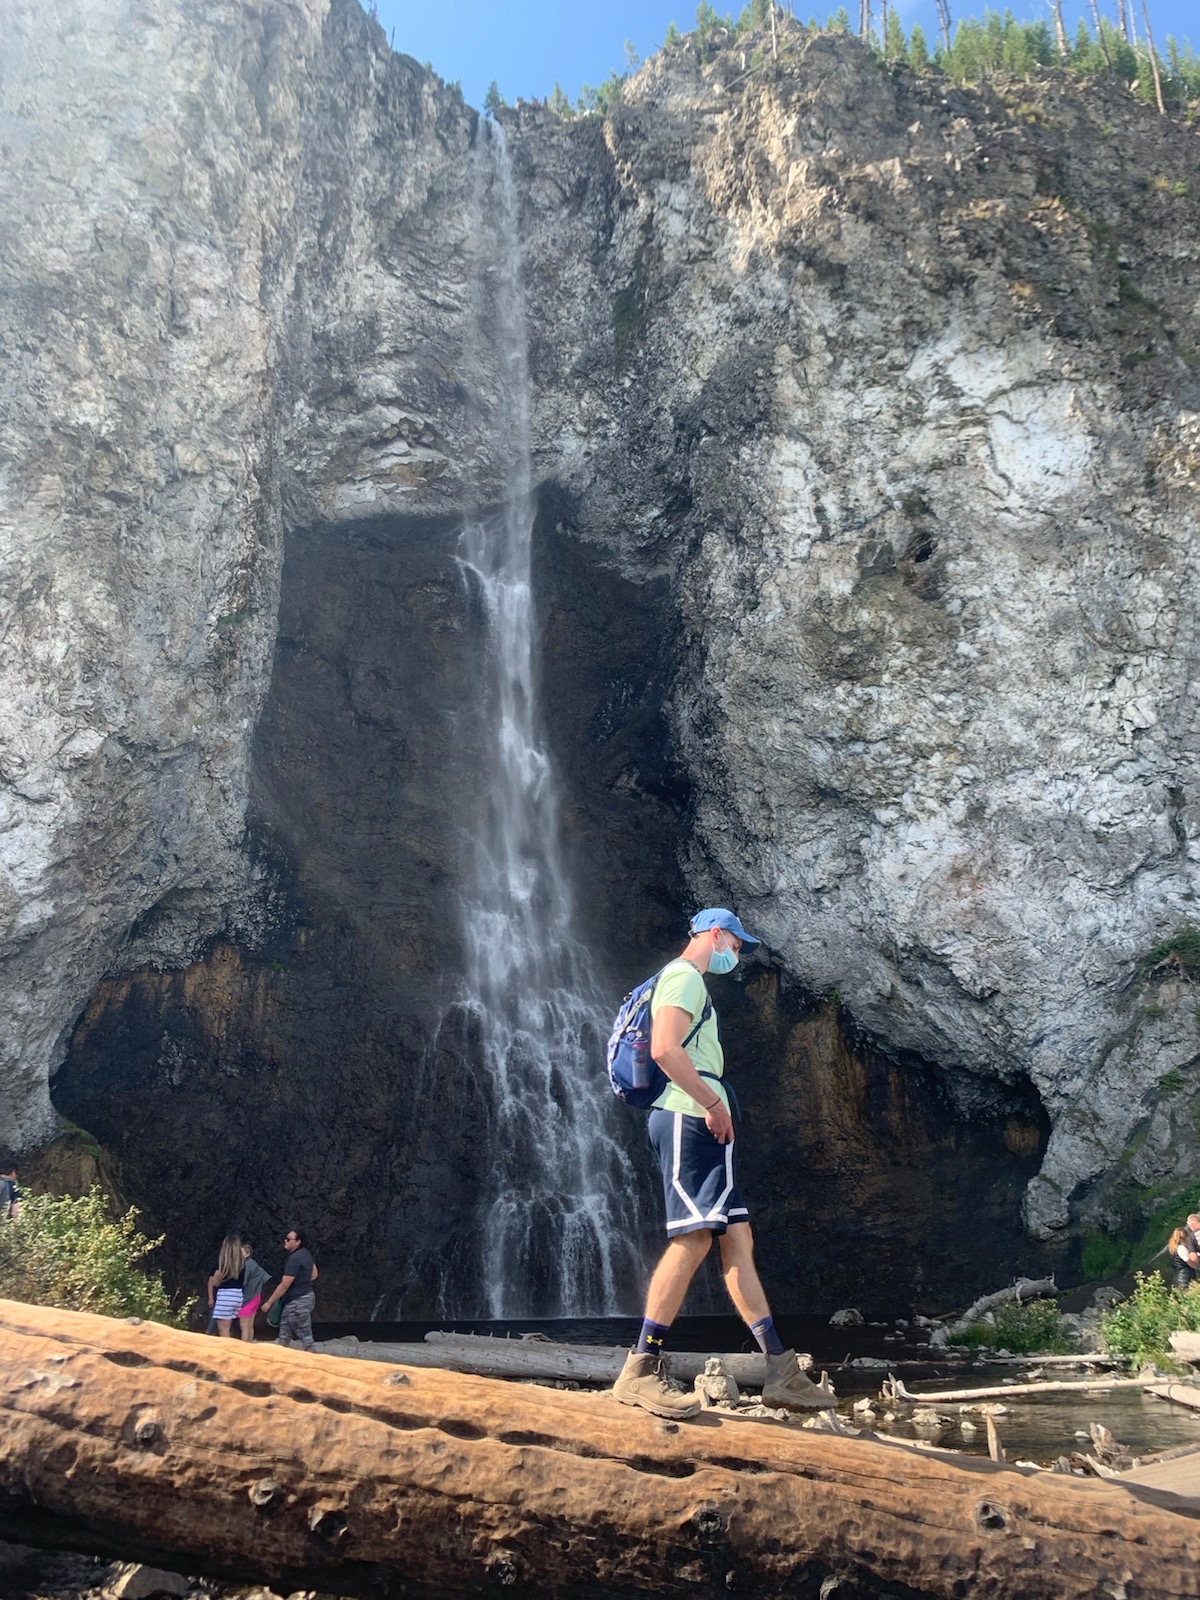
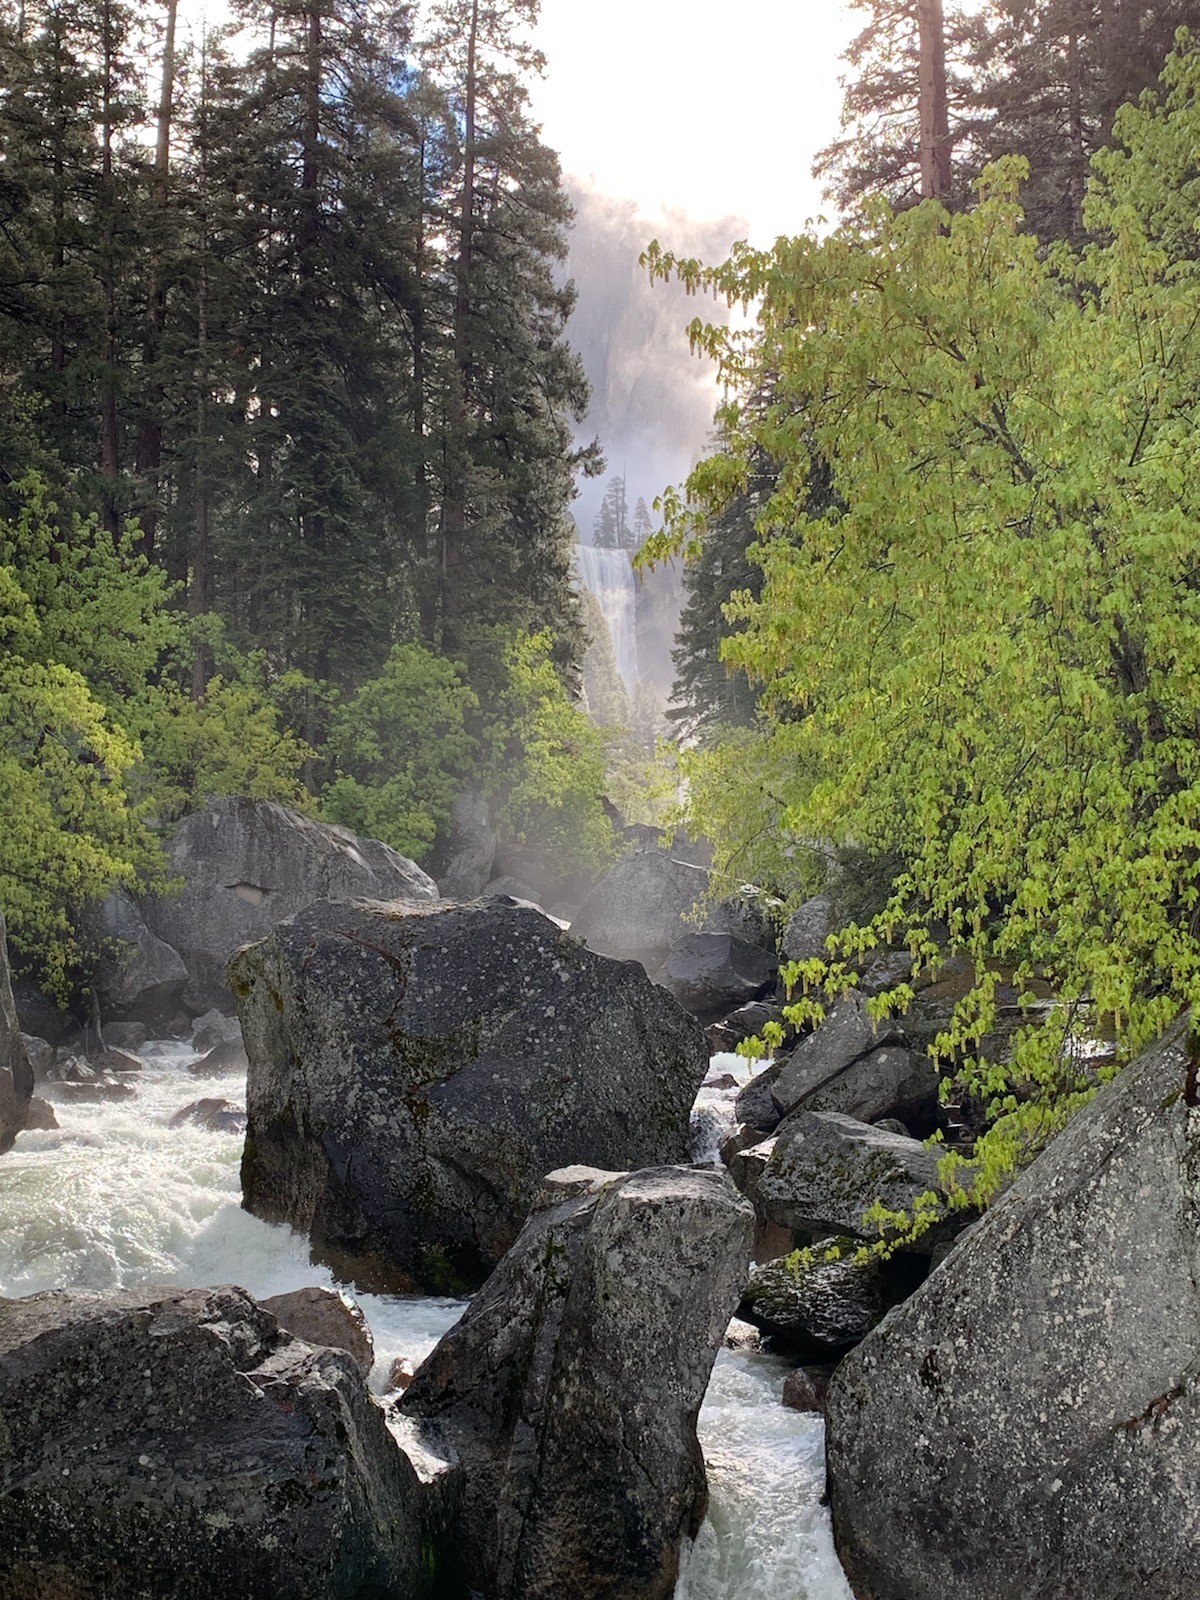
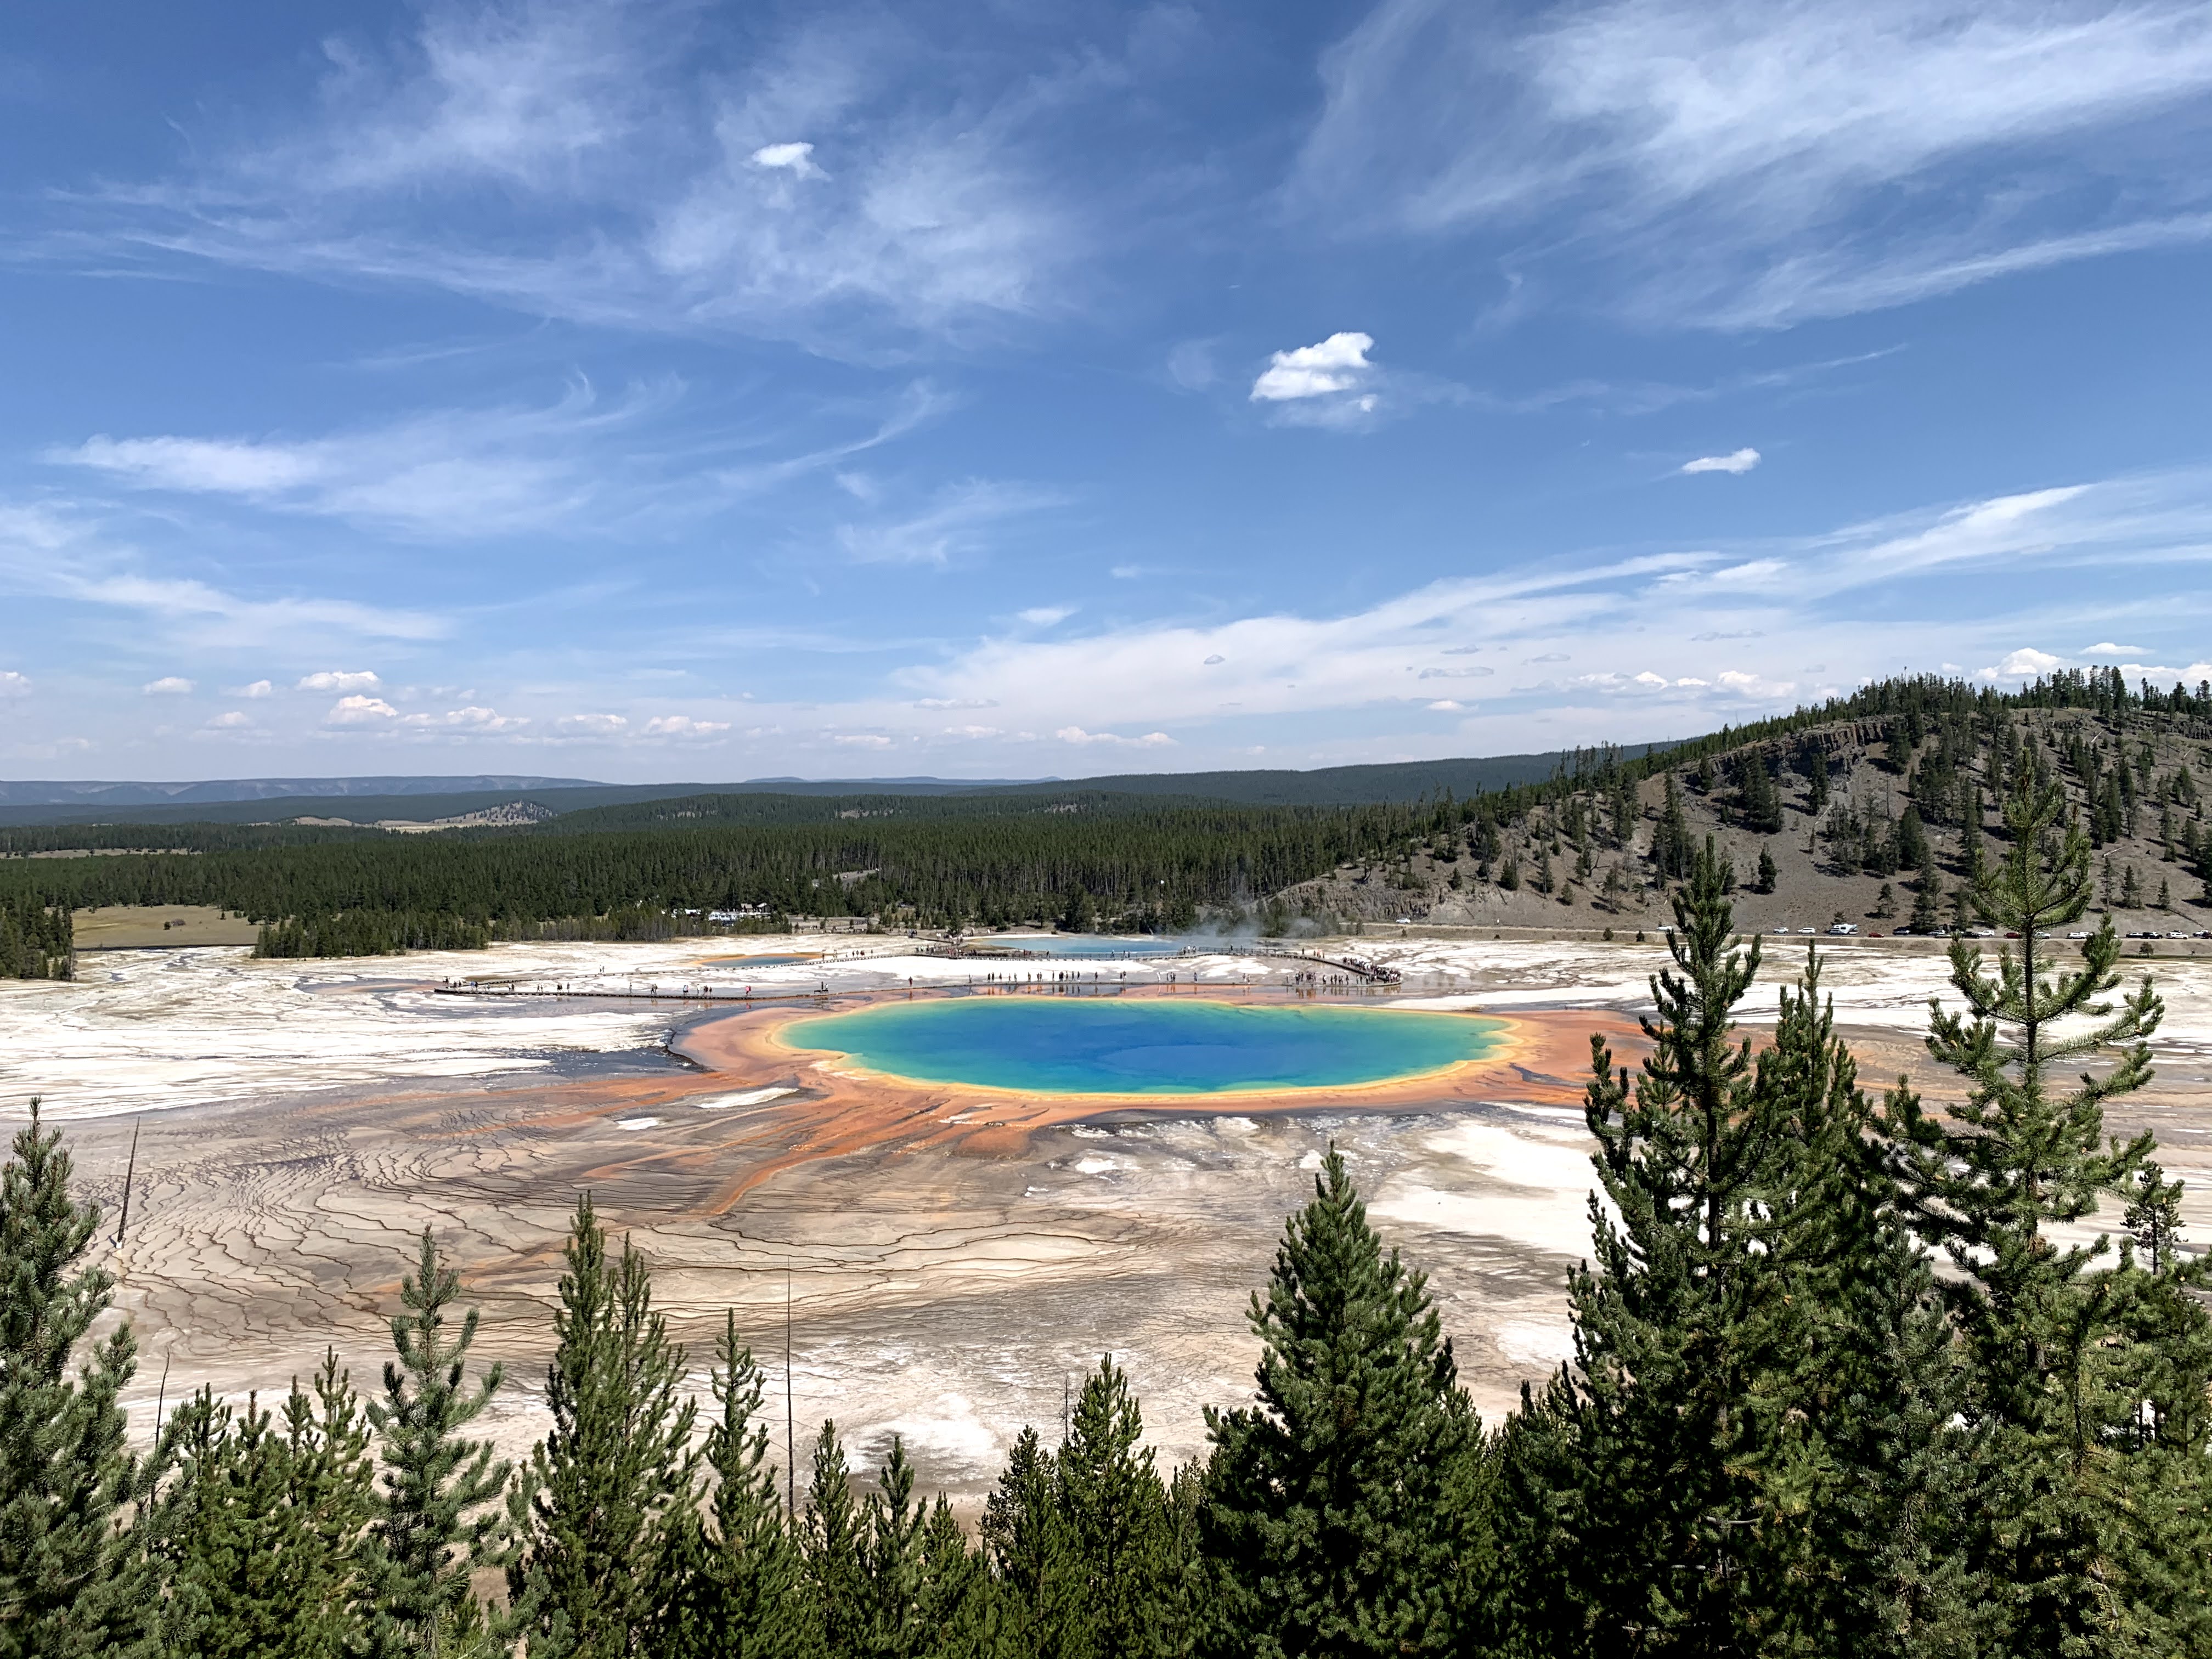
3 – Midway Geyser Basin – This includes Grand Prismatic, the famous colorful hot spring, and the Fairy Falls Trail, which brings you to an overlook of the Grand Prismatic, a beautiful waterfall, and an active geyser.

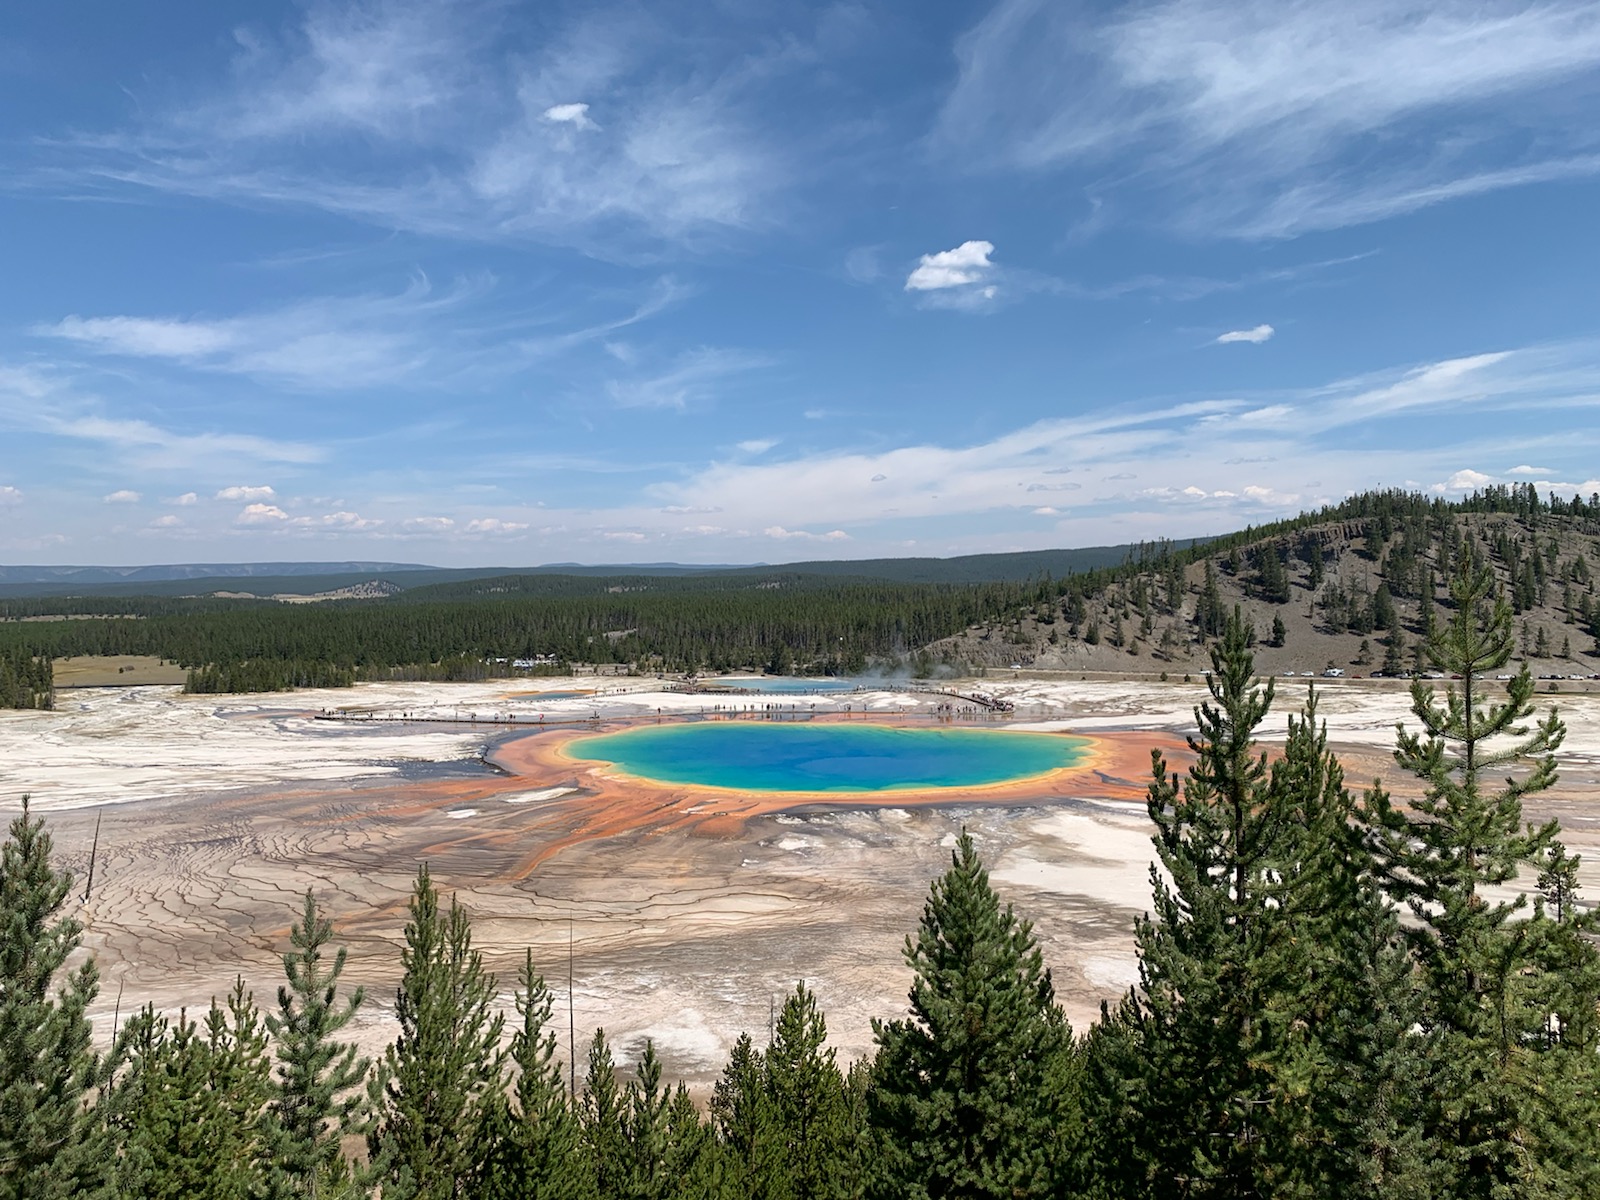
Grand Prismatic – This was the best thing that I saw in Yellowstone. Walk the boardwalk to catch the ground level view of this amazingly colorful spring, which will be steamy in the morning from the cool air touching its boiling hot water. The spring transforms and new colors appear as you circle it on the boardwalk. You will have an opportunity to see it from above if you walk the Fairy Falls Trail, which I highly recommend because it was 100% worth it.

Fairy Falls Trail – It’s a pretty short walk and short uphill climb to get to the bird’s eye lookout of the Grand Prismatic Spring. Definitely do this, because it’s a completely different experience from up above. Also, we found that this was a better view in the afternoon once it was warmer out and the steam from the spring subsided. Recommended to skip the overlook on the way into the trail, continue the Fairy Falls Trail until you hit the actual waterfall, and then even further to the Imperial Geyser (this one is constantly erupting so no need to time it). Fairy Falls is an in/out trail (not a loop), so do the Grand Prismatic overlook on the way back to your car for a more delayed view of it later in the day. Also, the trail to the Imperial Geyser is a bit difficult to find once you make it to the waterfall – when you are facing the waterfall, you will basically make a full 180 turn and walk in that direction. You will have to get through some rocks and tree trunks, but you should see the path emerge pretty soon after.

**We saw a grizzly bear on the Fairy Falls trail! It was a little bit scary becuase he/she was blocking the path and we had to wait for it to clear before we could proceed. But, the bear never seemed too concerned with us, and eventually traveled up the mountain to nosh on some berries. Always carry your bear spray!

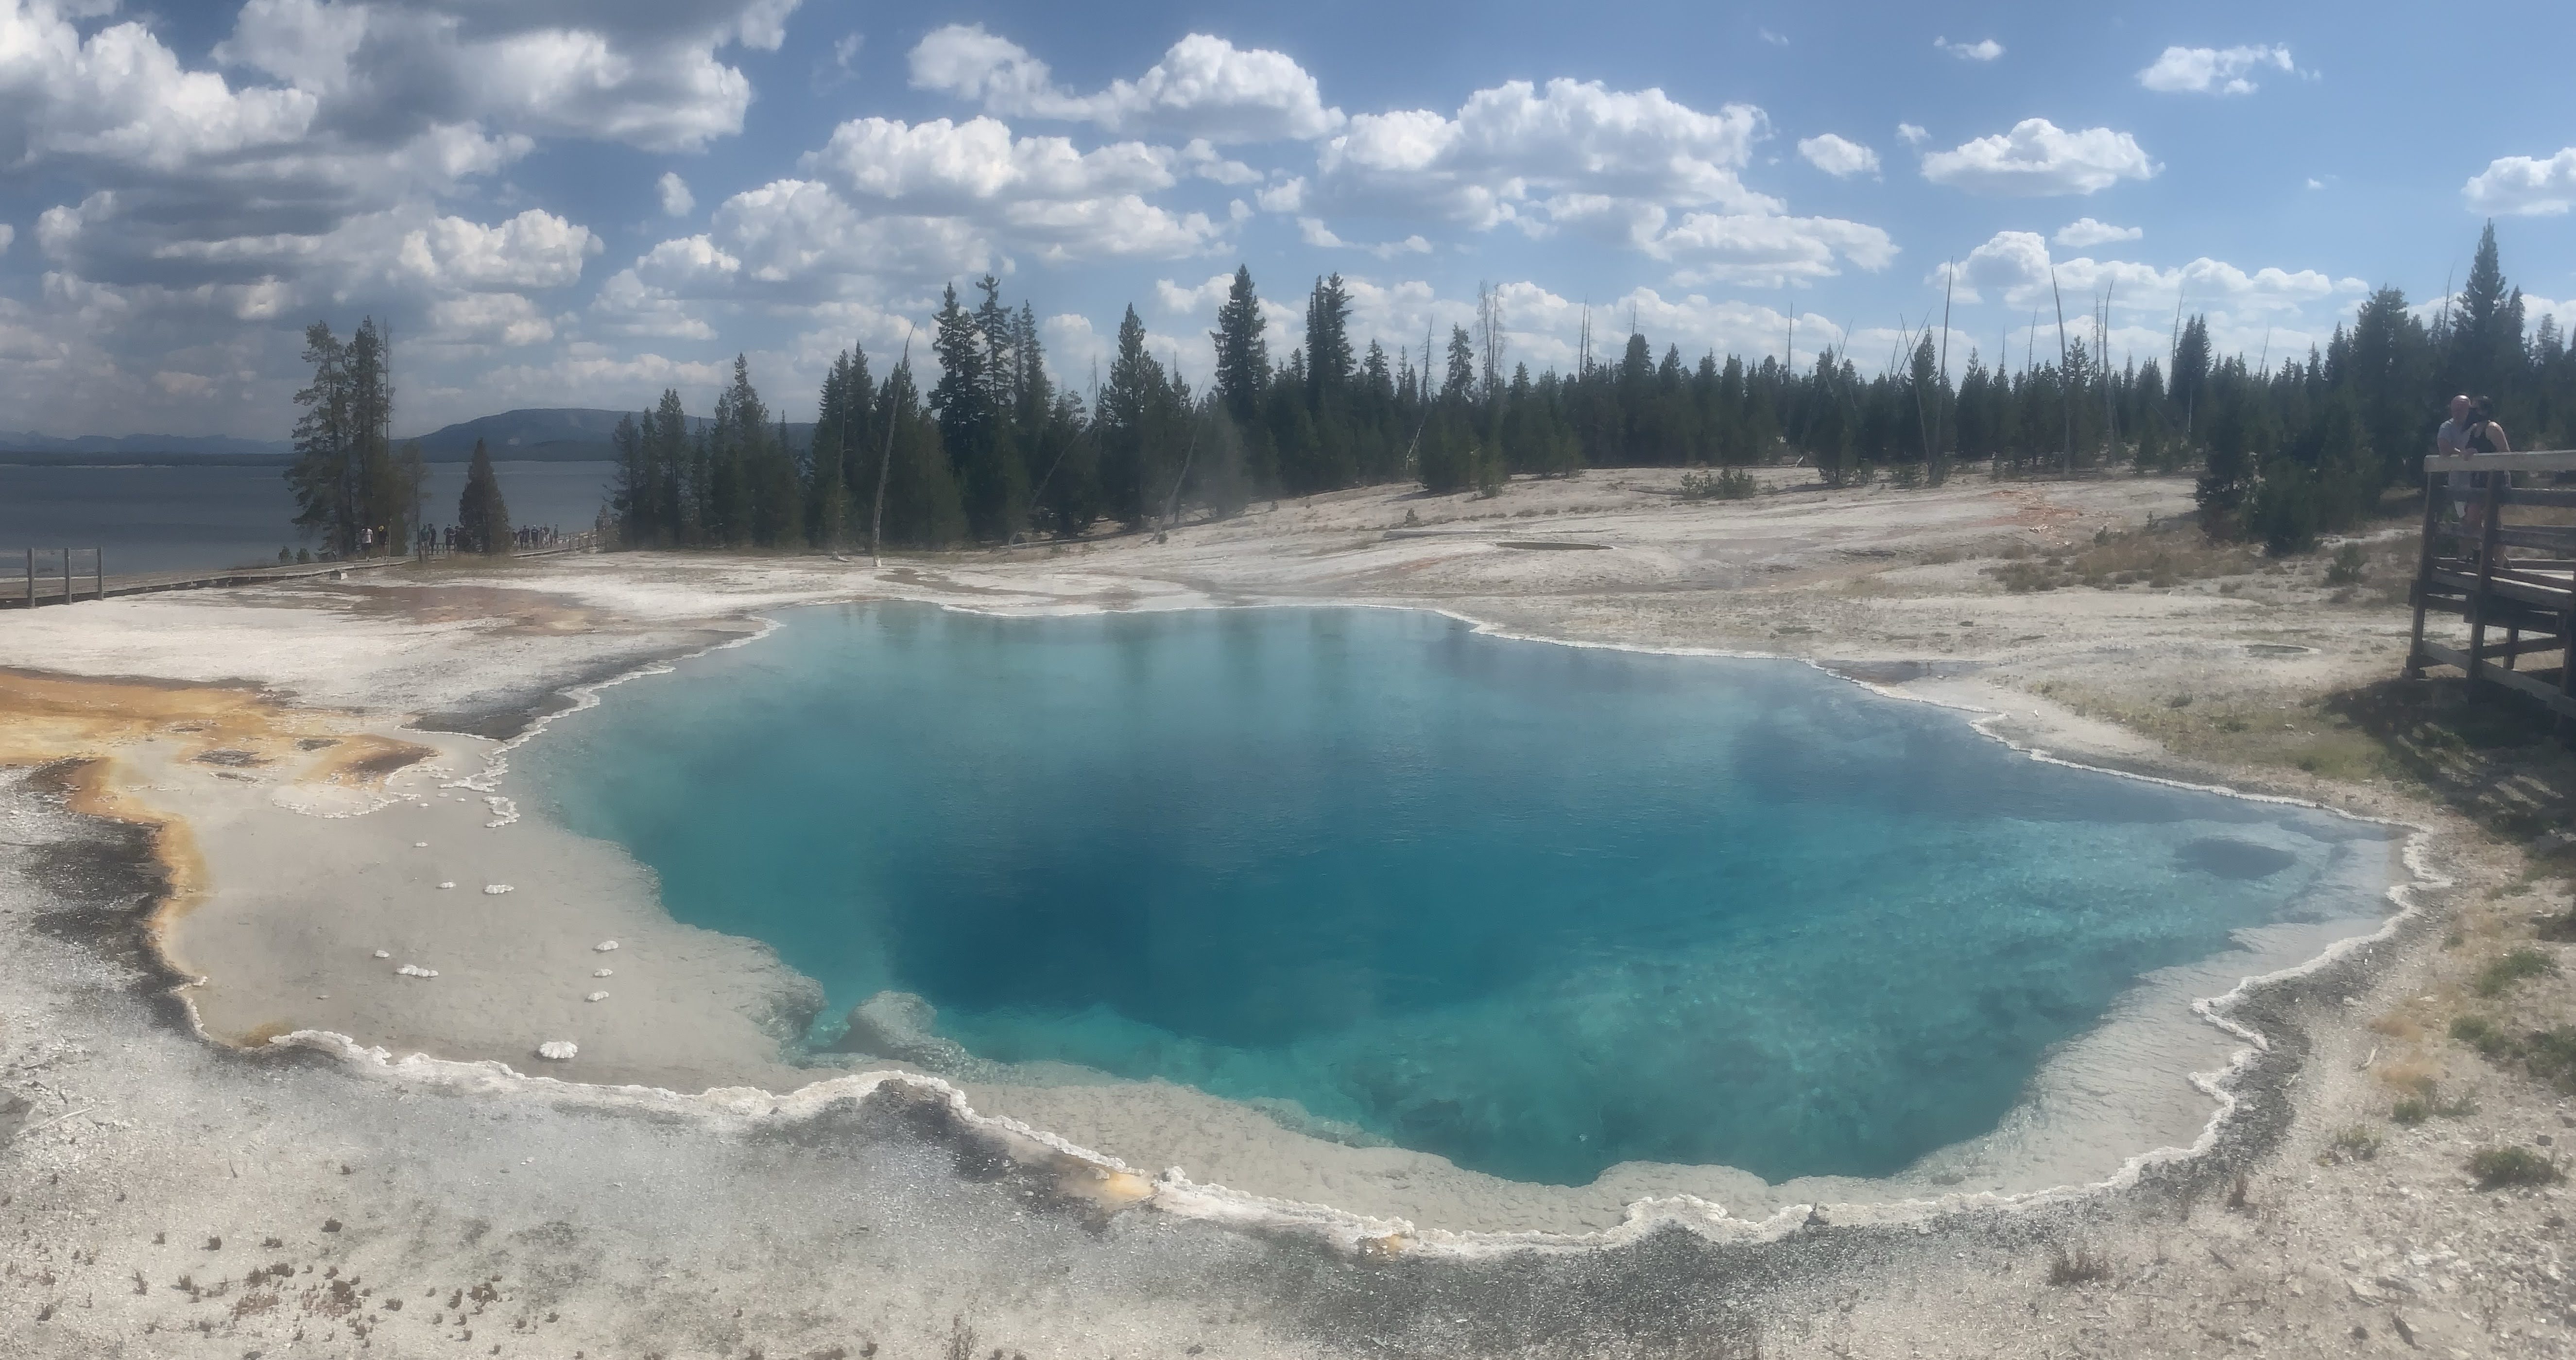
4 – West Thumb Geyser Basin – Park your car and walk the boardwalk

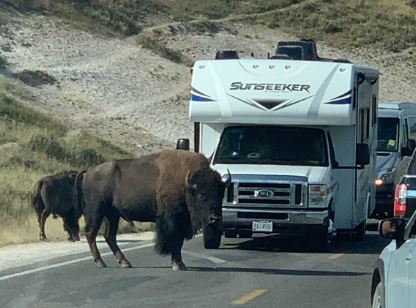
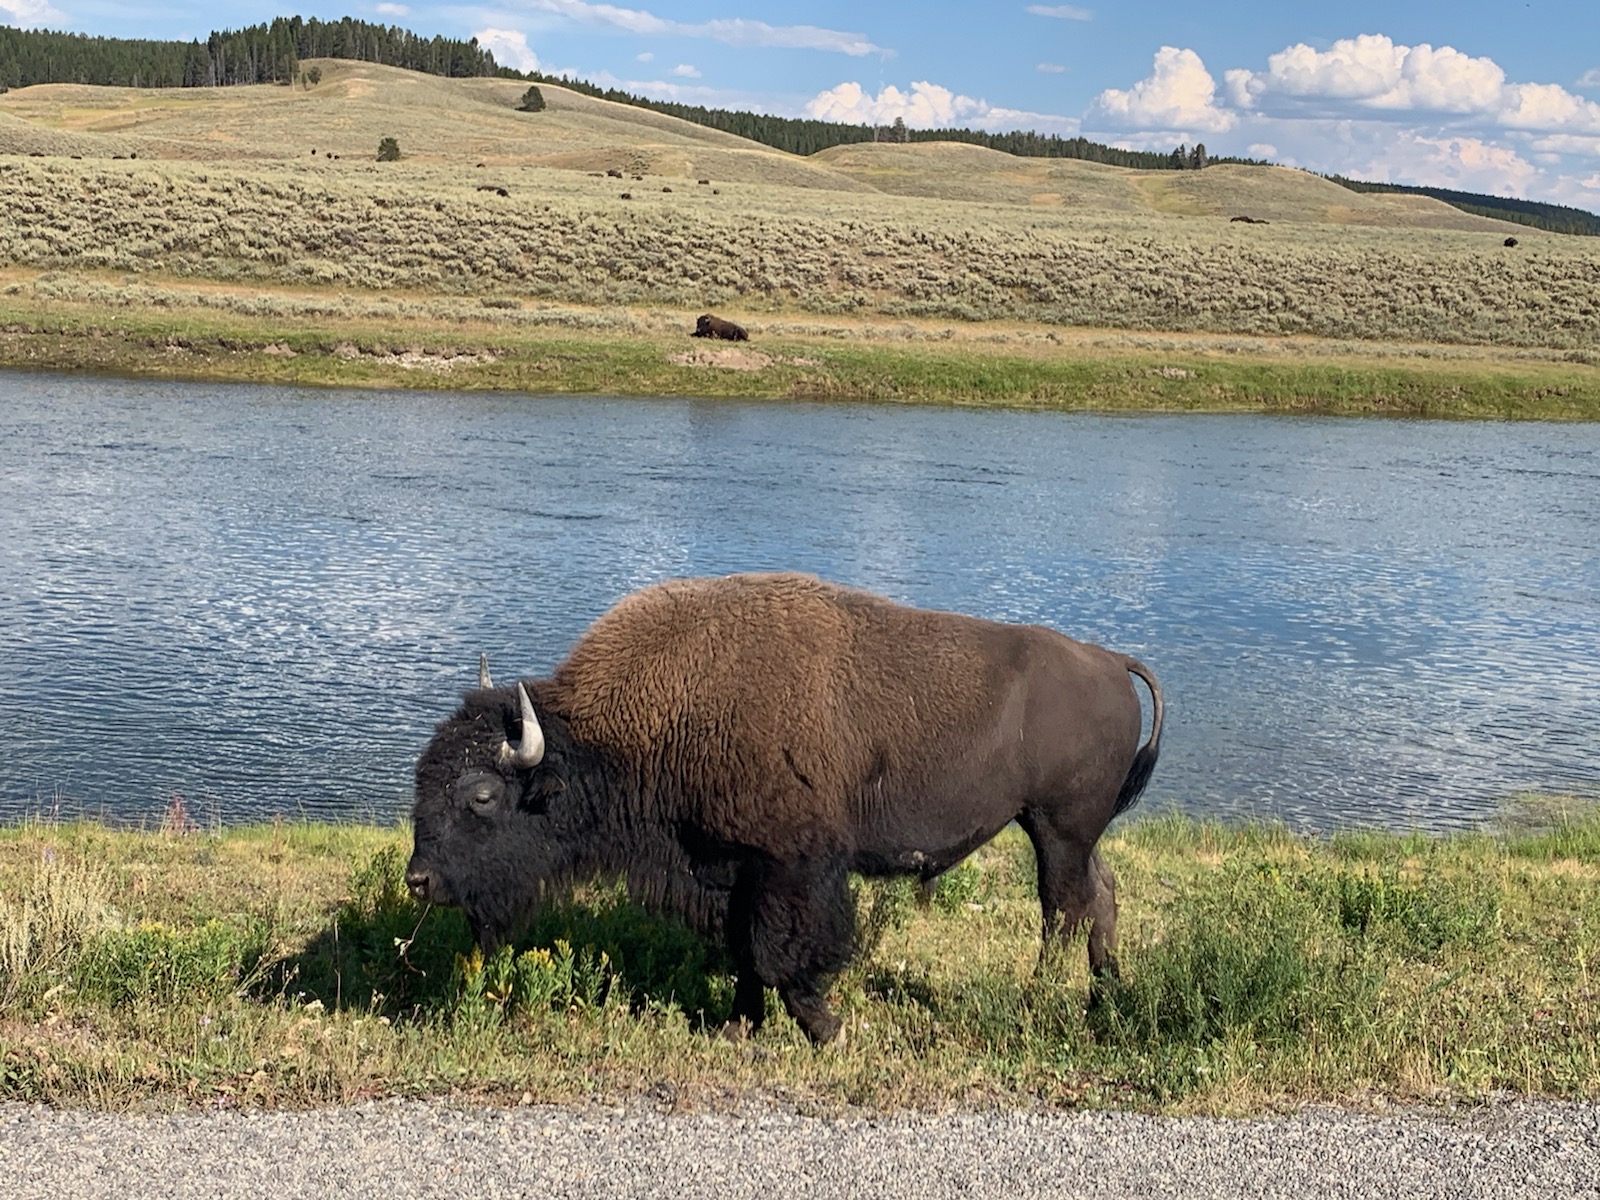
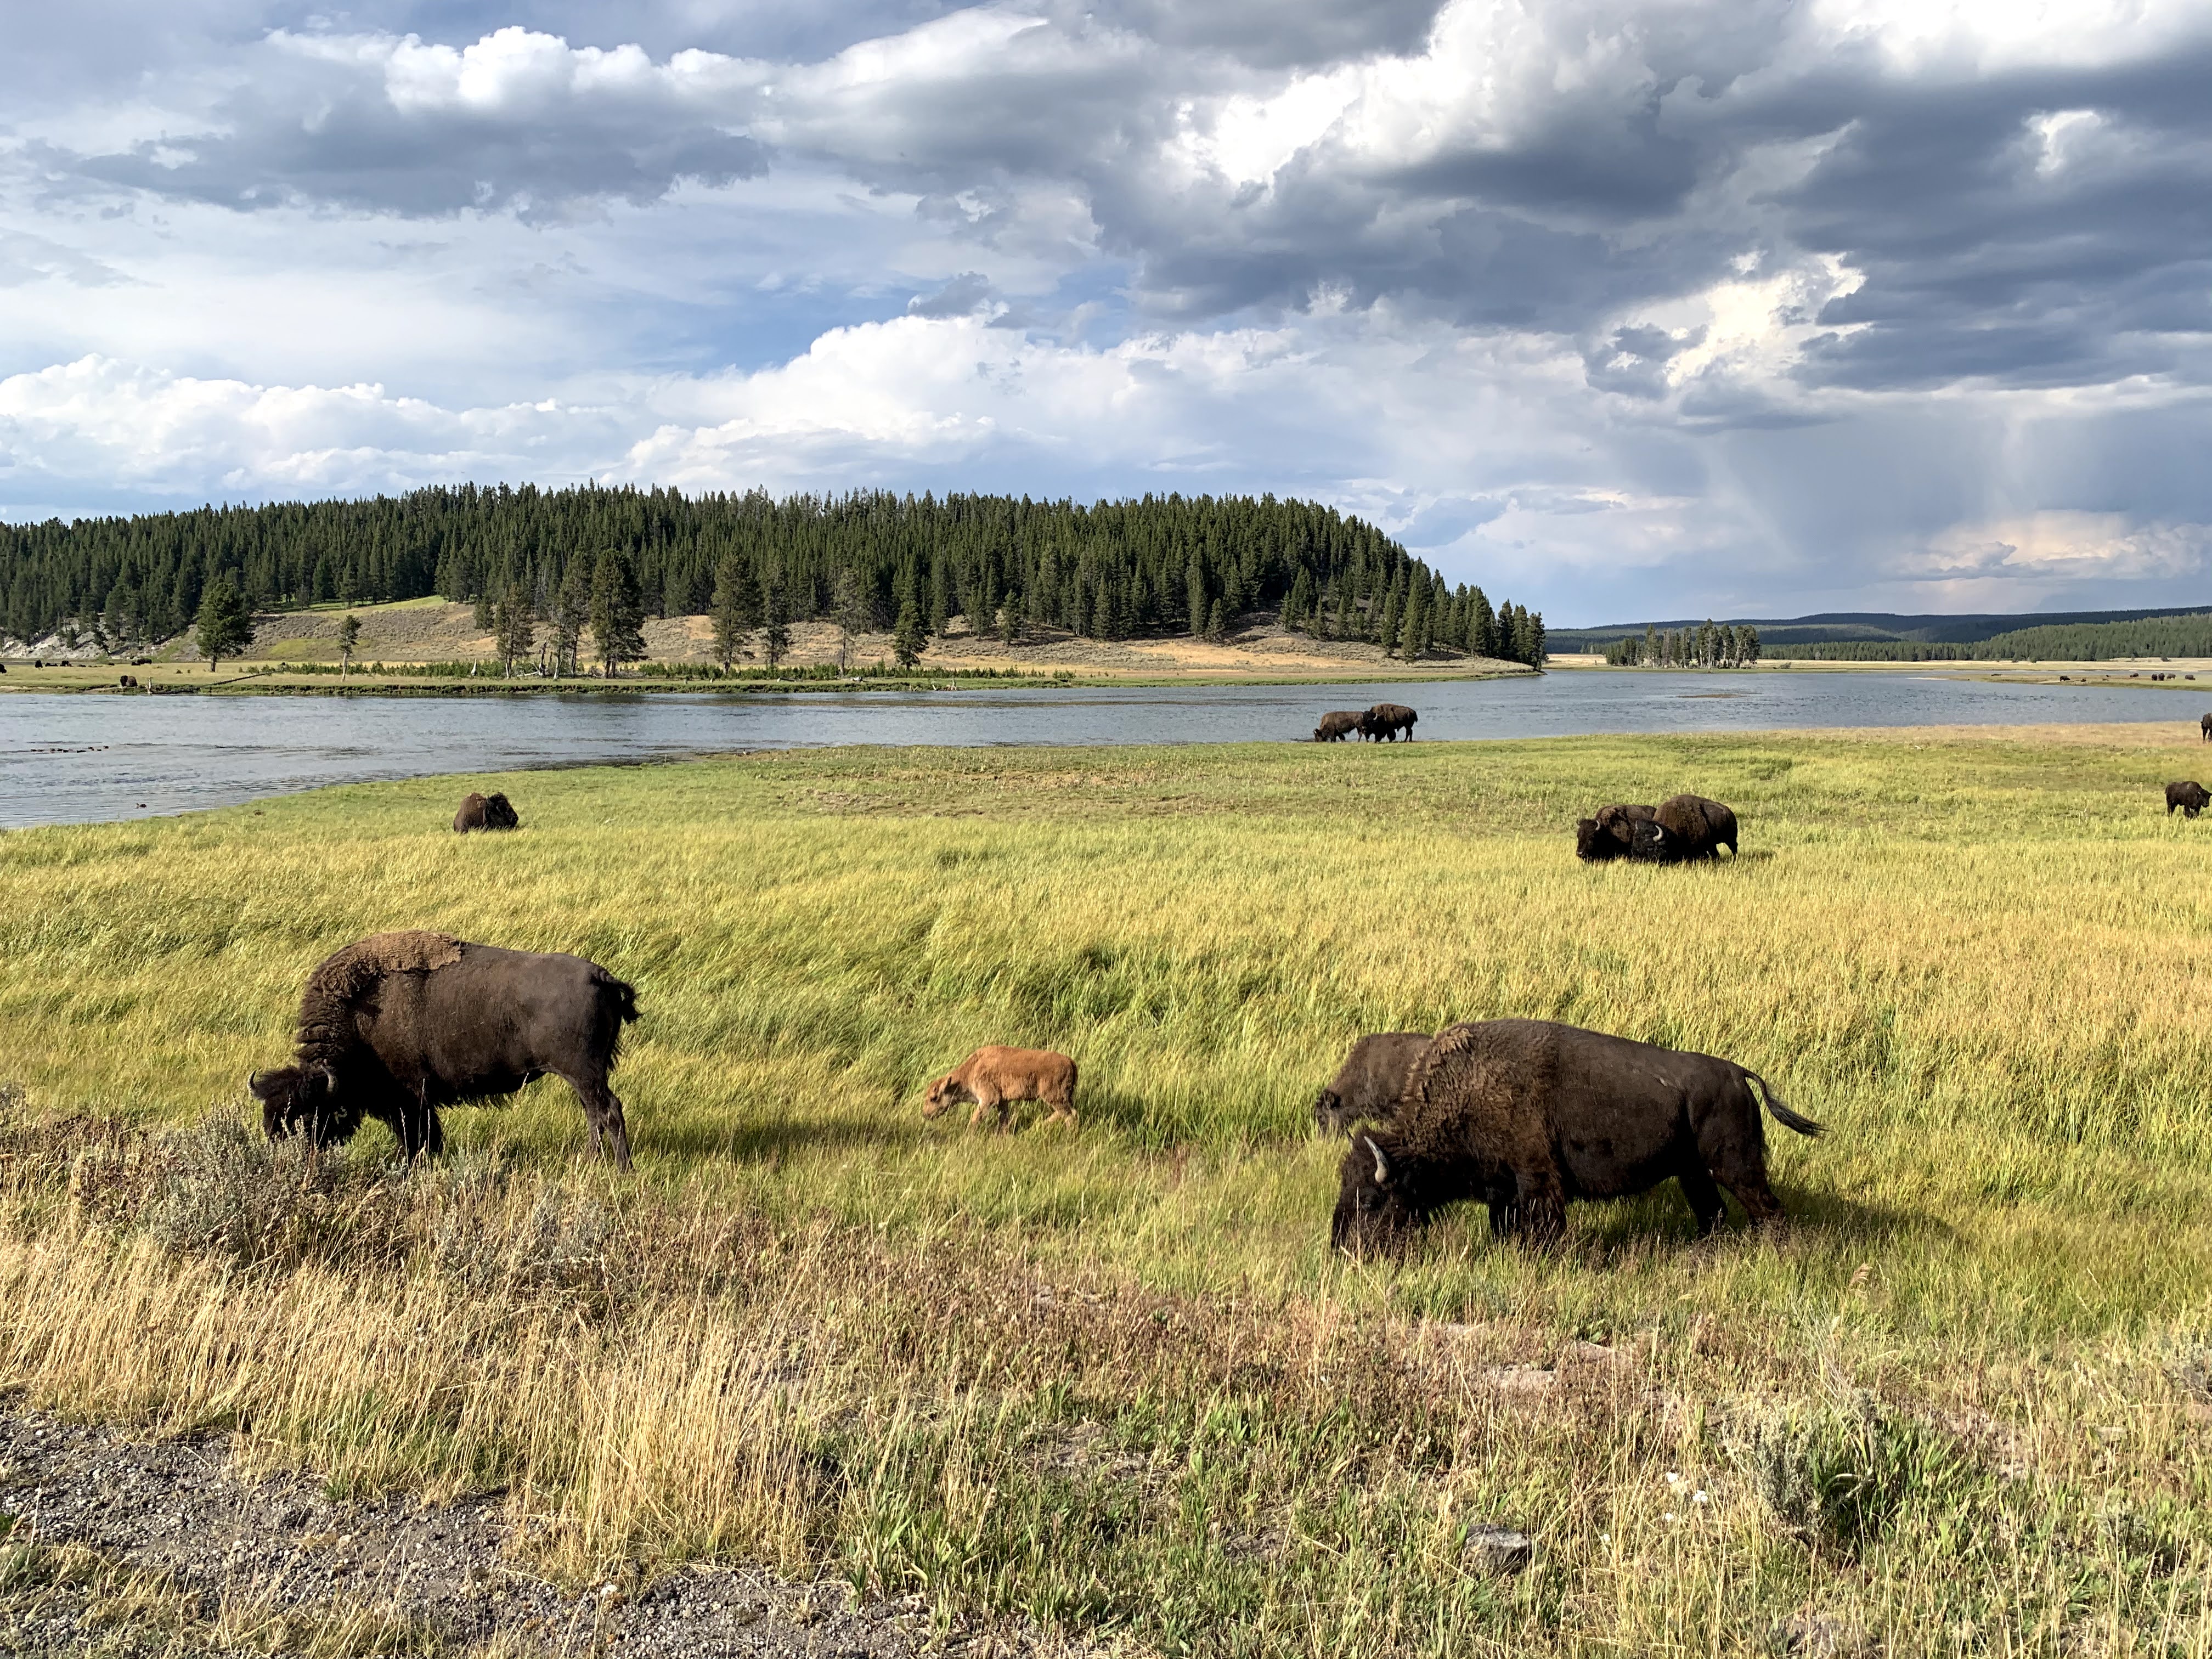
5 – Yellowstone Lake (Hayden Valley) – You don’t have to get out of your car for this one. Drive through the Hayden Valley and along the shoreline of the lake. It’s really pretty, and you are guaranteed to see bison, up close and personal. You can stop off to see the mud volcano along this road. It’s definitely cool, but be prepared for some smelly sulfur!

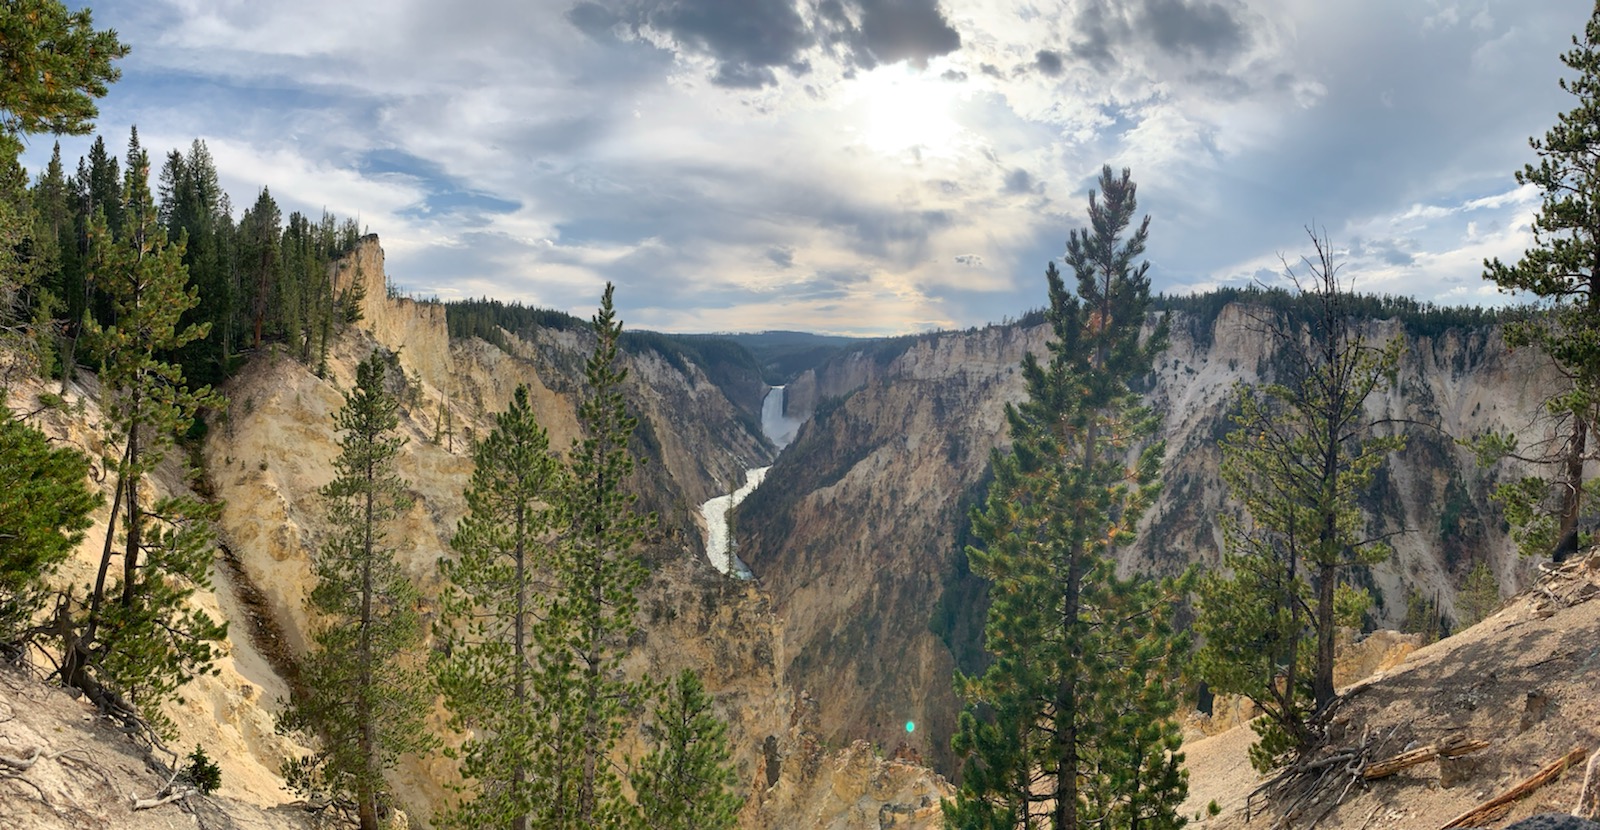
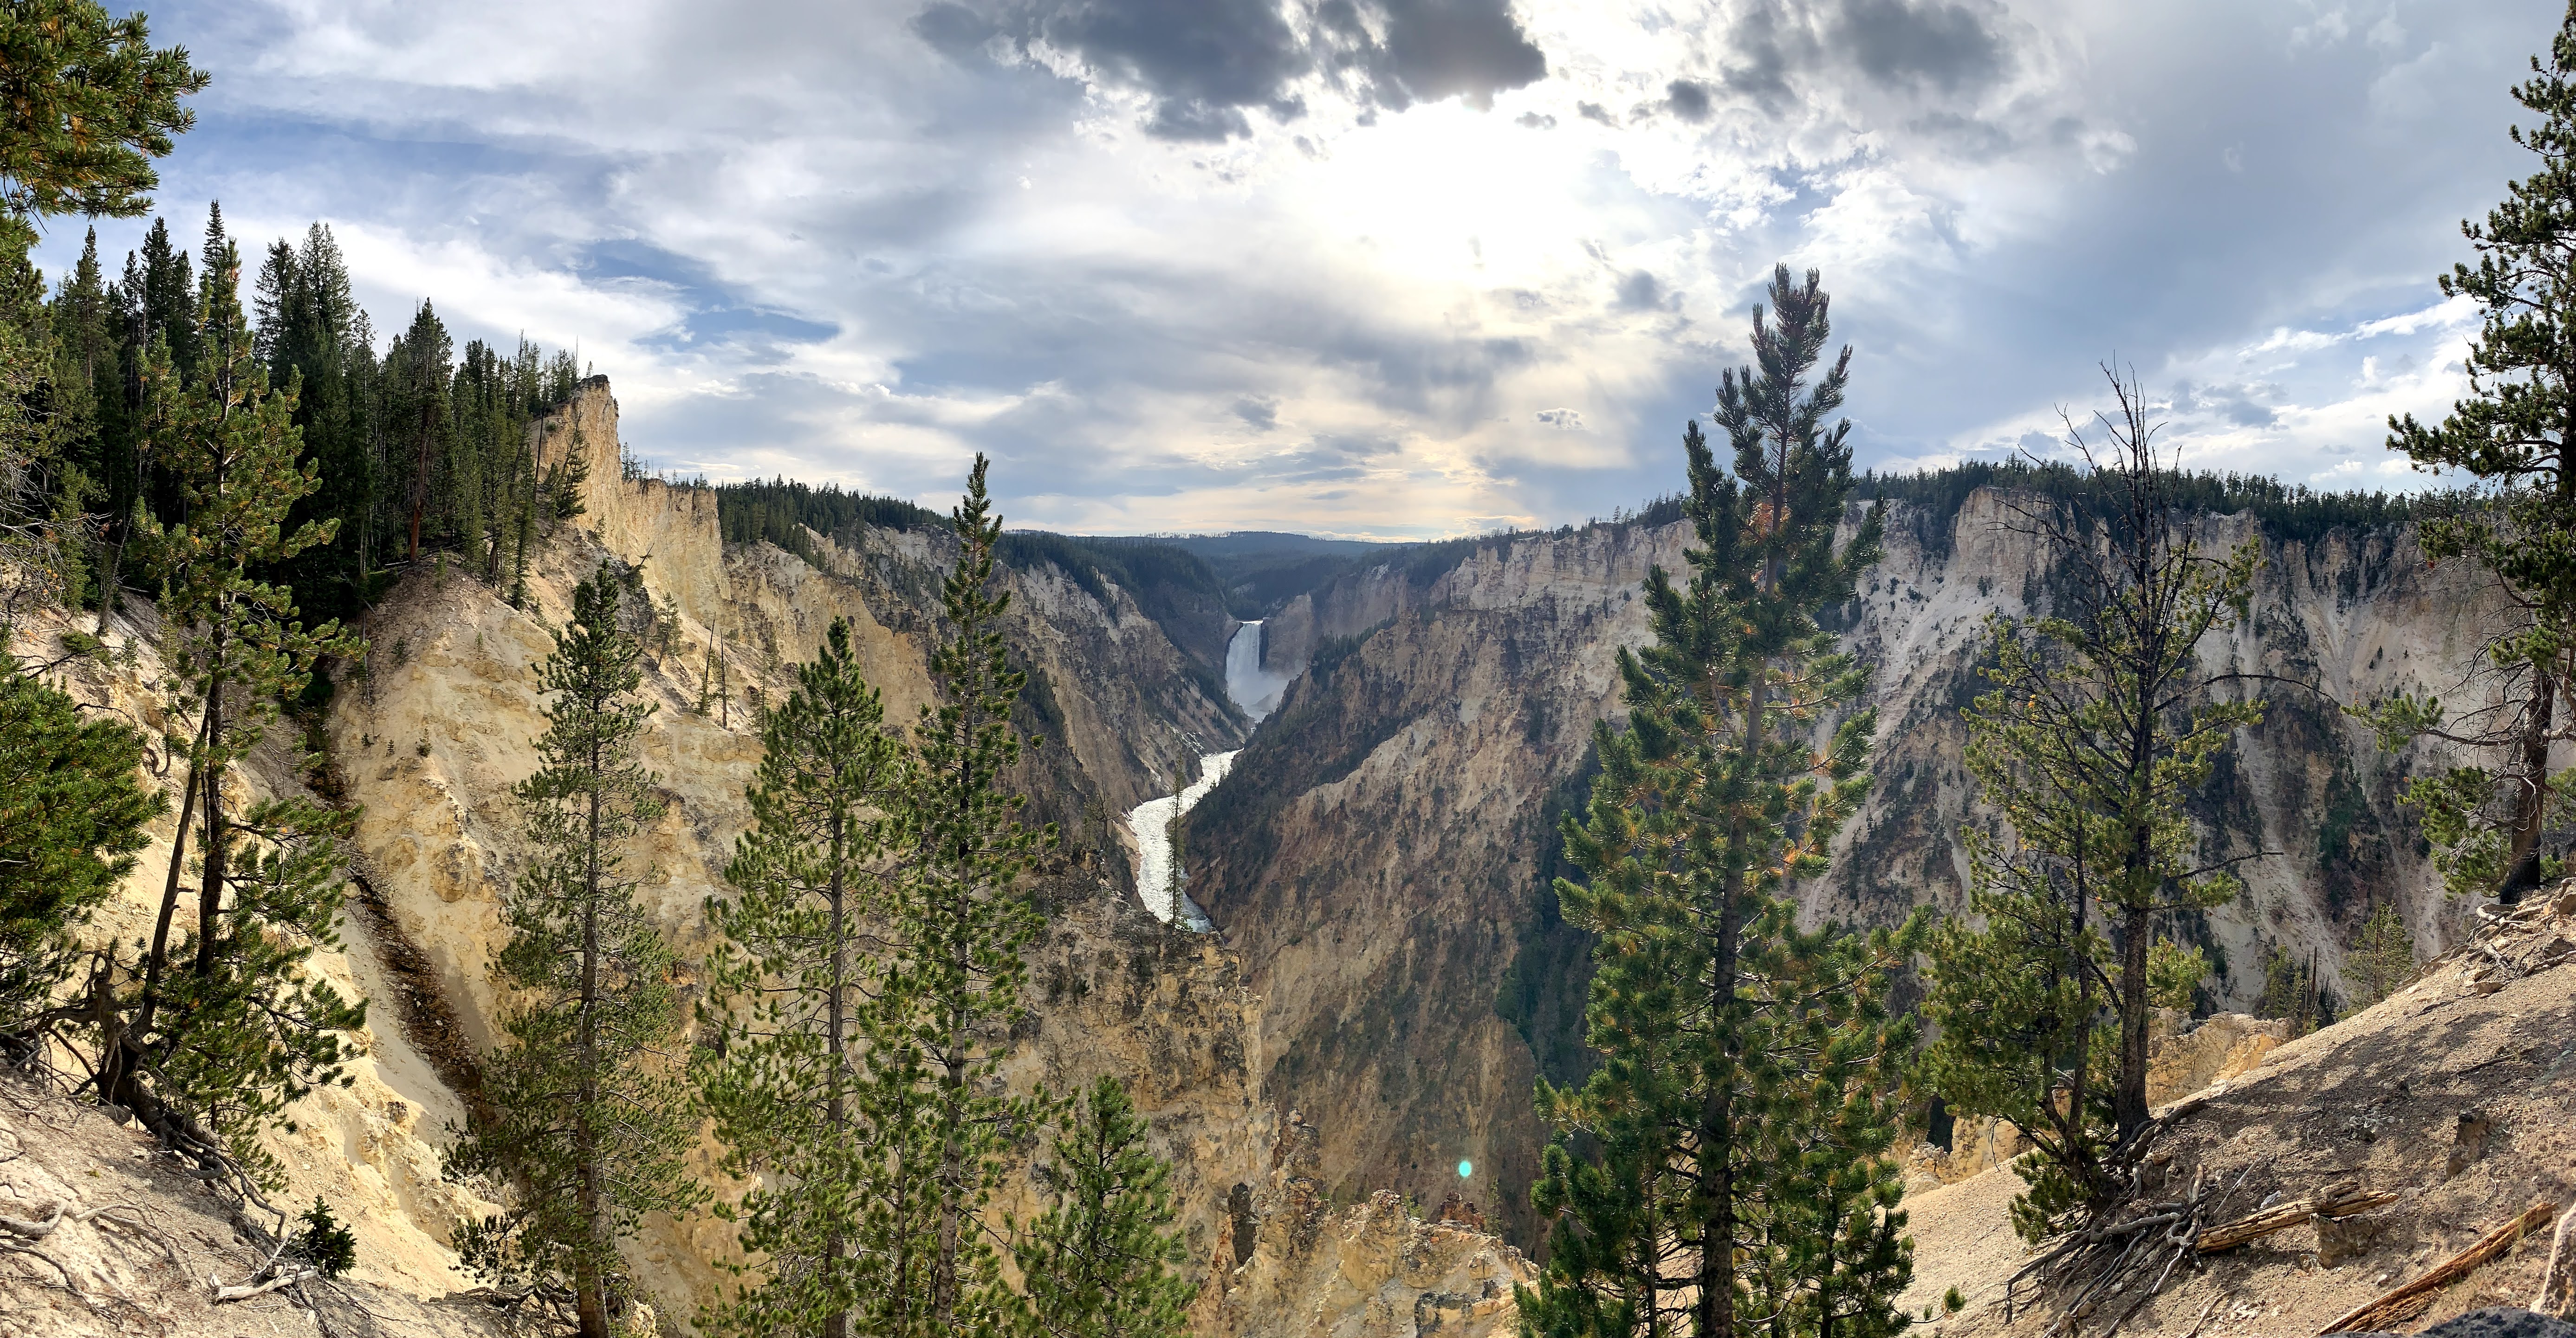
6 – Grand Canyon of Yellowstone – While not quite the actual Grand Canyon, this was breathraking. You want to go to the spot on the map called “Artist Point,” because this will get you the best view of the canyon from the South Rim. There is a huge waterfall and river, and the rock is beautifully rainbow colored (including yellow, where the park gets its name from). The good news is that you can drive right up to the lookout. There is hiking around this area though, if you are up for it.

We got dinner from a Mexican food truck in town this night since it was like 10 PM before we were out of the park and back at the hotel.

Day 8 (Grand Teton National Park, Wyoming)

We stayed in the same hotel for this park that we did for Yellowstone.

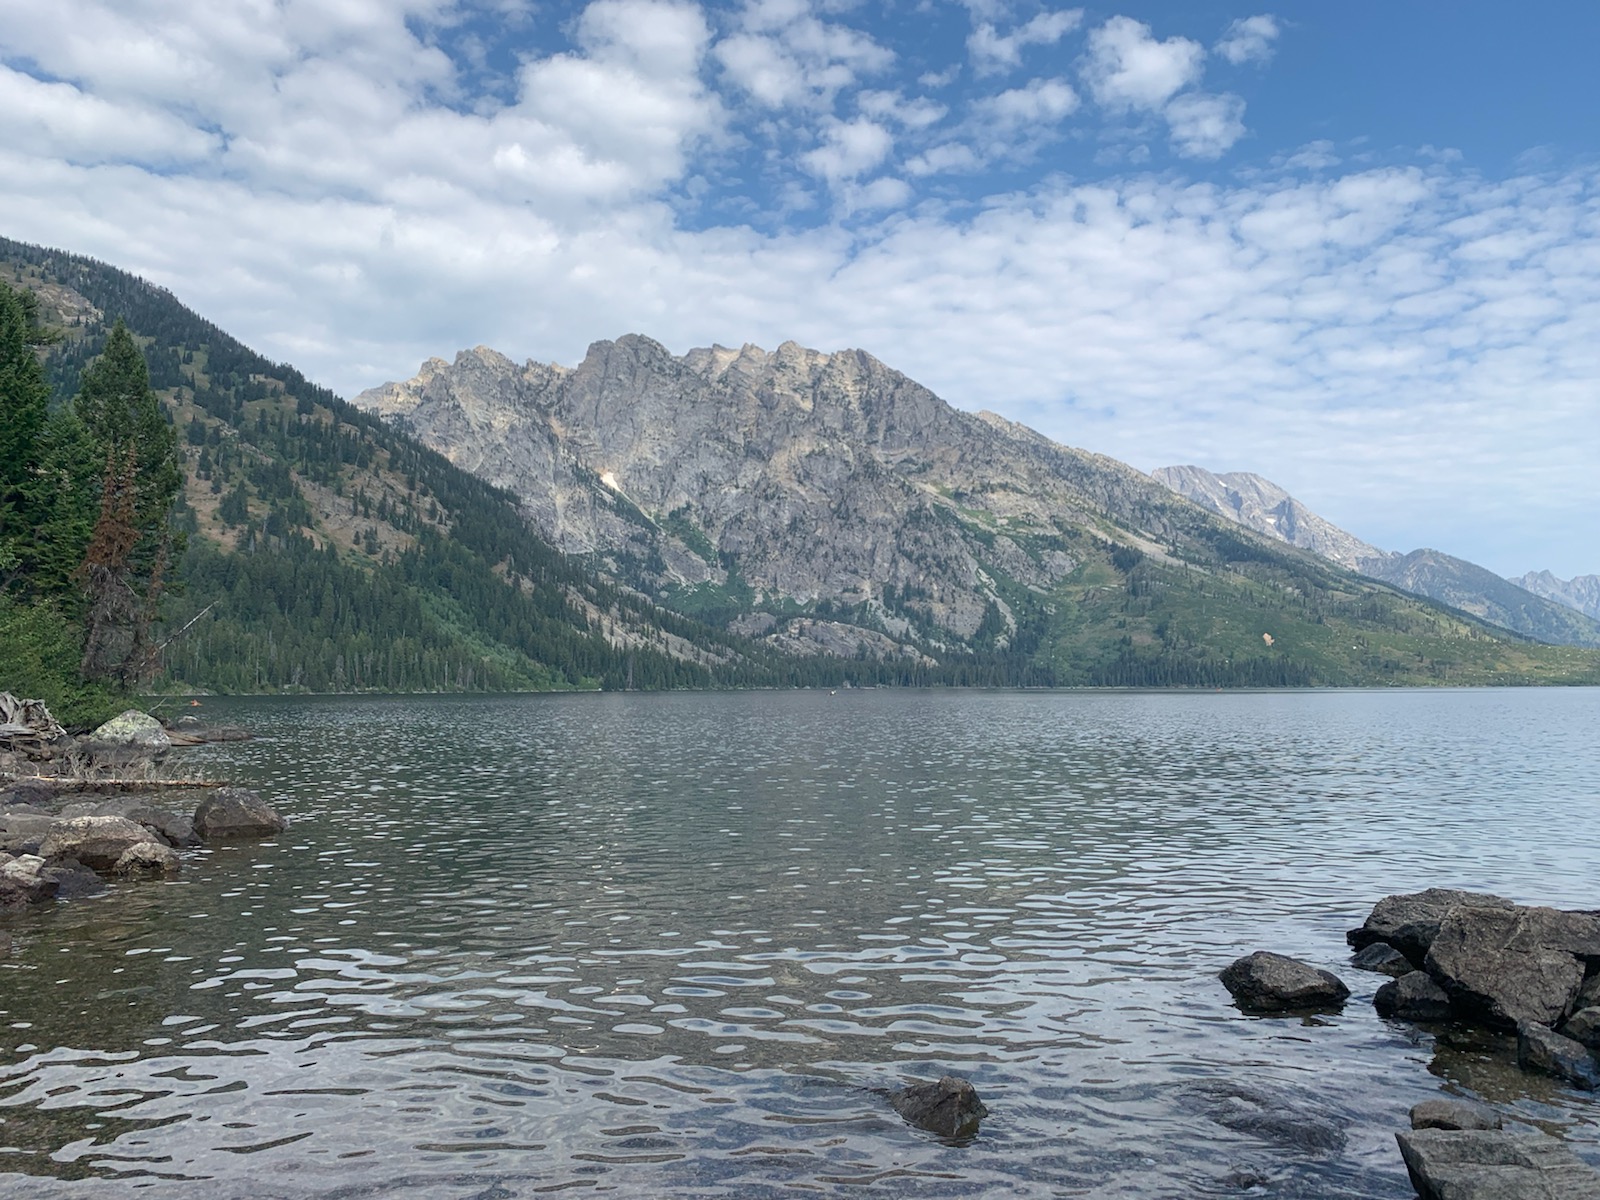
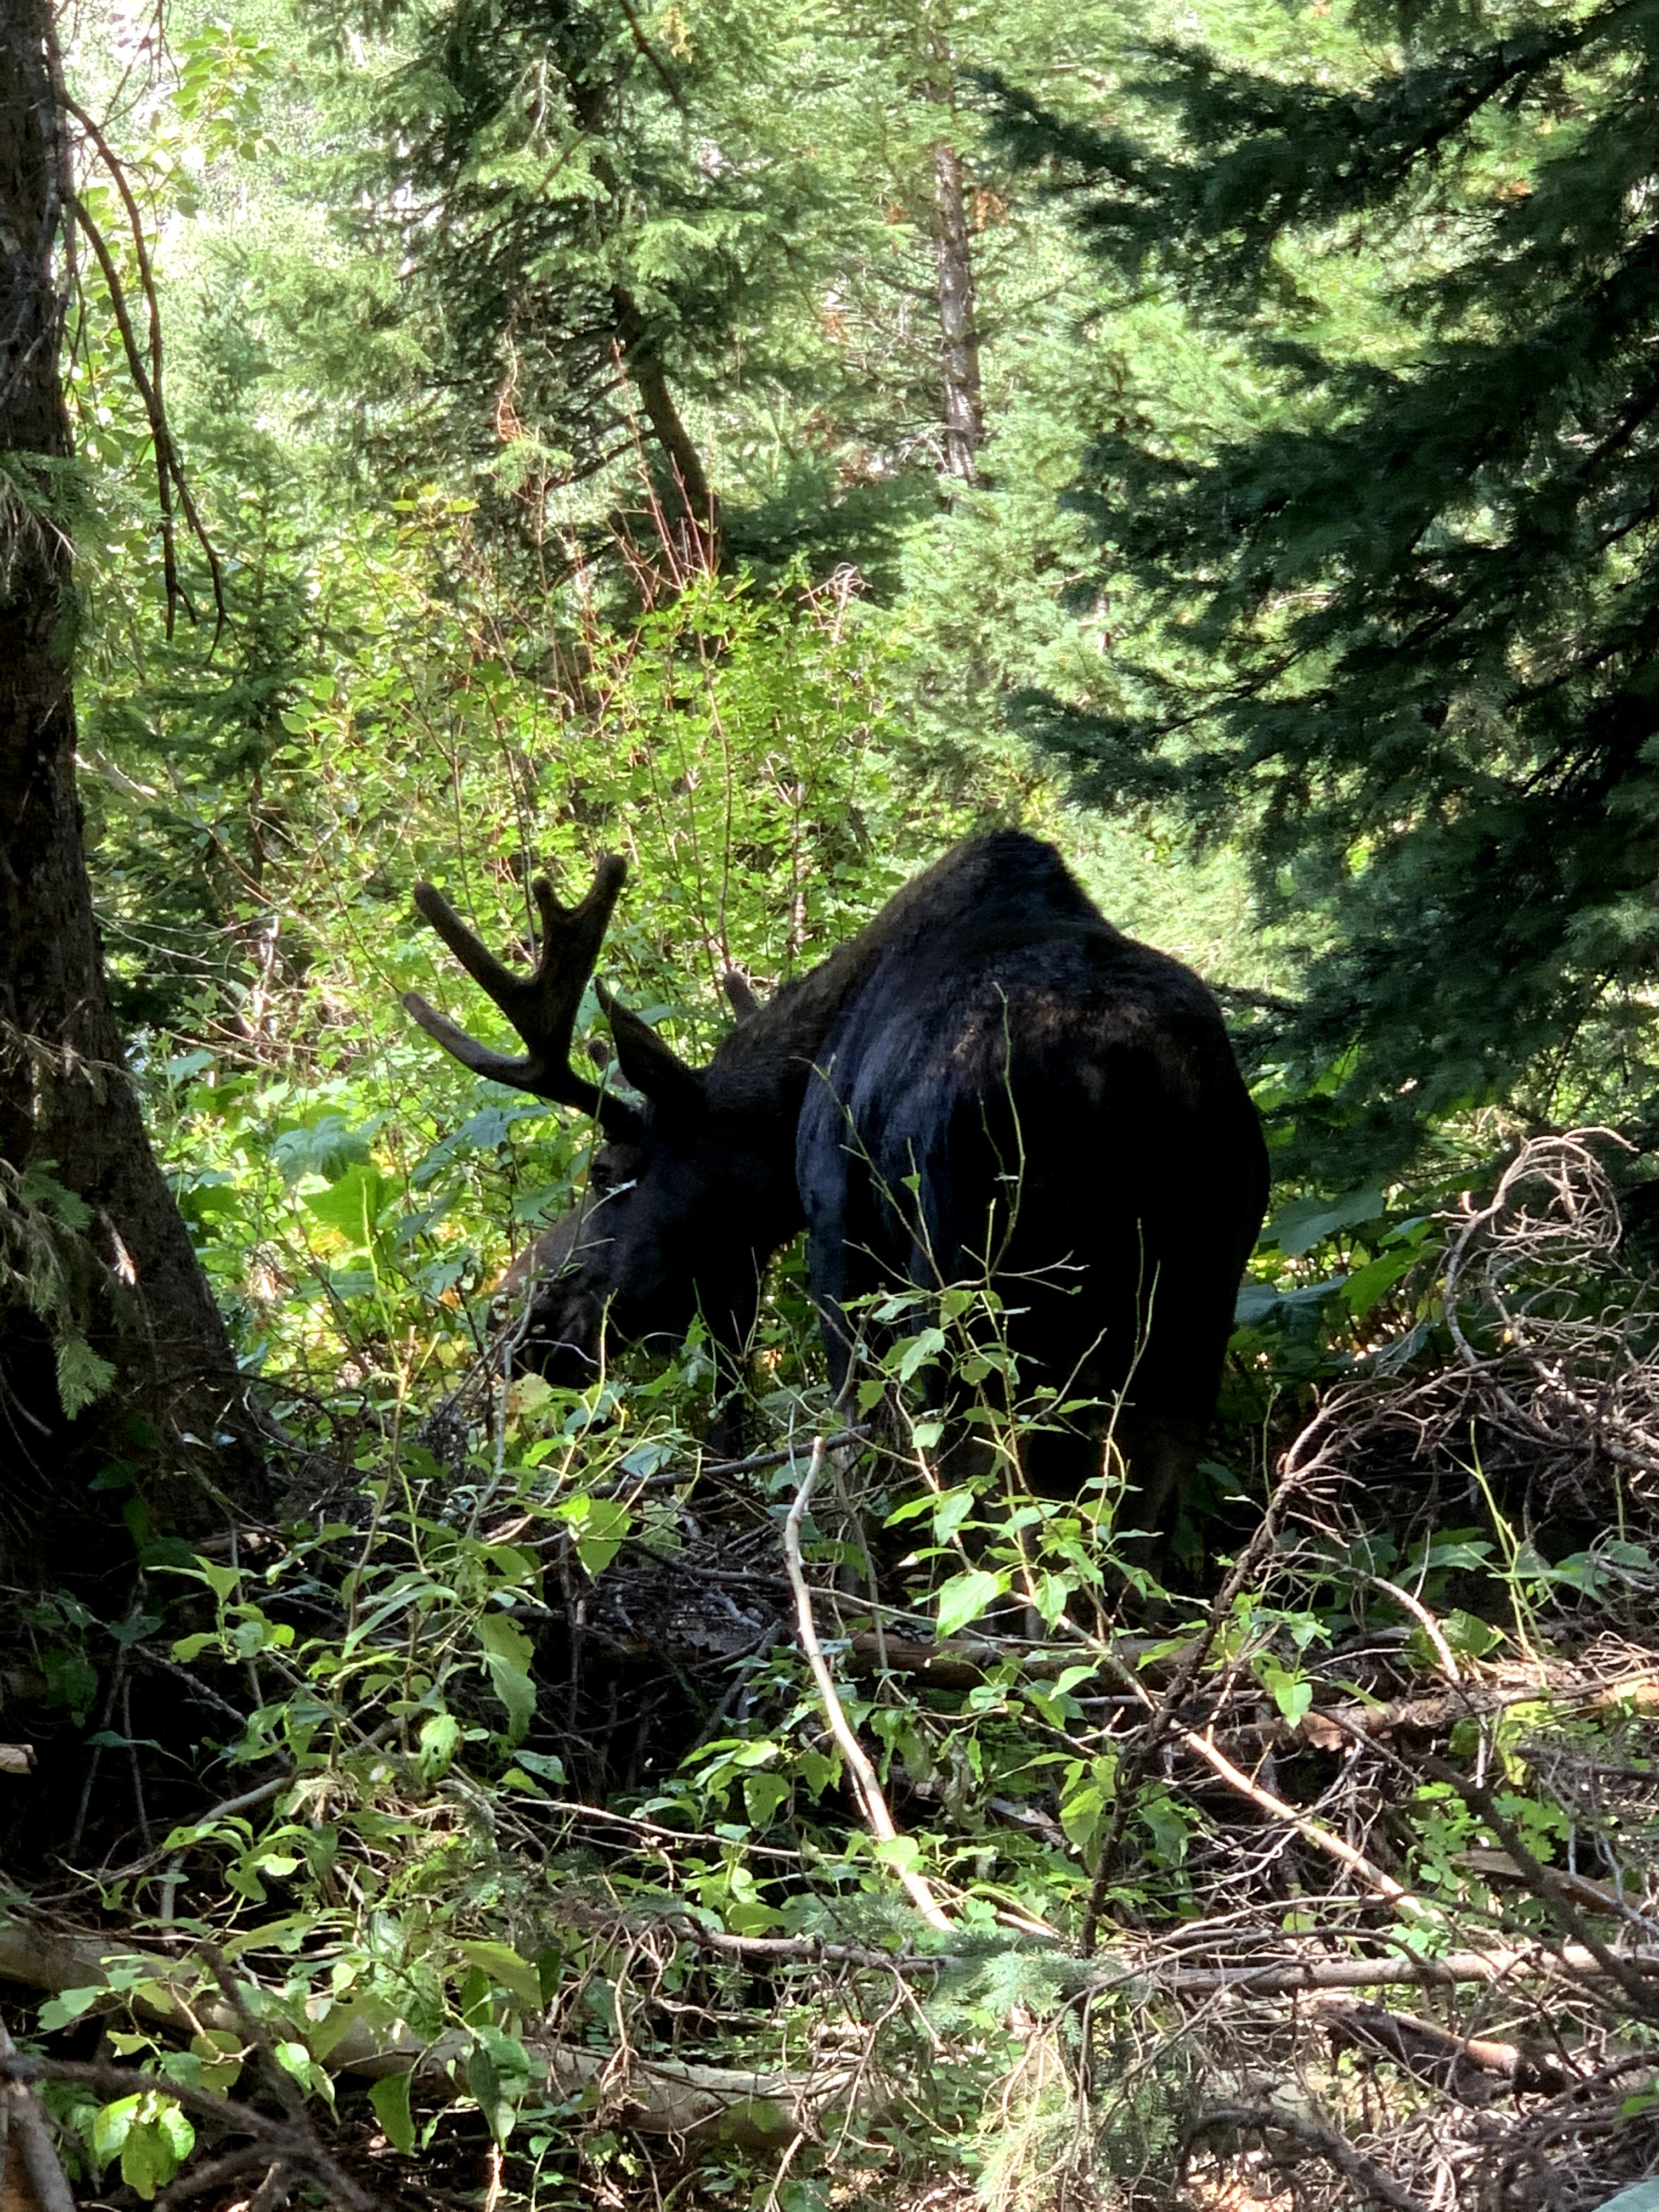
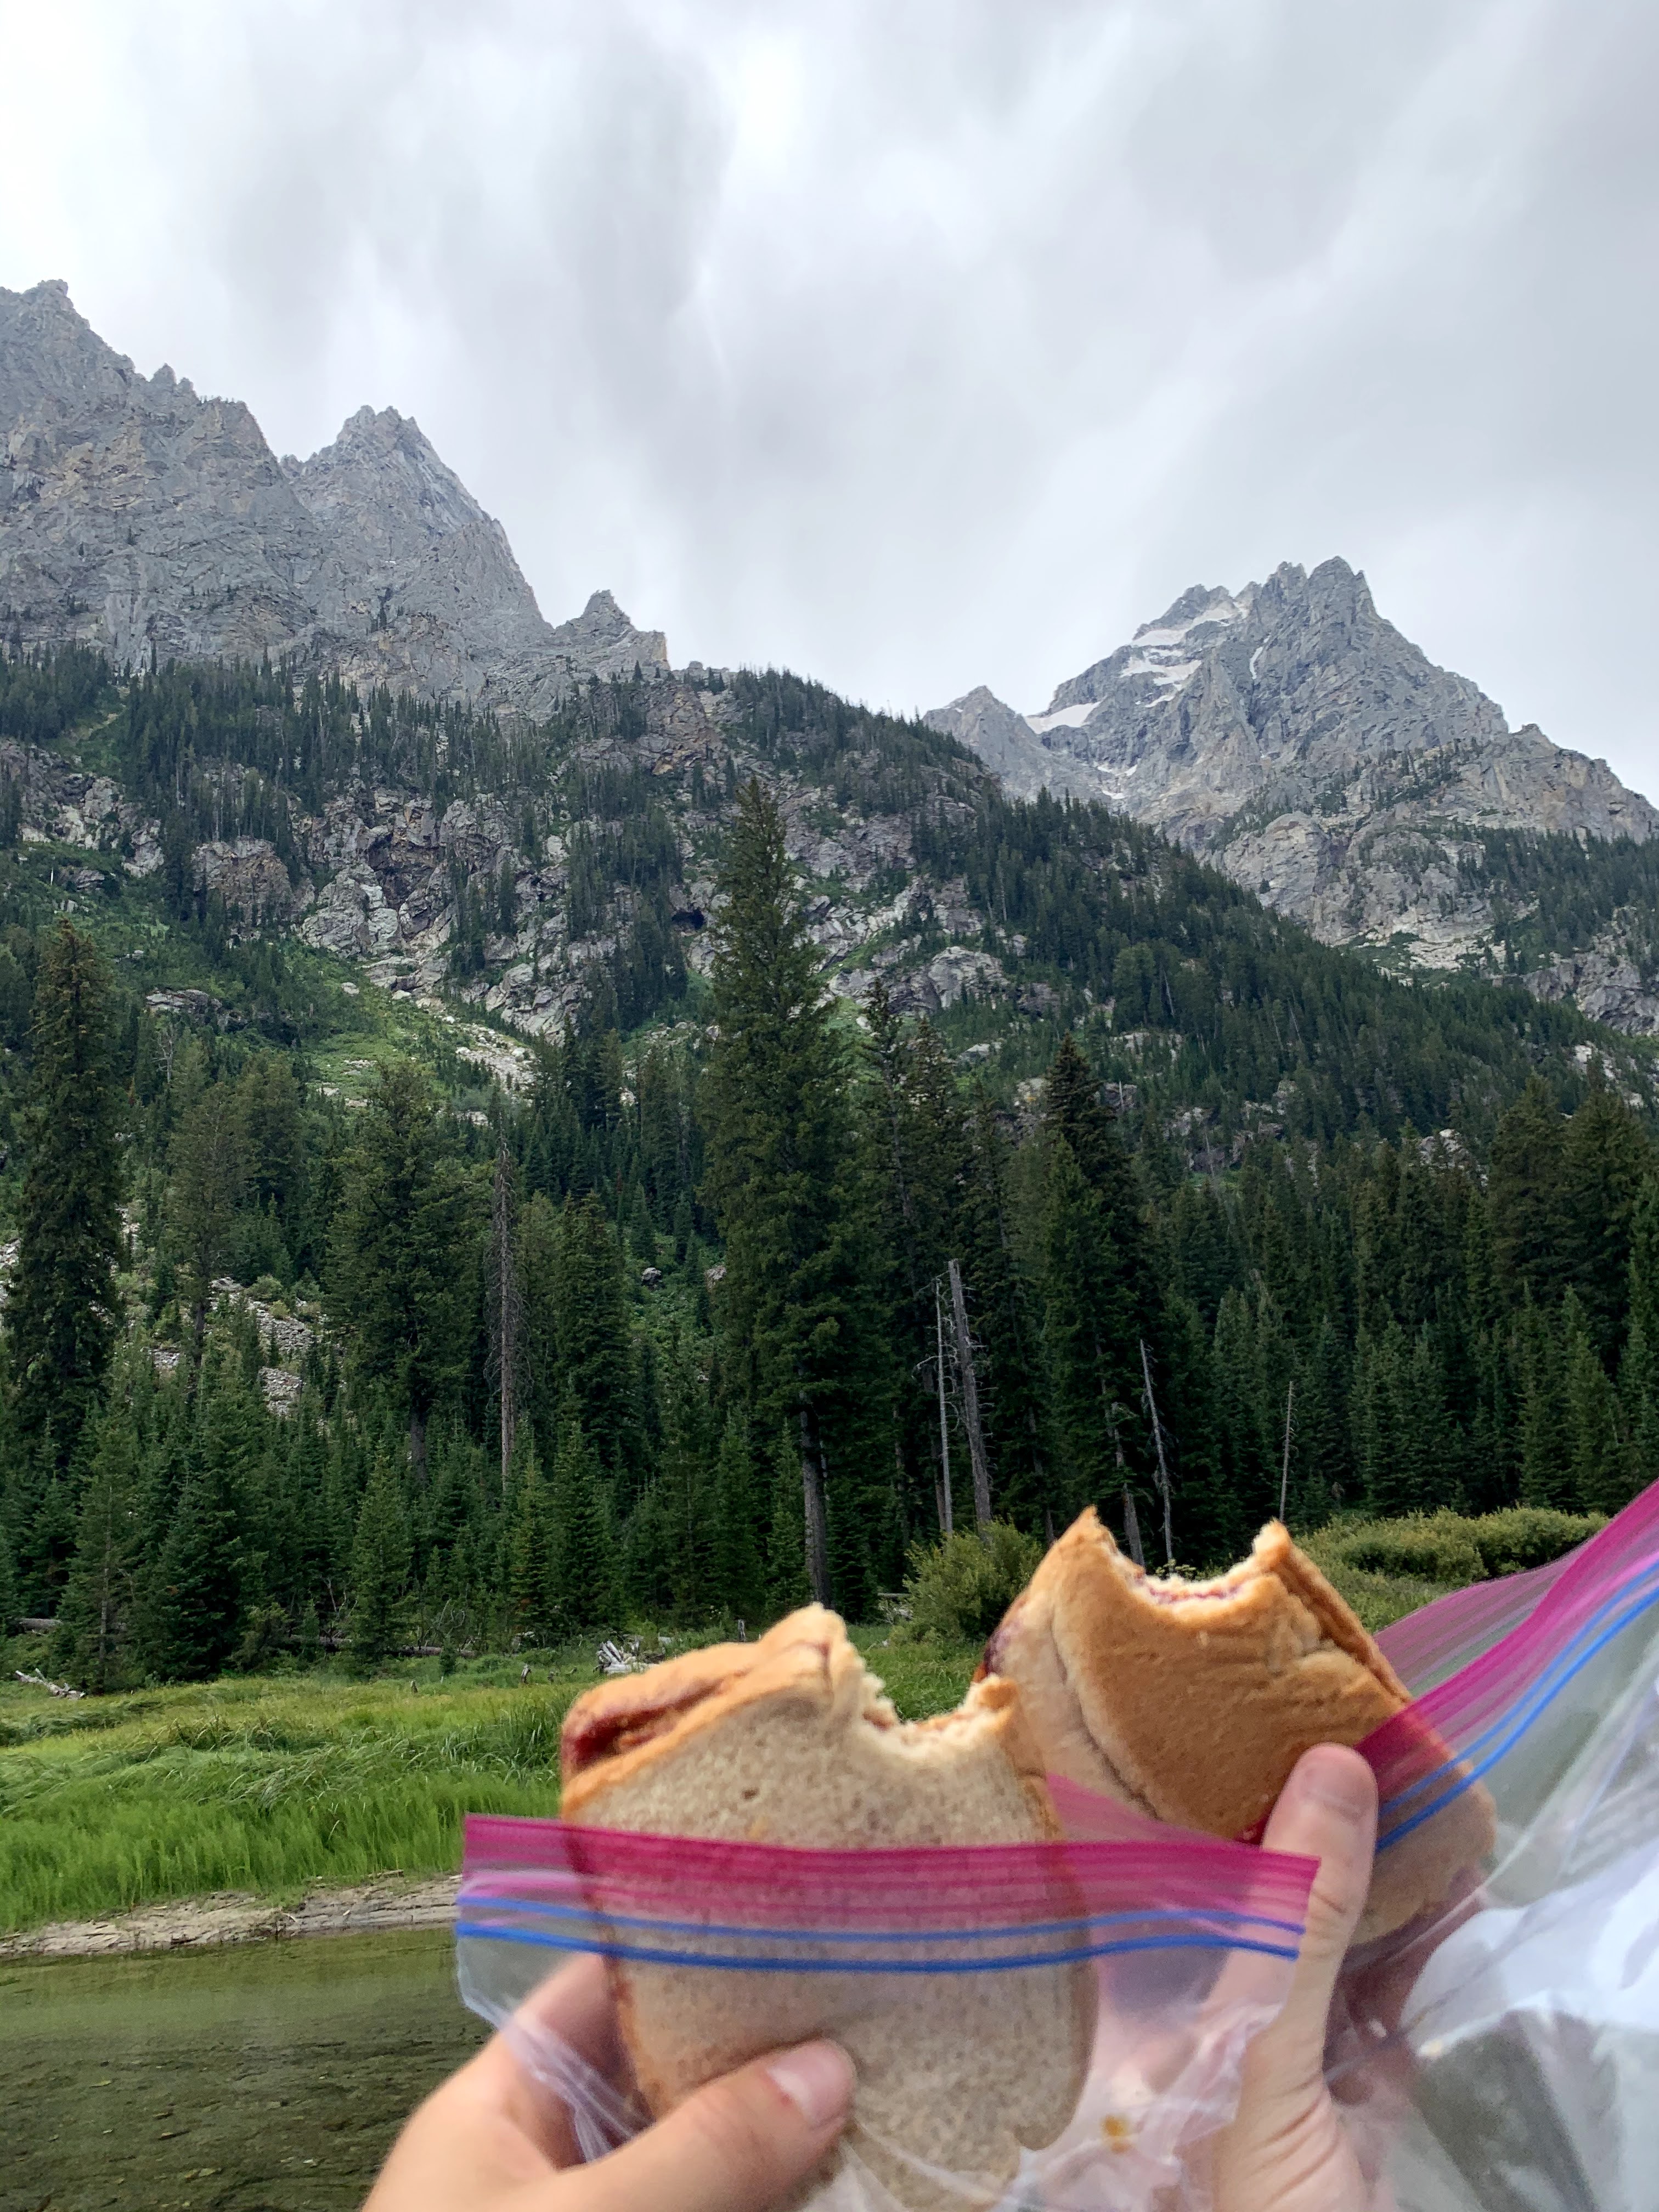
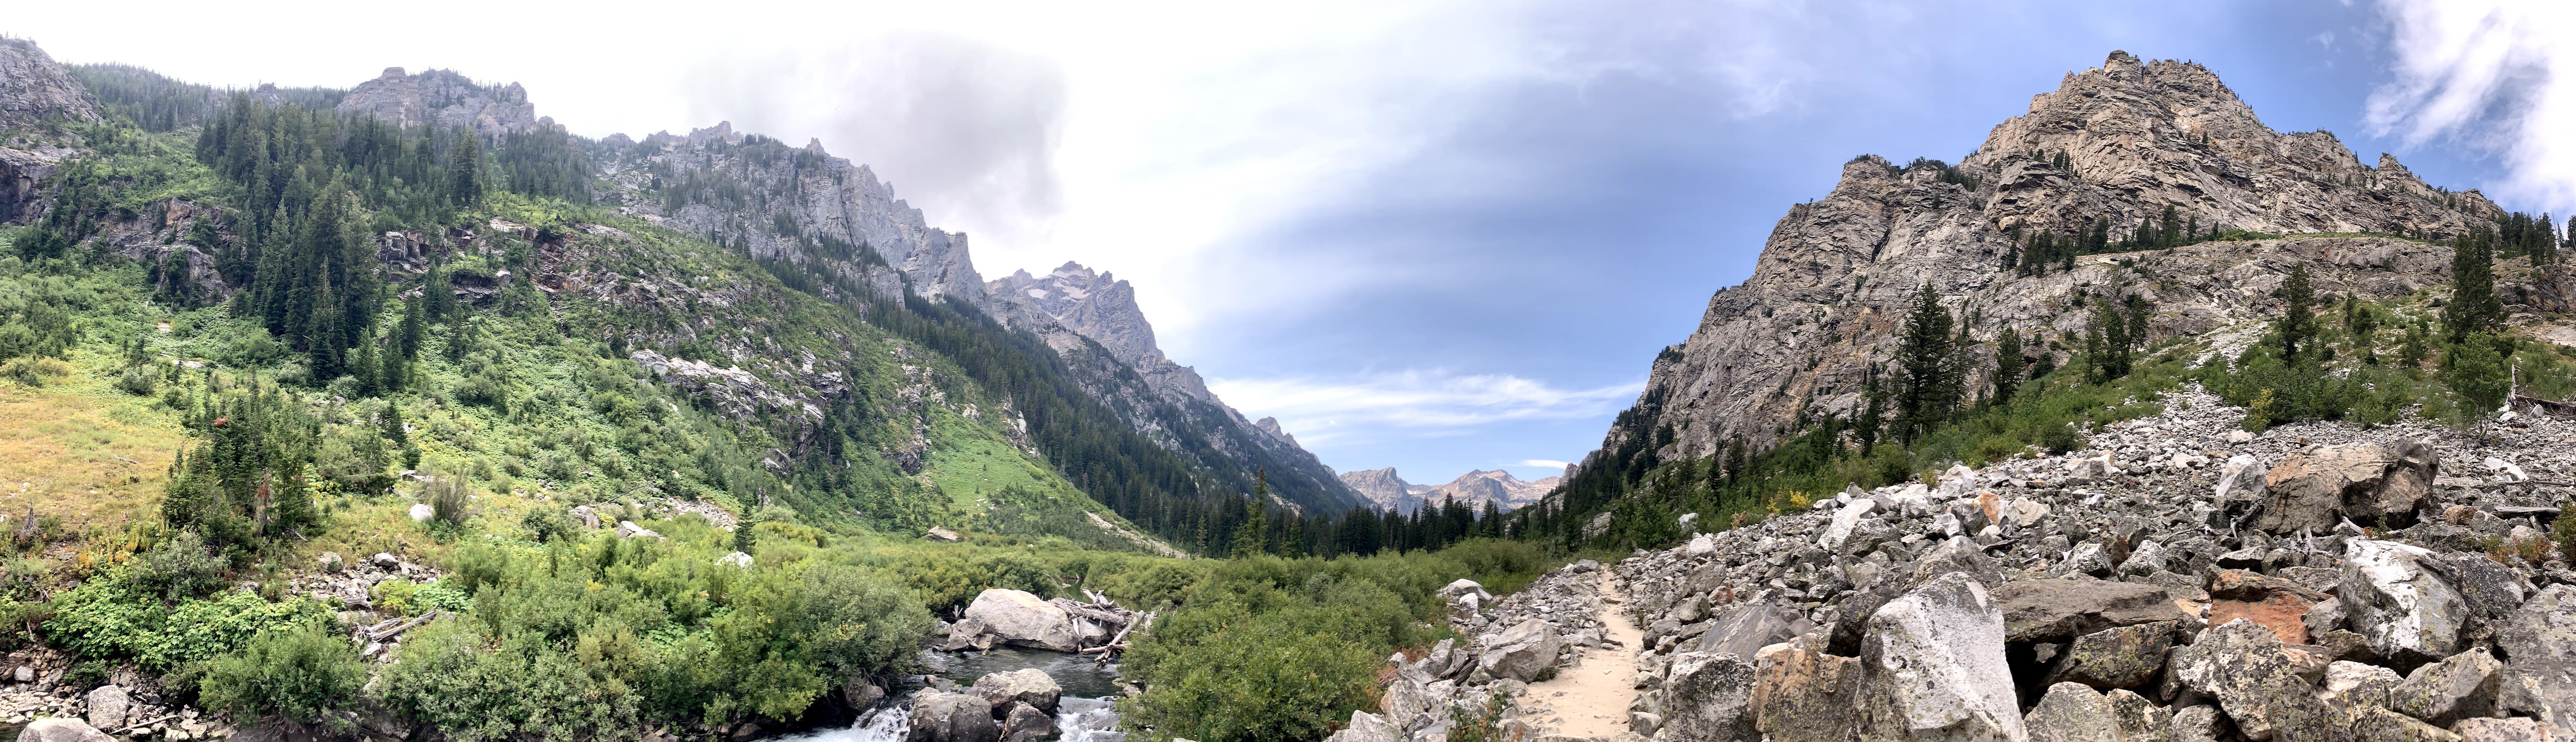
Jenny Lake to Cascade Canyon Trail – This was an easy and fun hike, totaling about 10 miles. We kind of constructed this one ourselves, just taking part of the Jenny Lake Loop until it connected to the Cascade Canyon trailhead. There is a pretty river along the Cascade Canyon with large rocks, which makes it a great place to stop for lunch. The Cascade Canyon trail connects with a couple of other trails wit more views, if you want to keep going. Honestly, if you are not going to connect with another trail, you can stop on the Cascade Canyon after you pass the waterfall and turn around, because after that point it’s all the same trail with no additional views. You can also splash around in Jenny Lake either before or after Cascade Canyon if you so choose! We saw two male moose munching on some leaves in the woods, two more female moose at the base of the Jenny Lake trail (aptly named Moose Pond), as well as a bald eagle flying overhead while walking the Jenny Lake trail on the way back to the car. This was definitely a big and exciting day for wildlife!

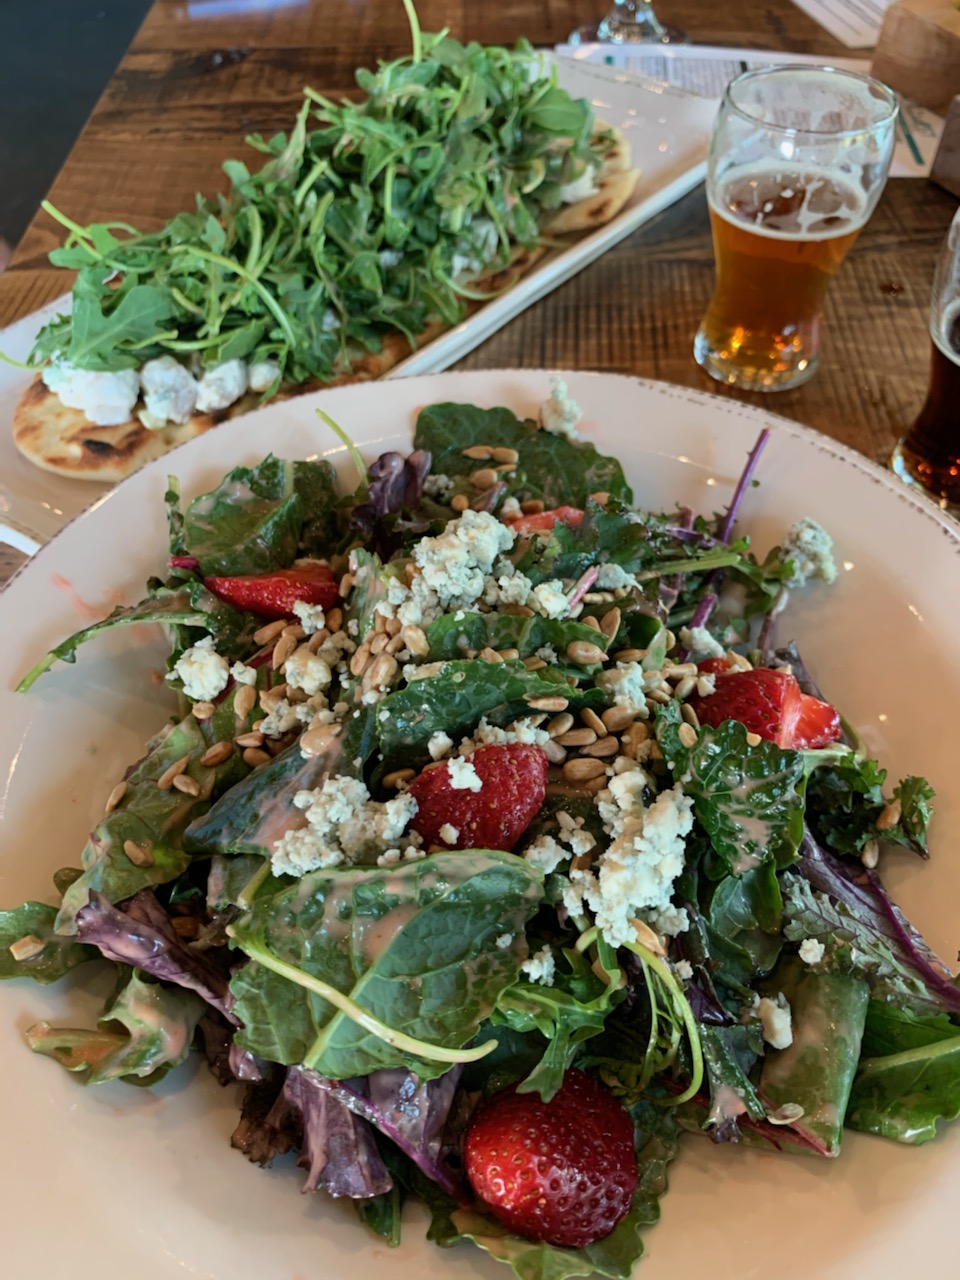
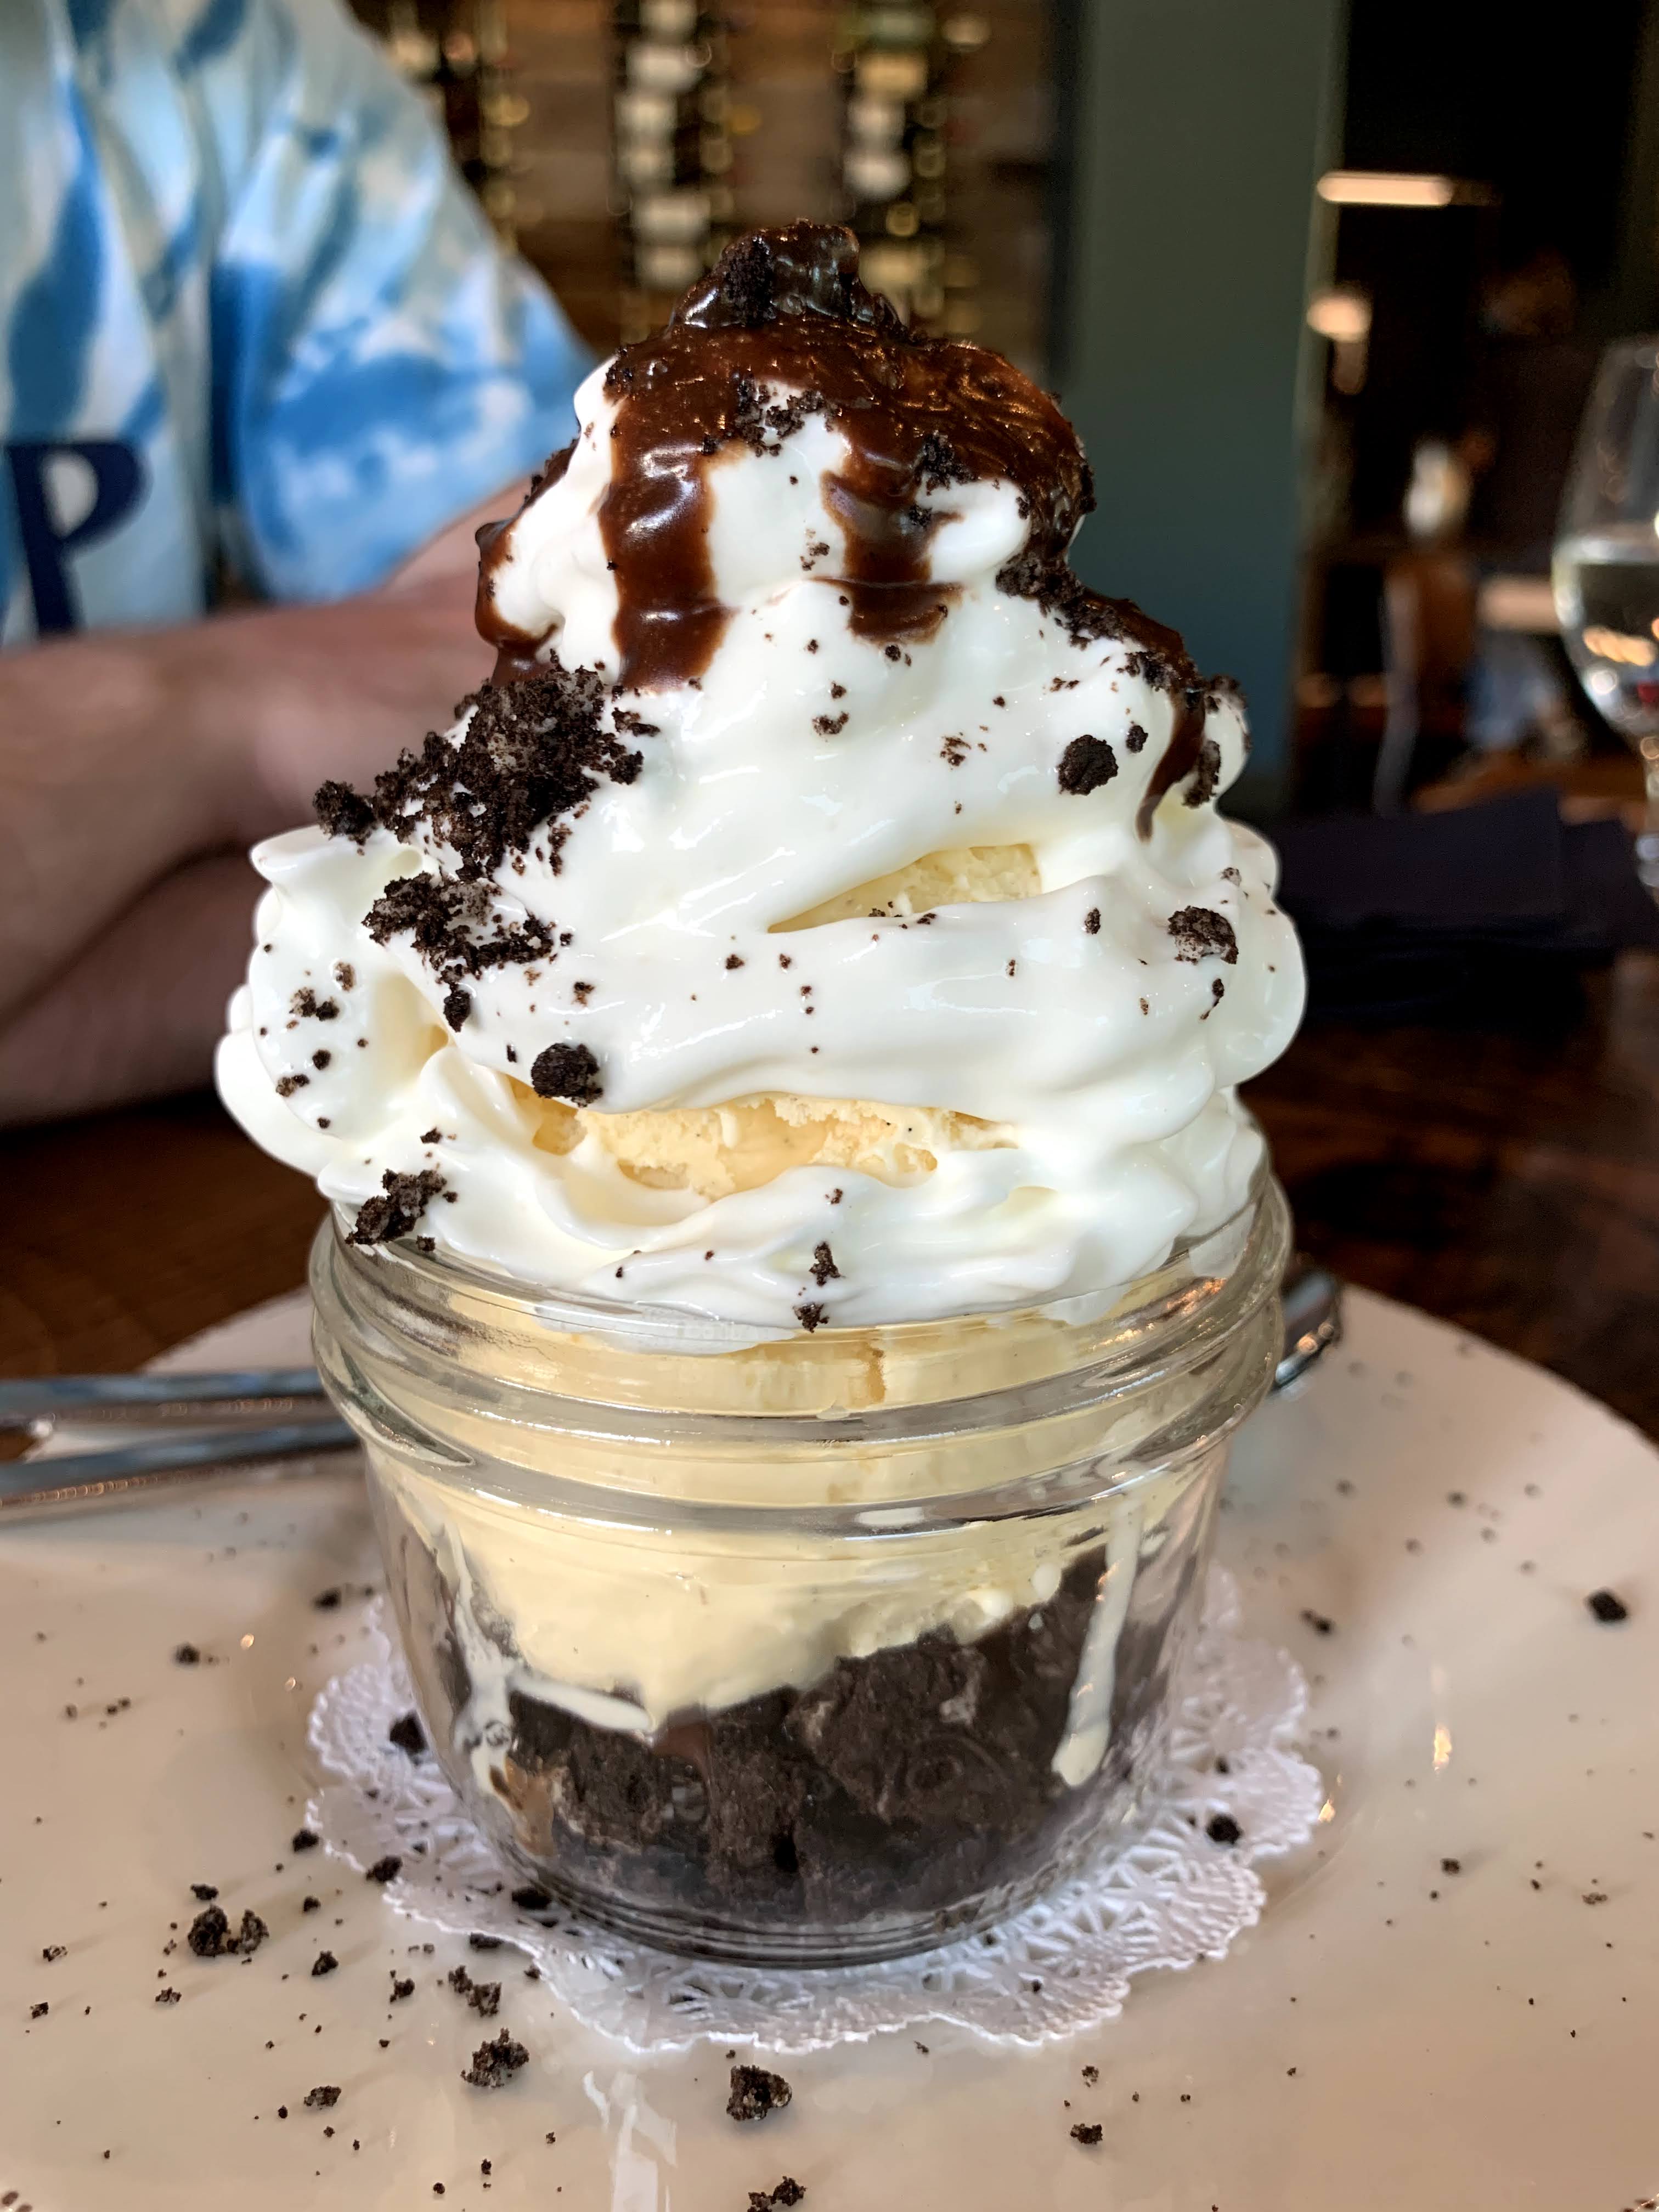
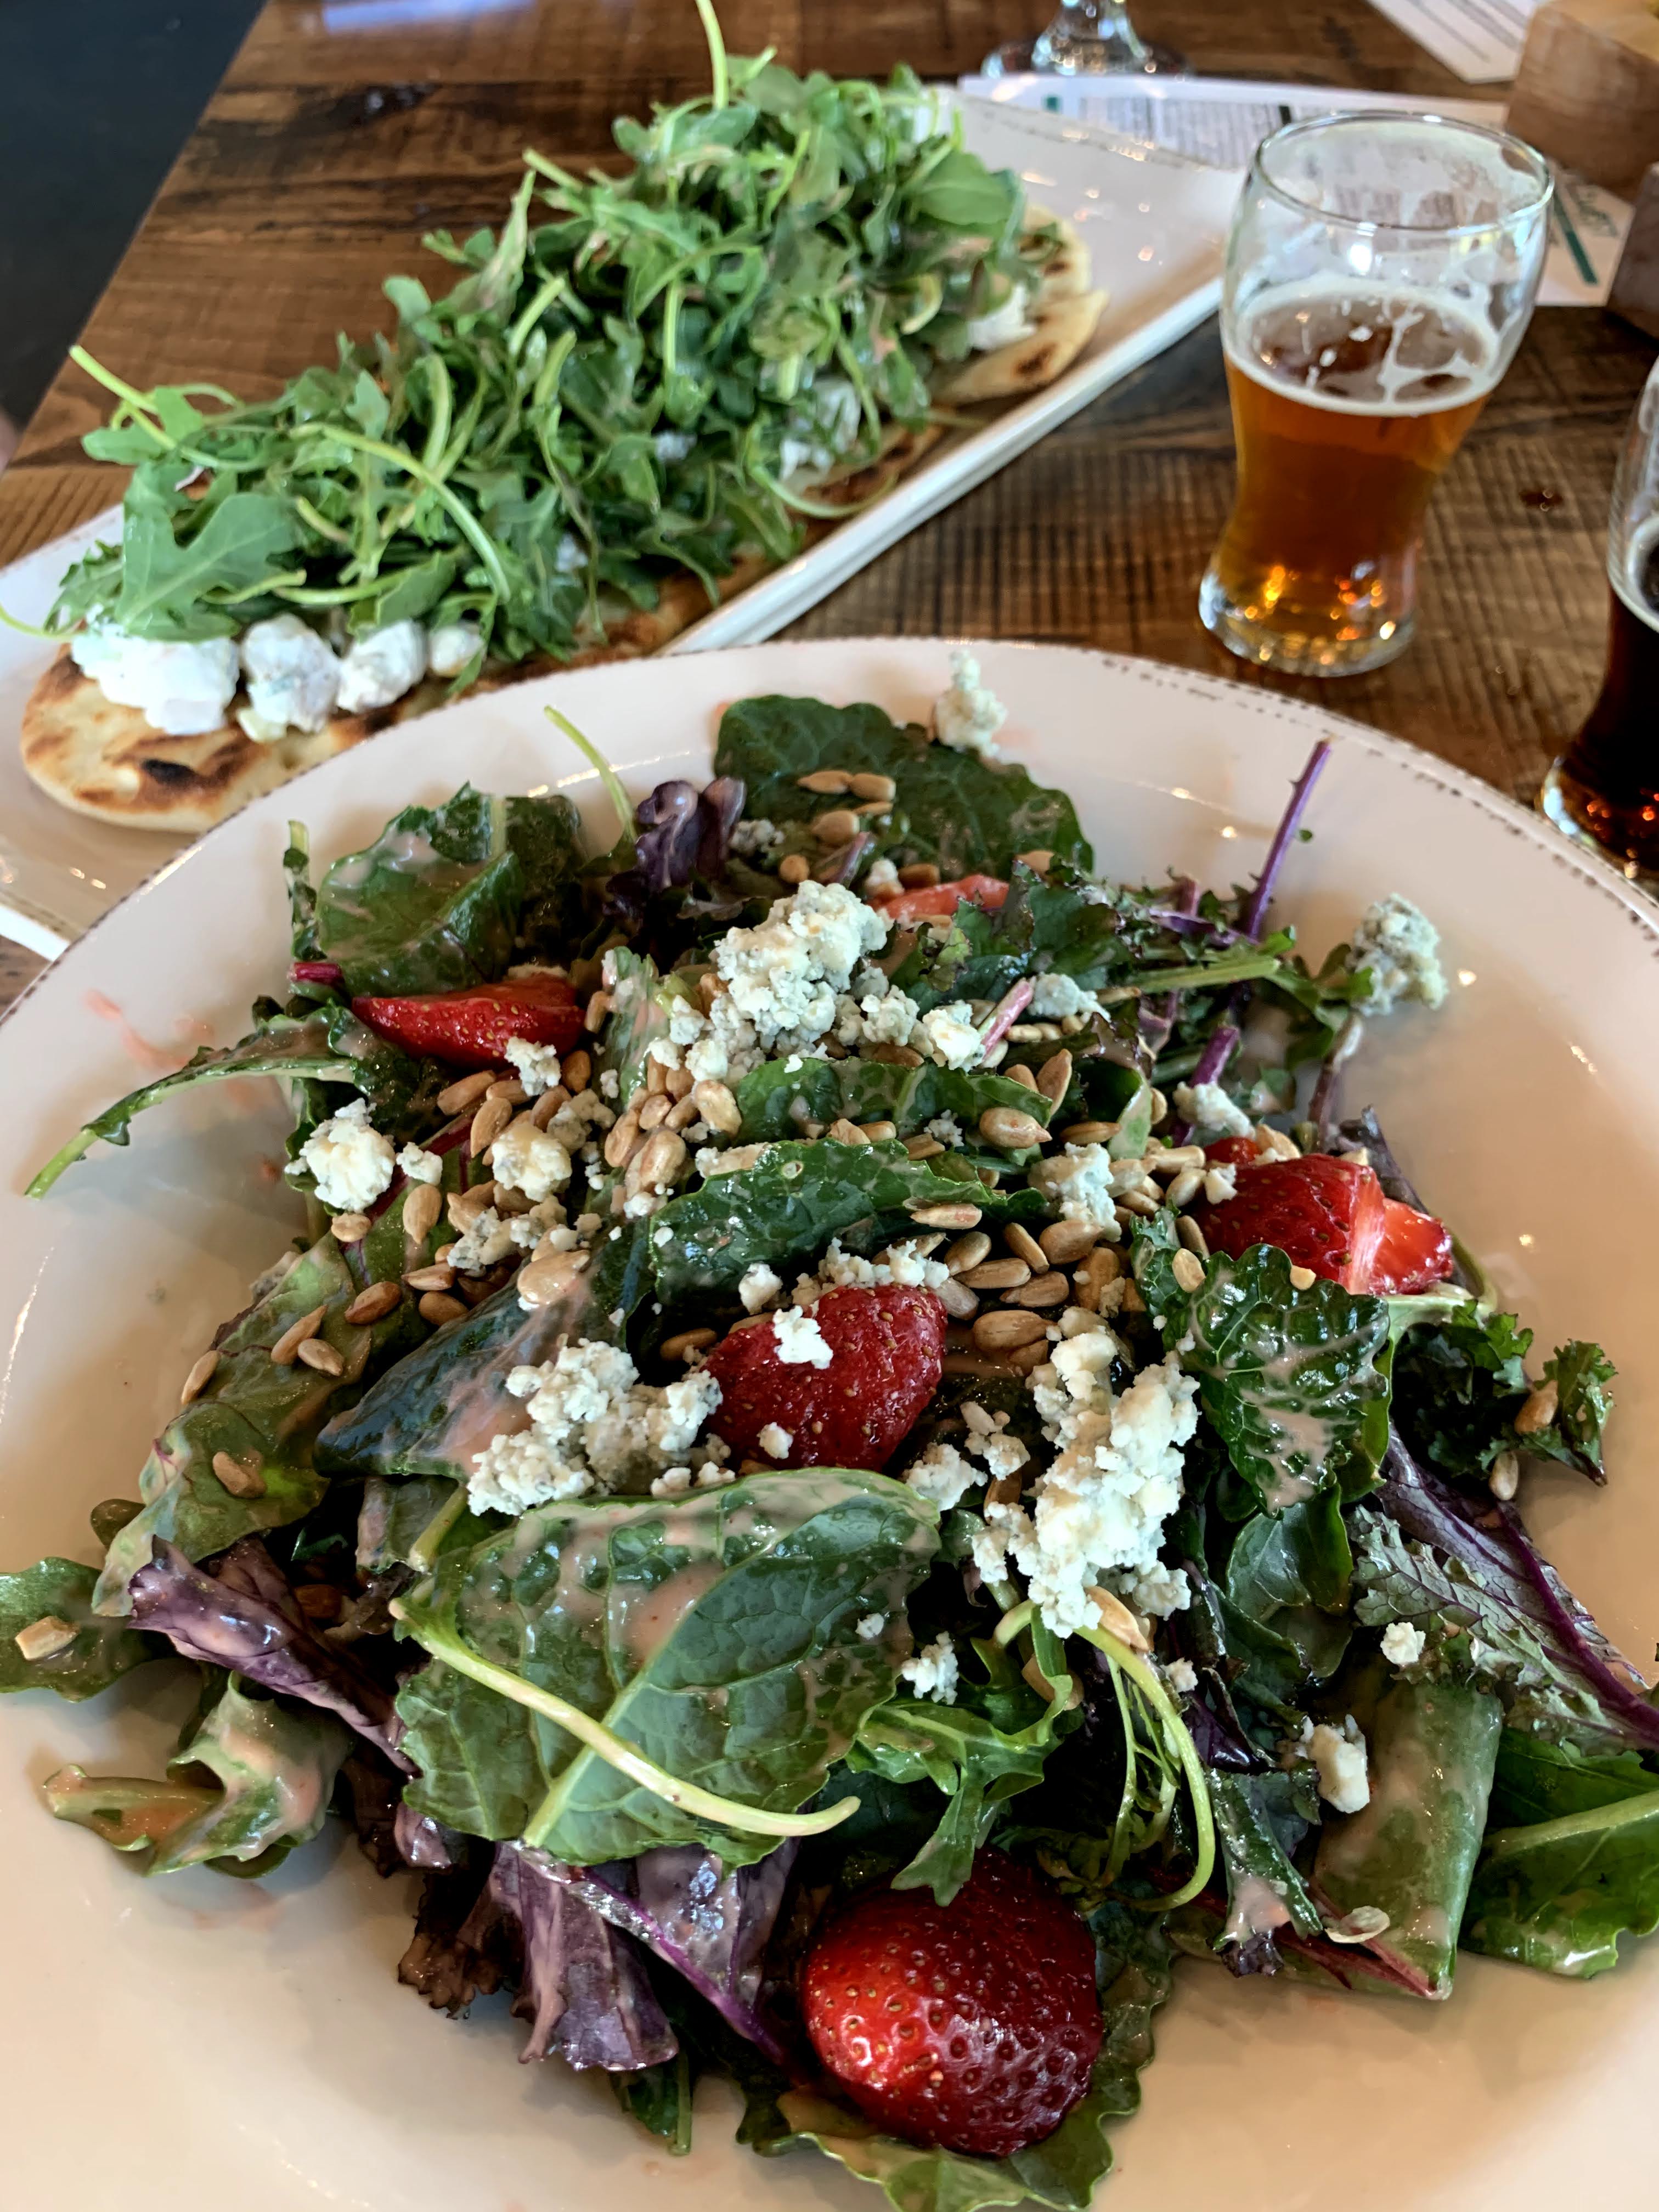
Stillwest Brewery in Jackson Hole for dinner – Beer was great, and the food was pretty good too! We got one of the flatbreads and a salad, and then a burger and the salmon bowl entrees. You can skip the dessert, though (we got the Mississippi mud pie, but it wasn’t really a mud pie – it was more so a large cup of ice cream with oreos on the bottom. Delicious, but not particularly unique).

Day 9 (Travel Day)

It was a full day of travel from Yellowstone to Colorado

Rioja for dinner in Denver. The meal was good, but a bit salty. The signature cocktails were really unique and VERY tasty. We got the sweet breads (tried this for the first time after watching people cook it on Chopped, but full disclosure these are goat brains. They were well done, but the texture a little odd) and ceviche appetizer, and the shrimp gnocchi and octopus entrees. The octopus was some of the most tender I have ever had. Would recommend all of it!

Day 10 (Estes / Rocky Mountain National Park, Colorado)

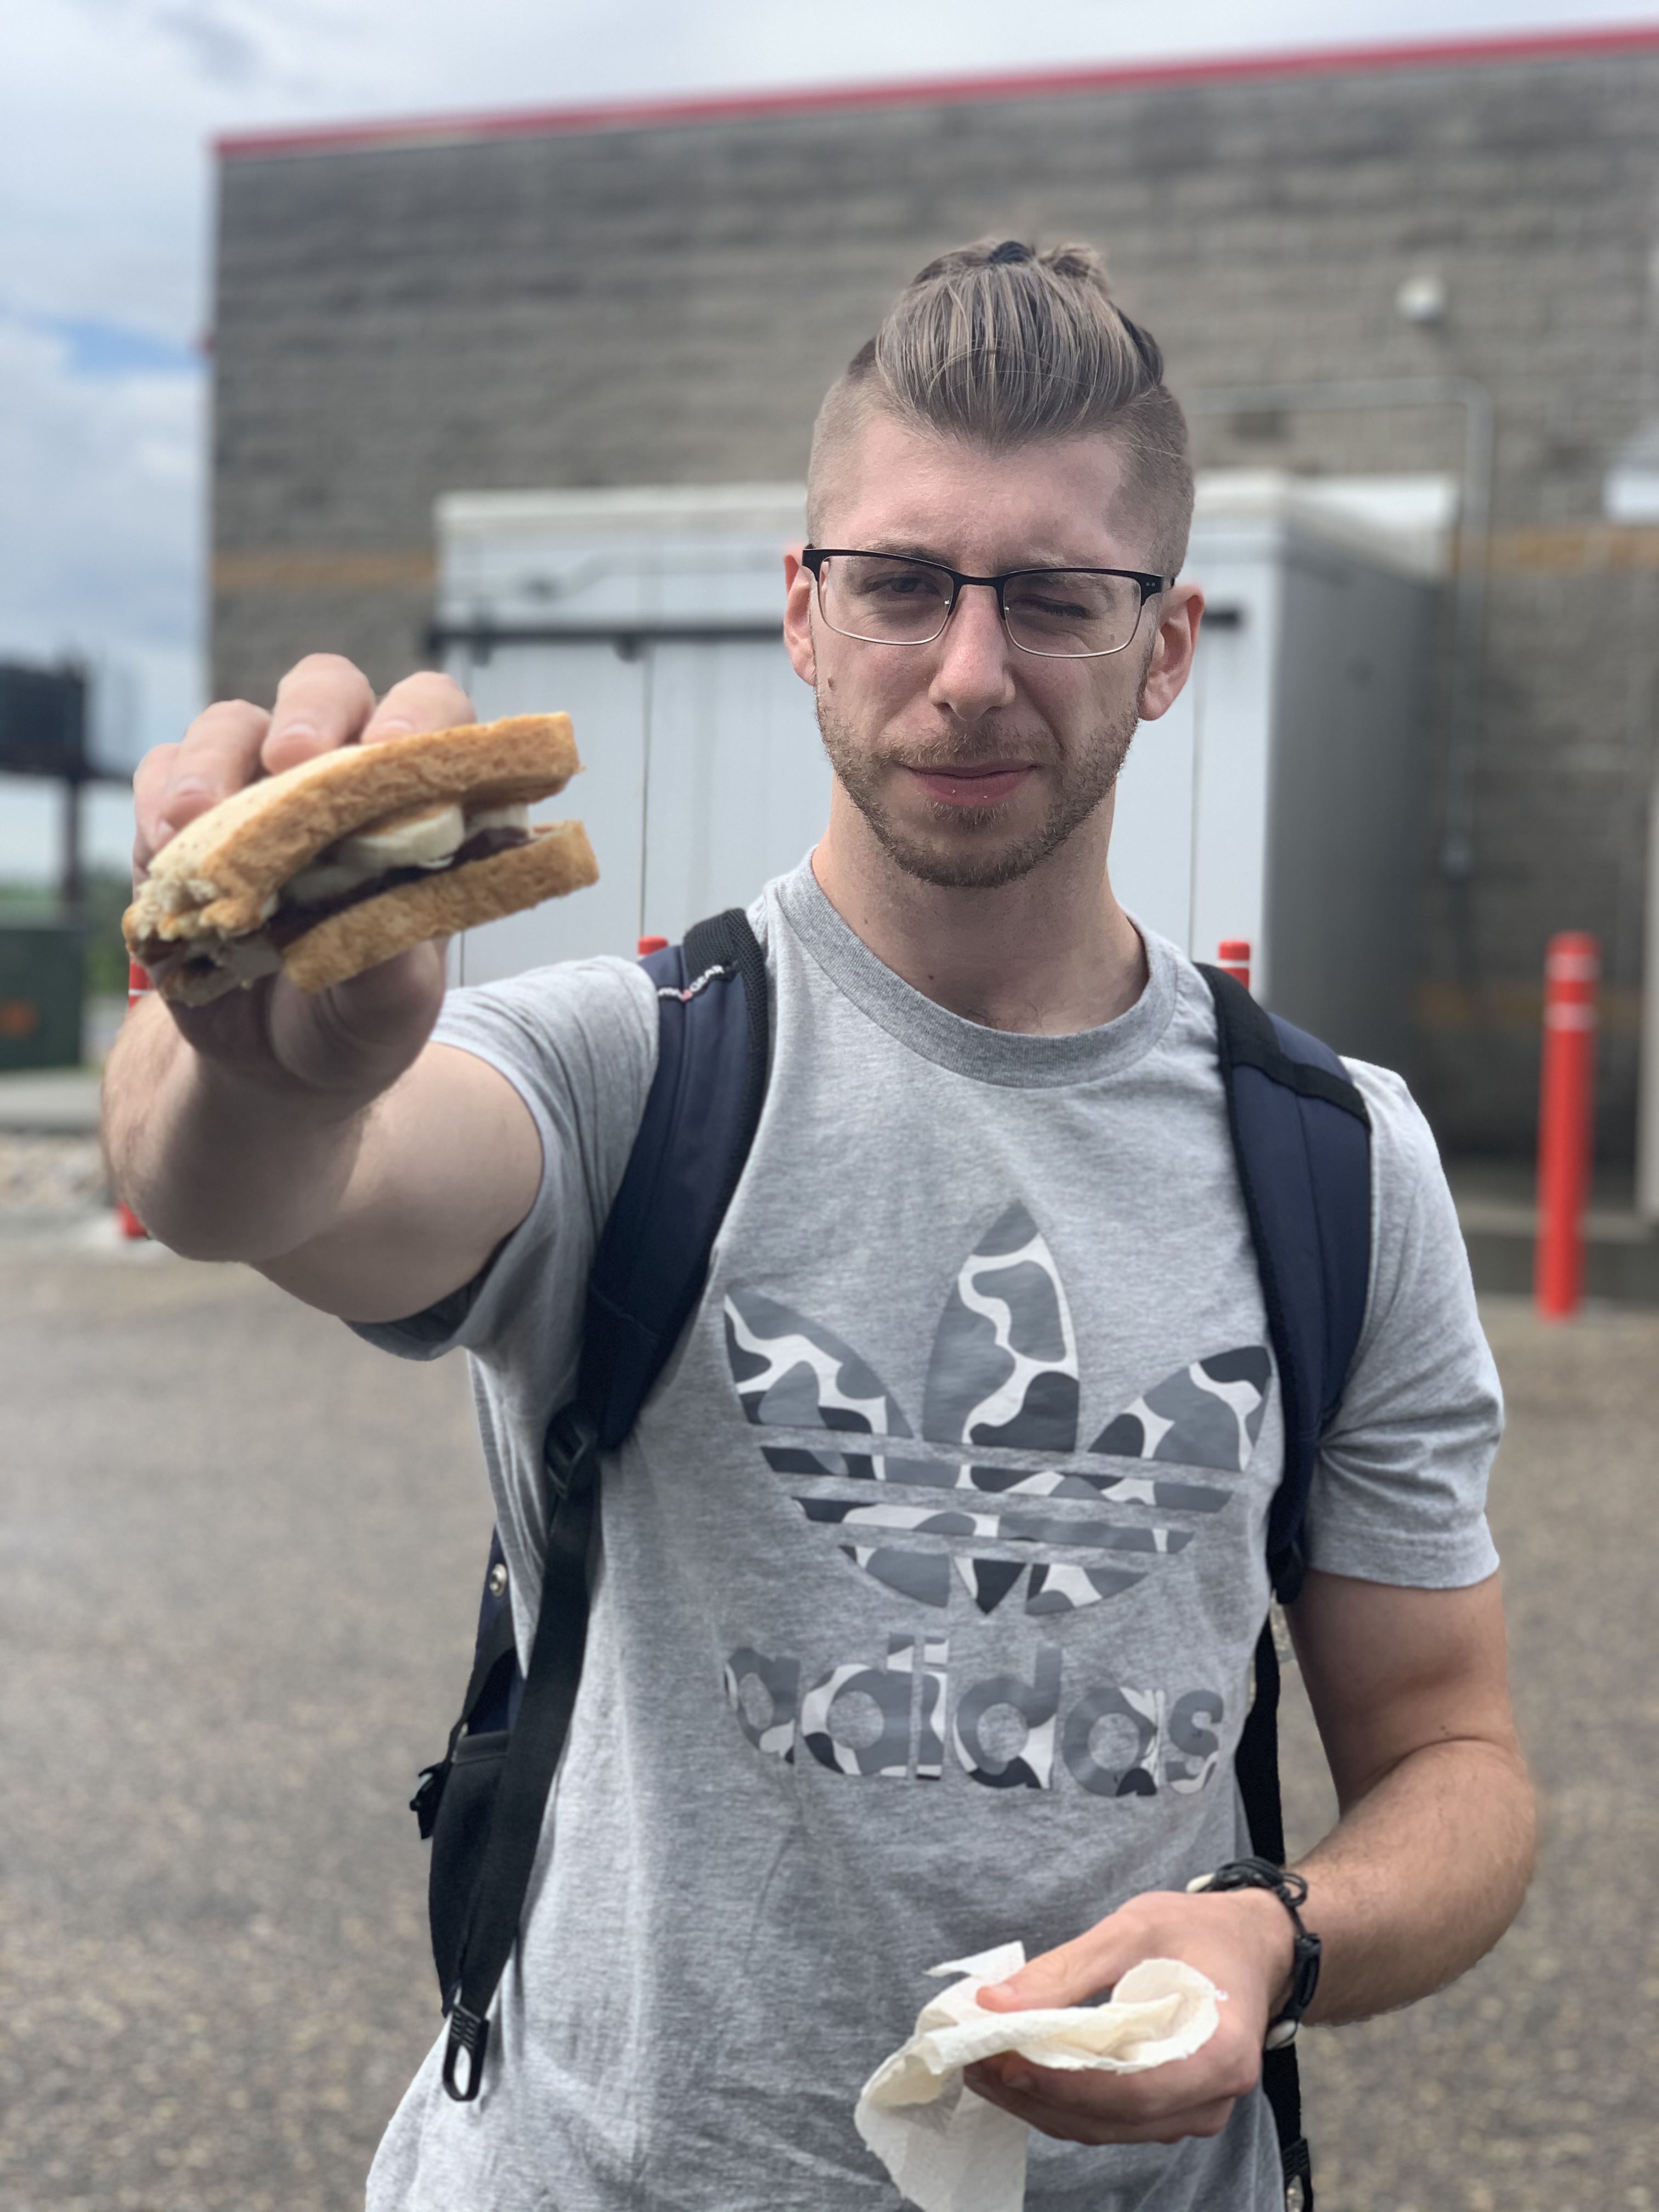
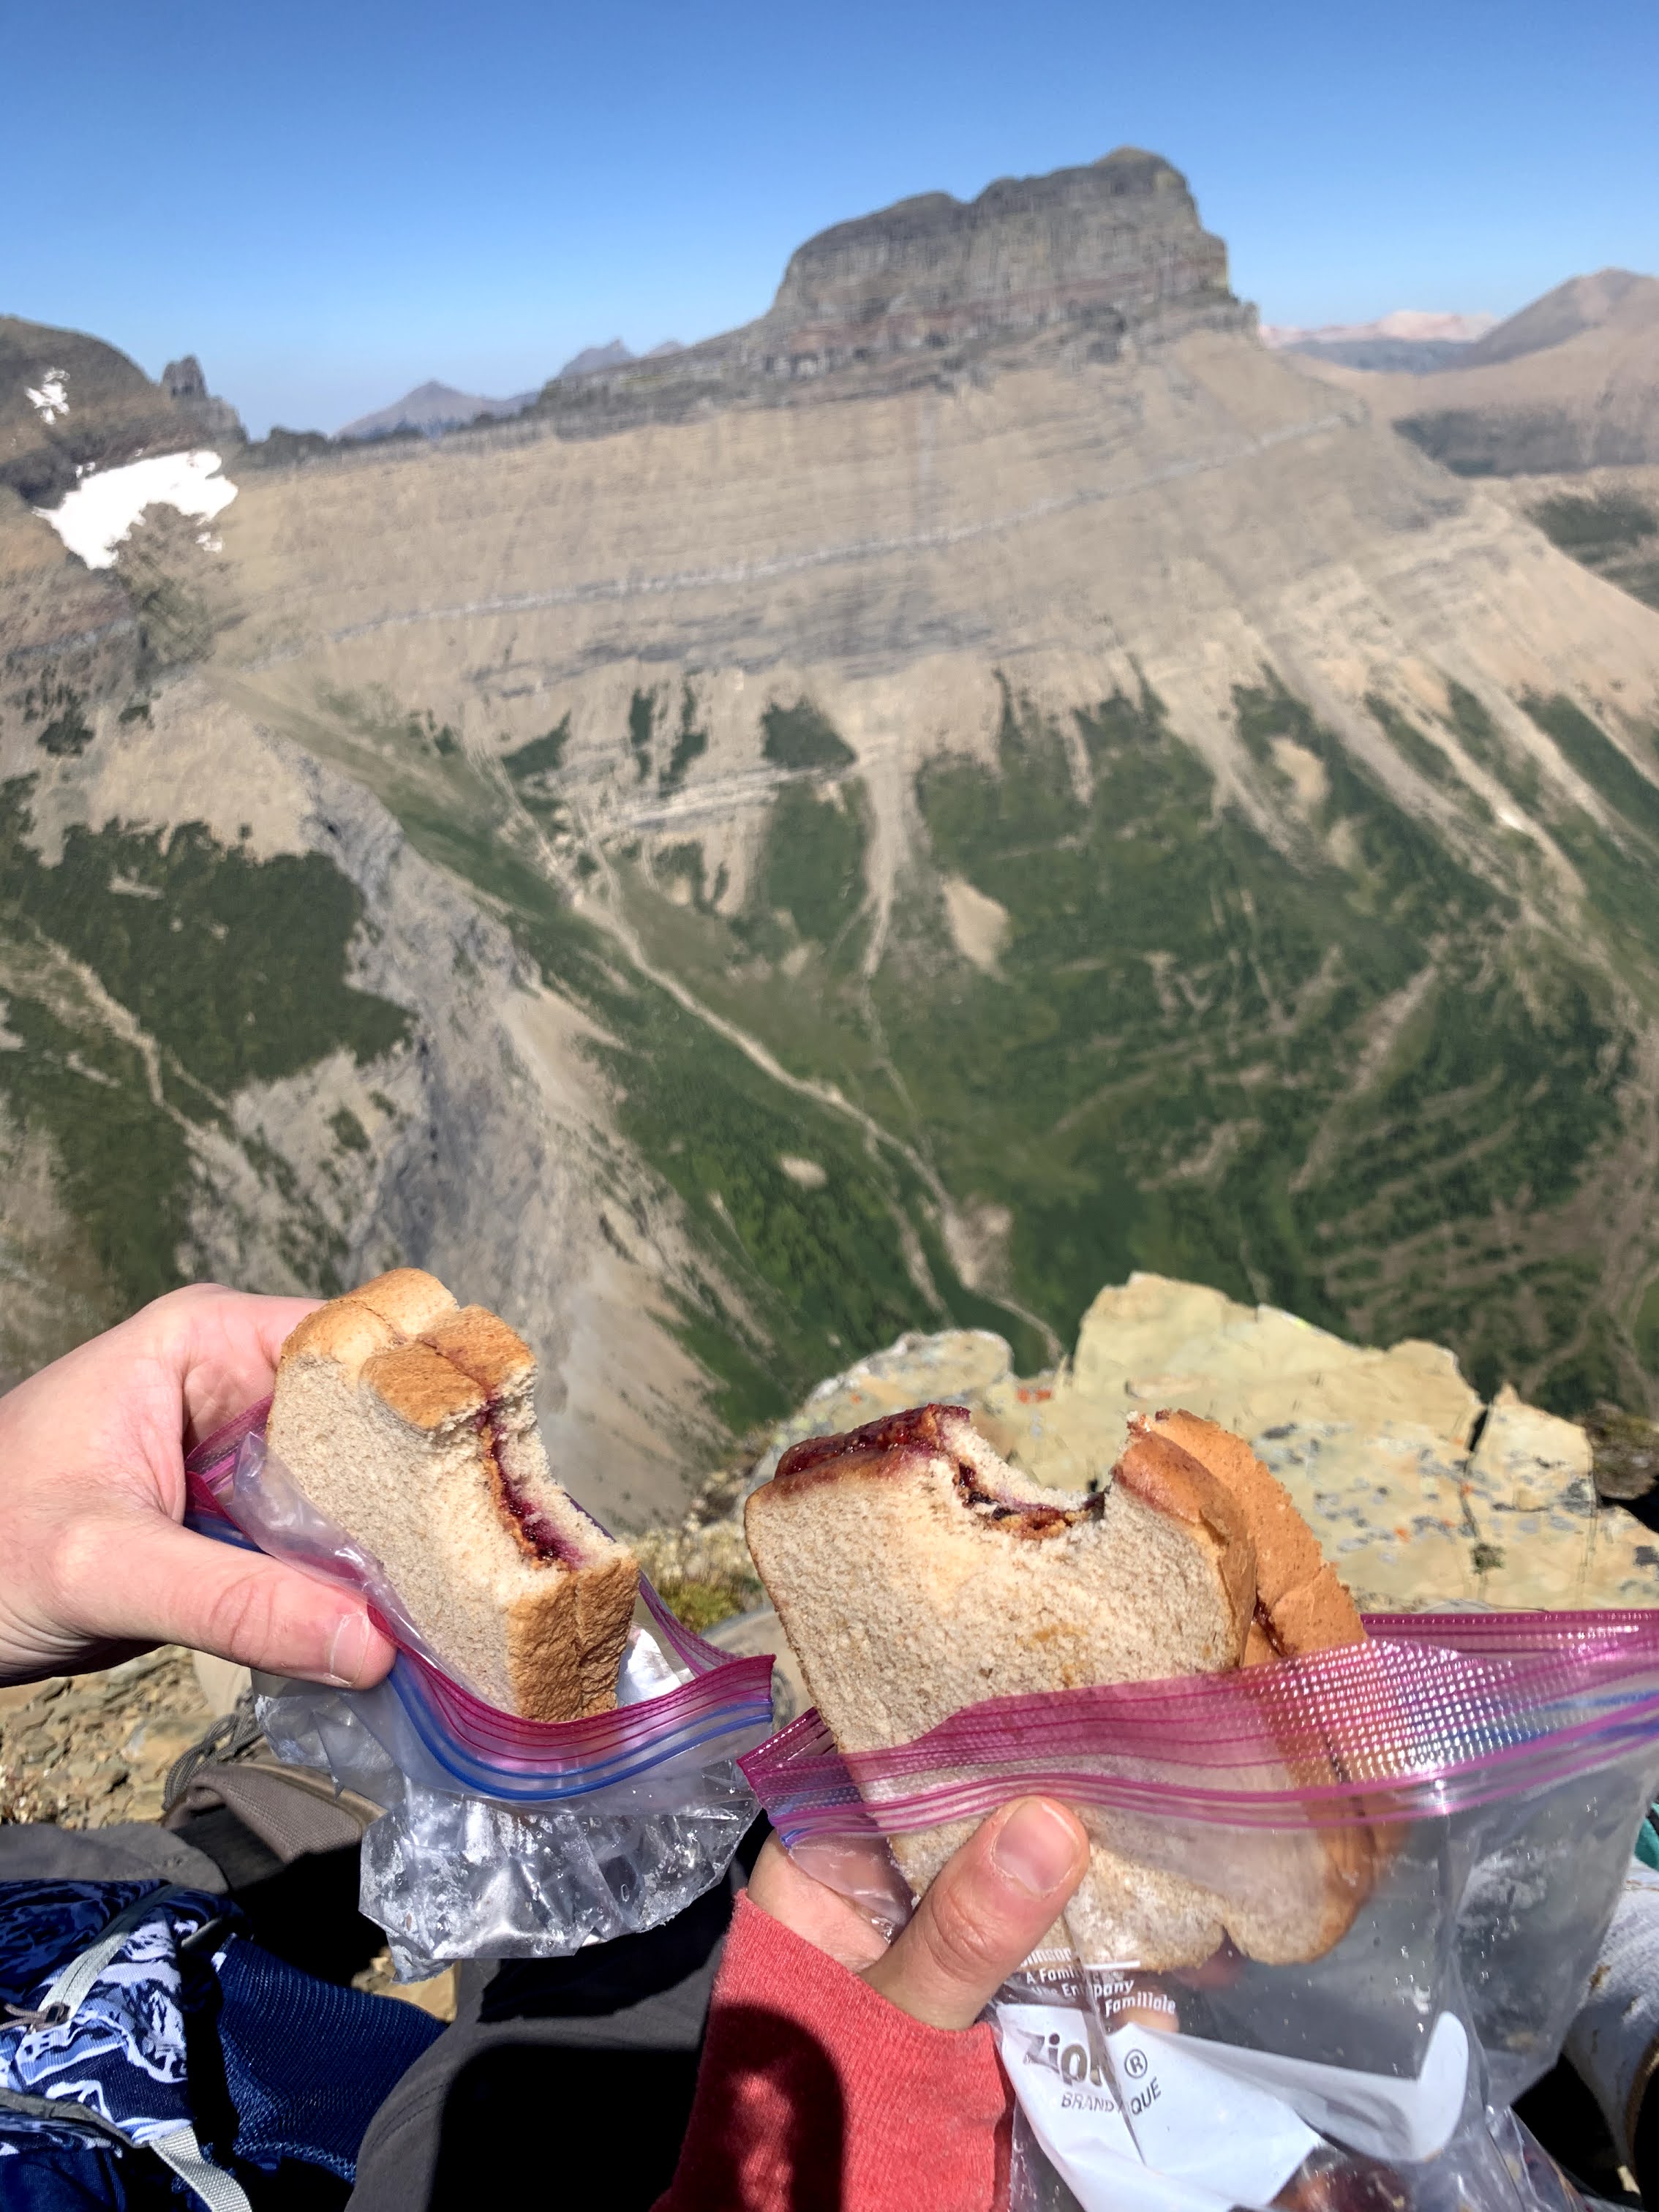
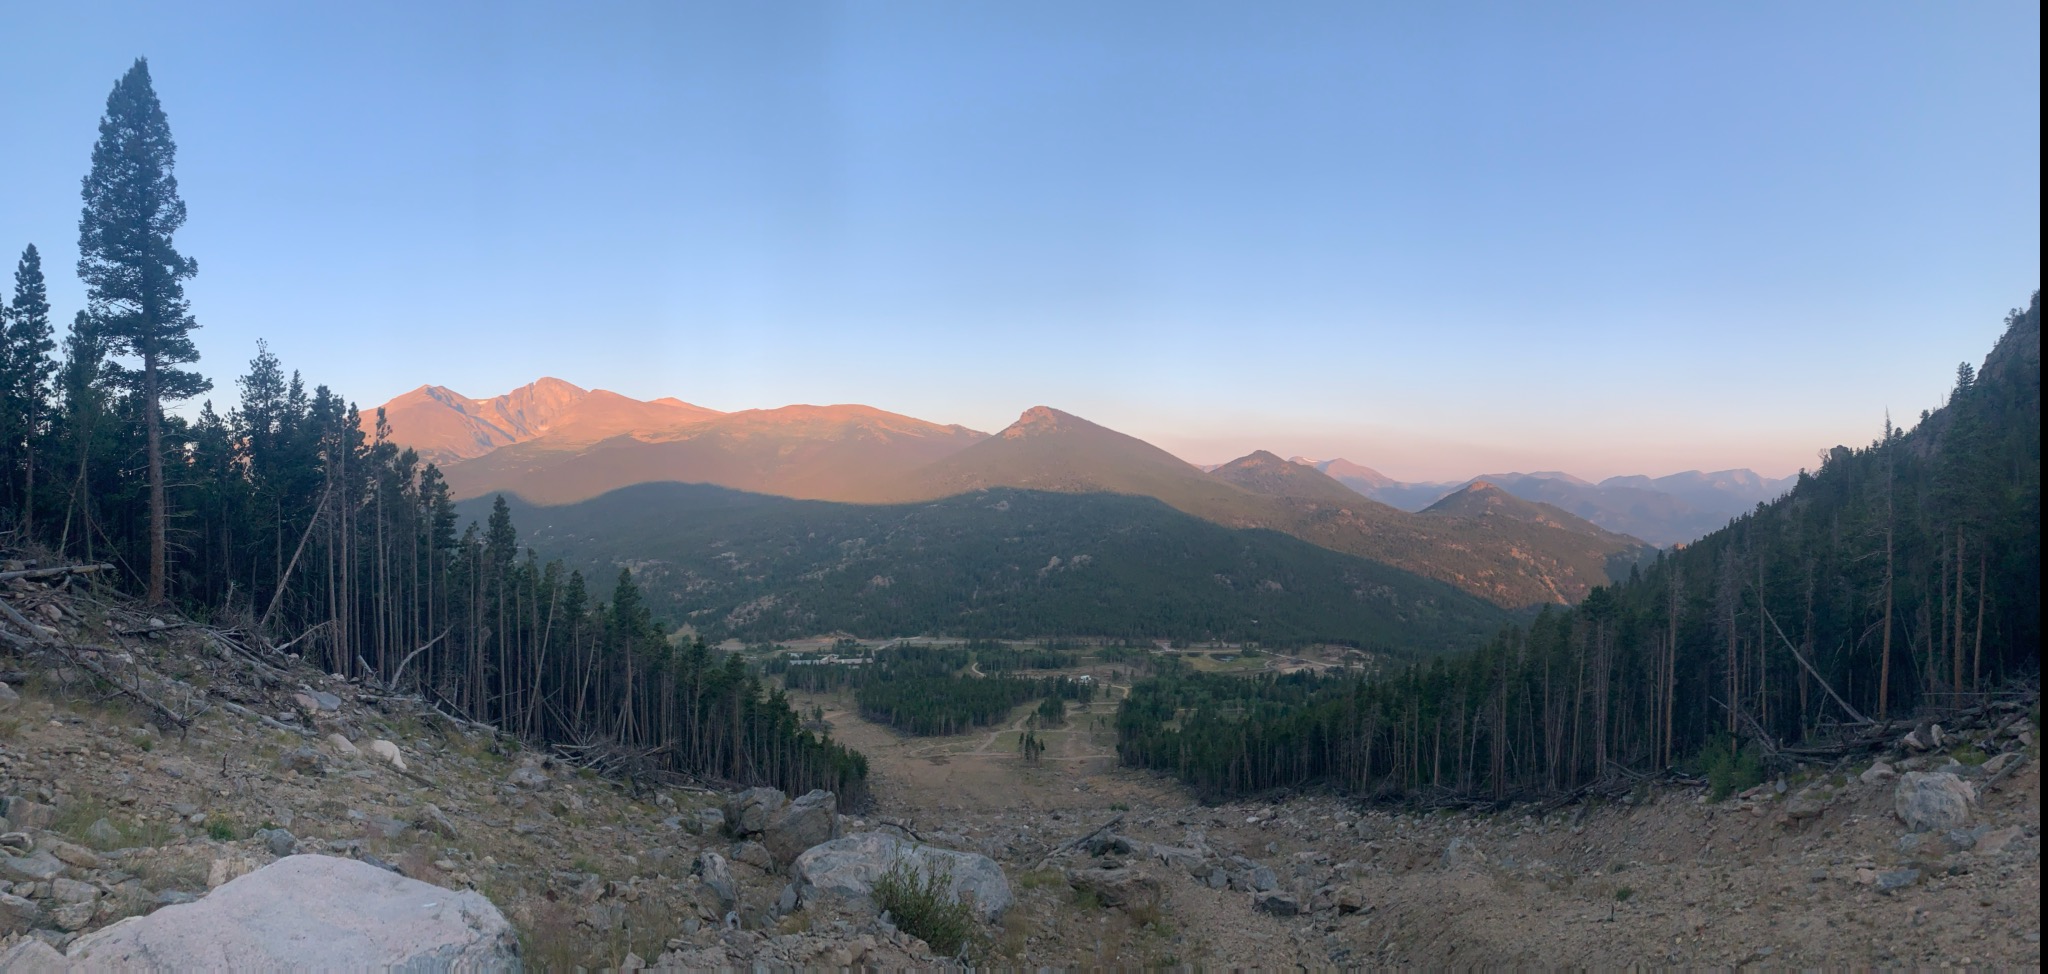
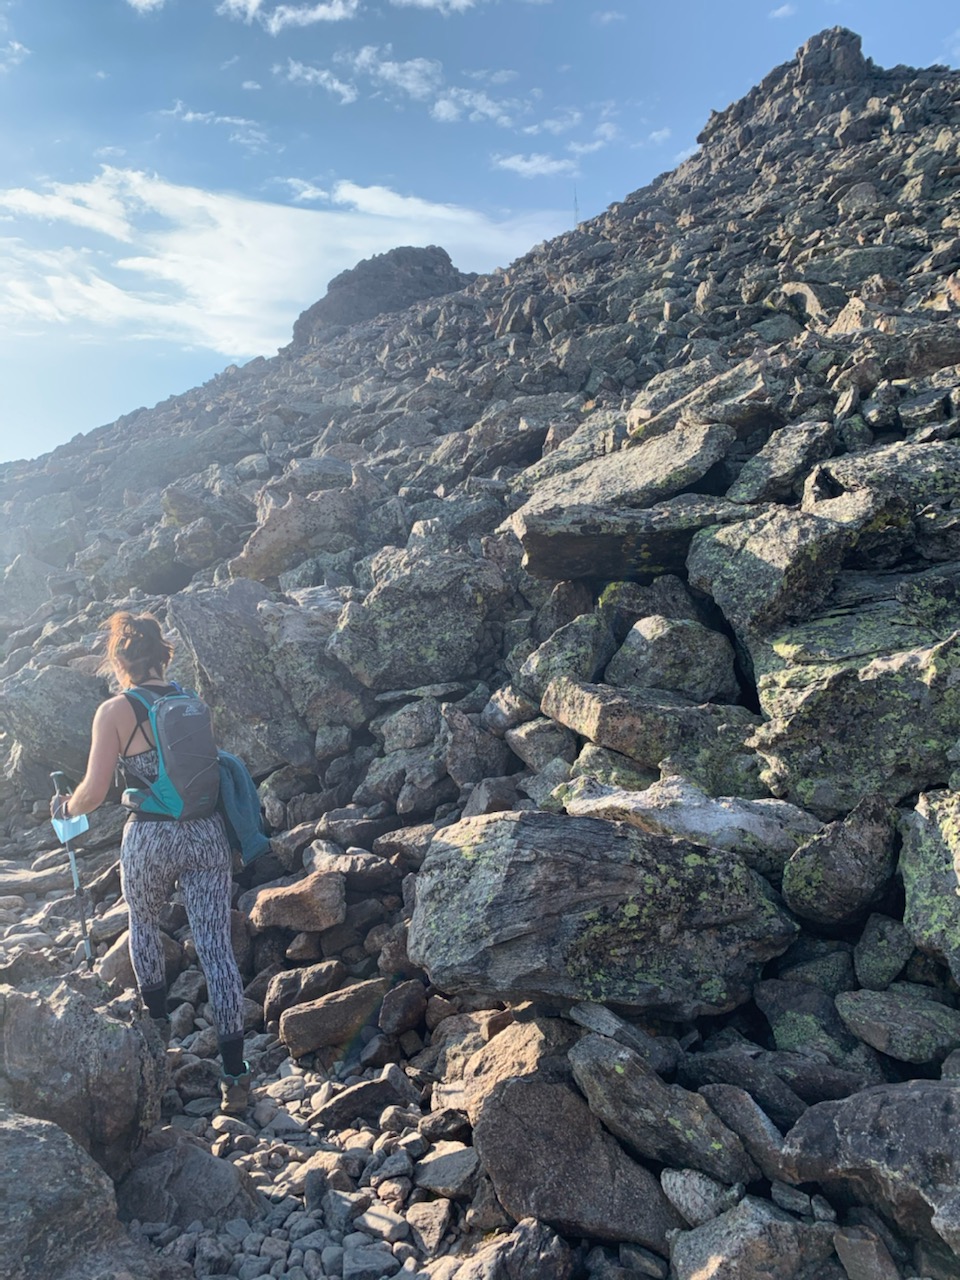
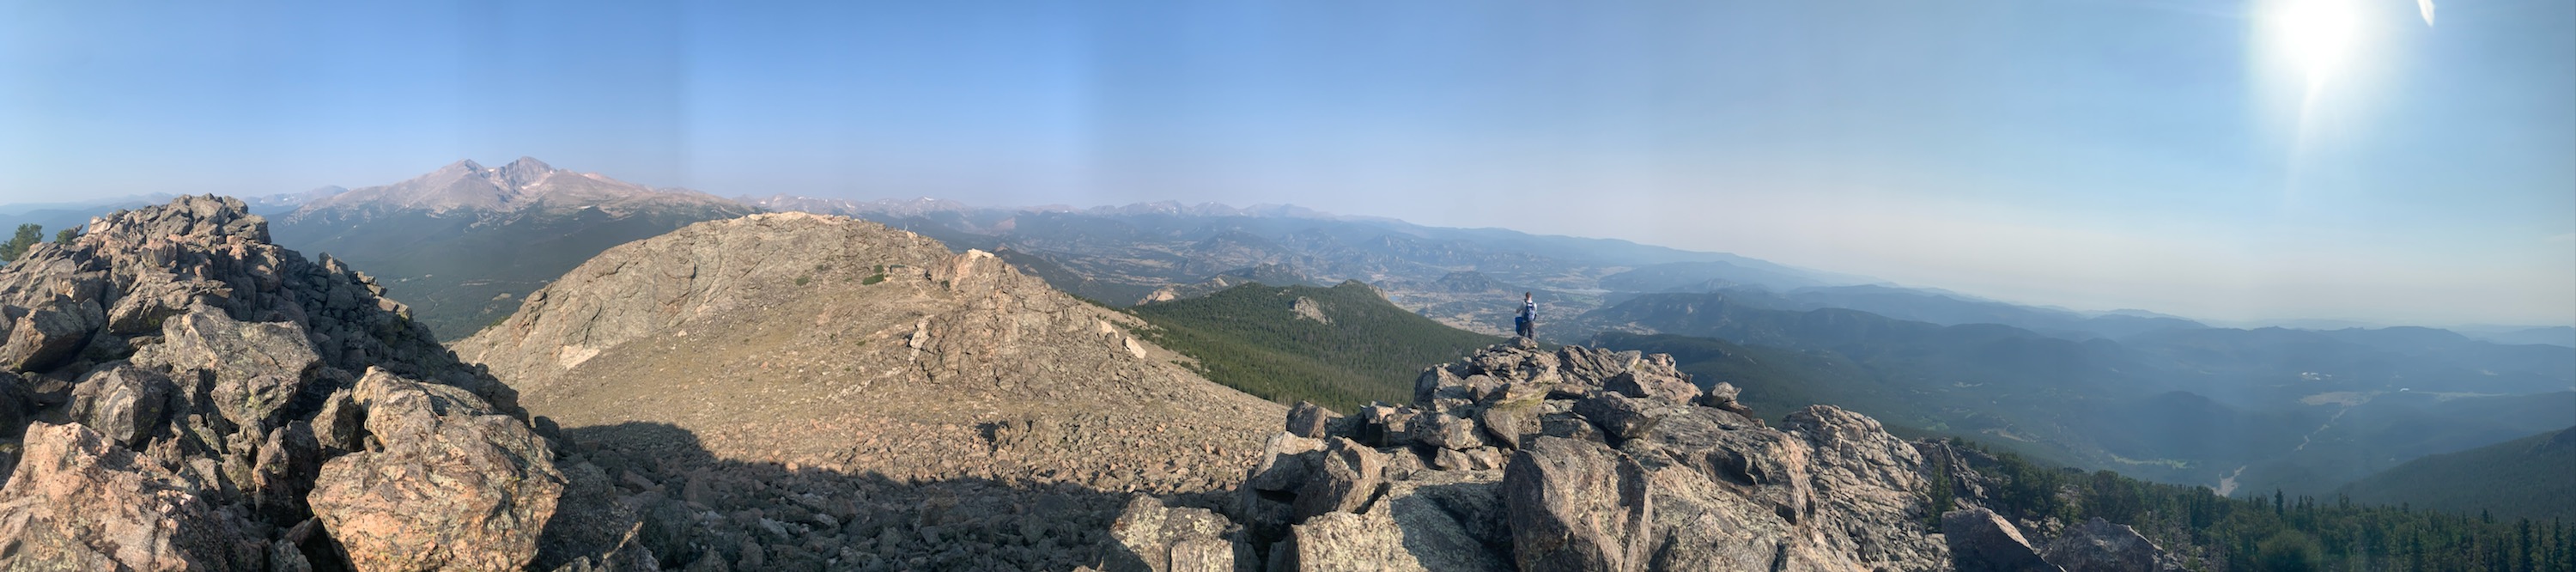
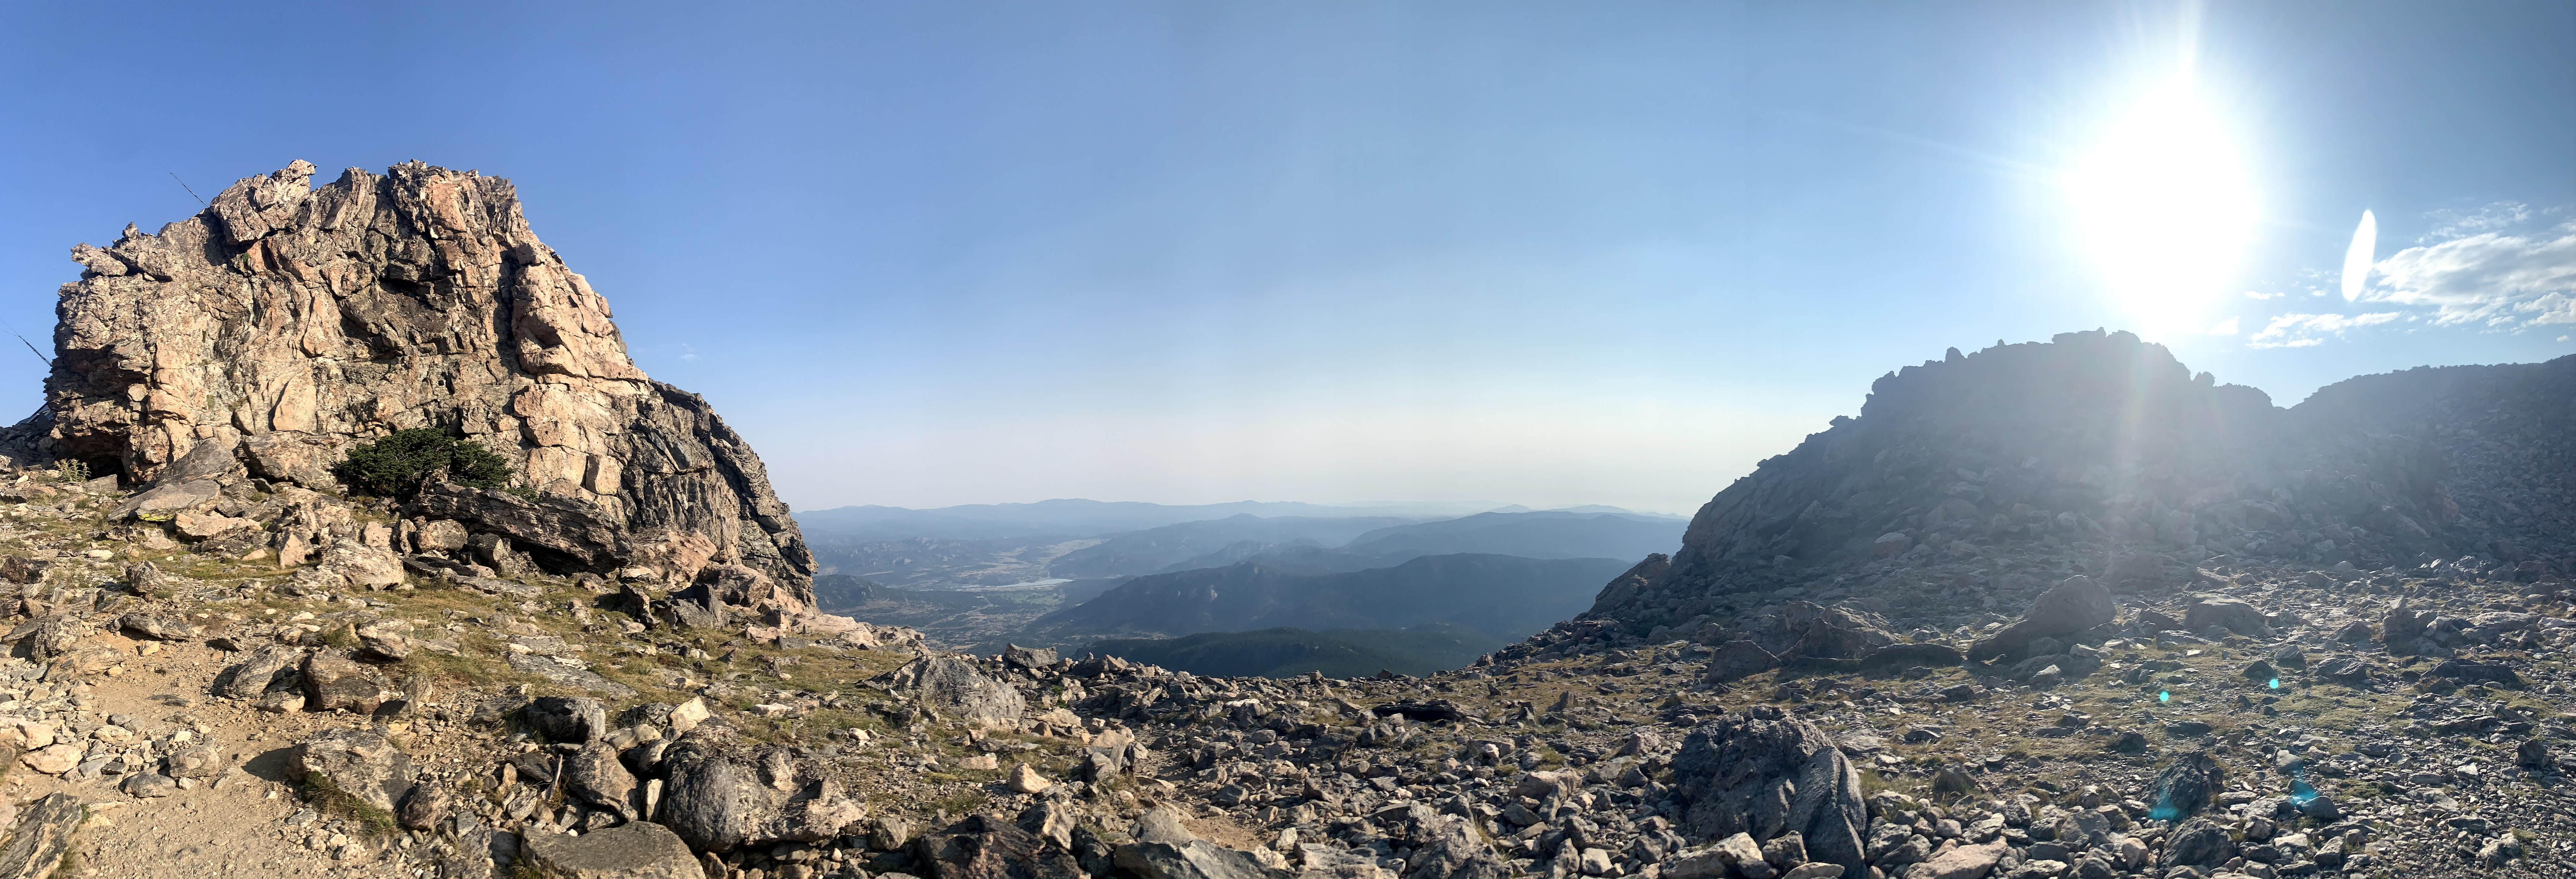
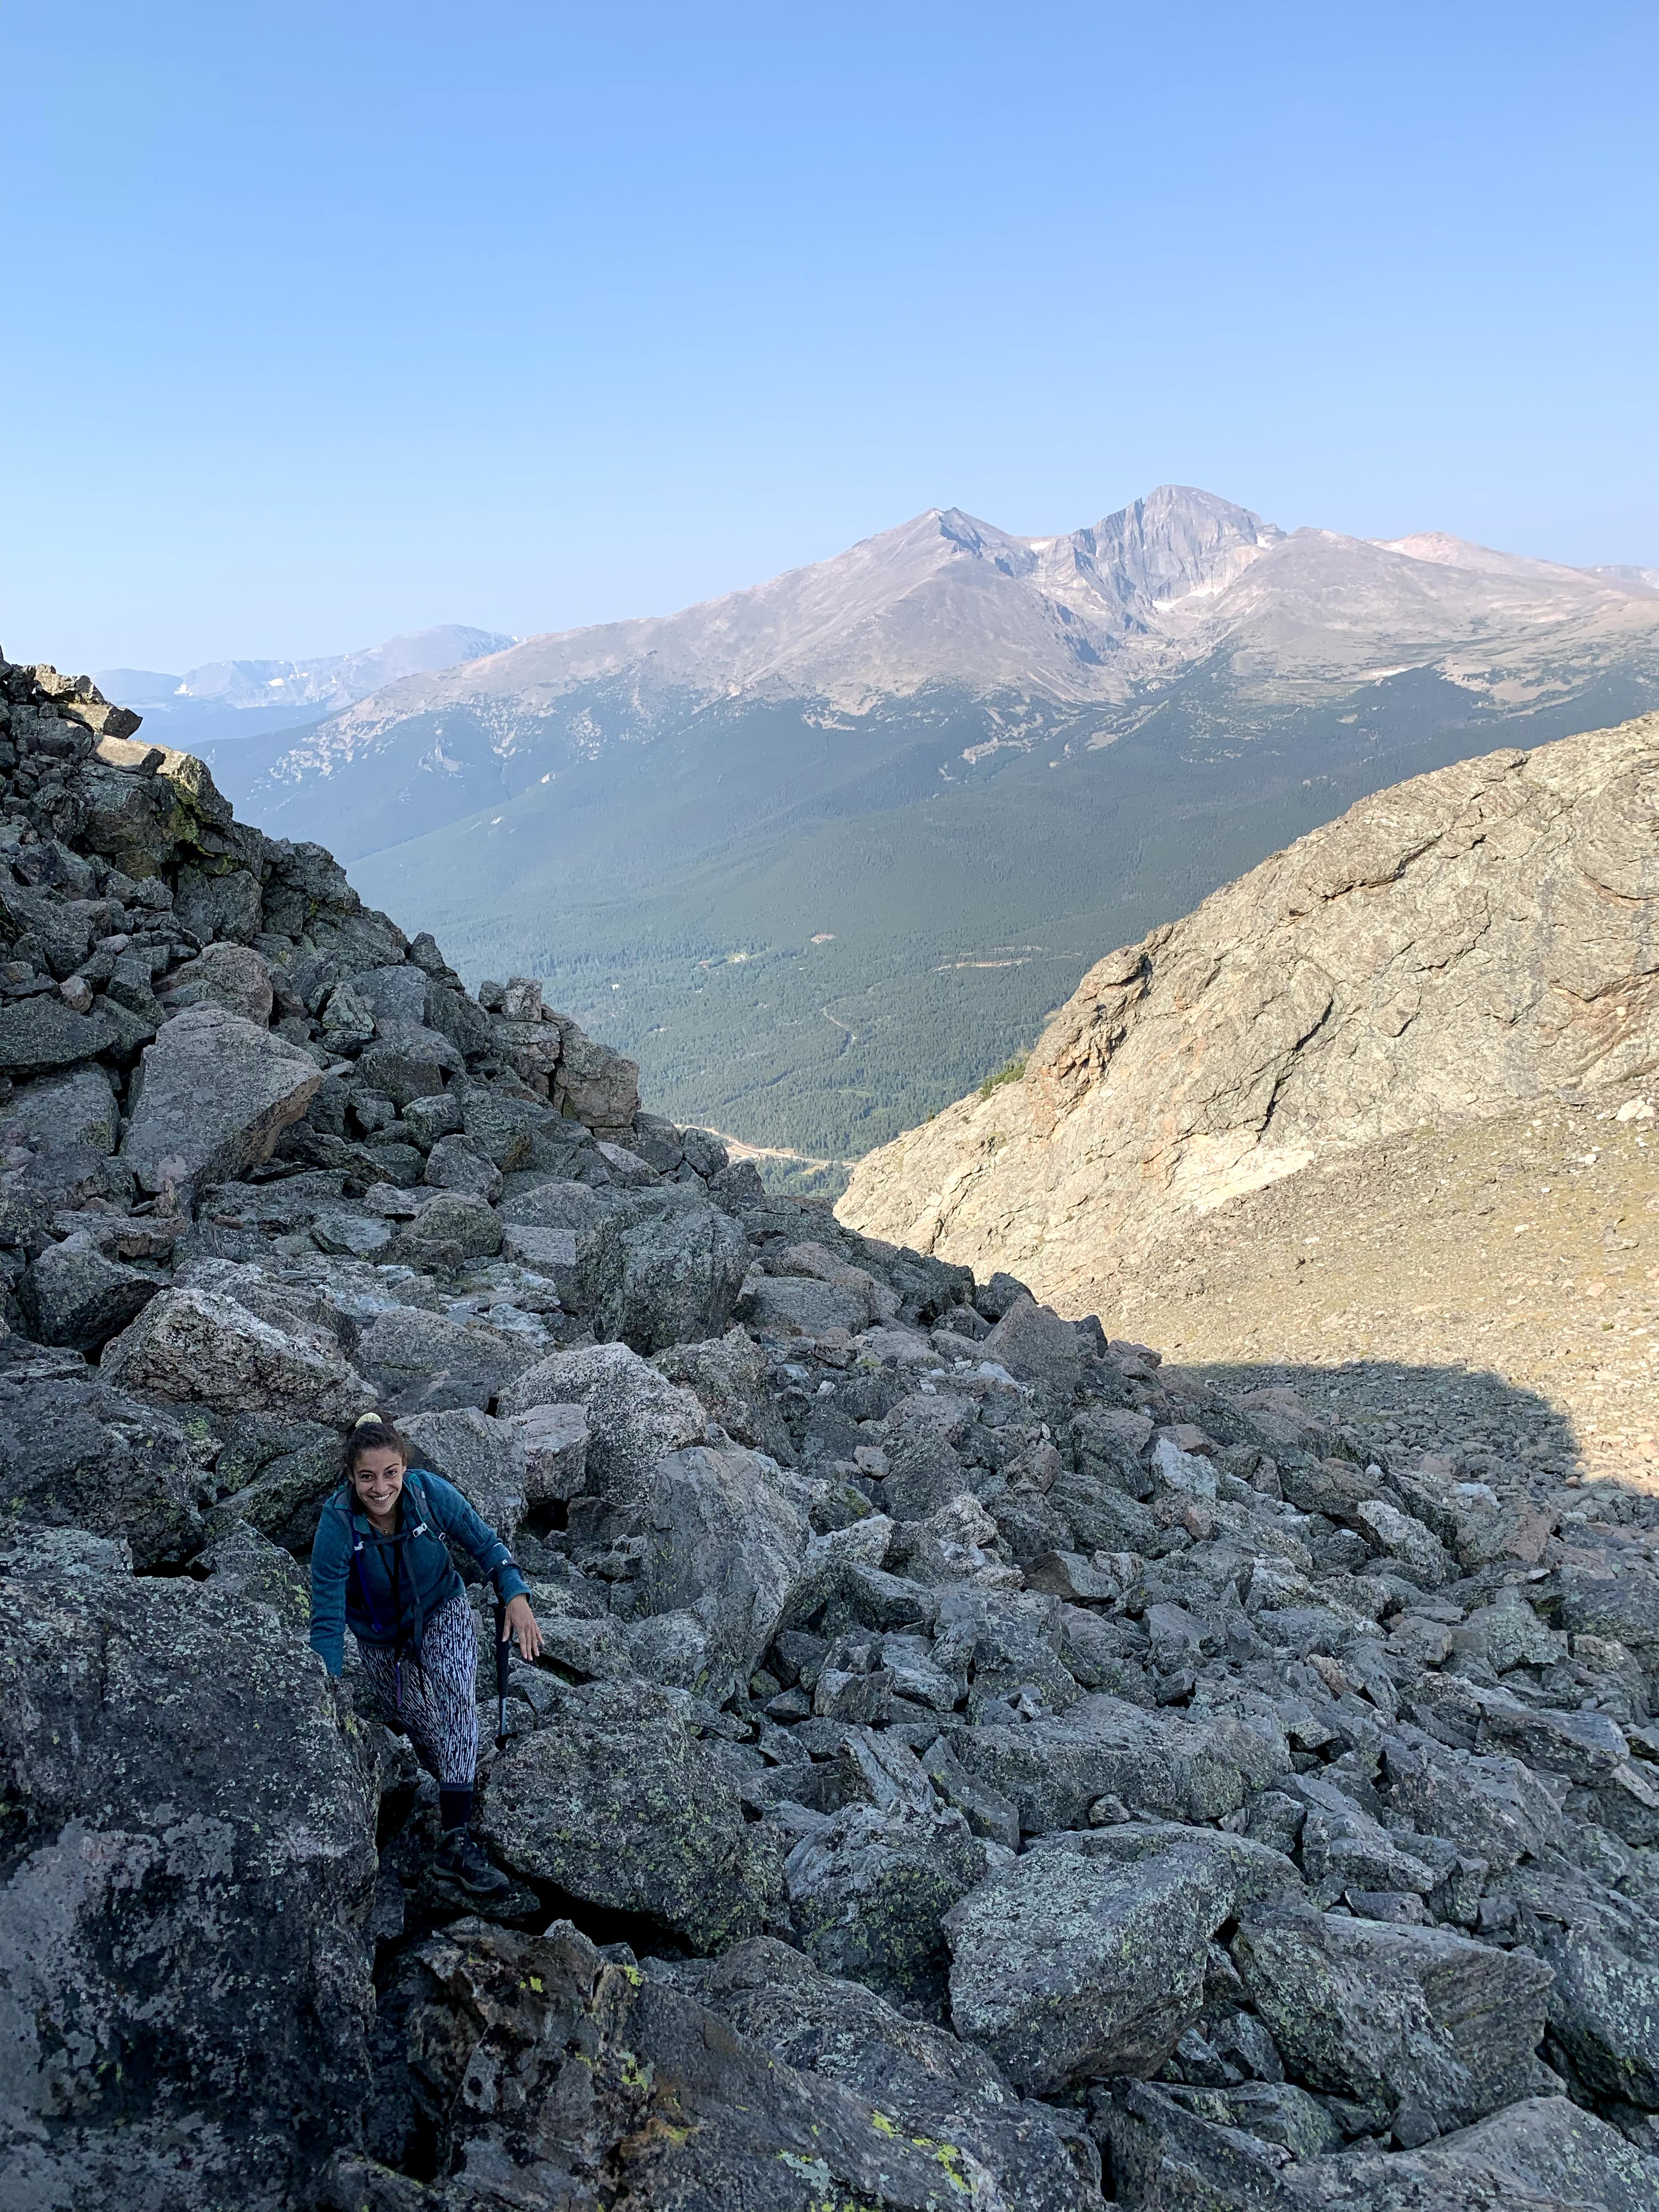
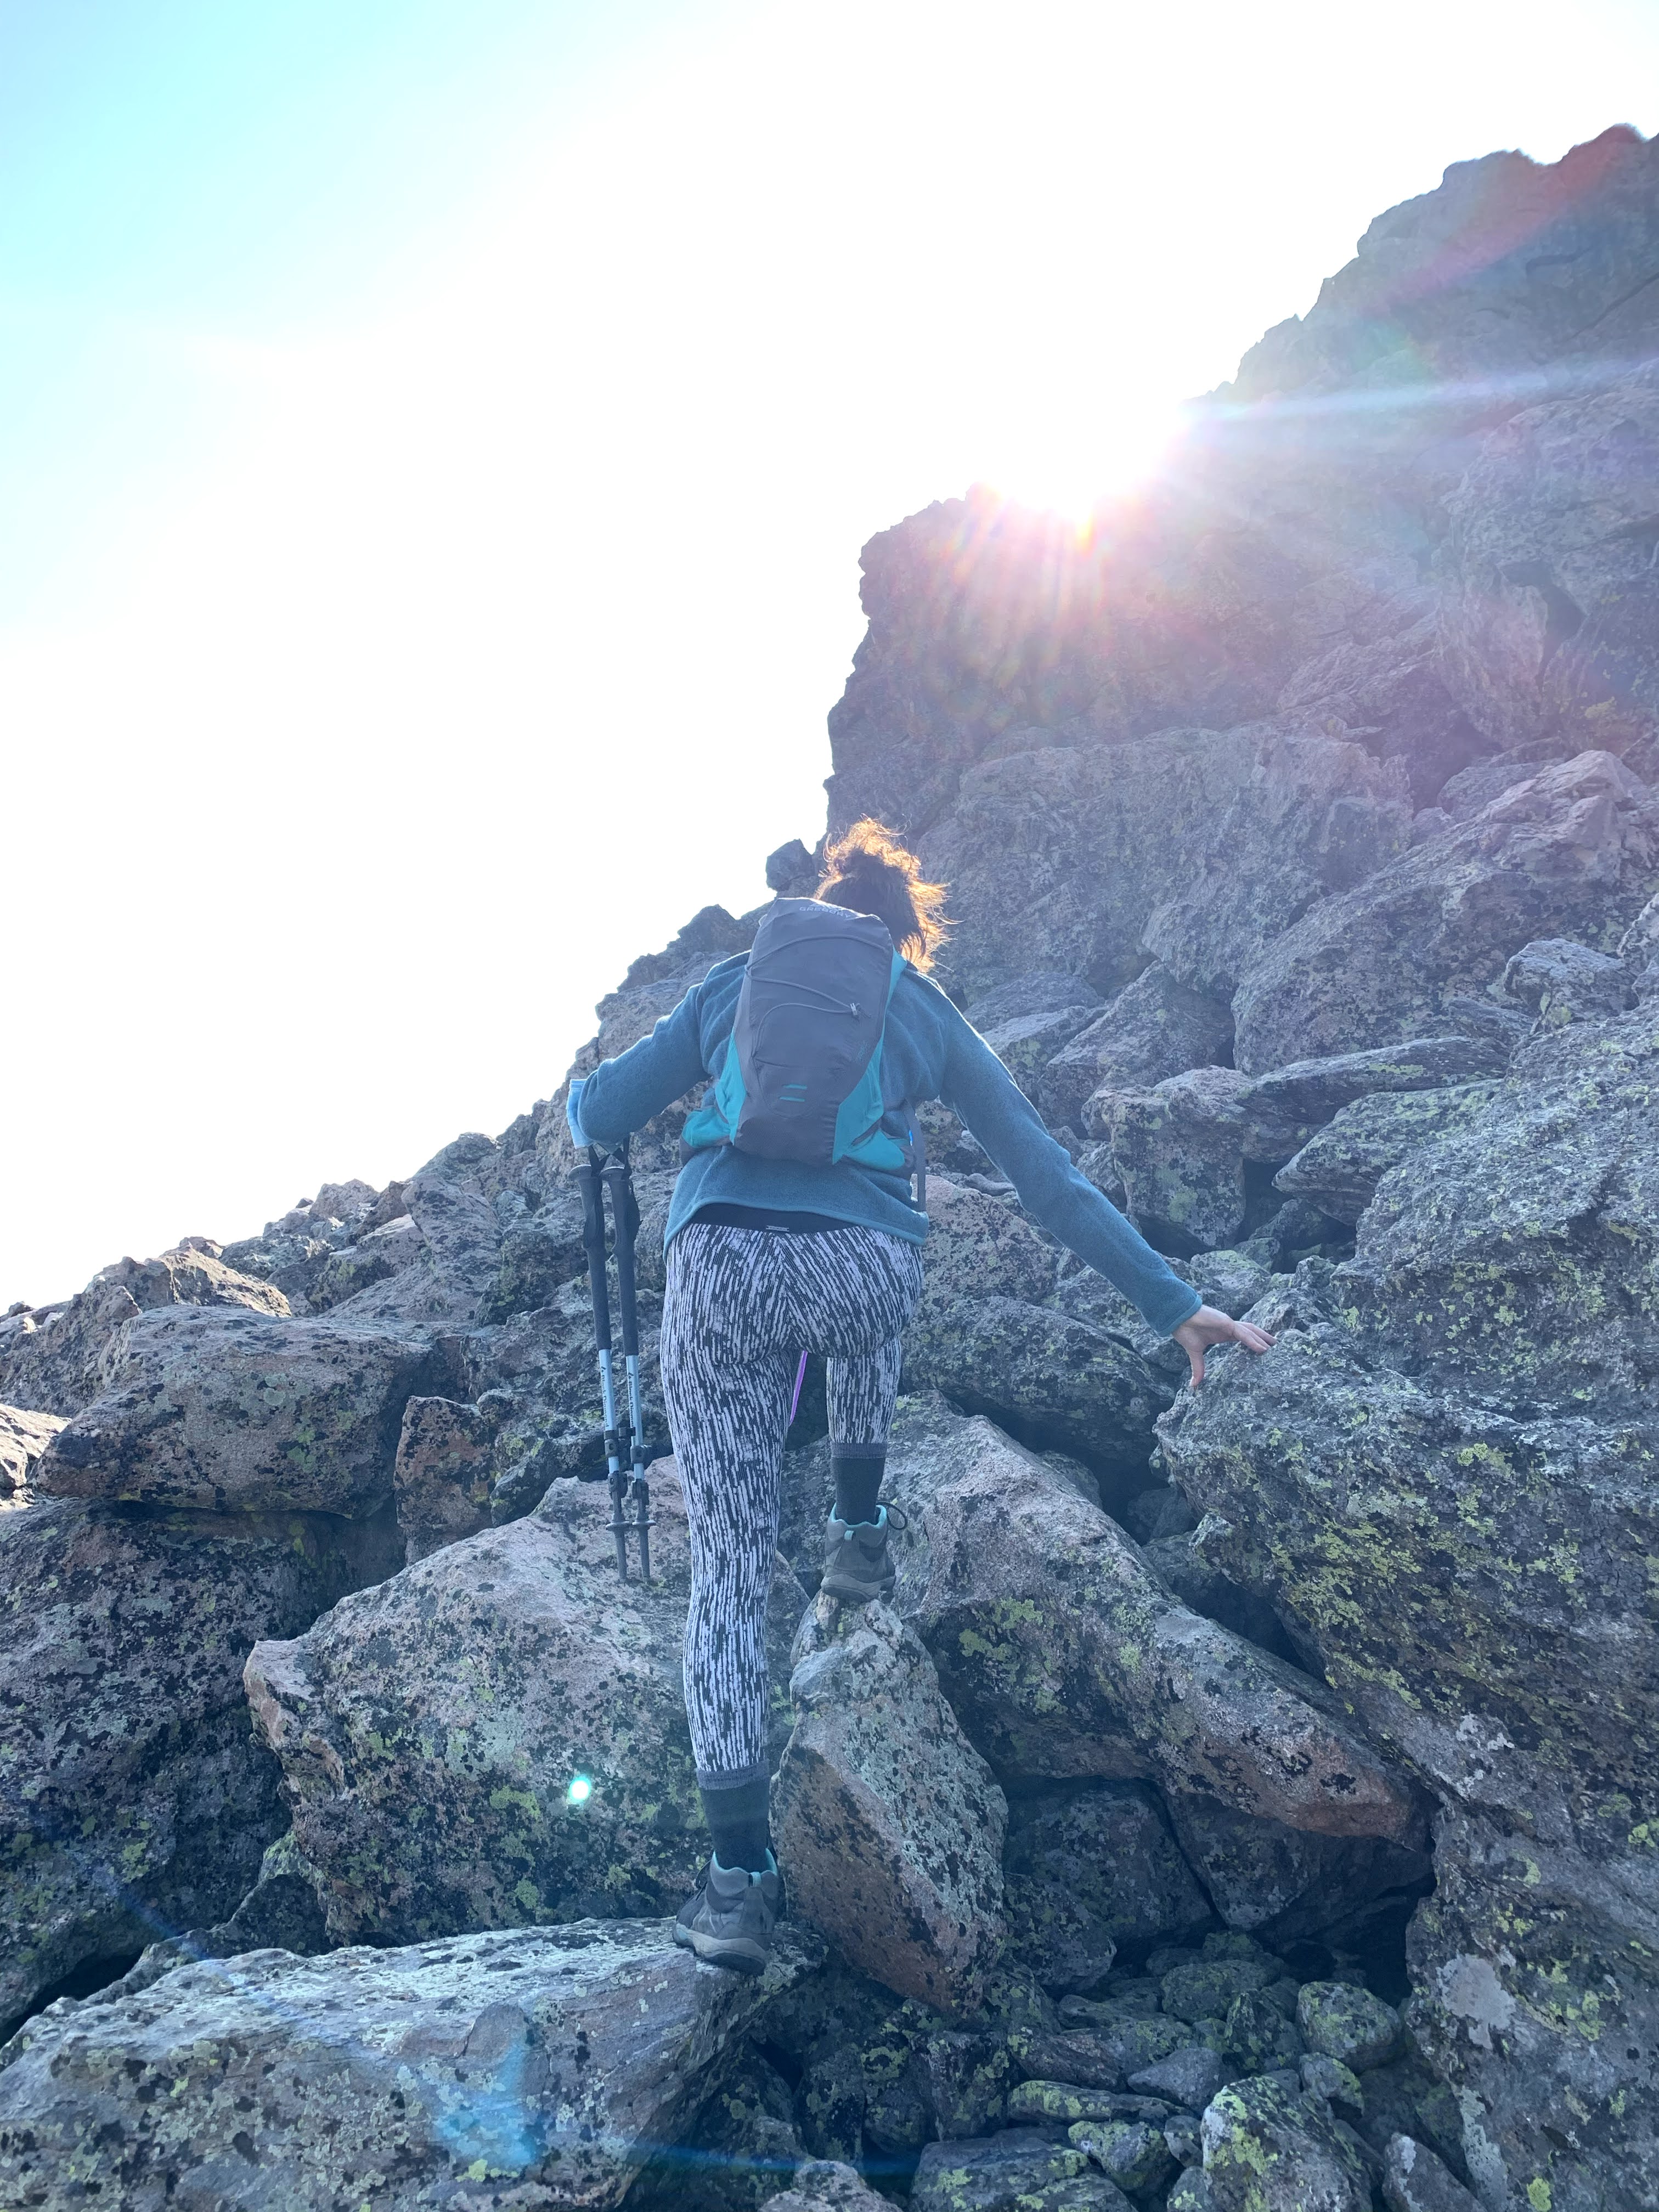
Twin Sister Peaks trail (7.5 miles in and out) – This trail was both beautiful and very enjoyable from start to finish. It was well maintained, and the last bit up to the two peaks was a fun rock scramble. You can skip the scramble if you want! It’s just the very end, adn you get a good view at the summit even if you don’t do the scramble. However, sitting at the very top of the peak for a 360 degree view of the park and a PB&J make it totally worth it. In Colorado, people often talk of altitude sickness. Honestly, I didn’t feel any while in Colorado, even at the top of the peak, and I also didn’t feel particularly winded on the hike. This seems to be different from one individual to another, but here is a pretty good resource on altitude sickness and how to both prevent and treat it.

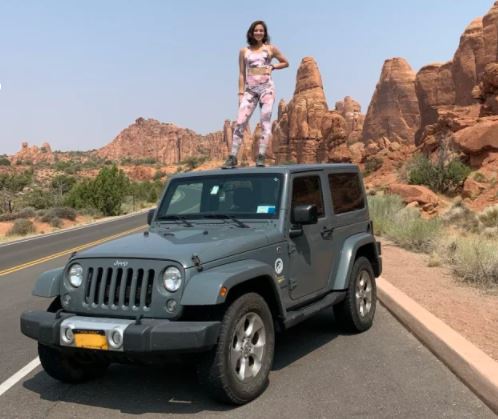
Day 11 (Arches National Park , Utah)

Traveled most of this day from Colorado to Arches National Park

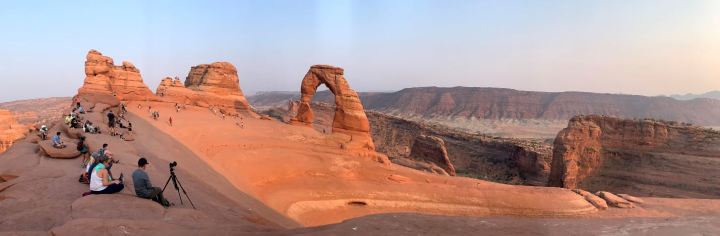
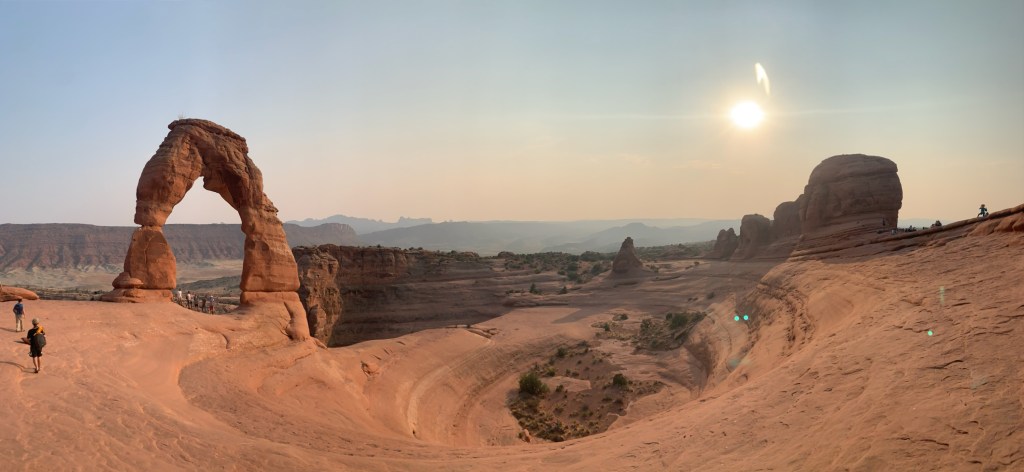
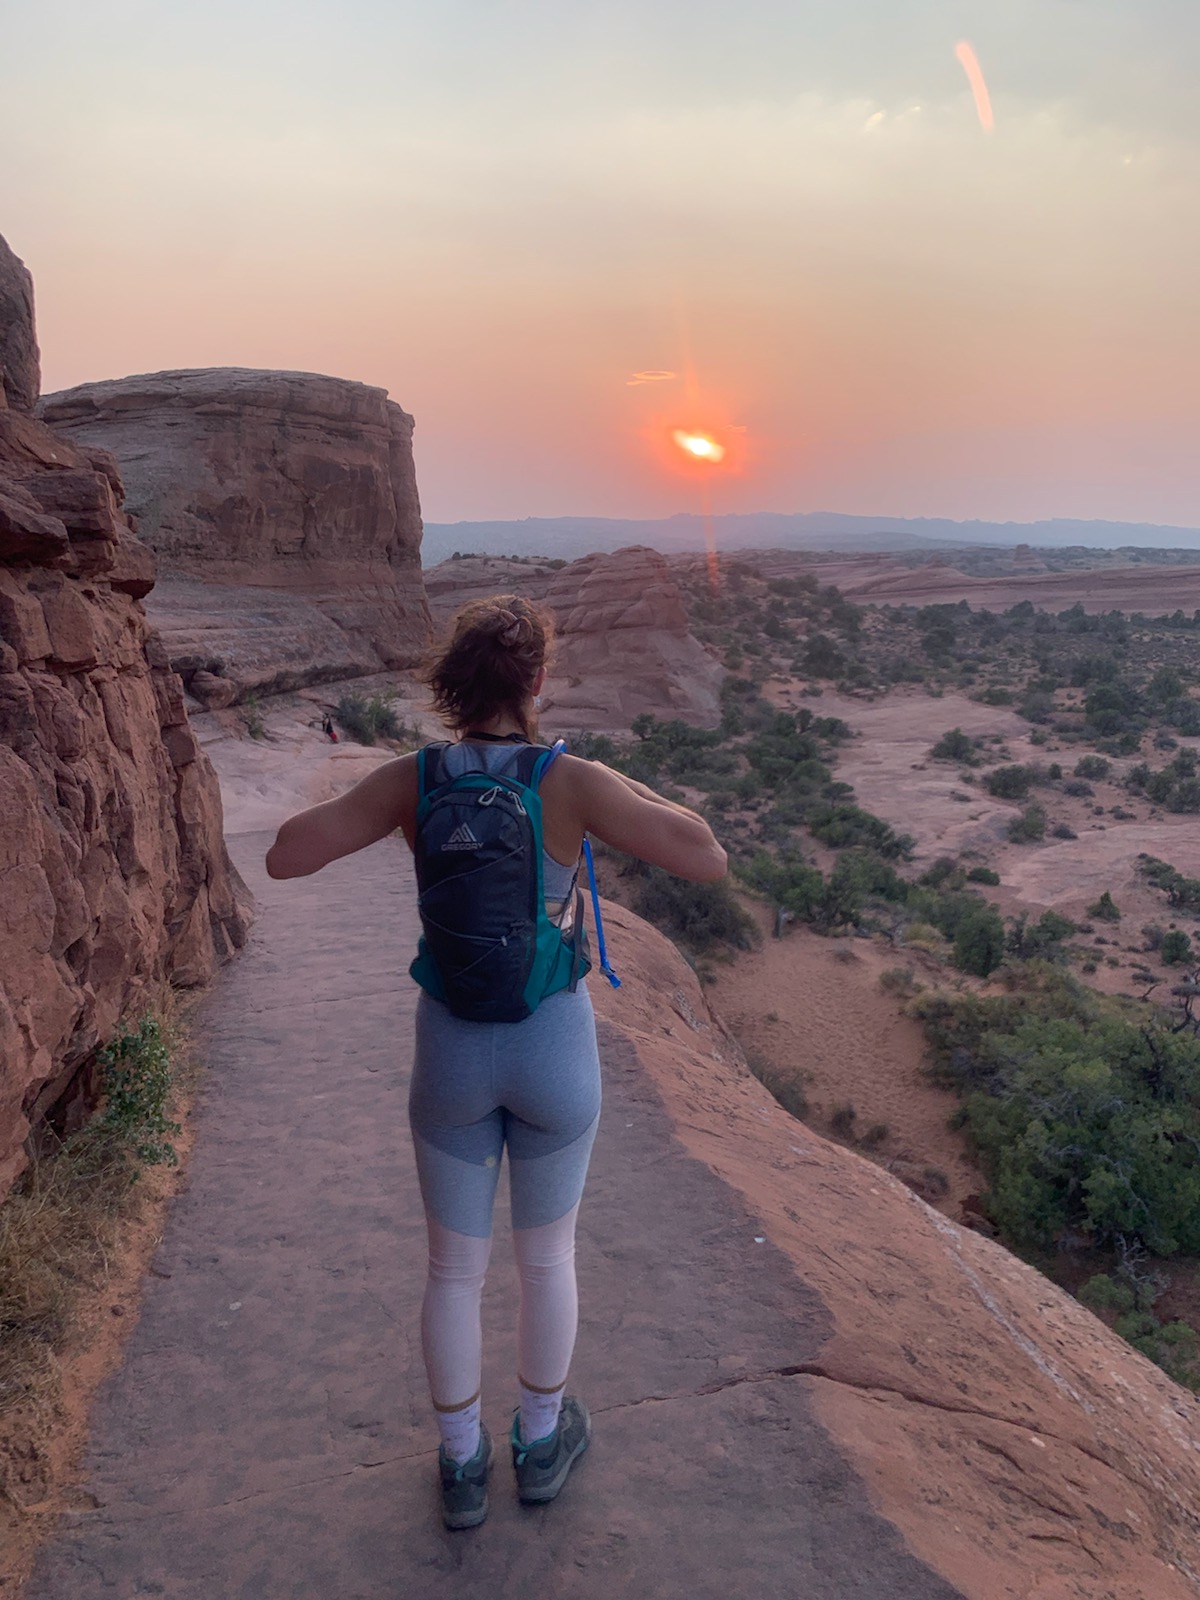
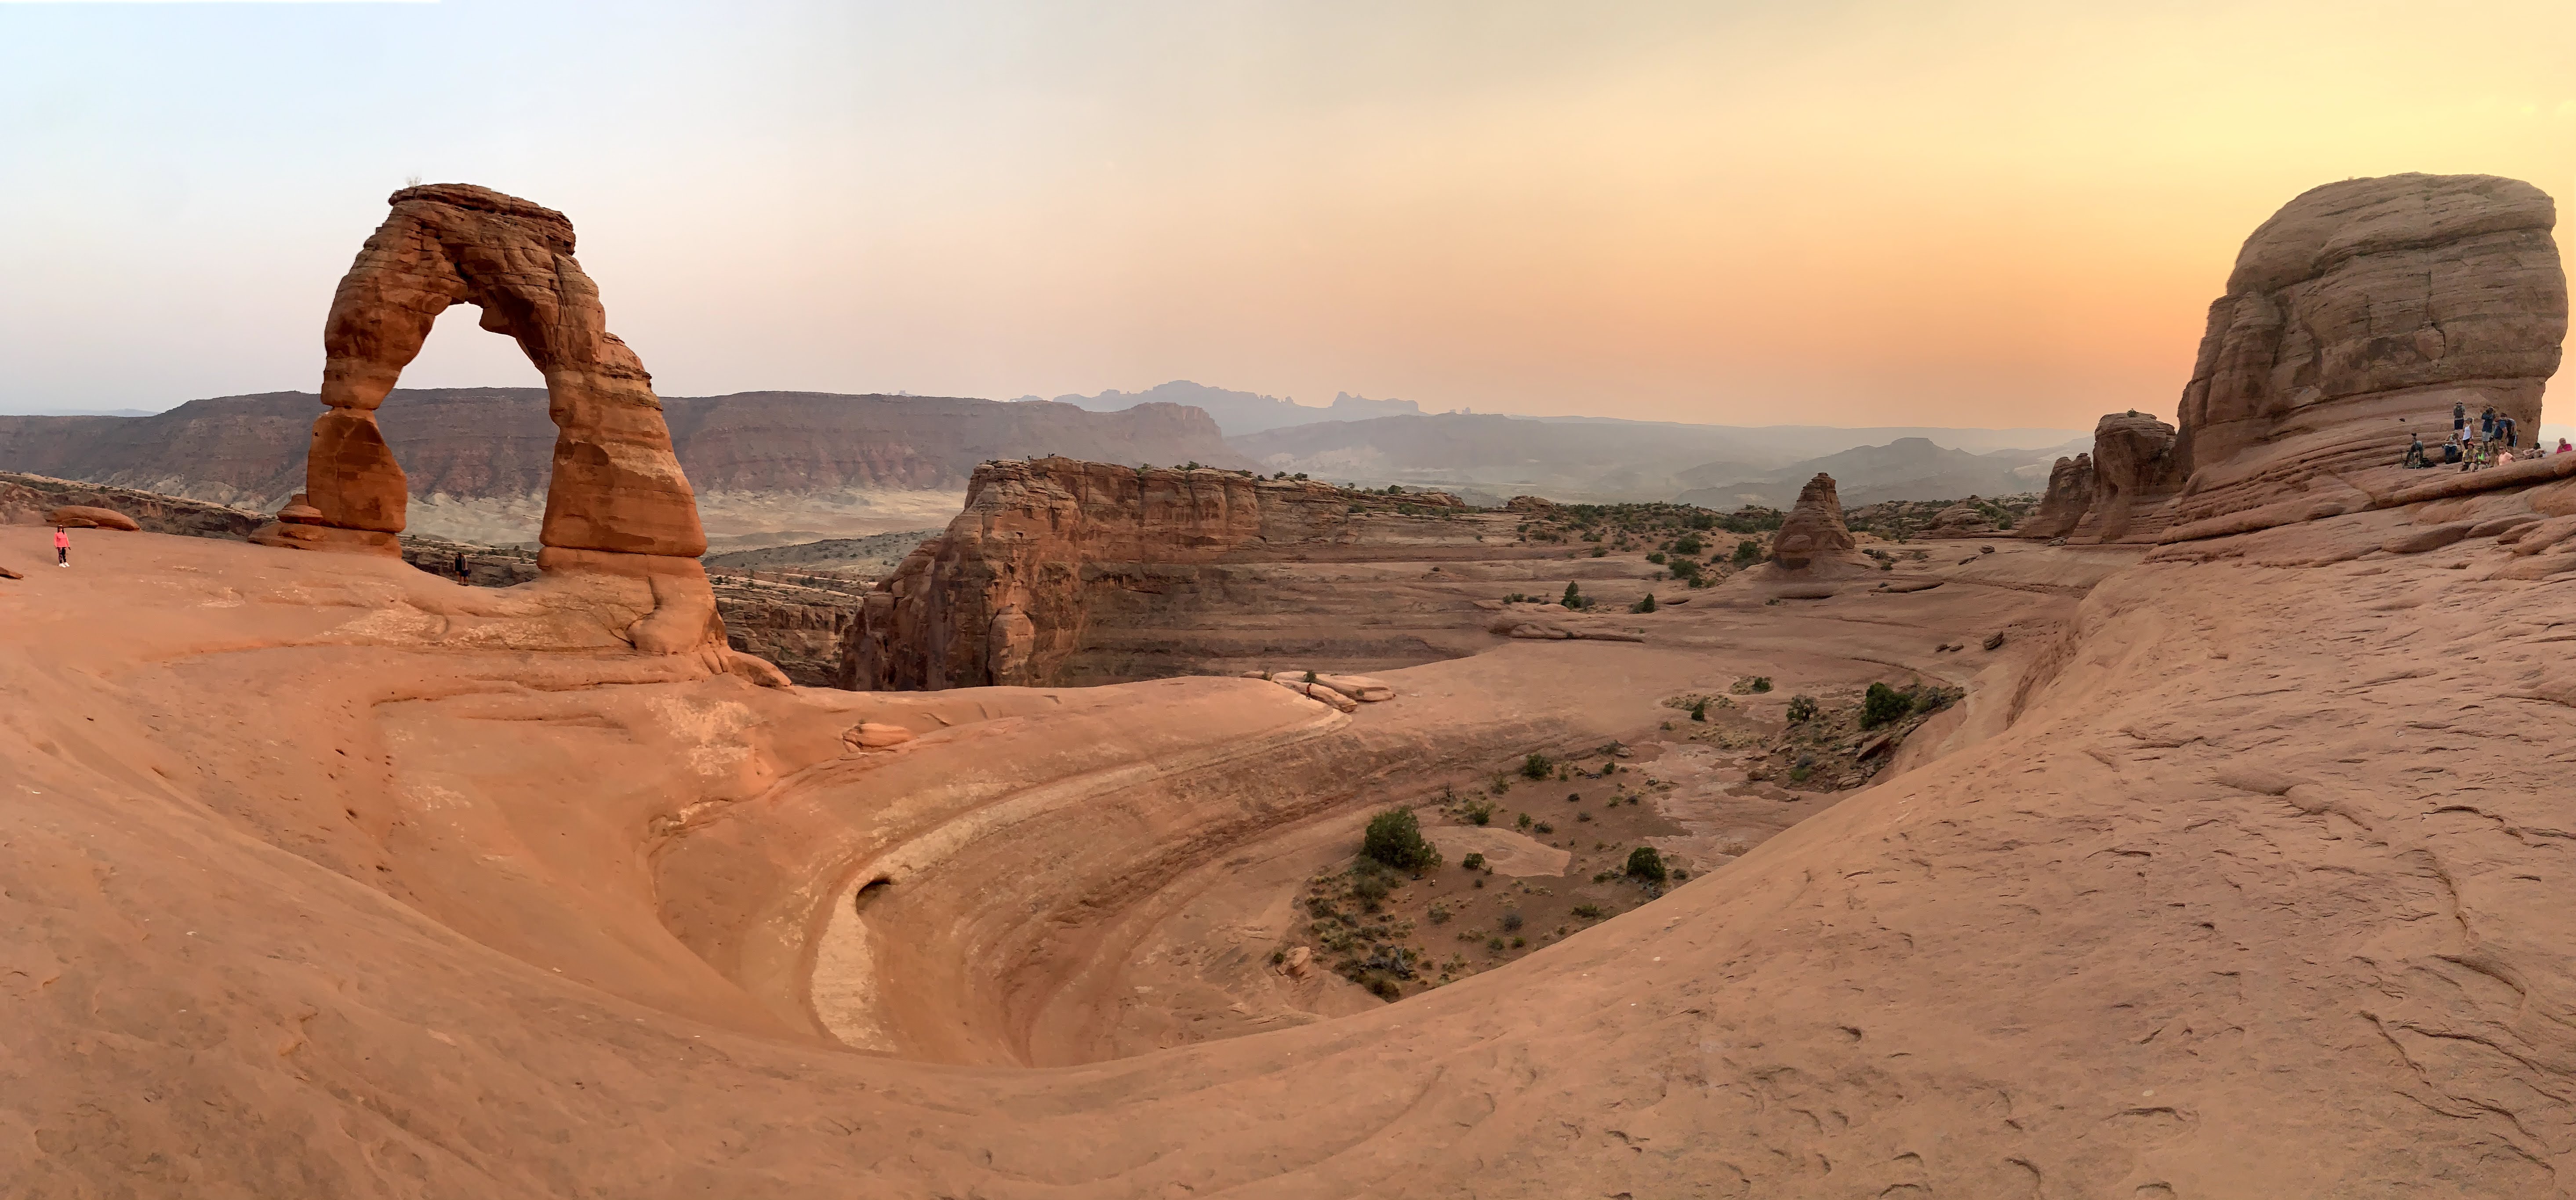
Delicate Arch Hike (3 miles in and out) for the sunset – This is a must-do hike if you are visiting Arches National Park – It is the famous image you see on the Utah license place because it is probably one of the more famous and most beautiful arches in the park. You have to do the full hike and not just the overlook viewpoint. The arch plays games with you, and somehow remains completely hidden up until the very last corner you turn, and then presents itself to you suddenly and in all its glory! The photos really don’t do this structure any justice – for reference, can you spot us in the bottom right photo?

This hike would *probably* be better suited in the morning for sunrise, since the arch faces east. We did this for the sunset, however, because it was the perfect length for the amount of time we had, and we had different plans for sunrise the next morning.

Day 12 (Arches National Park / Moab, Utah)

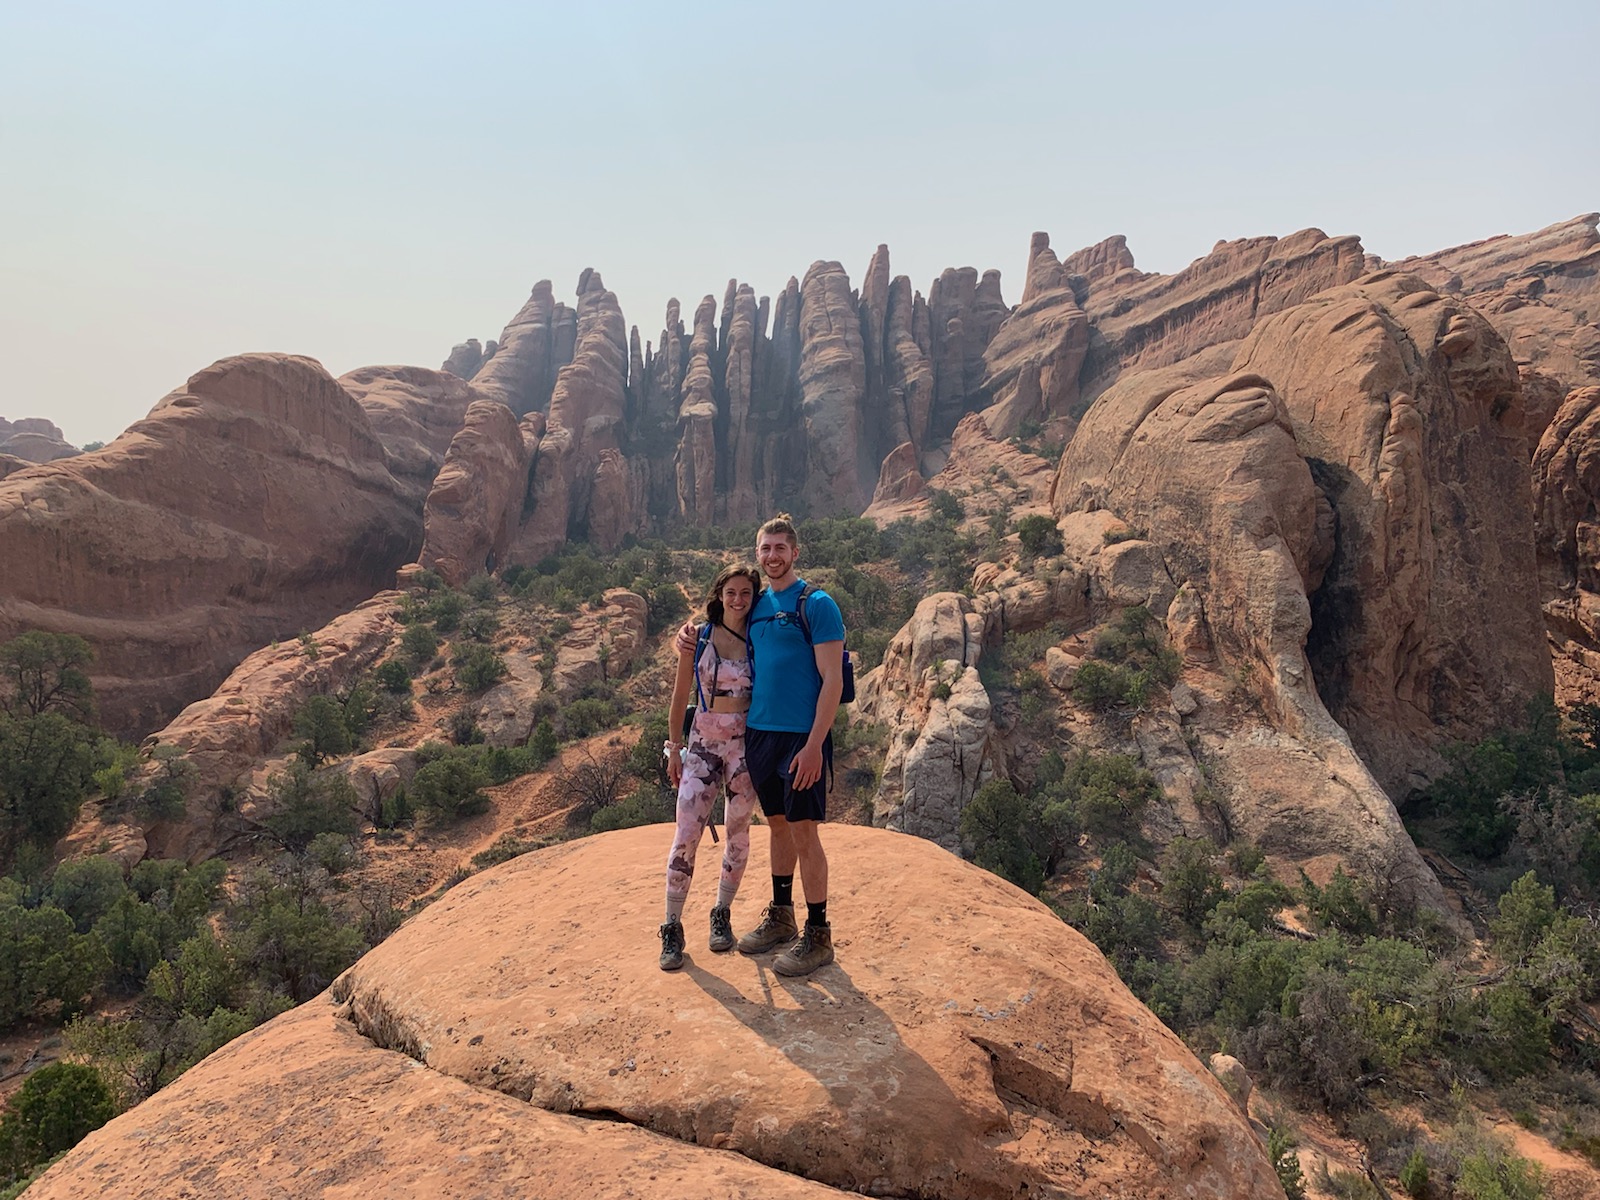
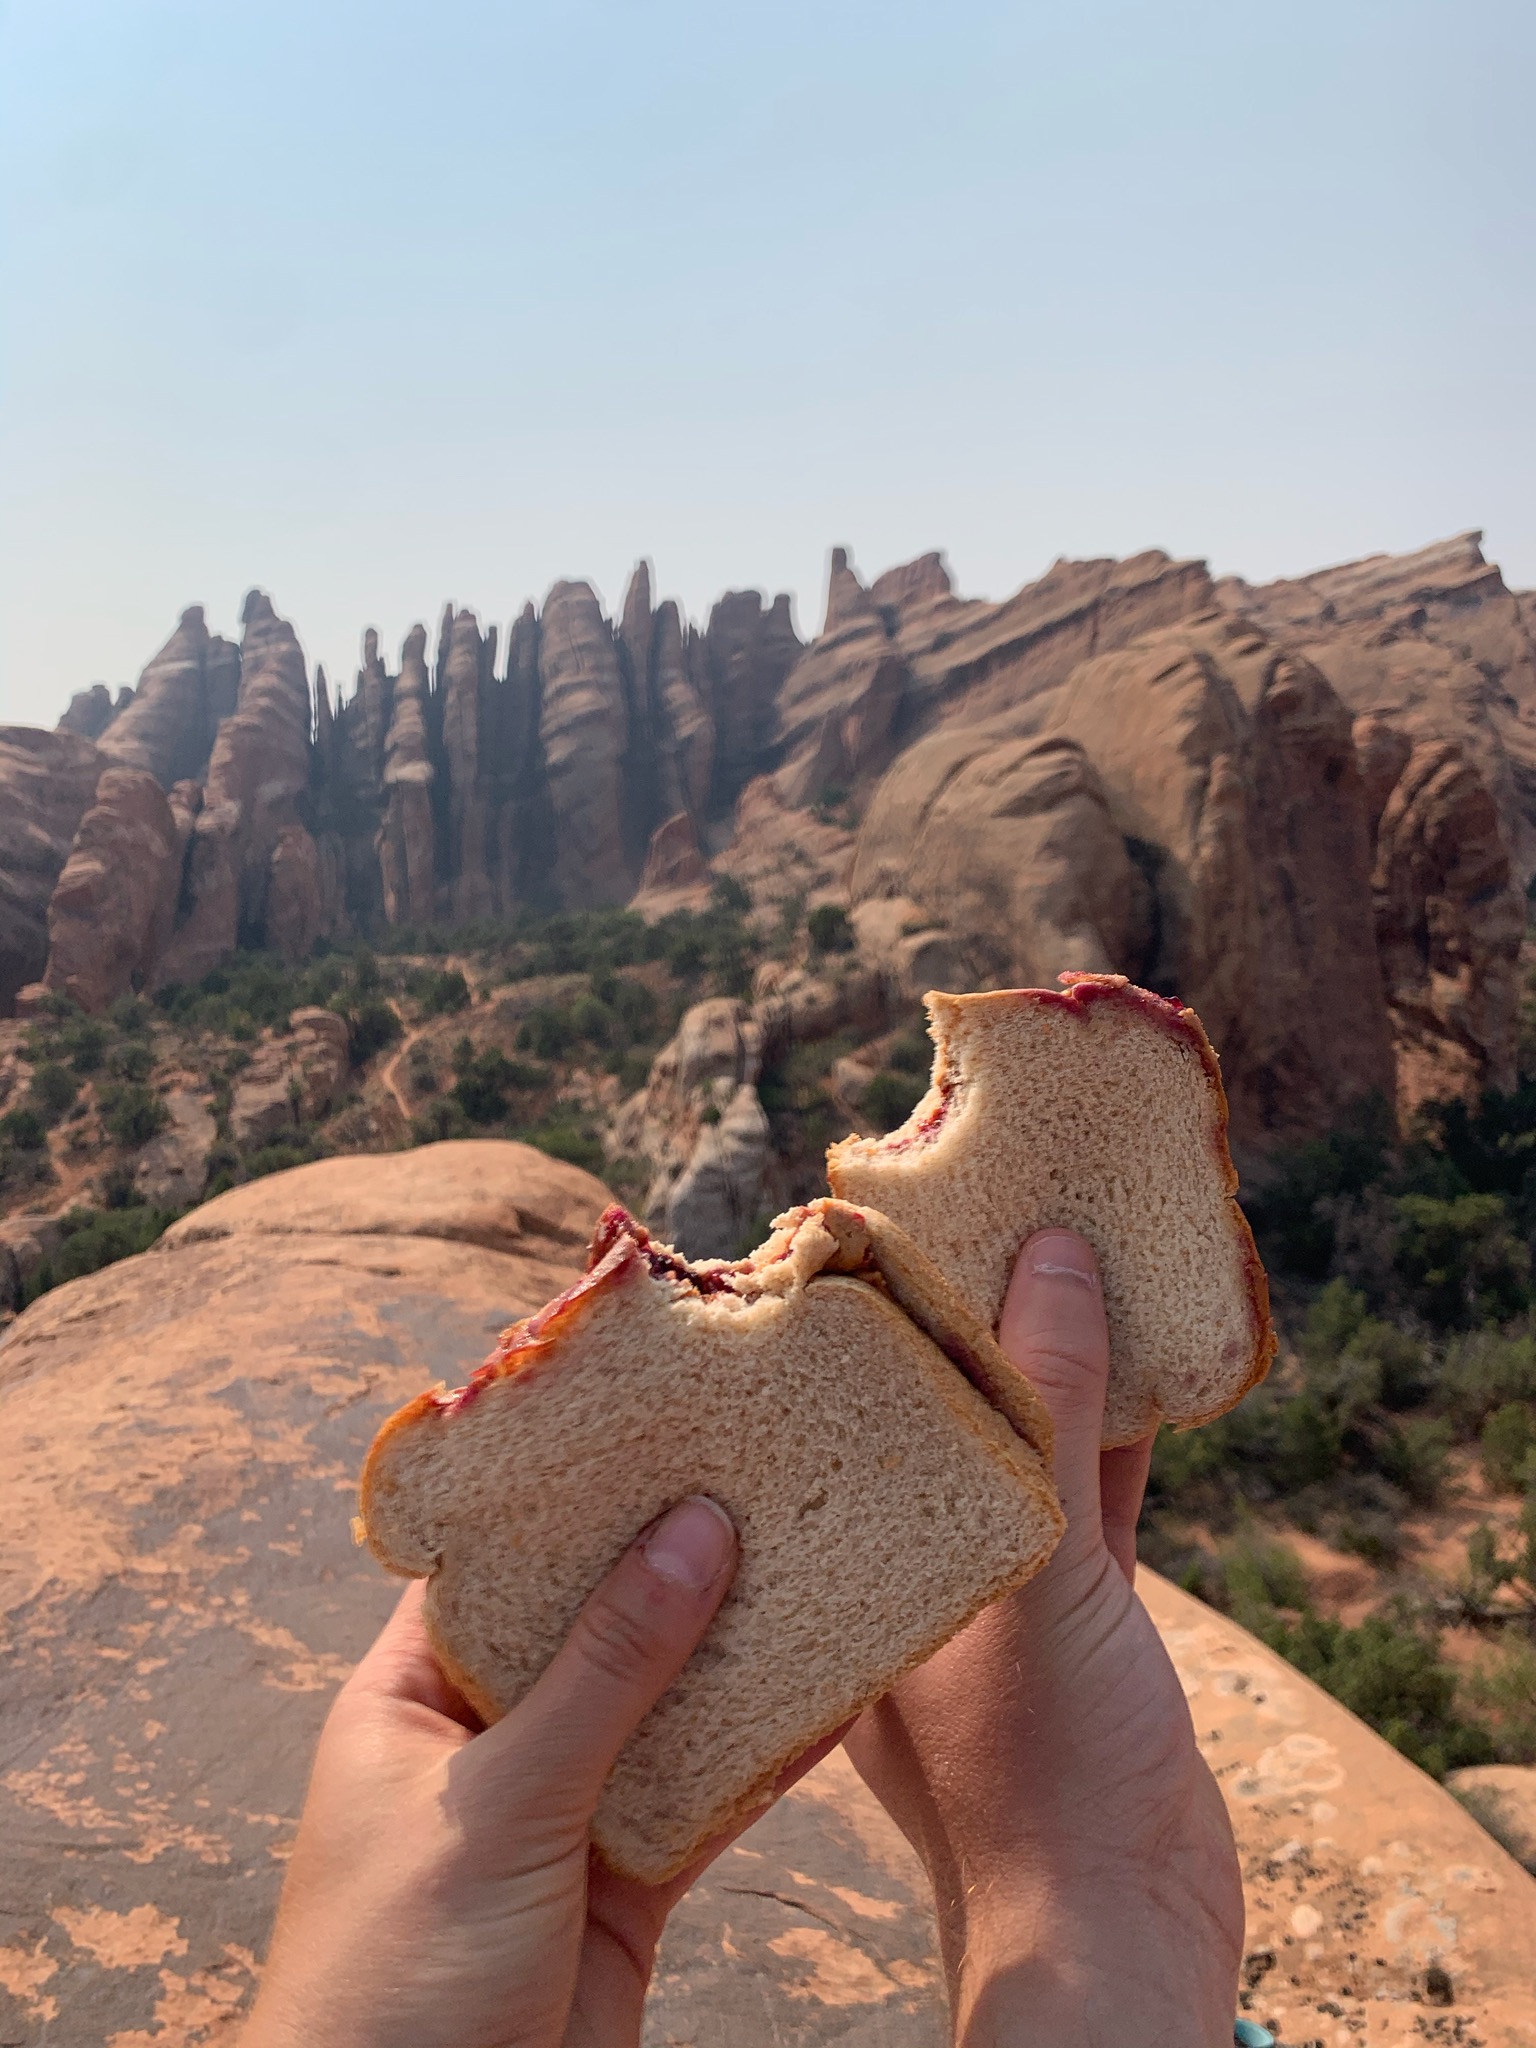
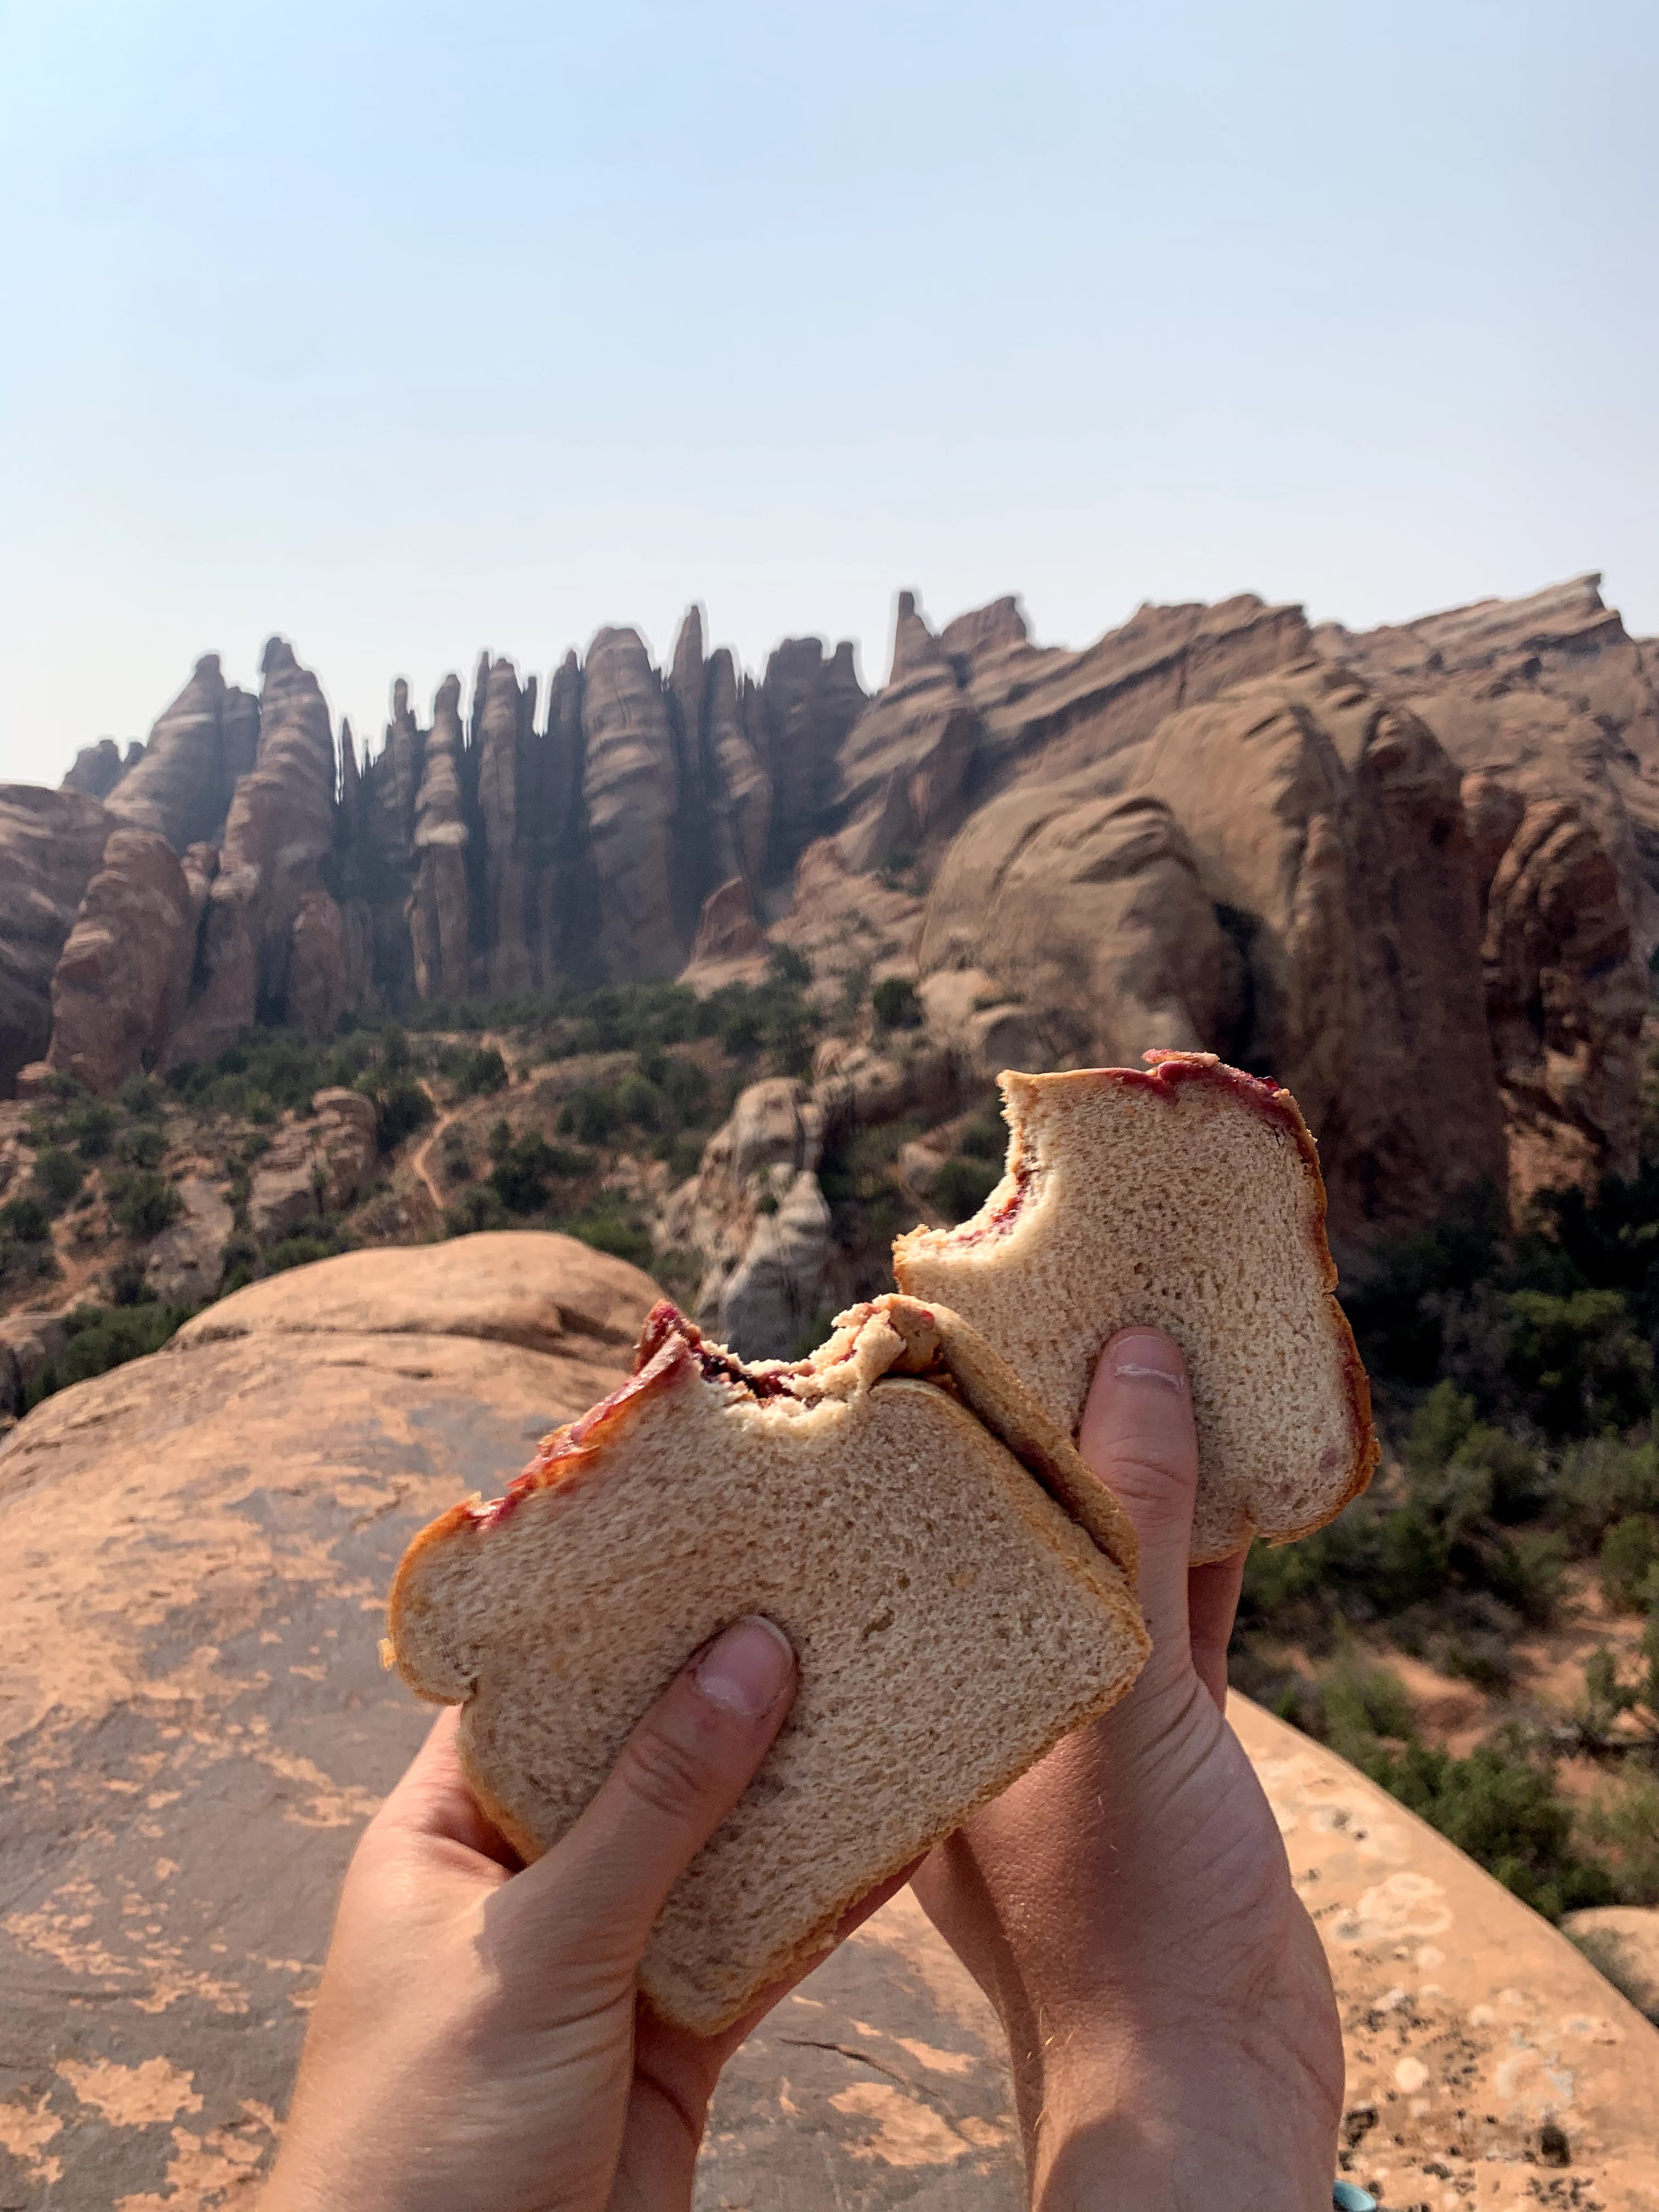
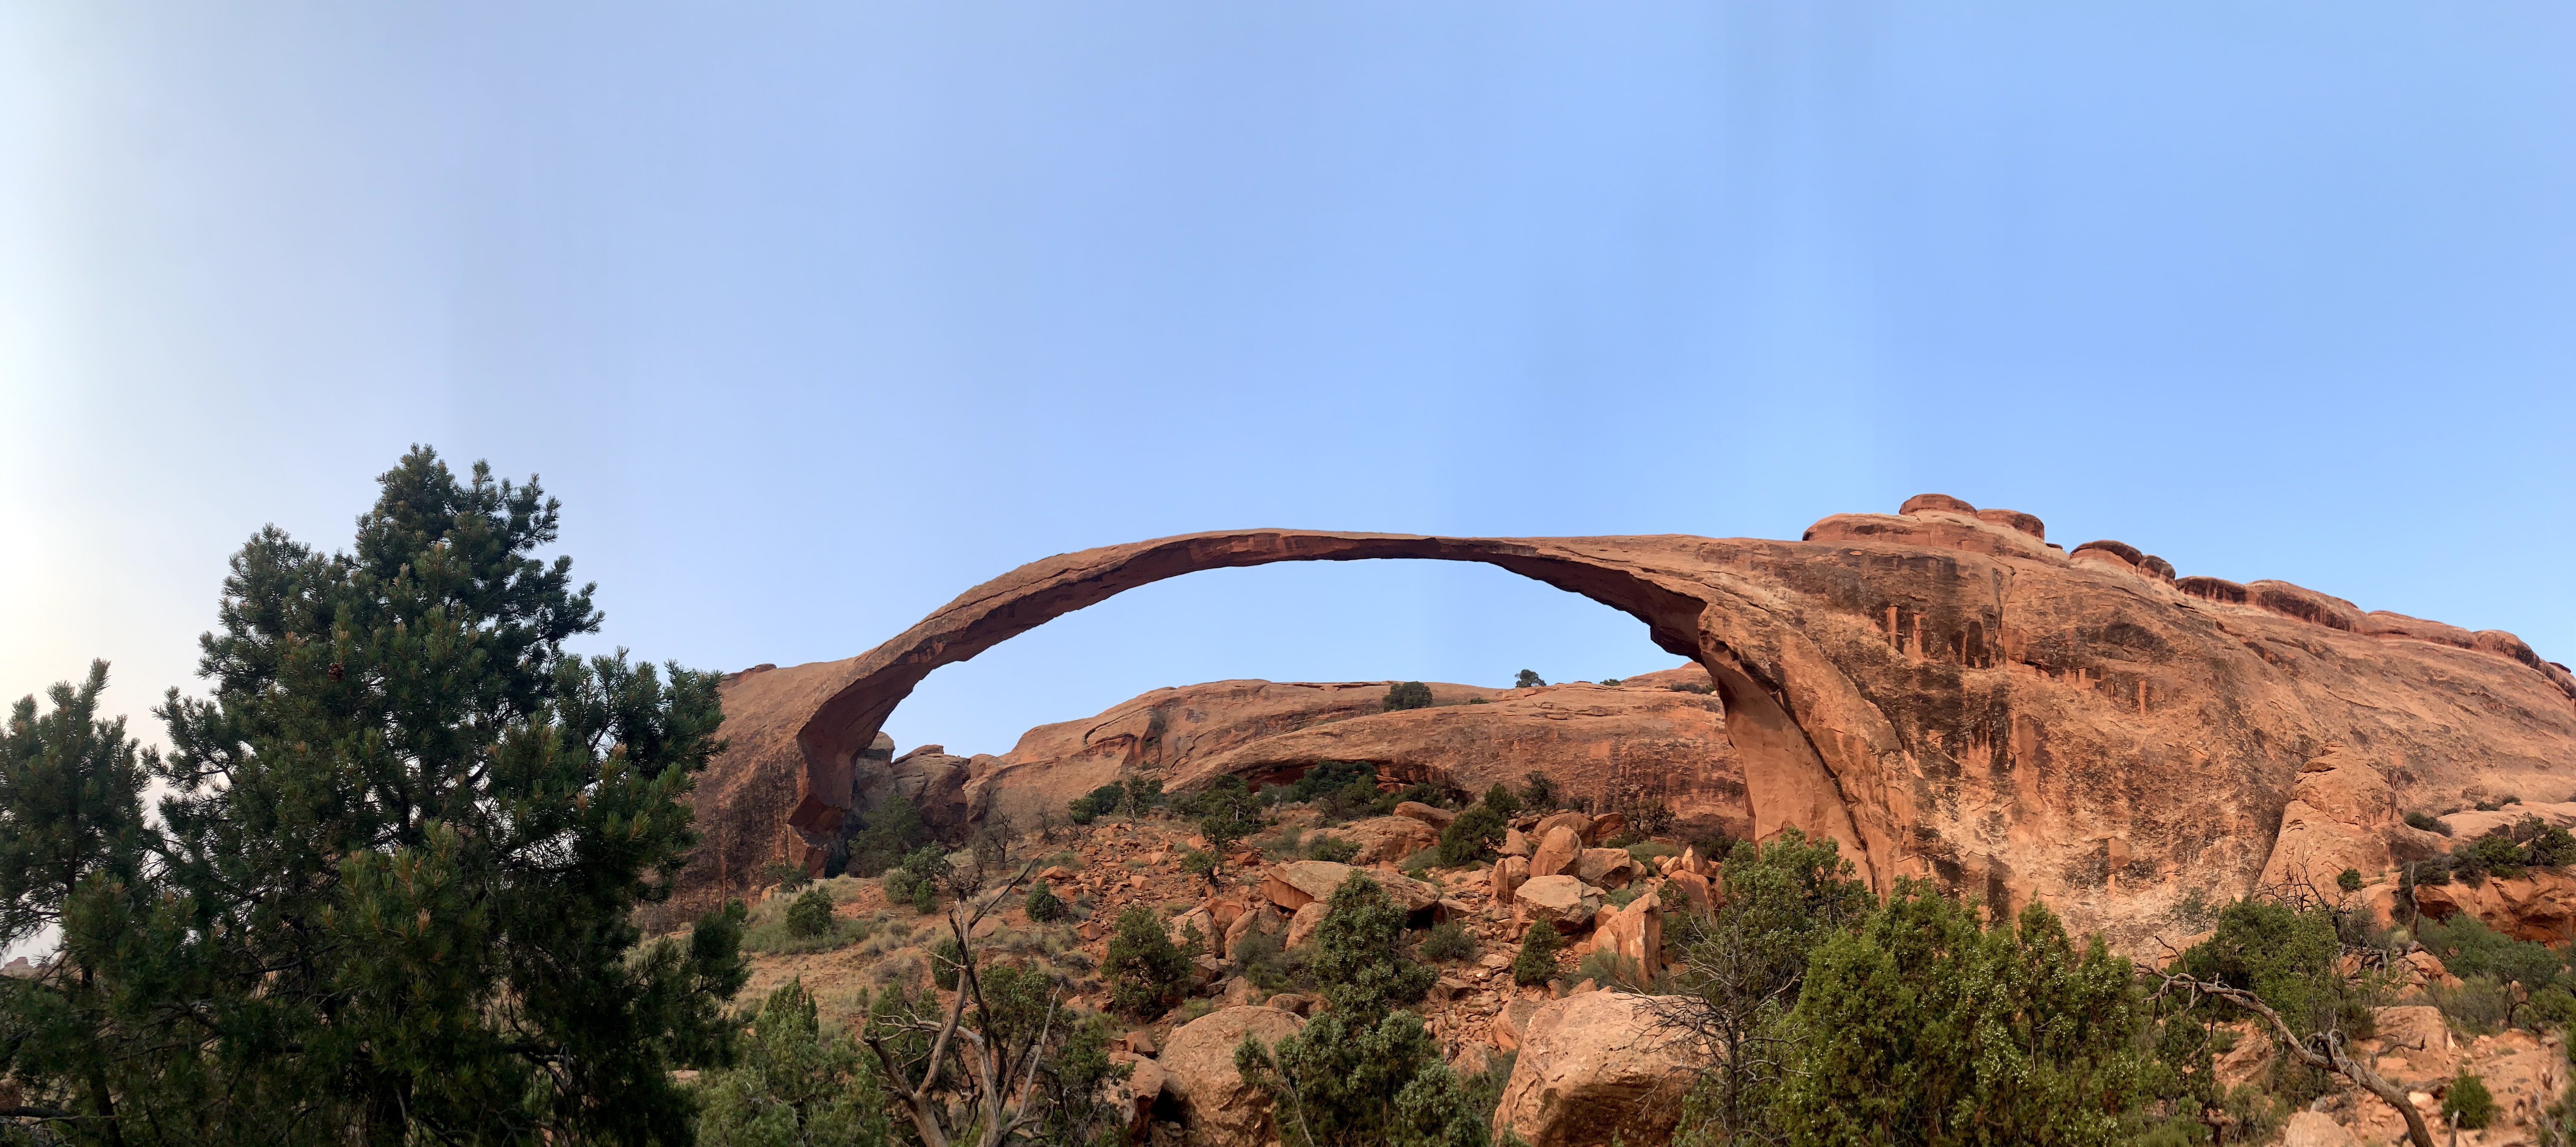
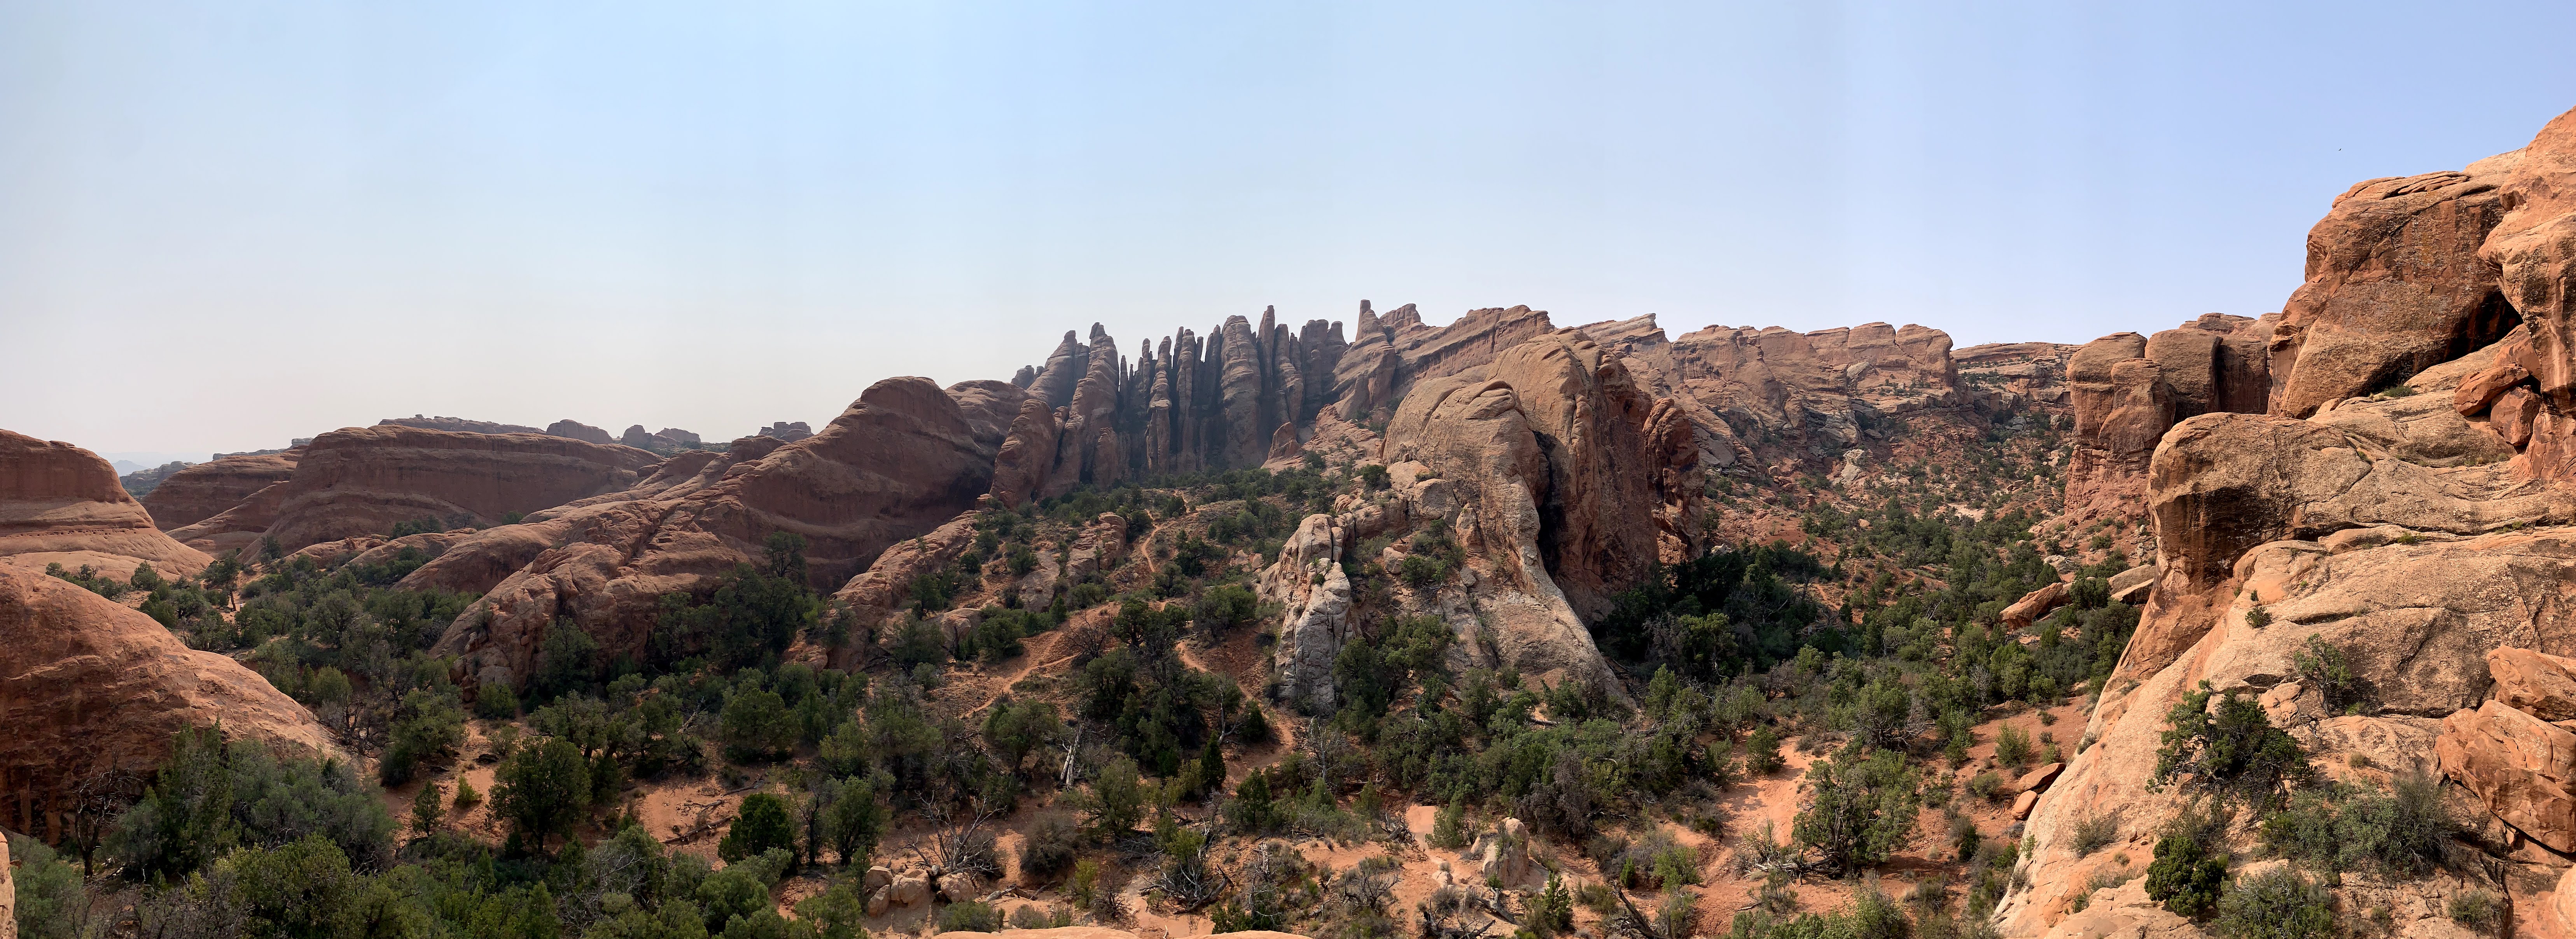
Devil’s Garden Loop Trail (7.8 miles round) – This is MANDATORY if you are visiting this park. The trail is fairly long and there are some steep sections, so start early because it gets HOT in the afternoon. There will be some places that you get to climb over some rock structures, but it was all safe, no steep drop-offs, and the rock is super grippy (it’s called “slickstone,” but it is comparable to sandpaper). As I mentioned in my review of this park in Part 1, it is like a scavenger hunt to find all of the arches on the loop, and a lot of them remain hidden until you turn the corner and are facing them directly. It was fun, playful, and the scenery along the way was breathtaking. Keep an eye out for the section where you walk towards what I liked to call the “skyline.” It was a set of structures that looked like a hundred needles all lined up in a row, almost like the NYC skyline. It was so compelling that this was where I stopped for lunch! Also, this was one of the hikes where cairns came in handy to keep on the correct path.

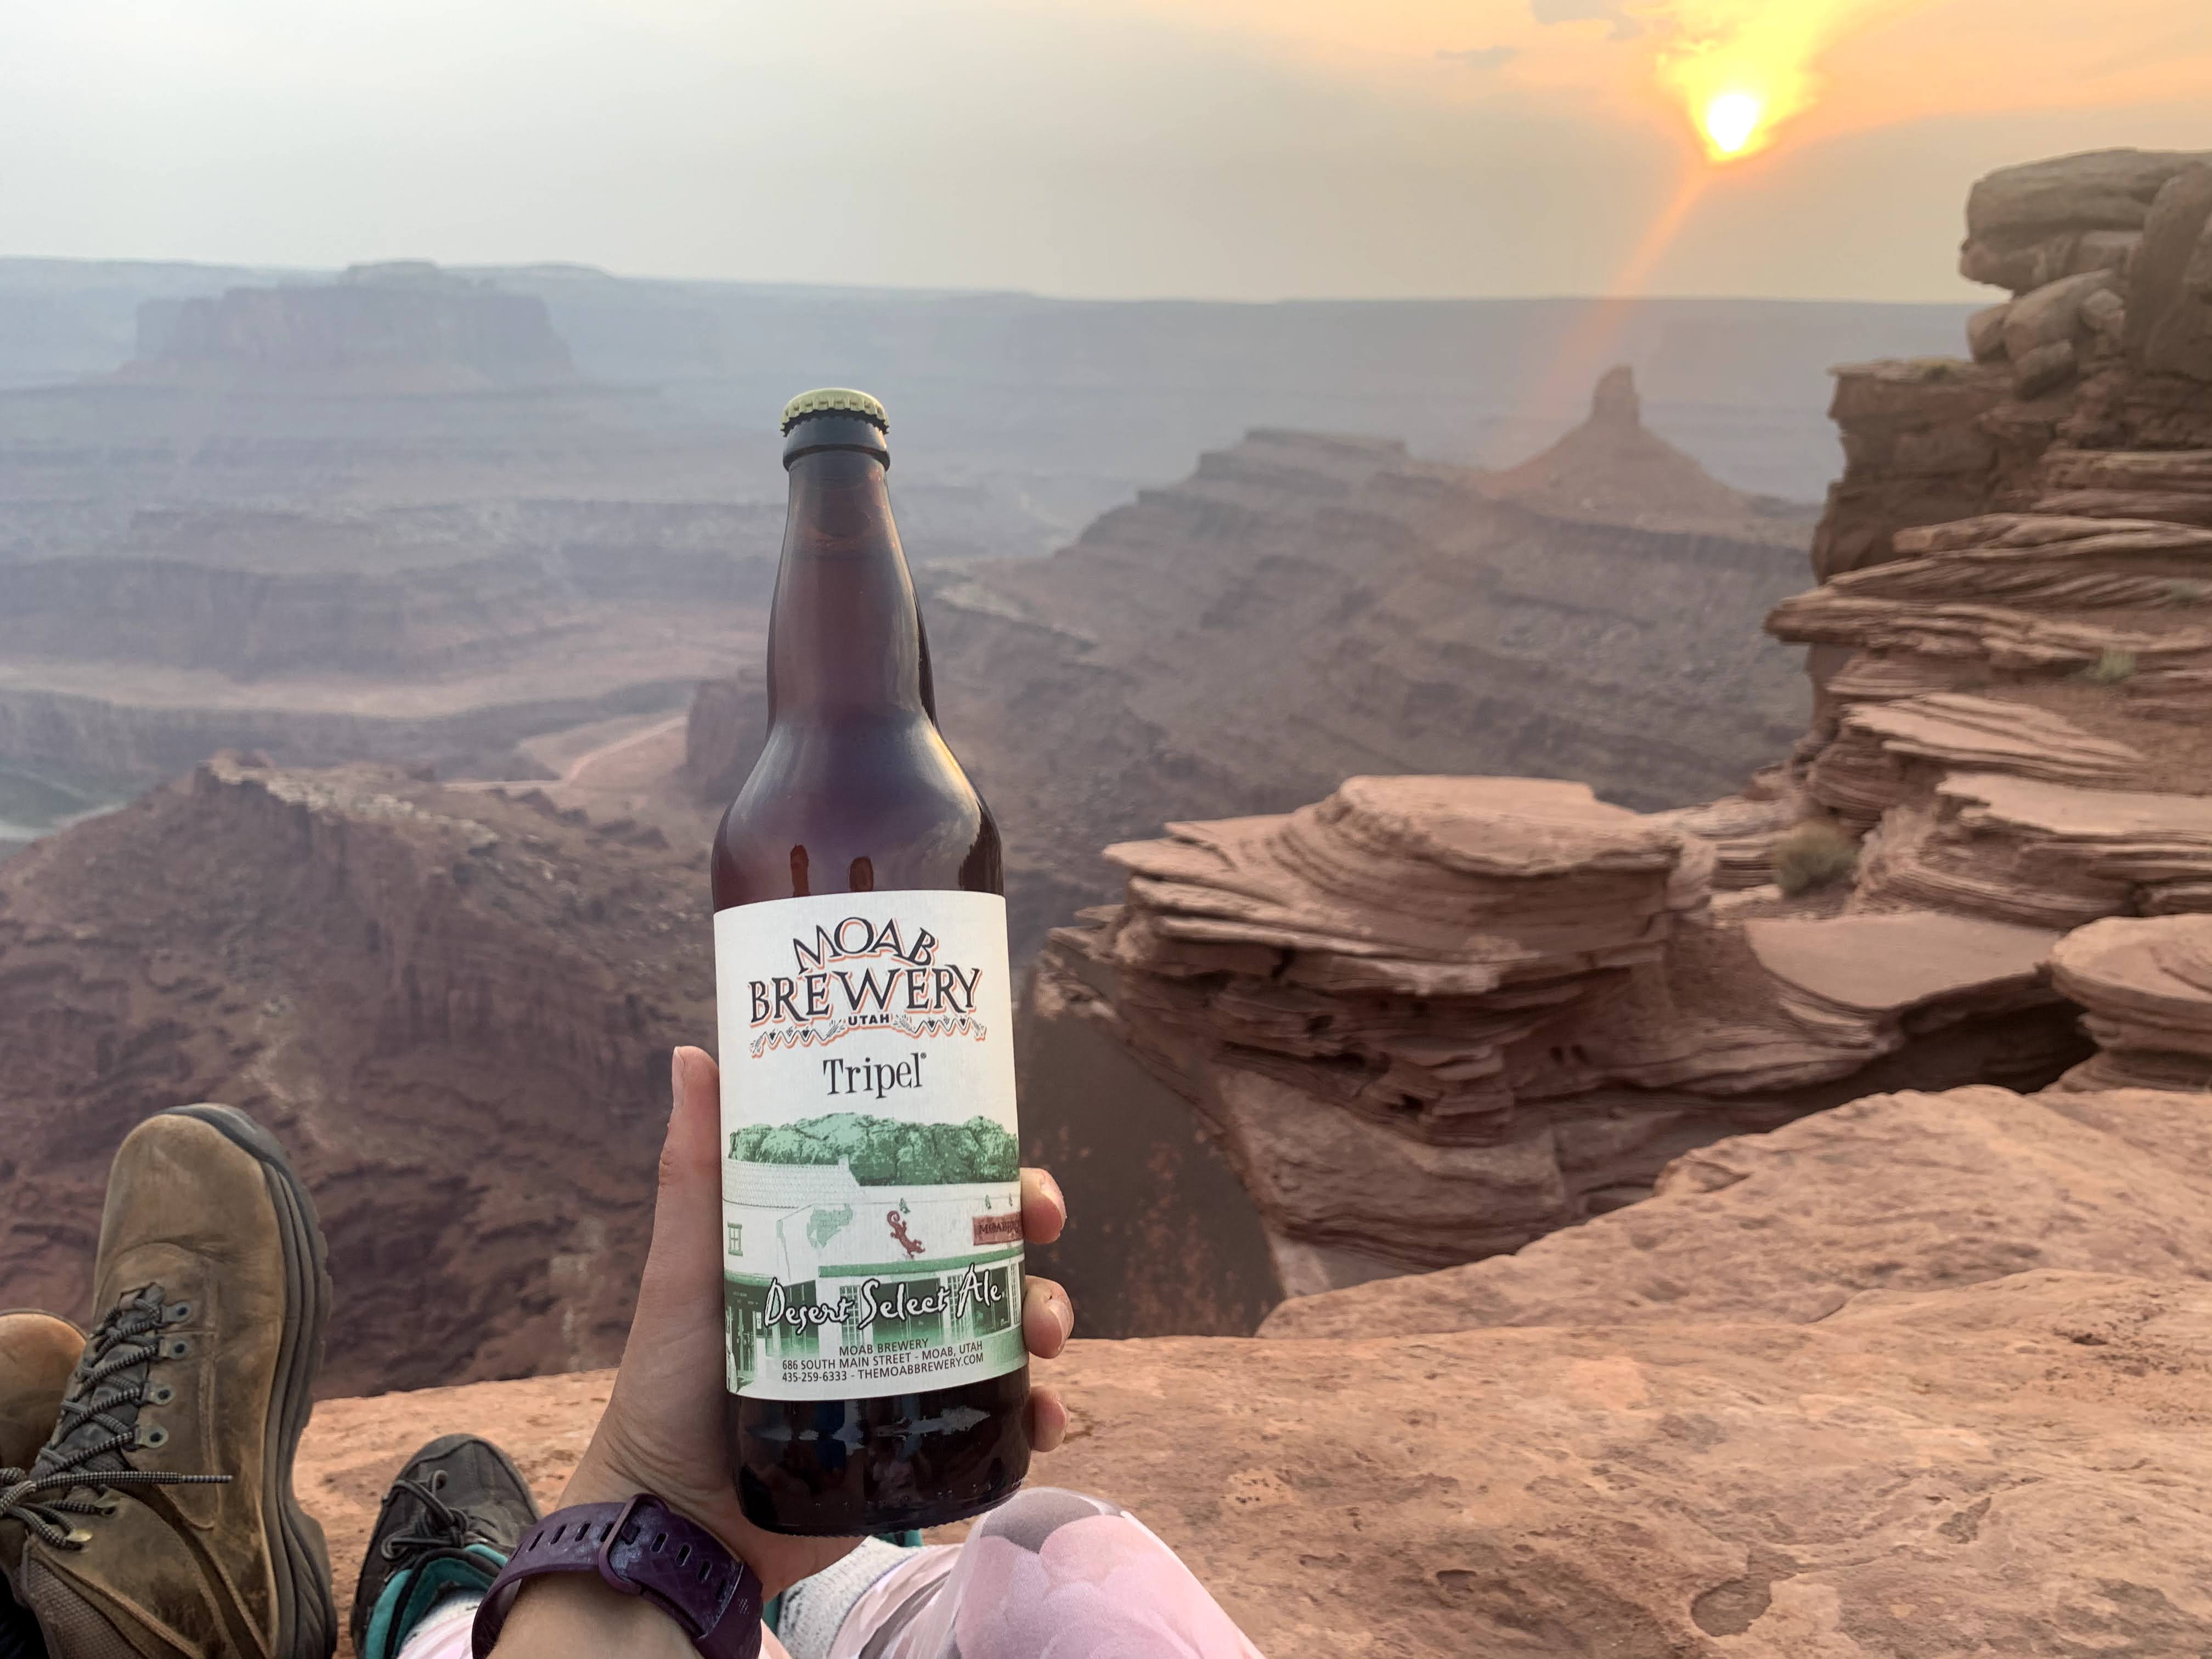
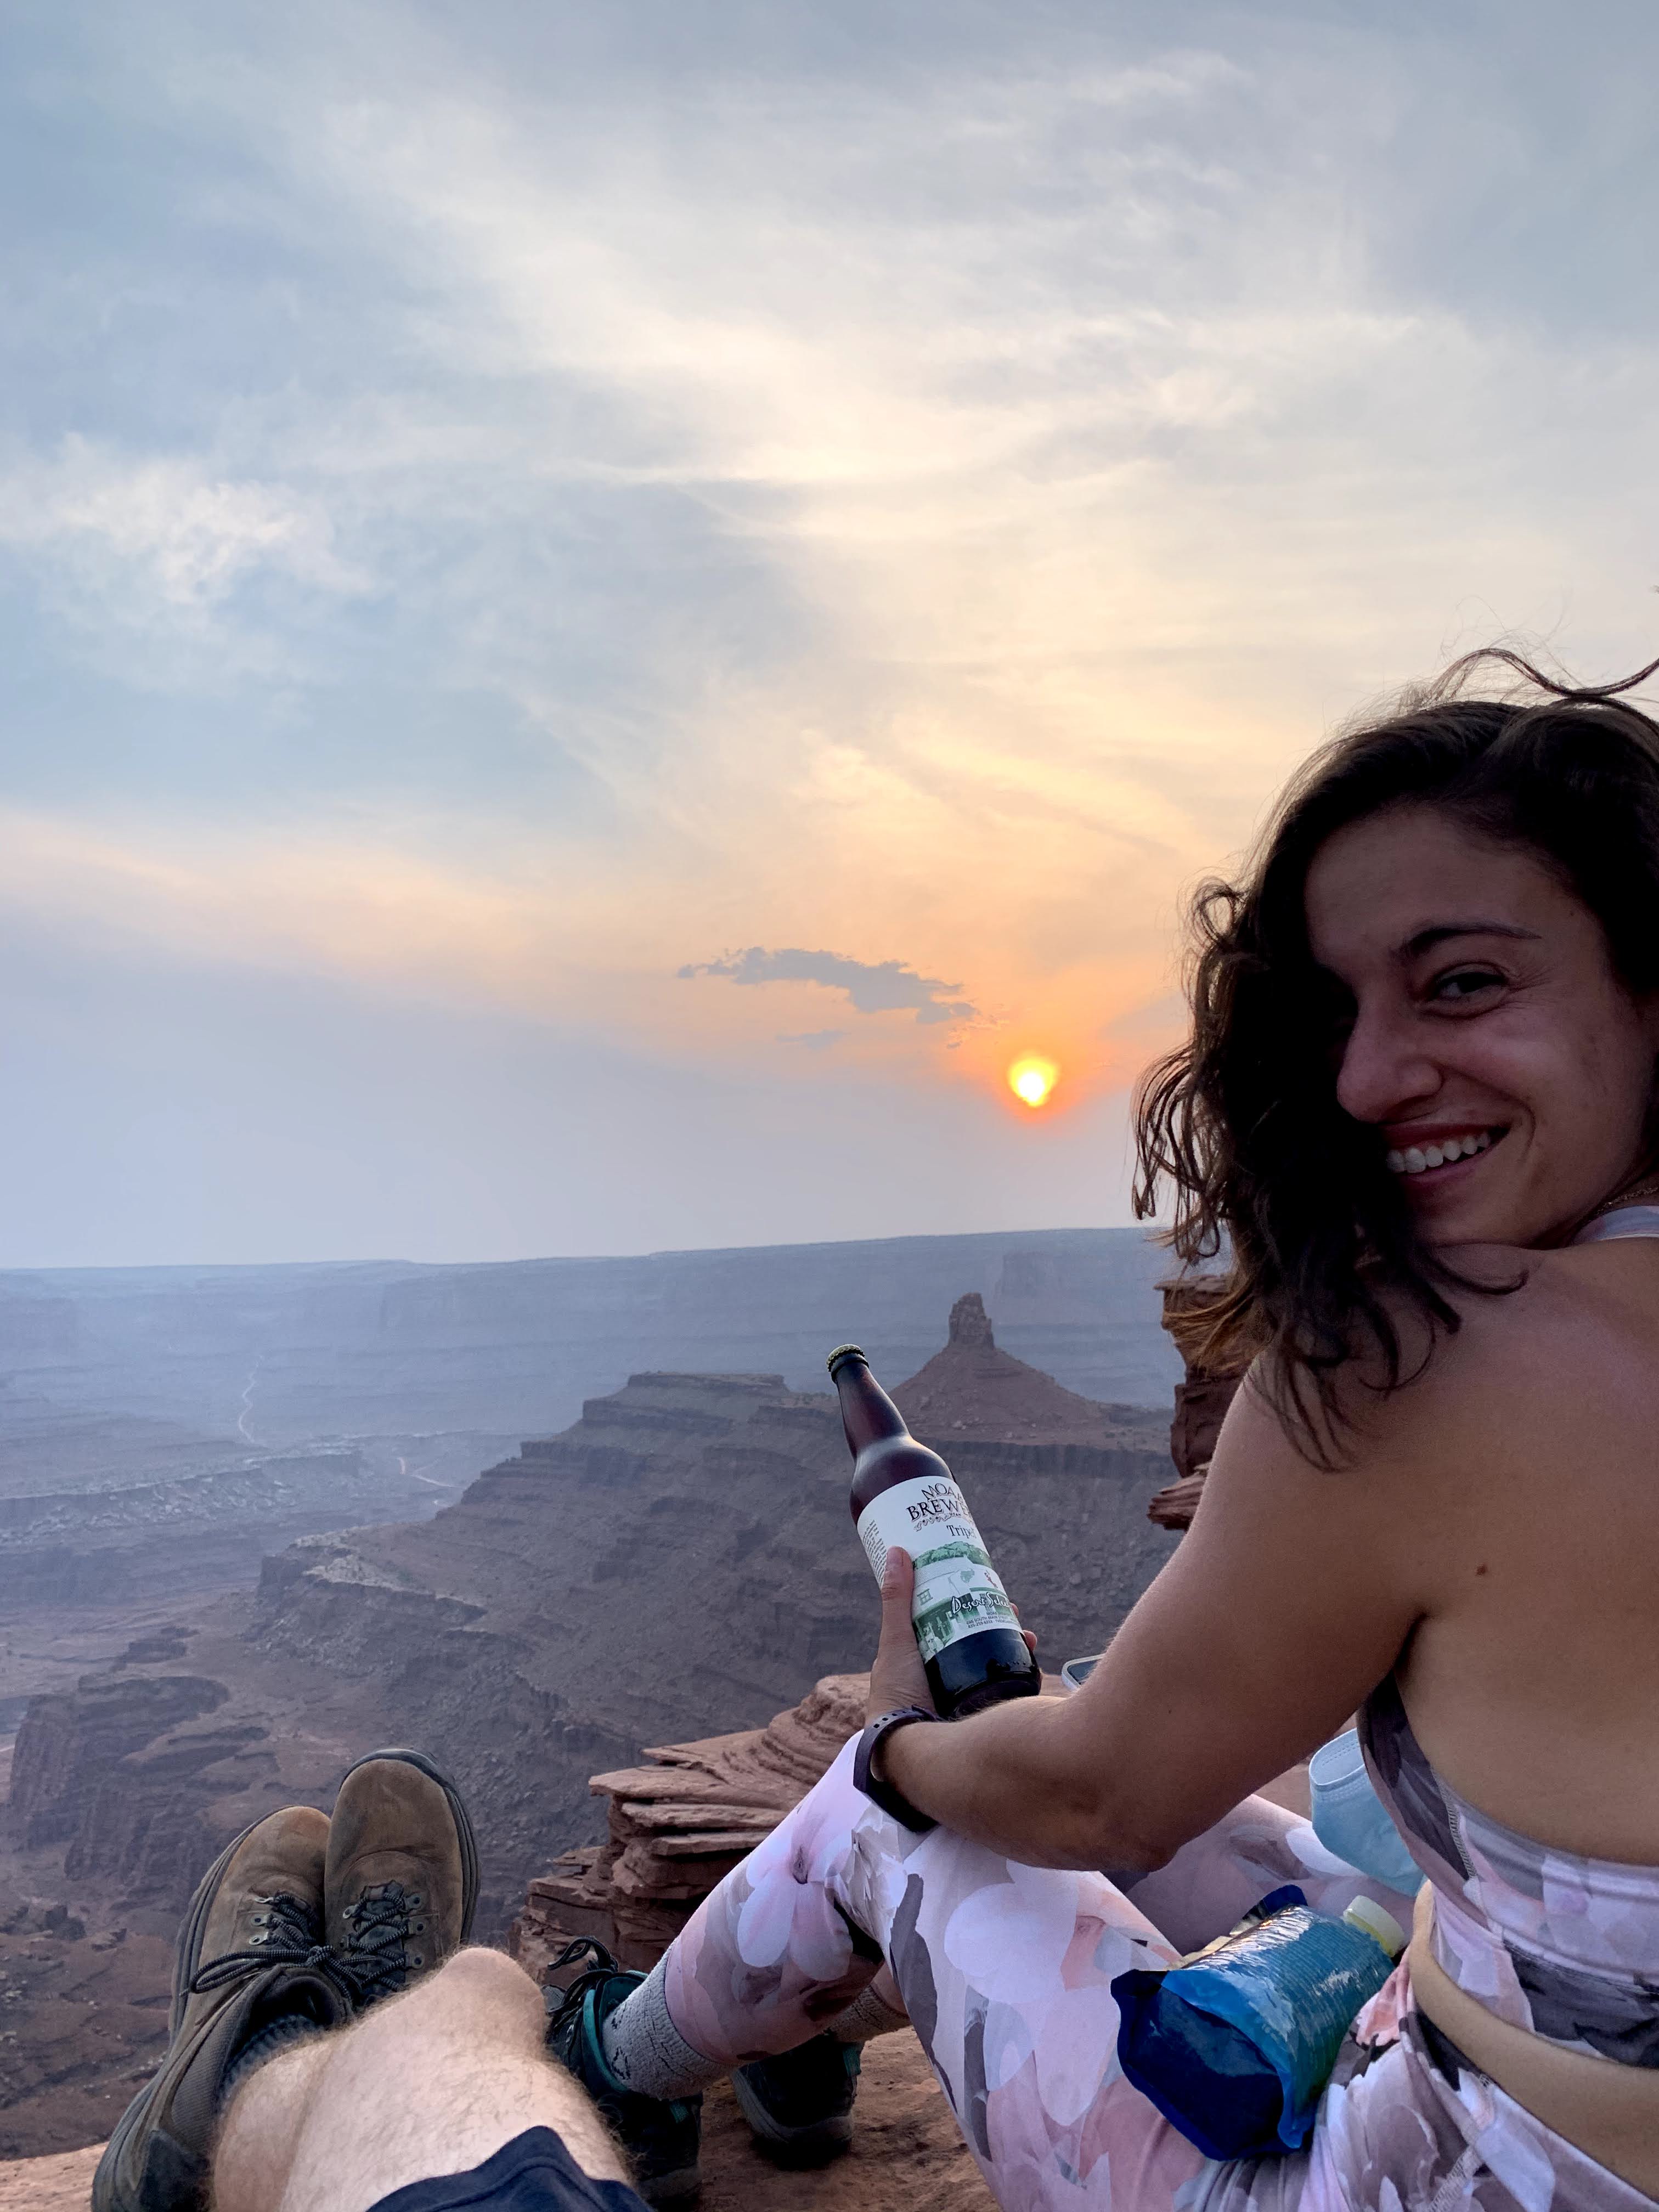
it gets HOT in Moab in direct sunlight, so in the afternoon we walked around the town, hit up some gift shops, the Moab Brewery (to take a case home), and the food truck park to pick up sandwiches for dinner.

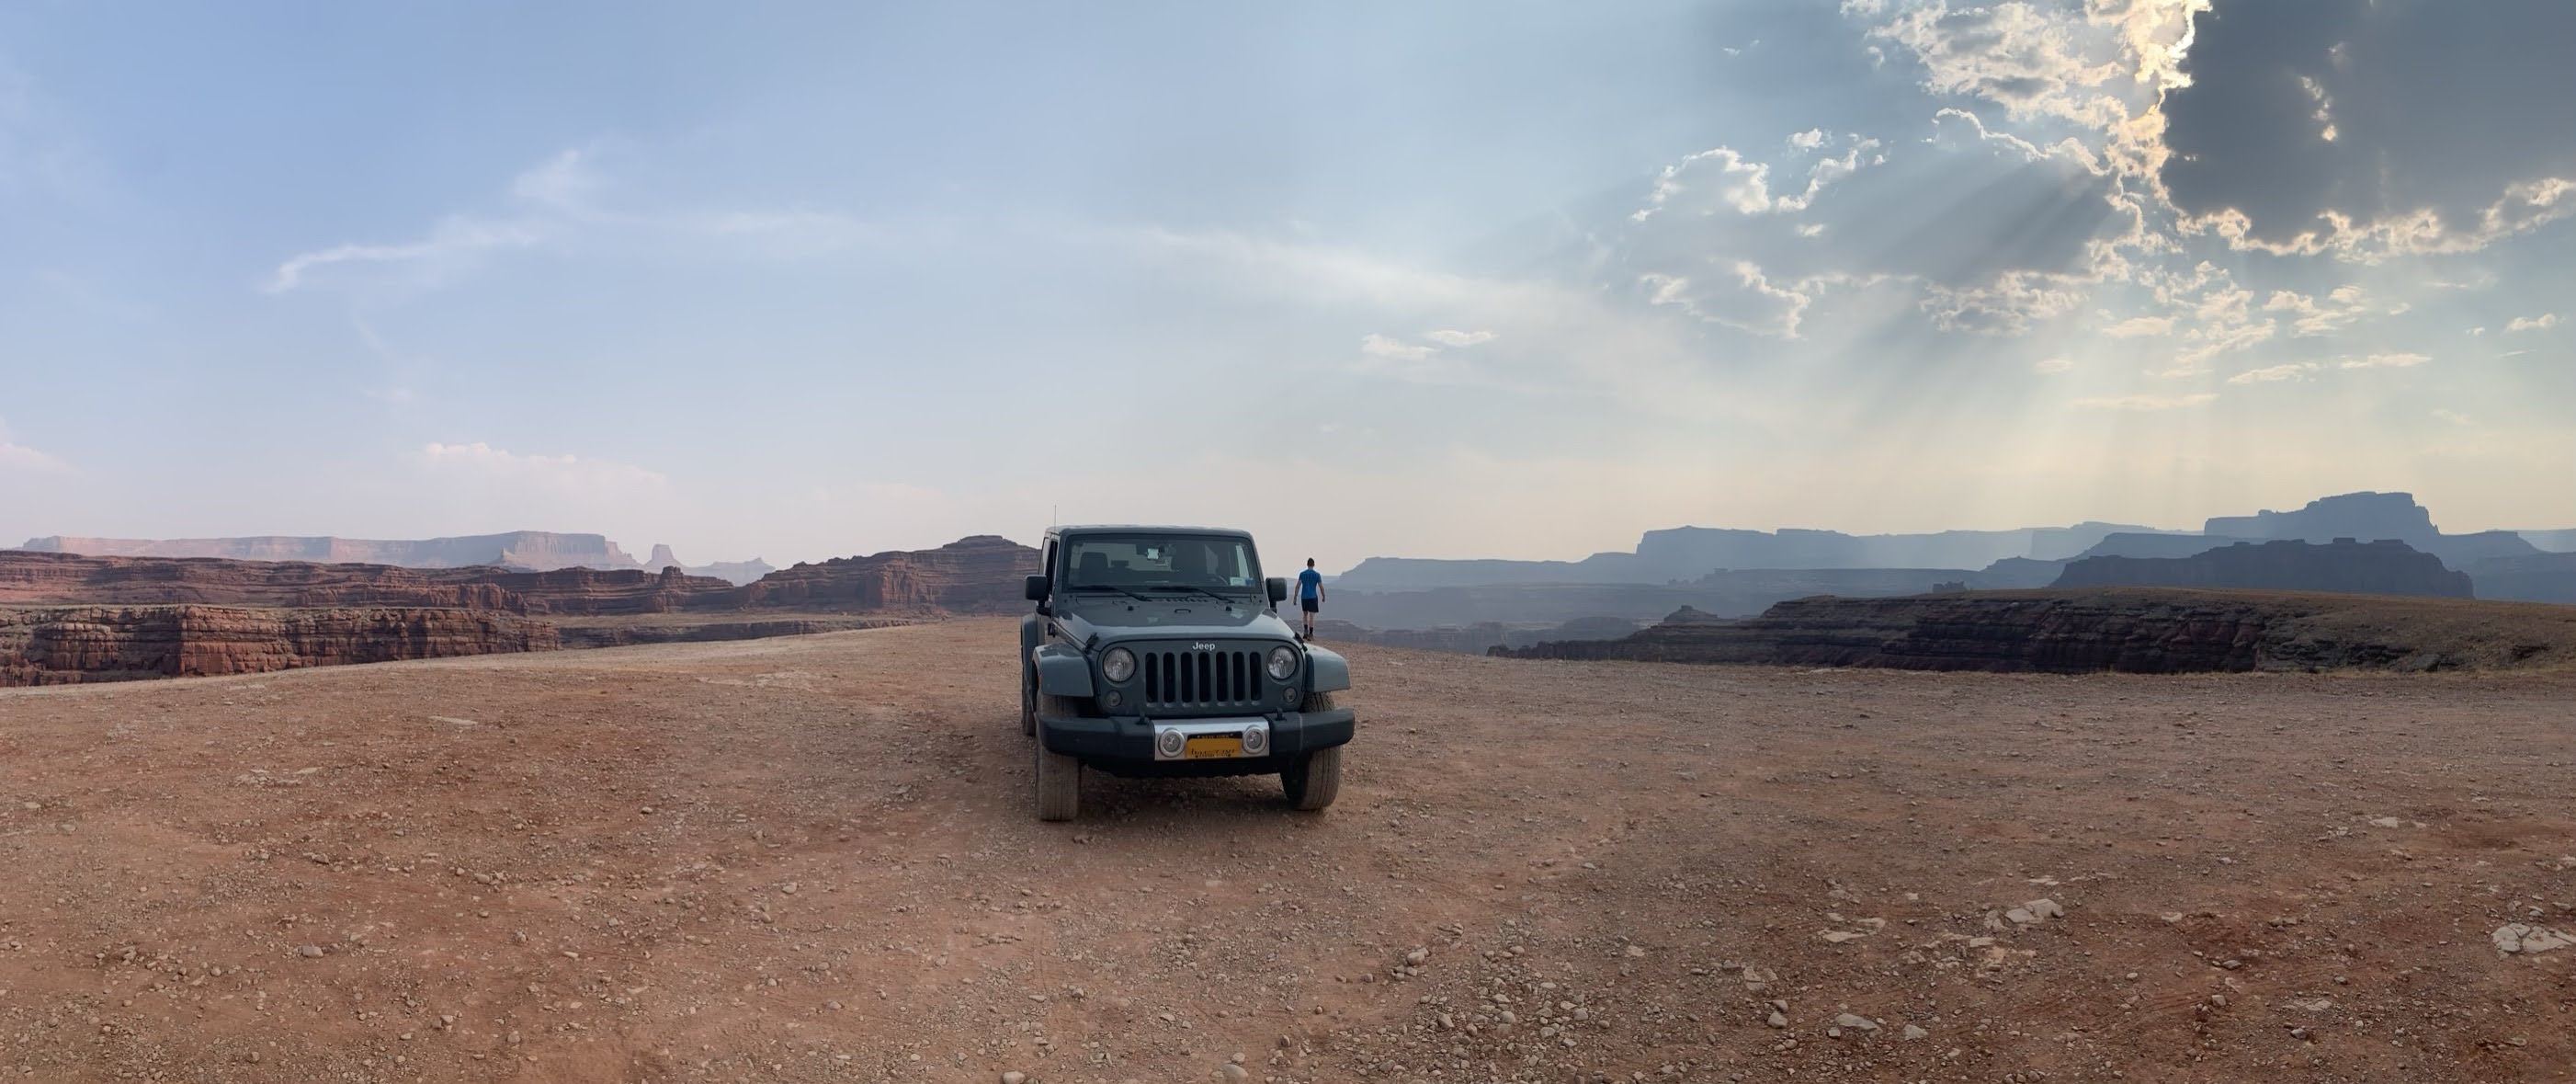
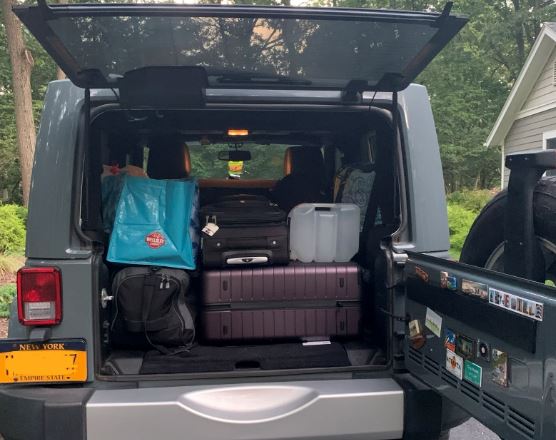
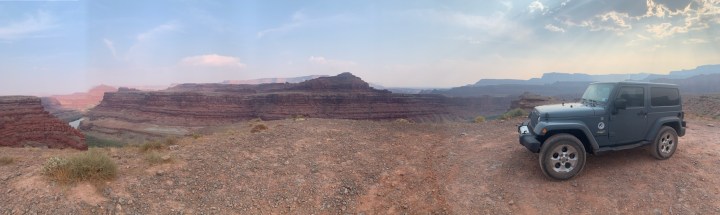
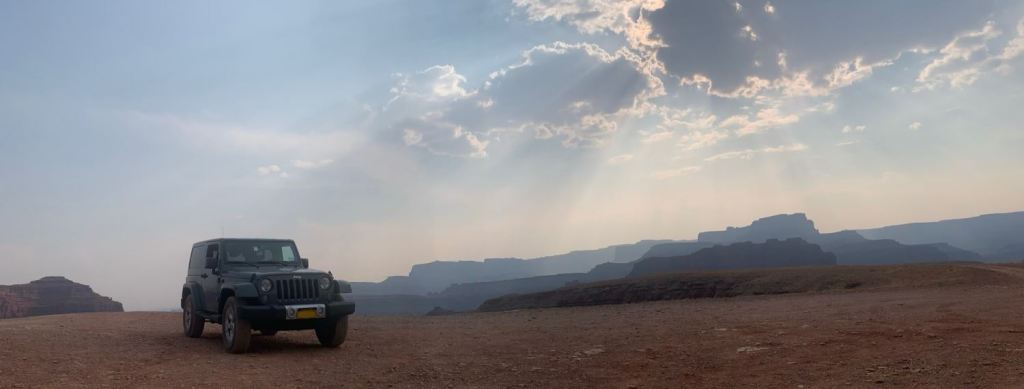
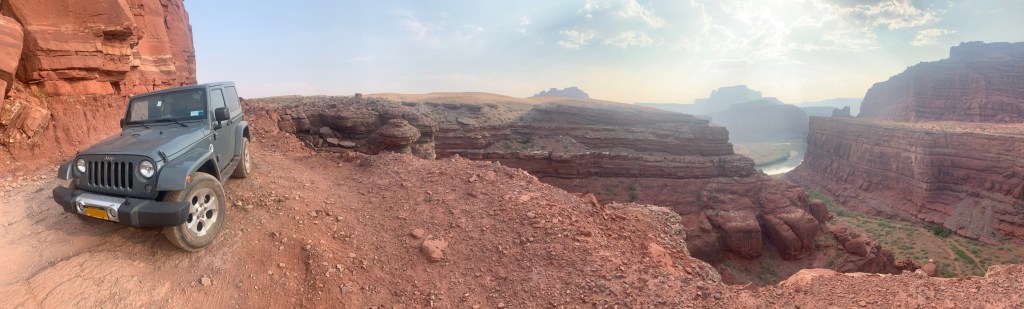
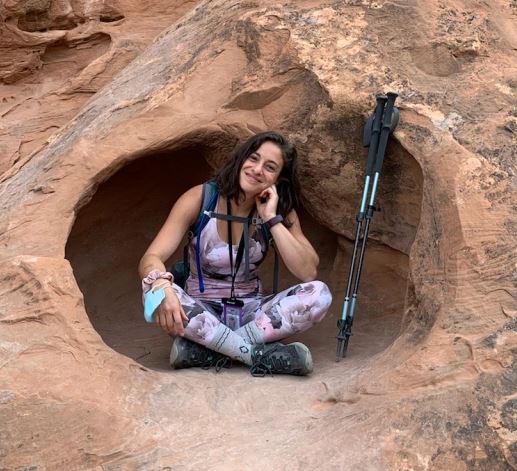
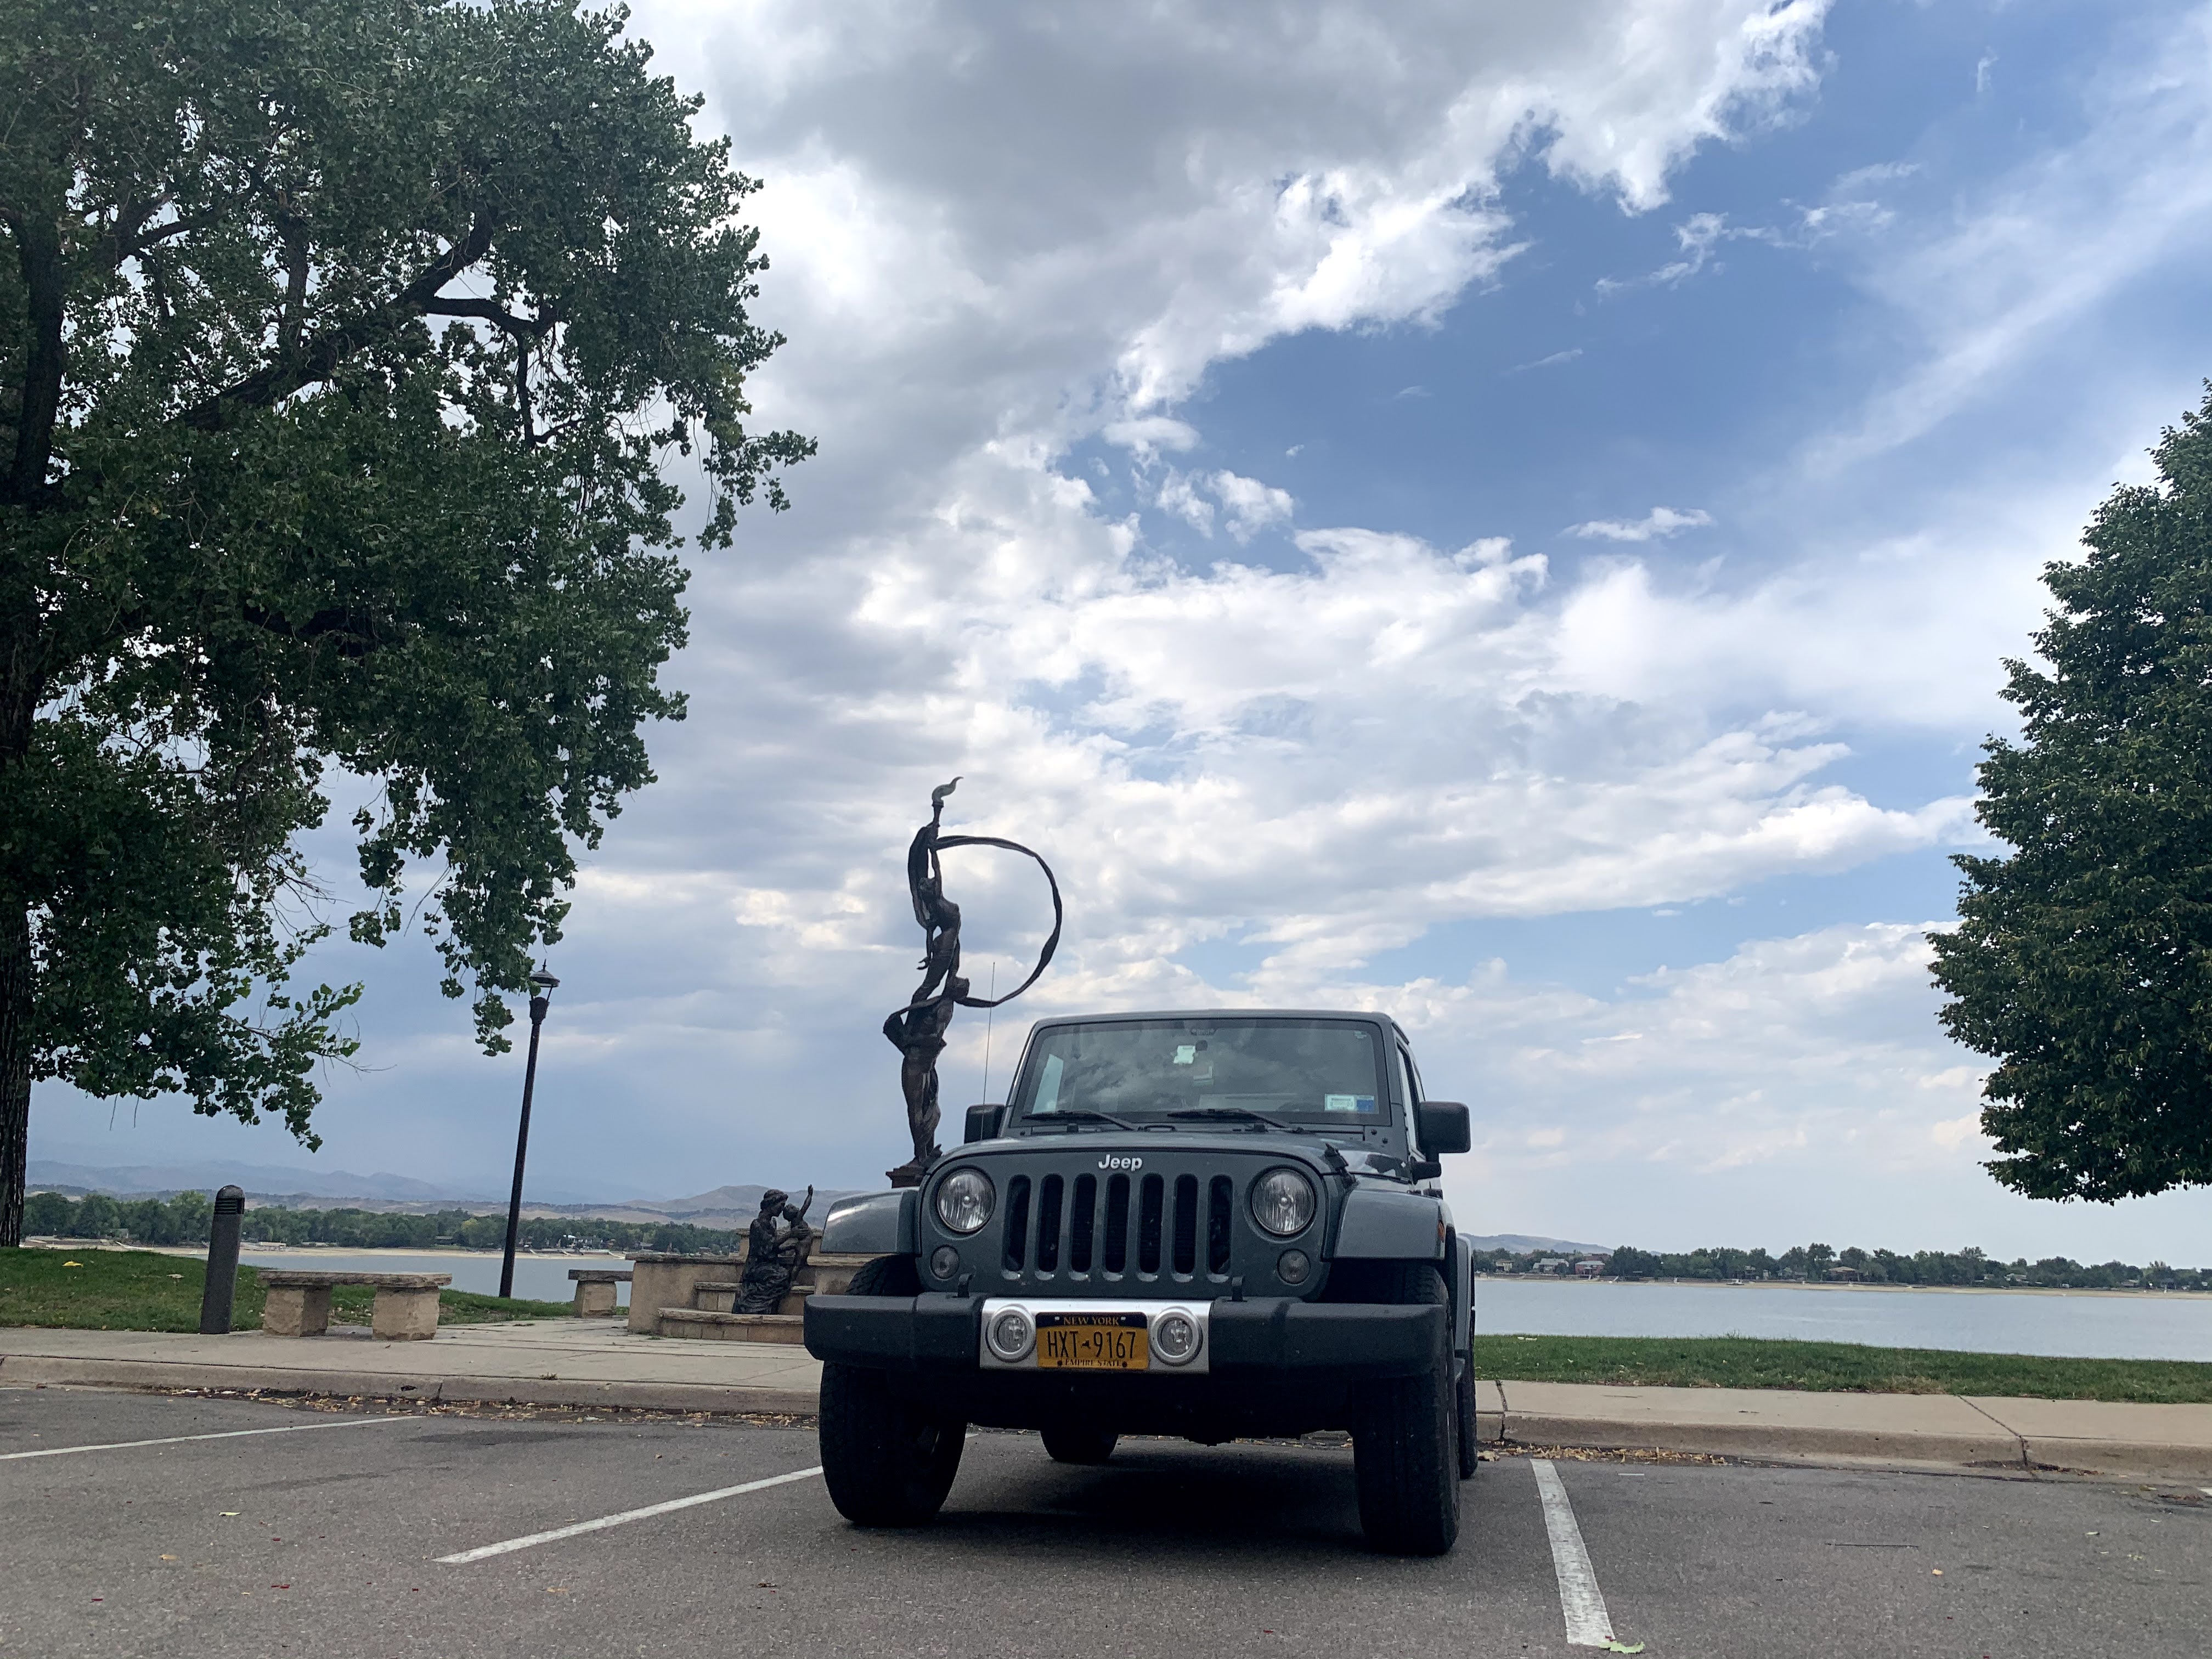
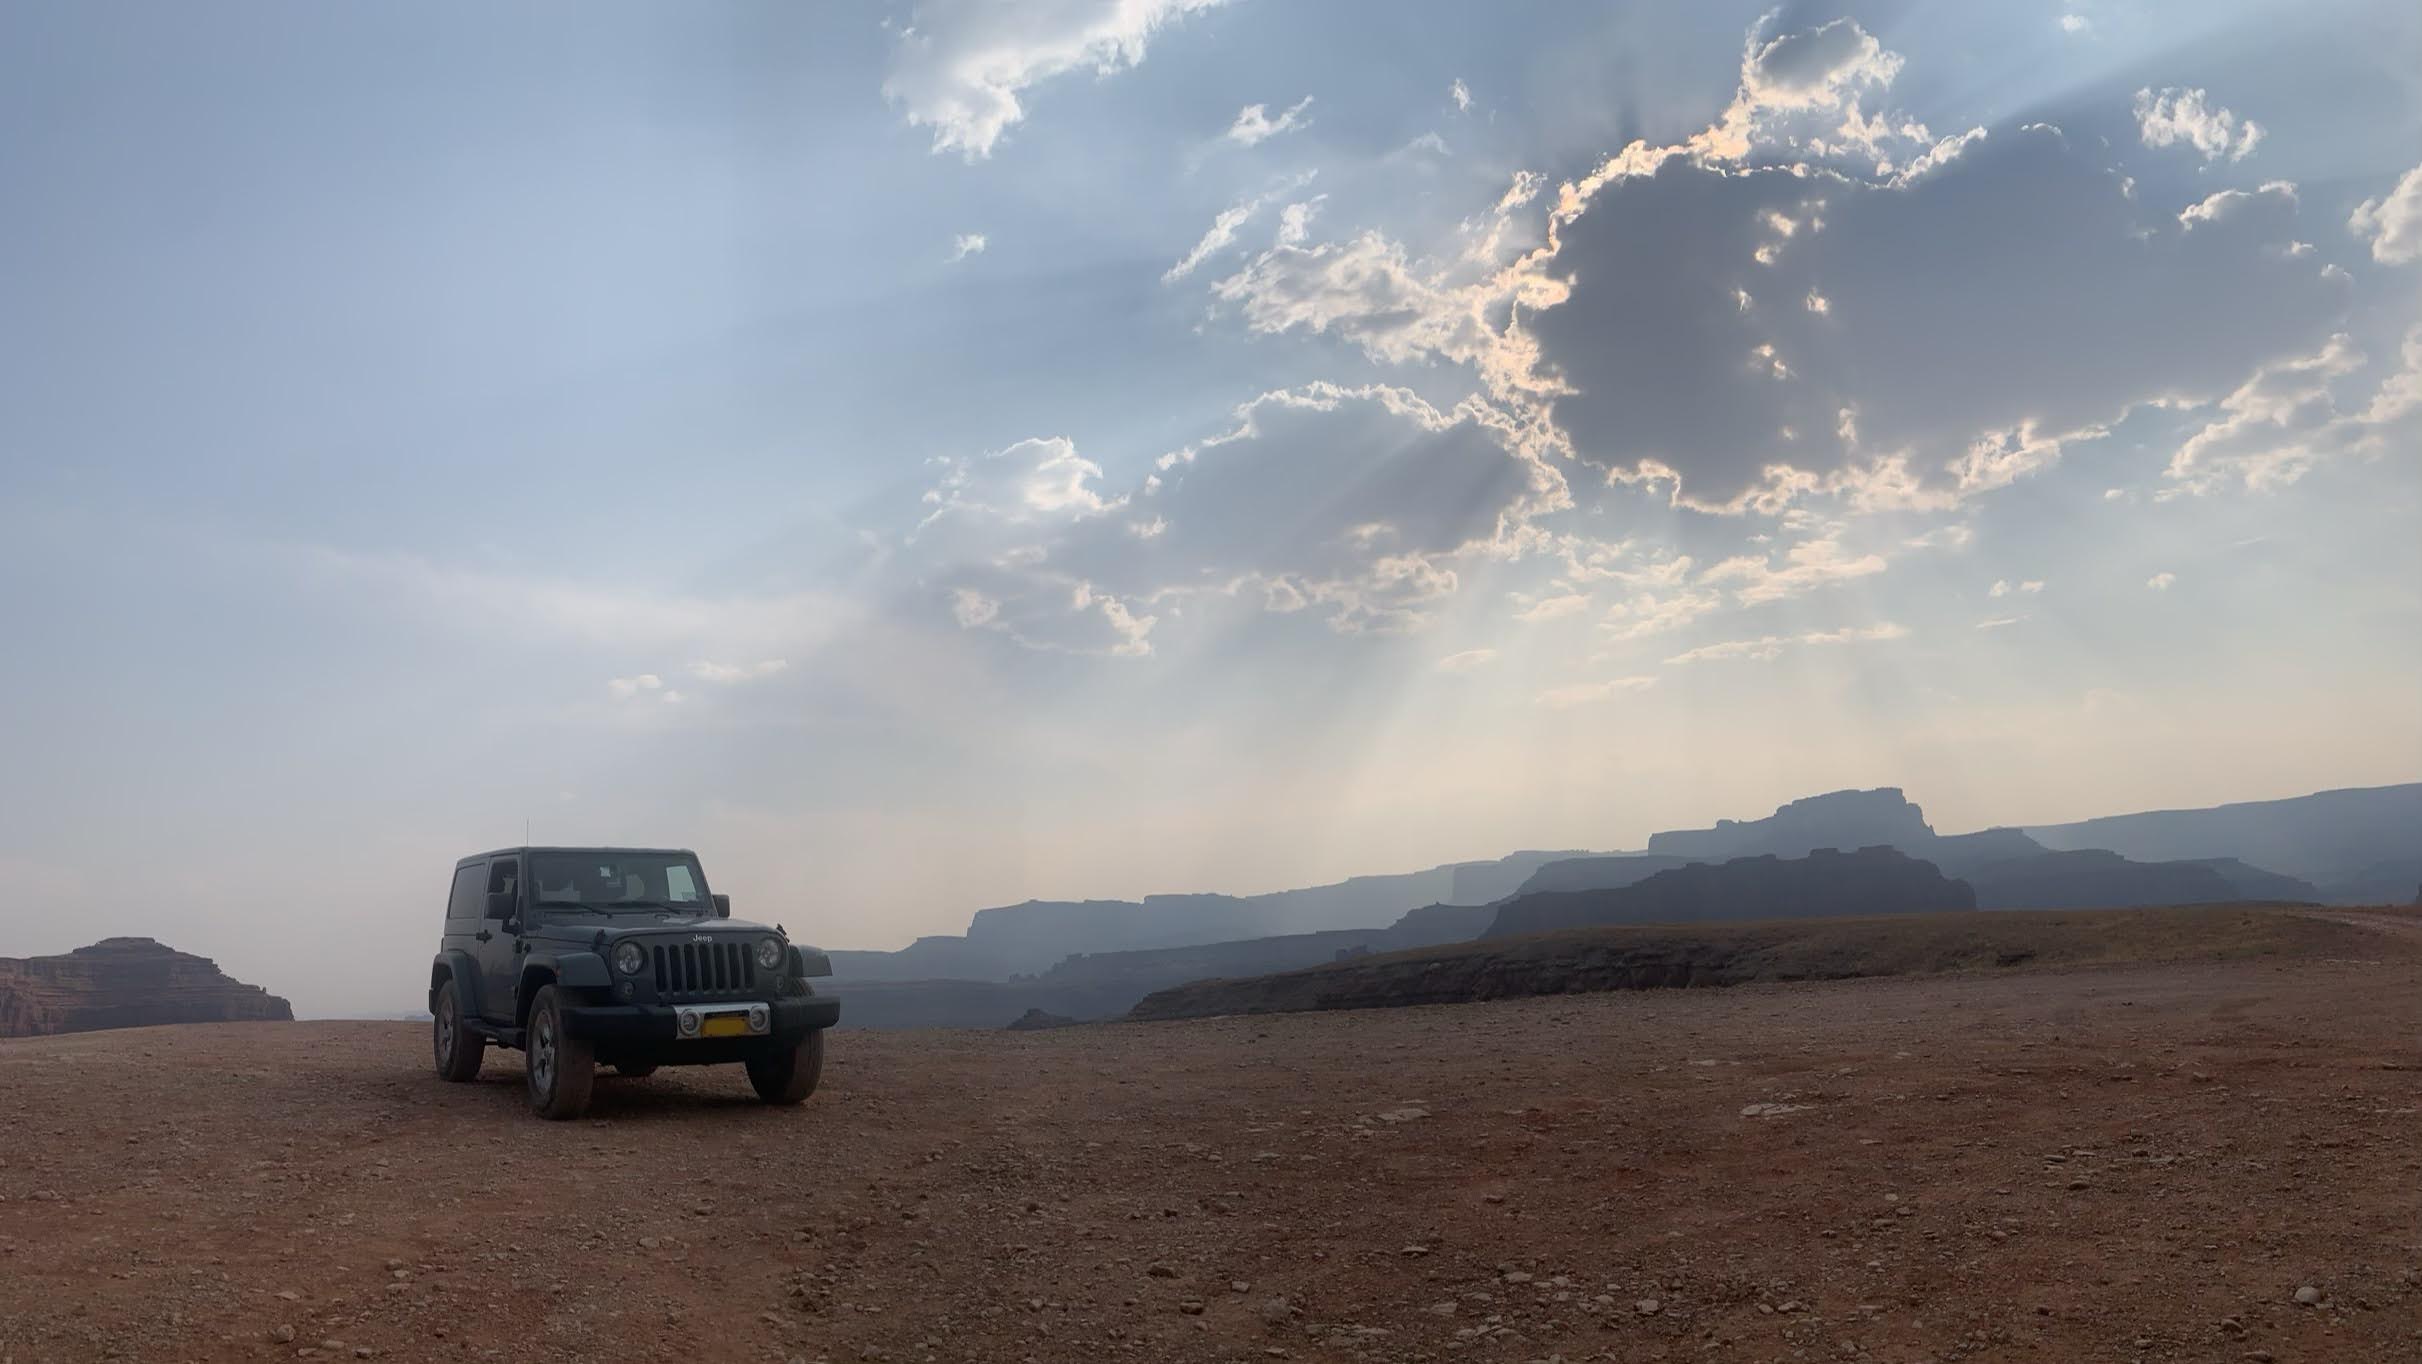
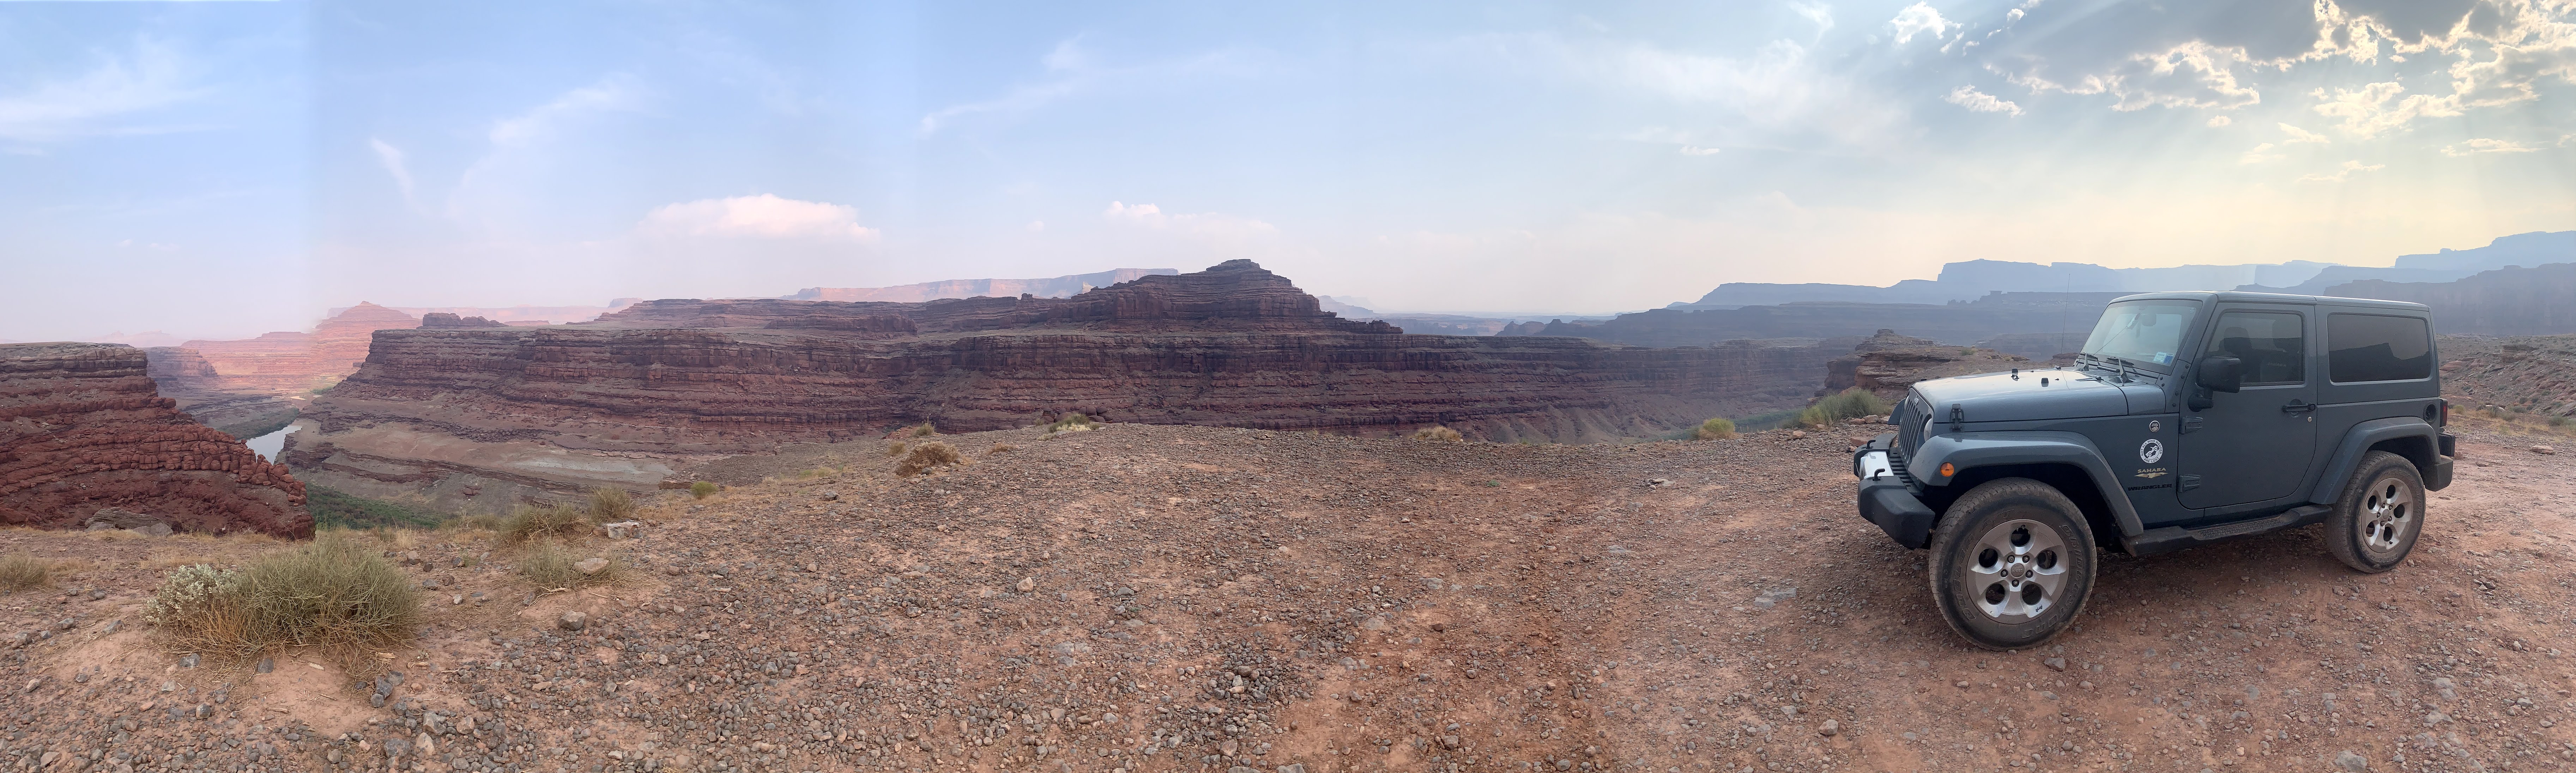
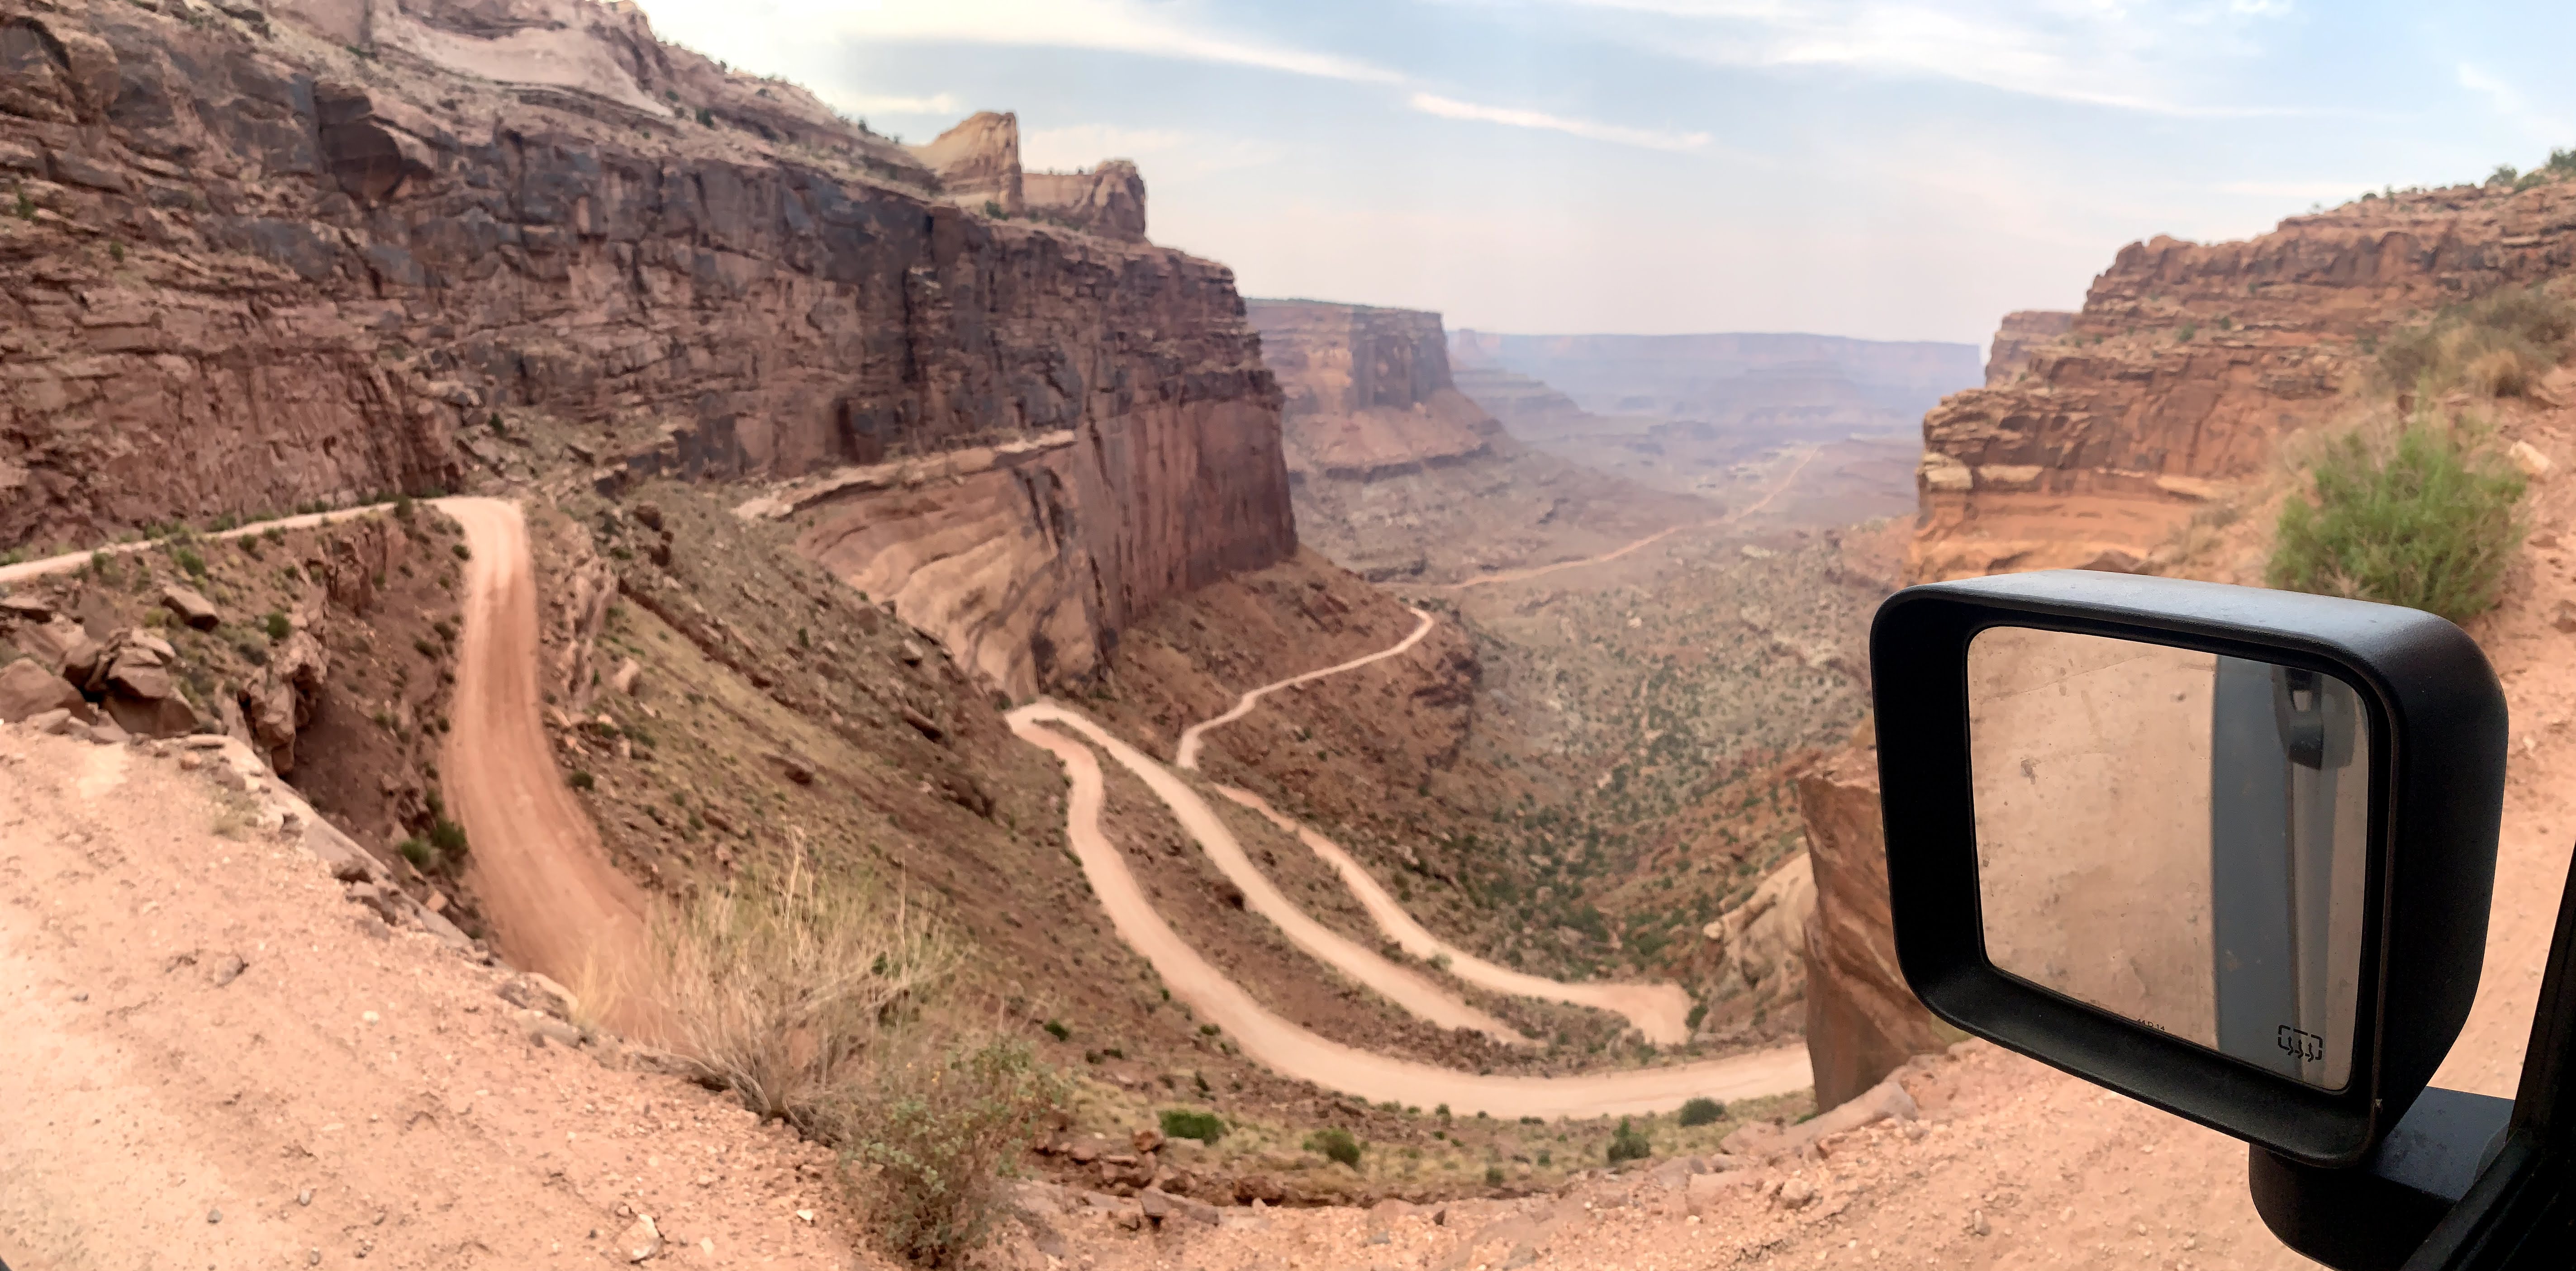
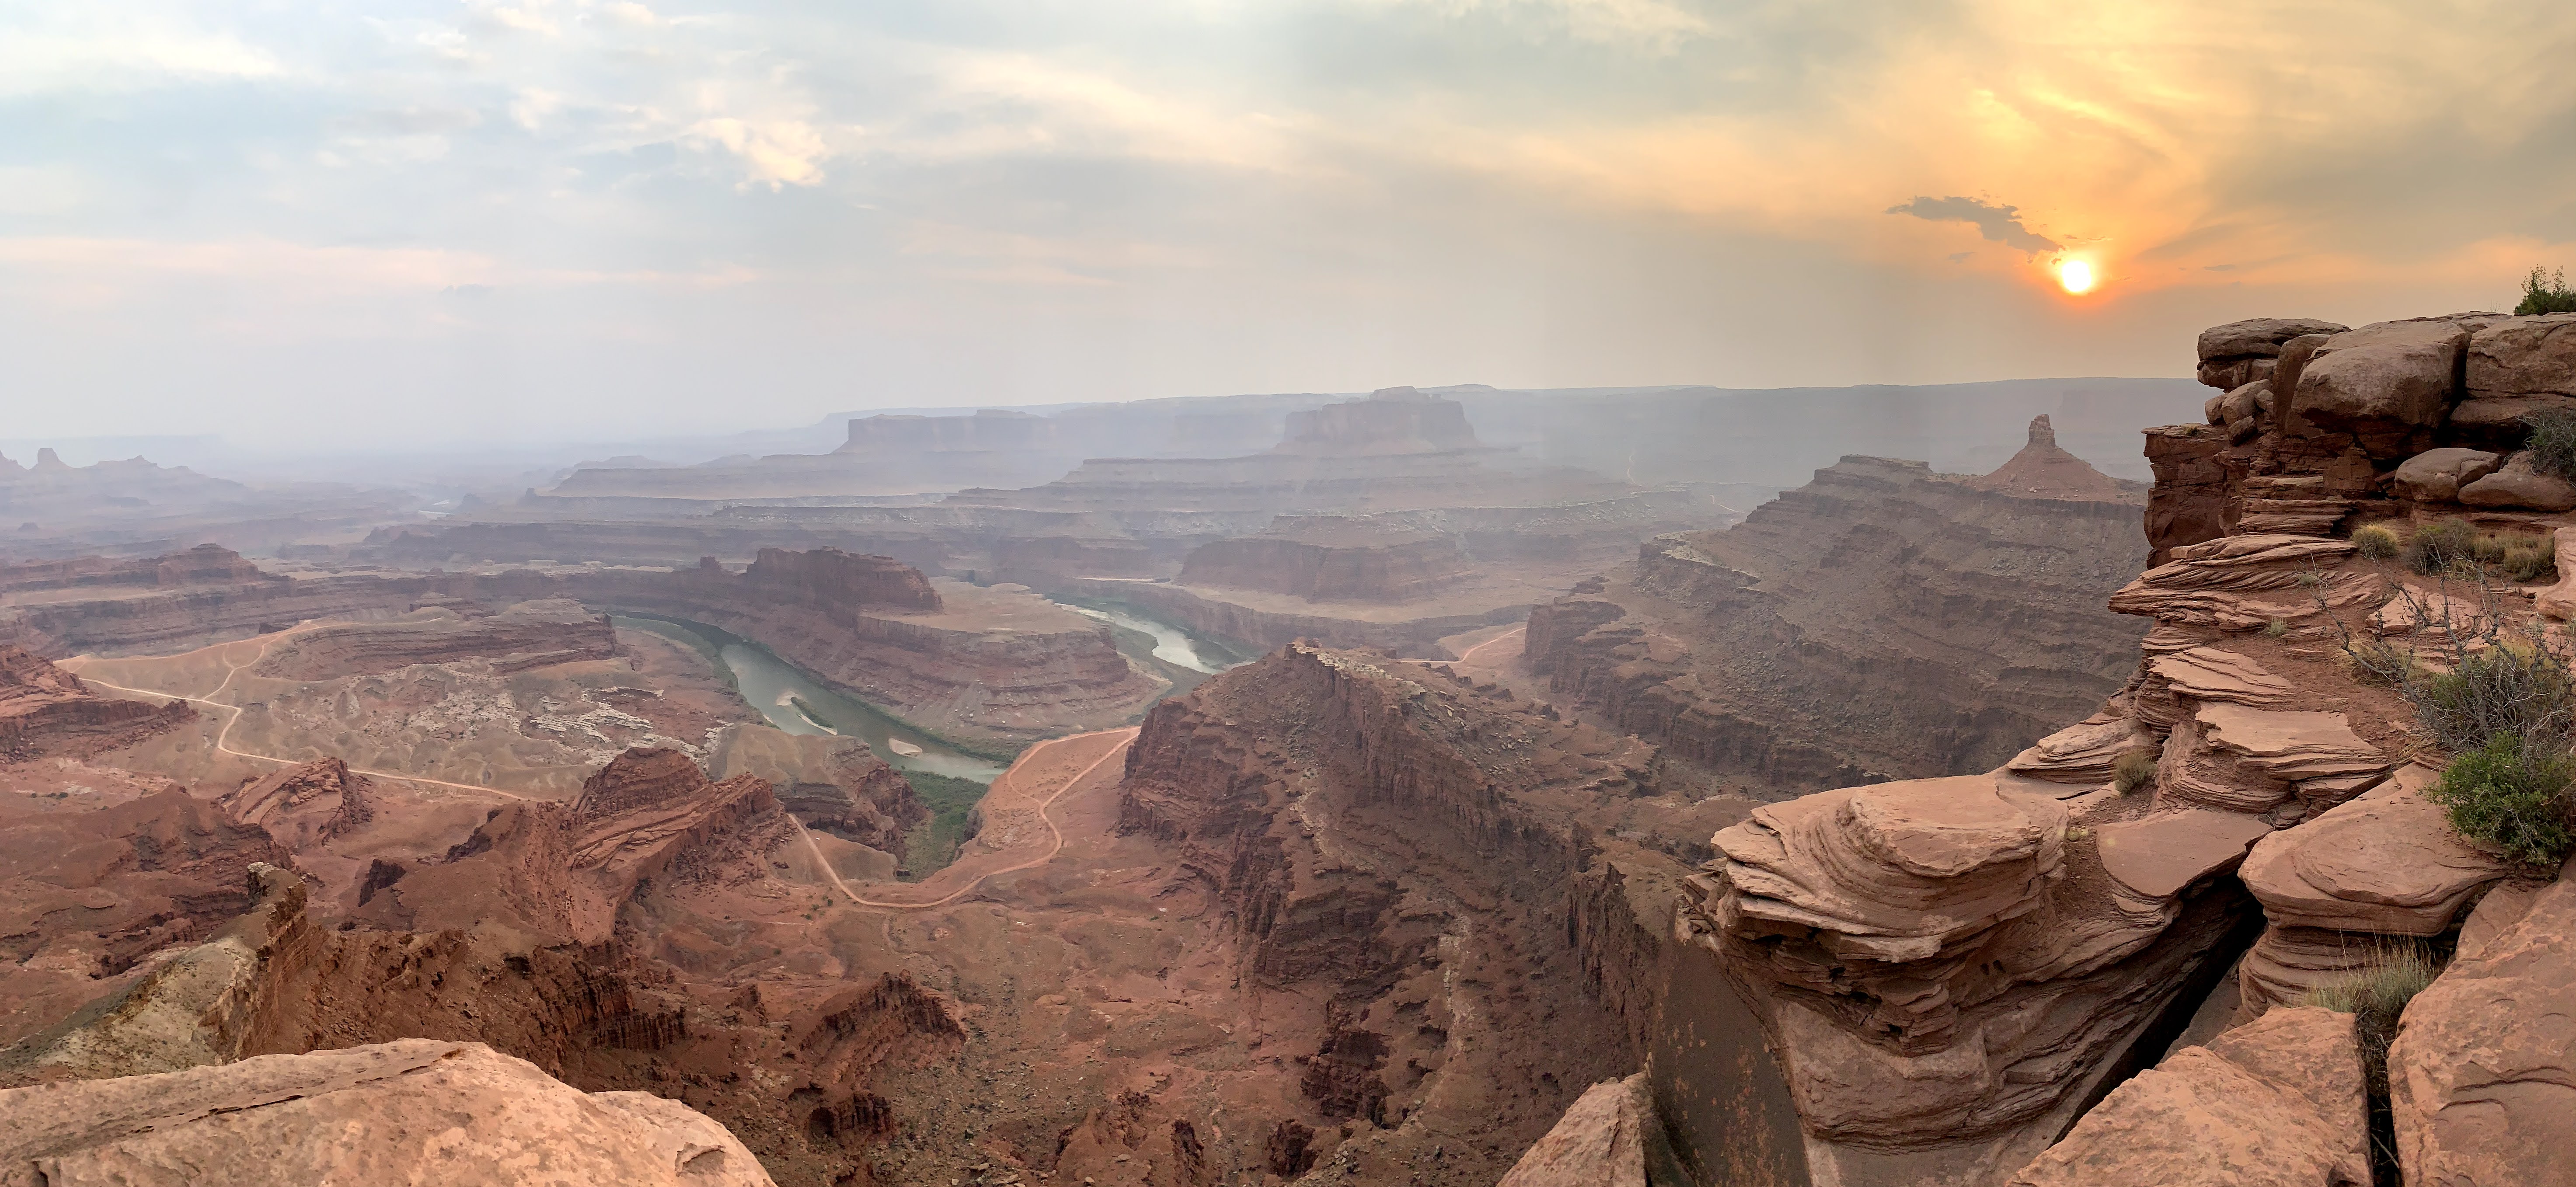
I took my Jeep Wrangler to Moab, so it was only fair to reward her with some off roading. Later on in the afternoon, we did the Potash and Shafer Trails in Canyonlands National Park with the Jeep. We did these backwards technically because we wanted to end up at the Canyonlands visitor center area once we finished the trail. The Potash Trail was rocky and rough, but was just logistically necessary in order to get to the Shafer Trail Shafer had some cool switchbacks to get you up the mountain with incredible views along the way. There were plenty of places to turn off and take iconic pictures of your vehicles with views off the mountain of the Colorado river in the background. Totally safe trail that you can probably do with whatever car you are in, to be honest.

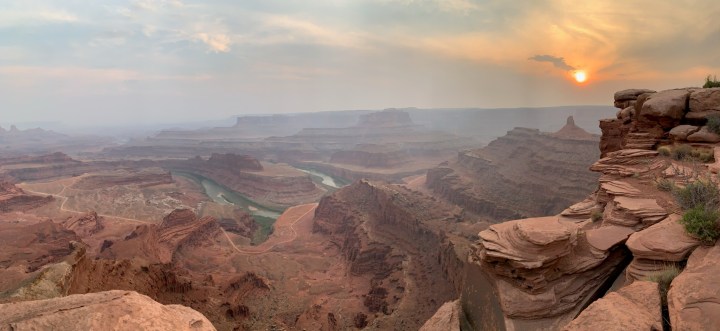
Sunset and Stargazing at Deadhorse State Park – We stayed in the park until after dark because this area is an official dark zone, meaning that stargazing is superb. If you decide to do this at any point, it doesn’t have to be at this park in particular, and you should choose a lookout point wherever you go that is very close to the parking lot (if not the parking lot itself). Bring a flashlight or make sure your phone has a really good charge. Finding your way through a perfectly pitch black park is a lot more difficult than you envision, even if you think you know exactly where you are. “Dark” has a new meaning out here. I wish that photos of the sky could come out on my phone, because the stargazing was like nothing I have ever seen before. We even caught some shooting stars that were leftover from the Perseid Meteor Shower.

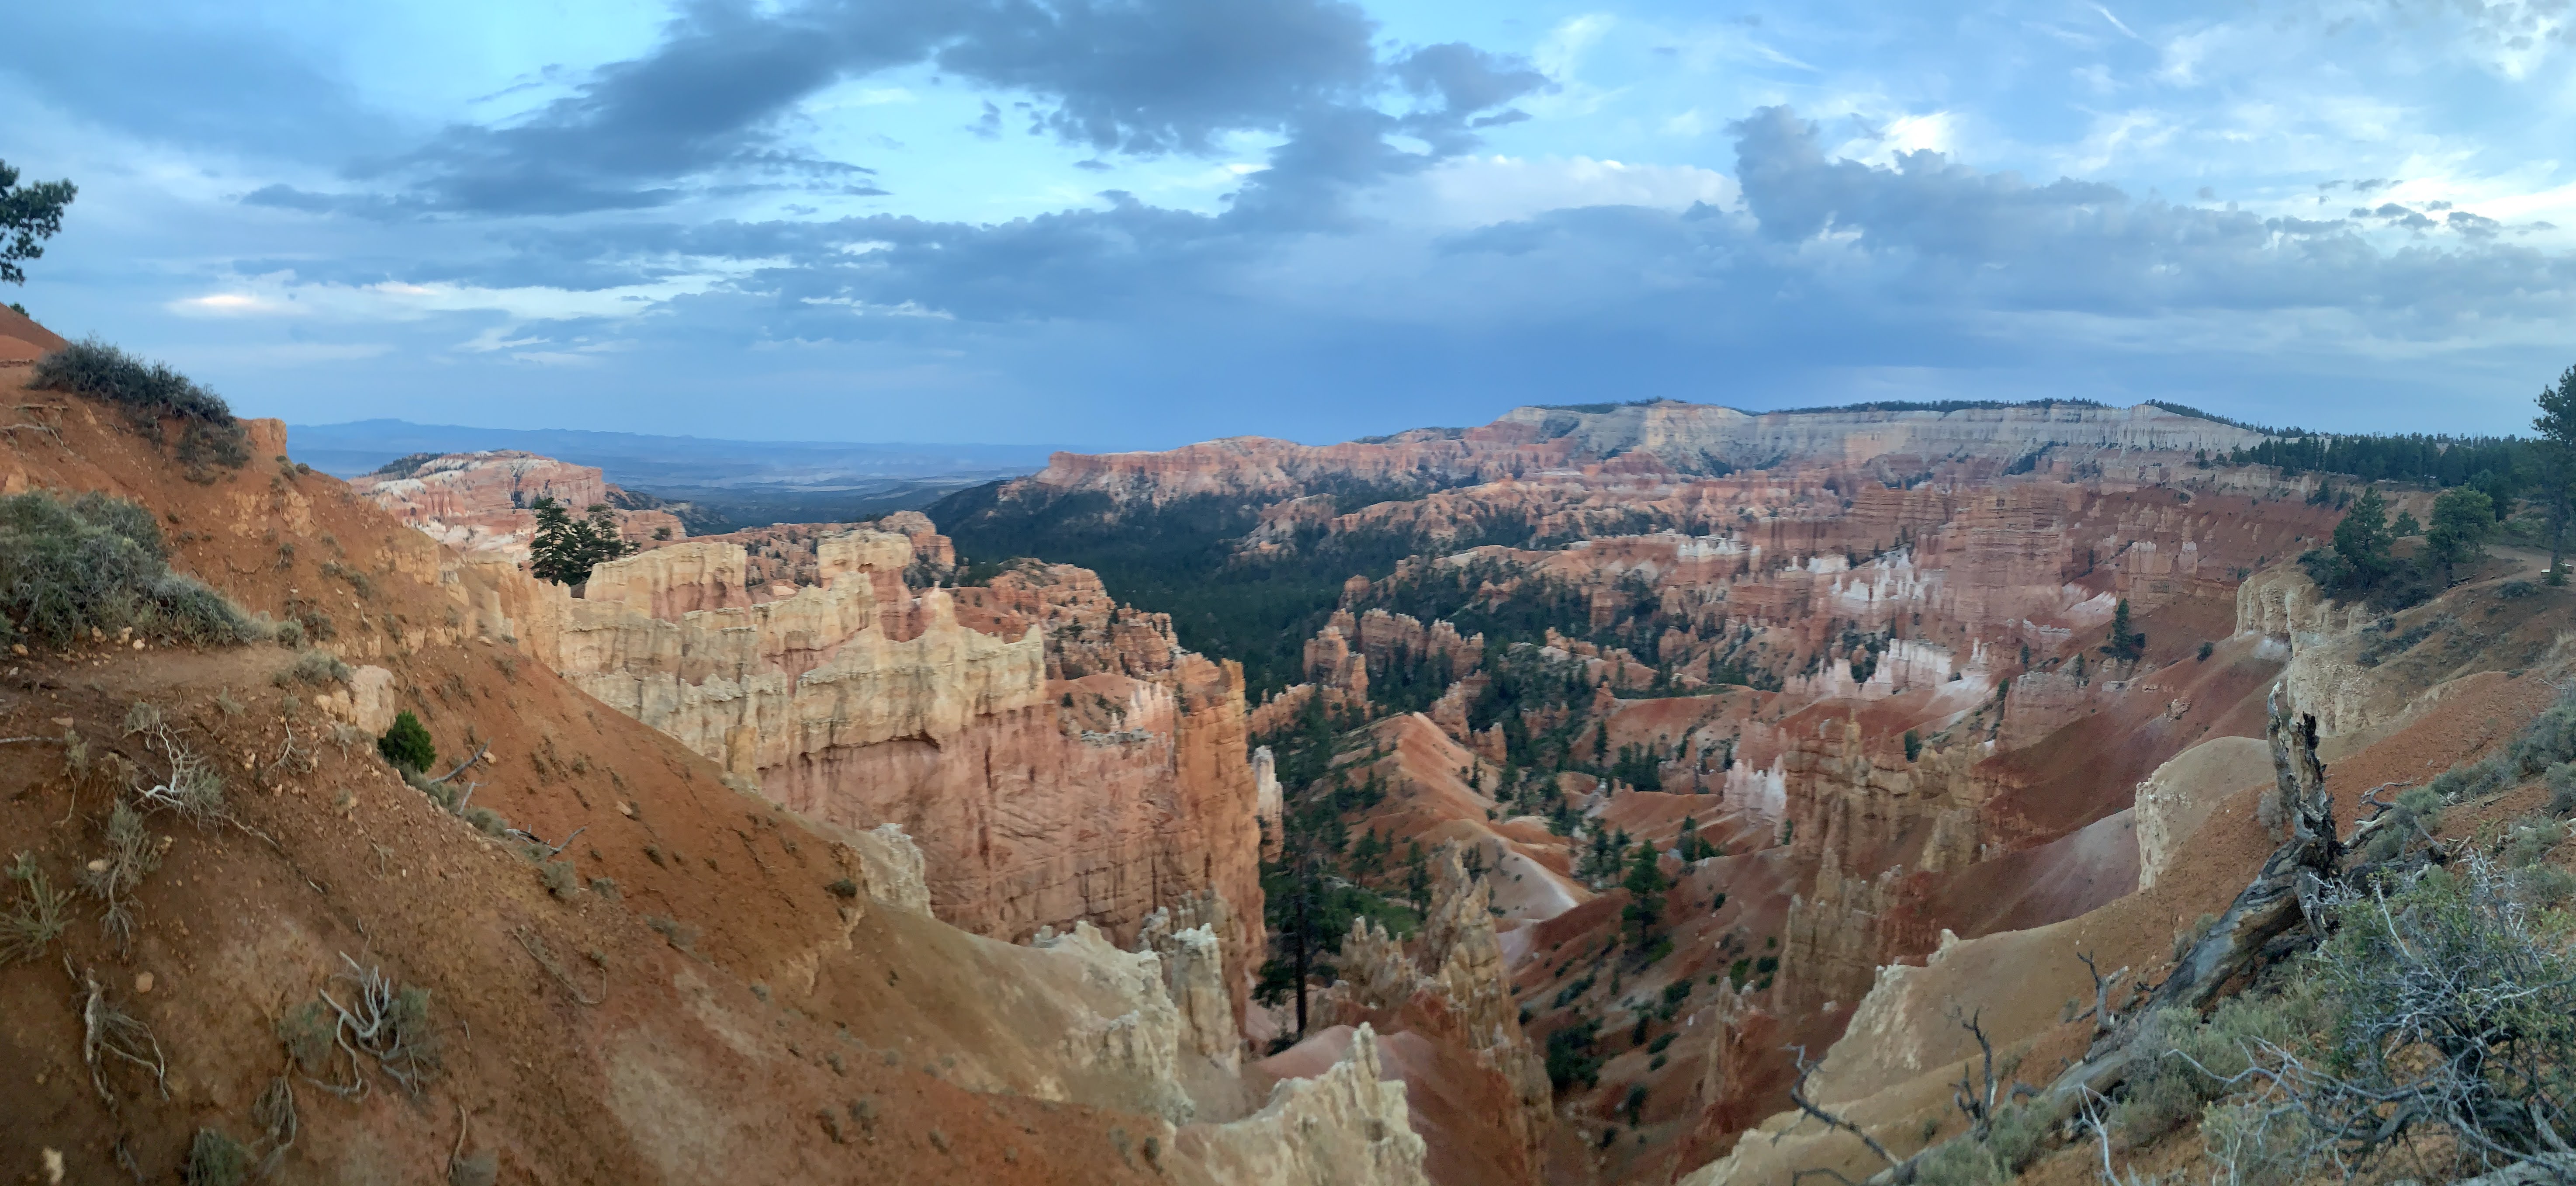
Day 13 (Bryce National Park, Utah)

Jailhouse Cafe for breakfast in Moab before we left – This was a pancake house/diner, but the pancakes were not the best I ever had. The best pancake here is the apple ginger. The egg white omelet I got was filling and tasty!

It was just about a full day of travel down to the Bryce/Zion area from Moab.

We stopped at Puffer Lake on the drive down – This was recommended by a friend, who loves to fish. We didn’t fish but recommend it here if you do, and the view of the lake was beautiful. It was chilly and stormy that day so we didn’t go in, but it looks like you could if you wanted to!

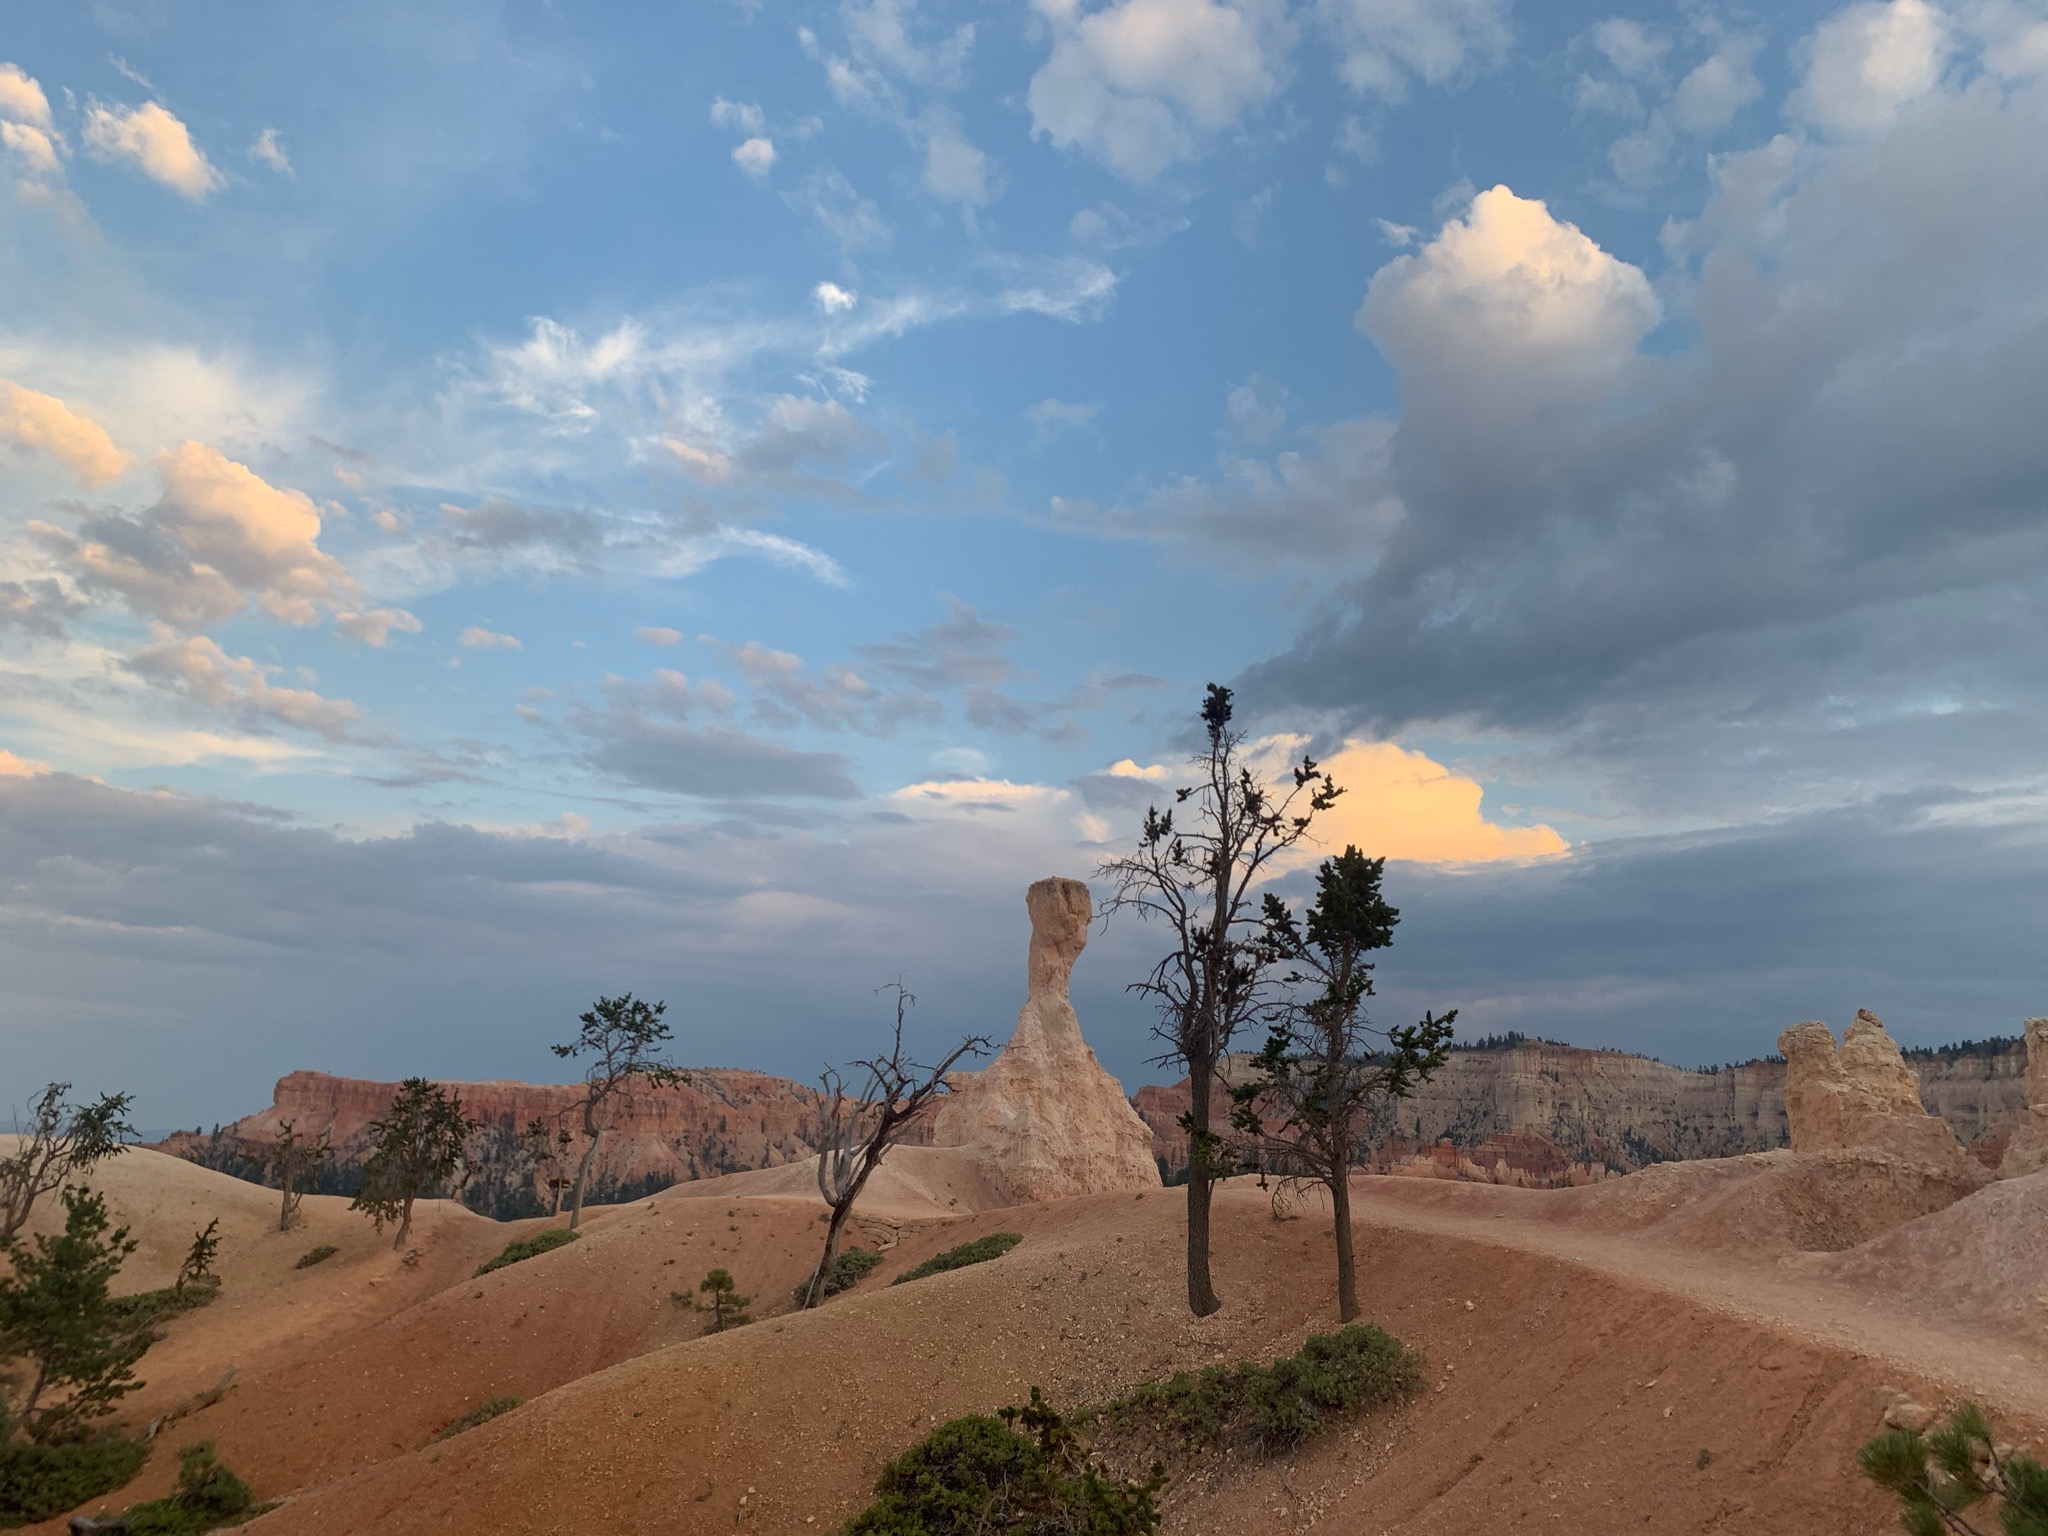
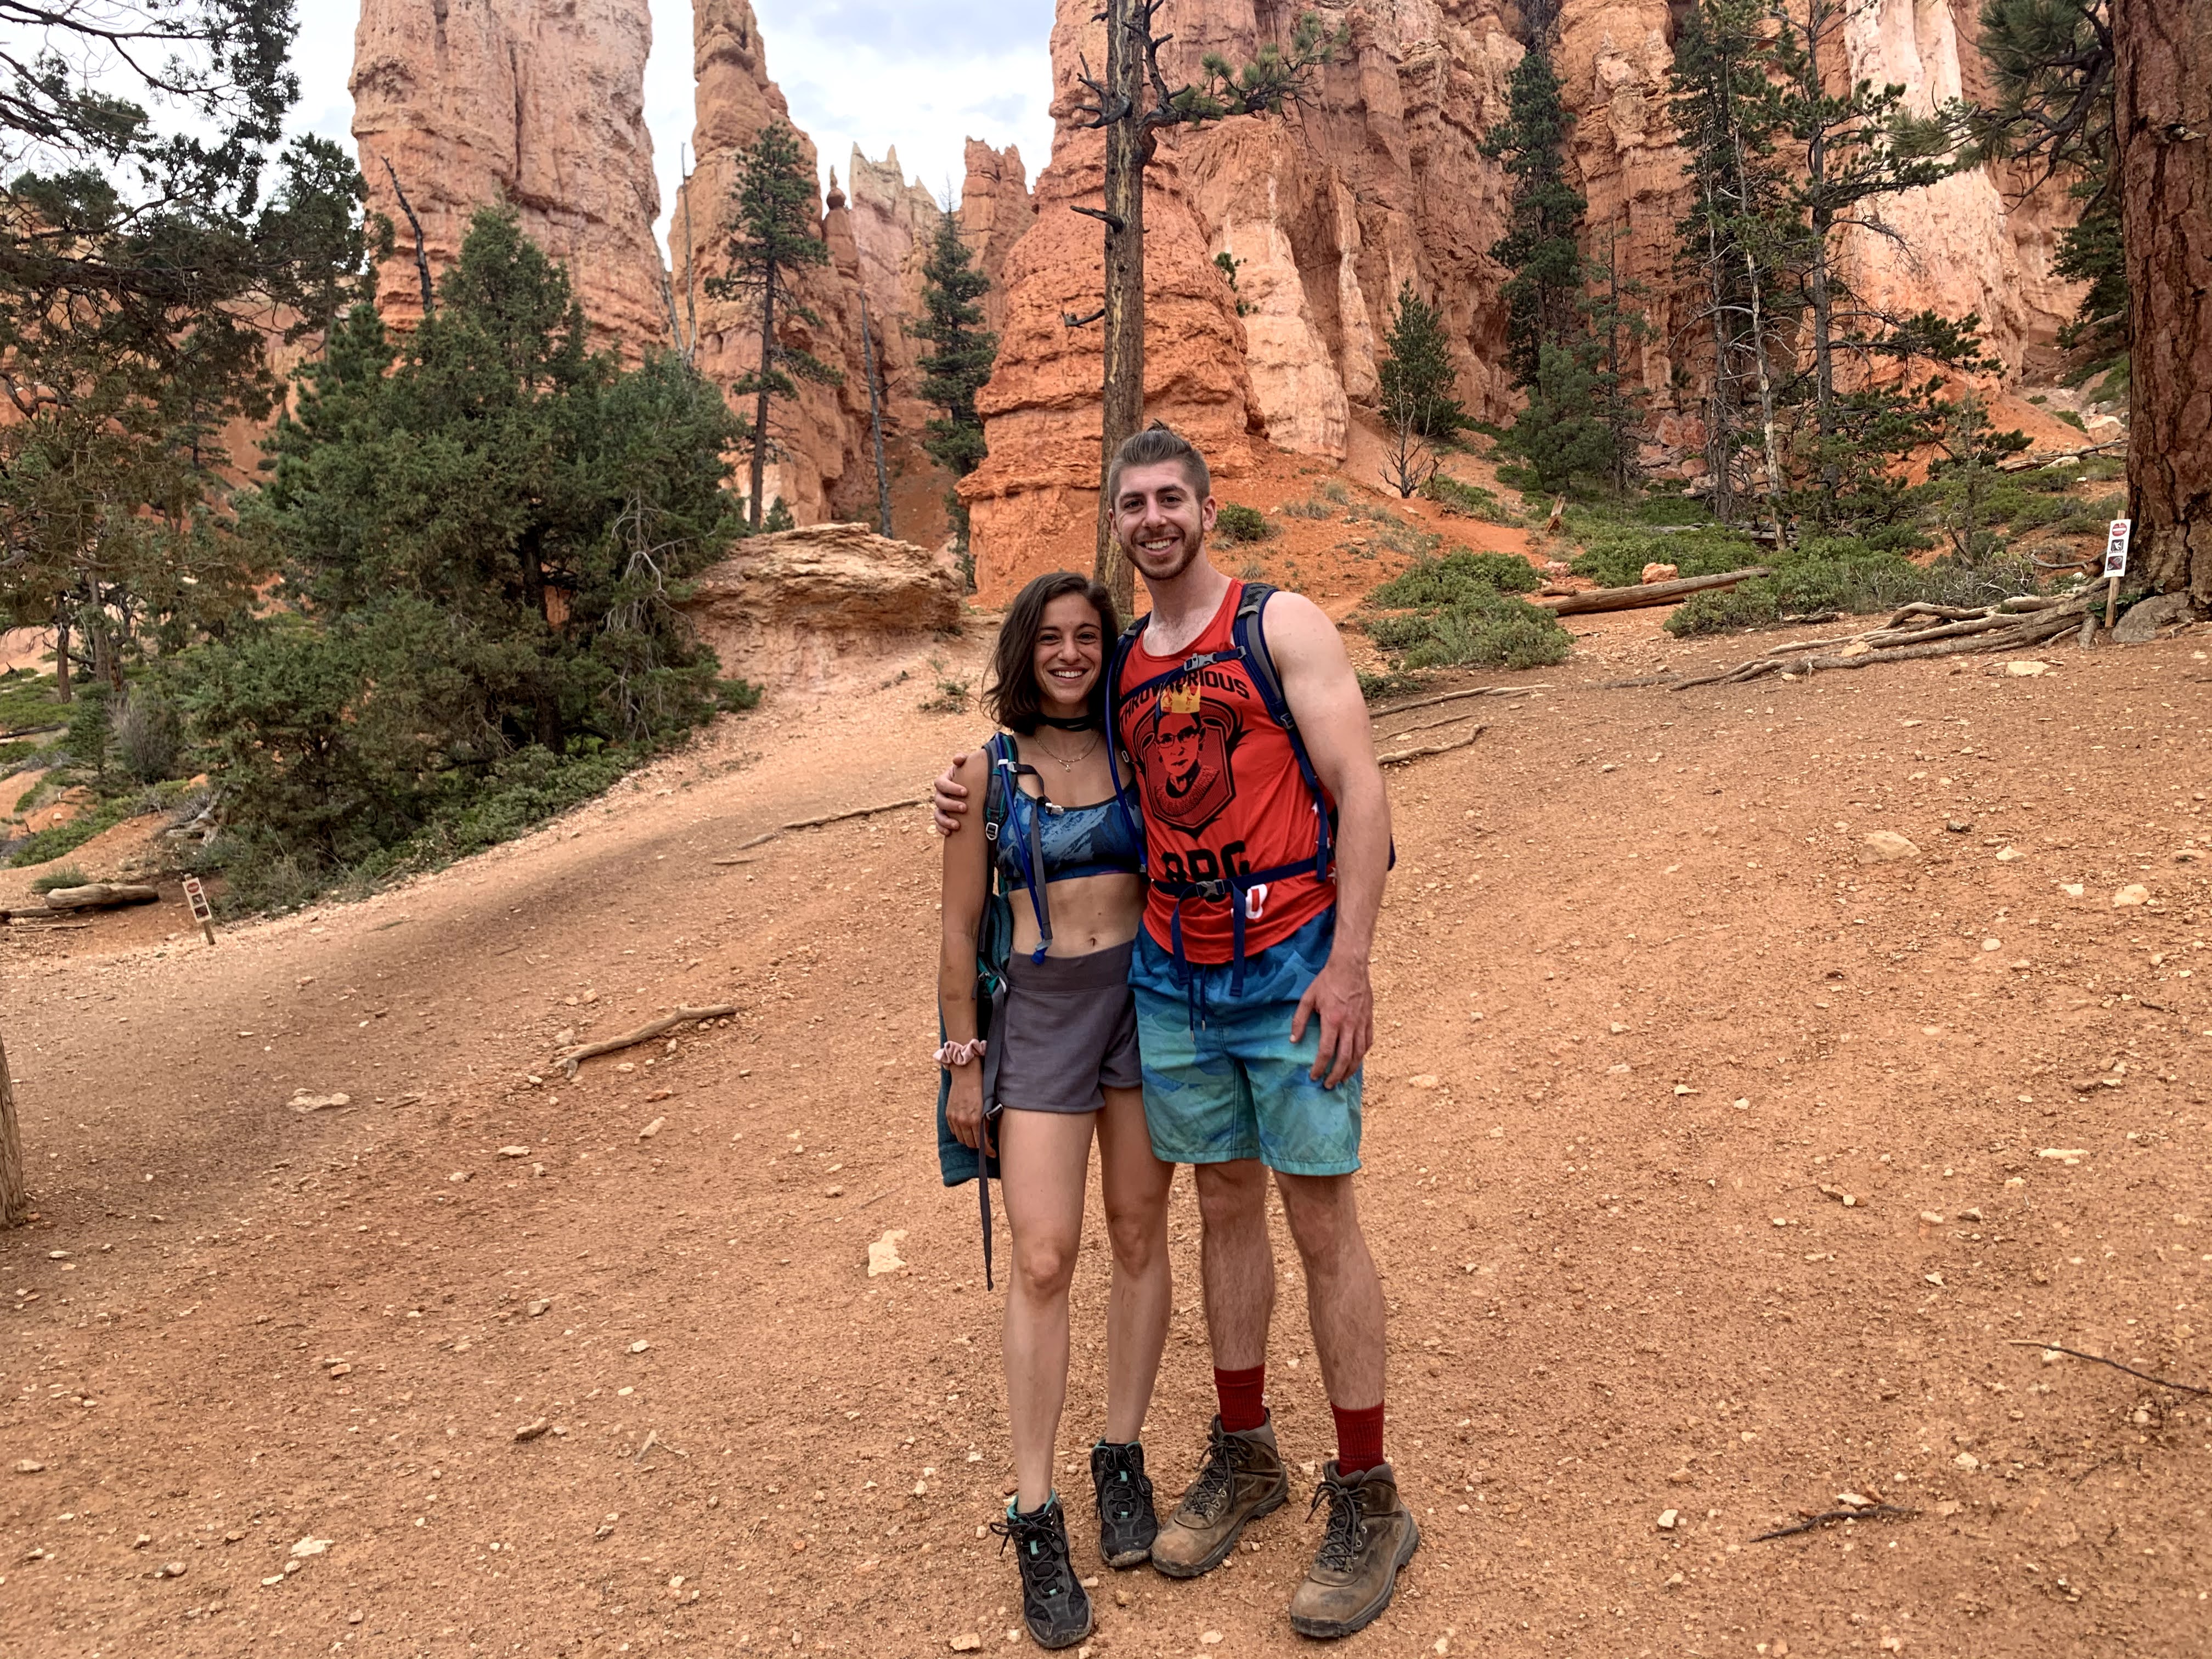
Once in Bryce – Navajo Loop and Queens Garden Trails (3 miles round) for the sunset – These were easy trails (dare I call them nature walks?) and the views and structures in the Bryce canyon are very cool! These trails were very interactive and the trail starts you out walking directly down into the canyon, and then you get to explore the little “city” below ground level.

Sol Foods for dinner – By the time we had gotten to the hotel after Bryce, it was after 10 PM and this little deli/grocery was literally the only thing open (one of the less glamorous aspects of this trip).

Day 14 (Zion National Park, Utah)

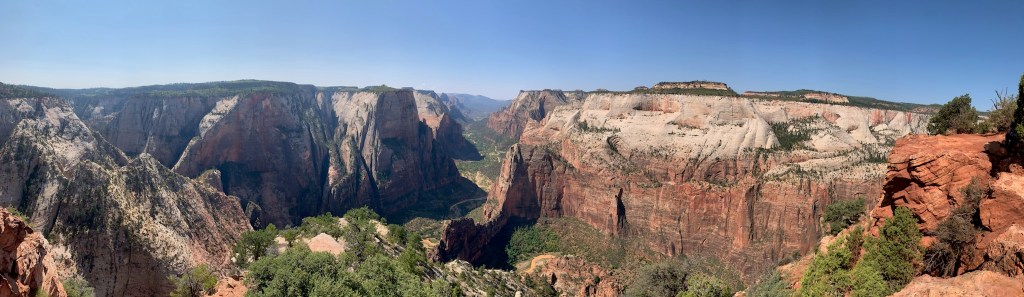
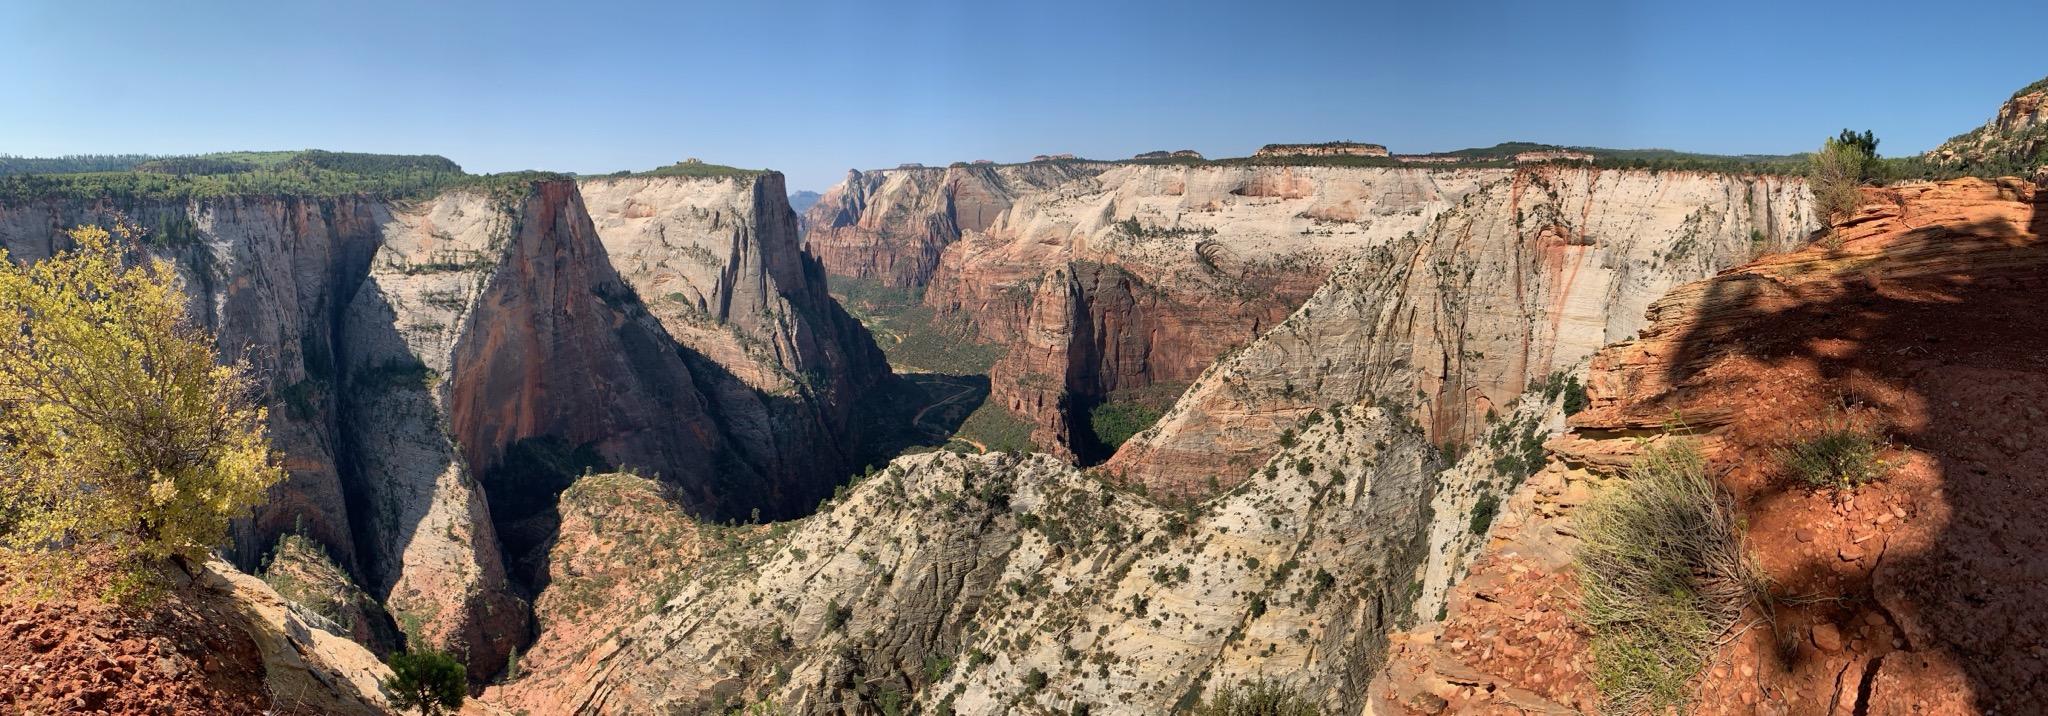
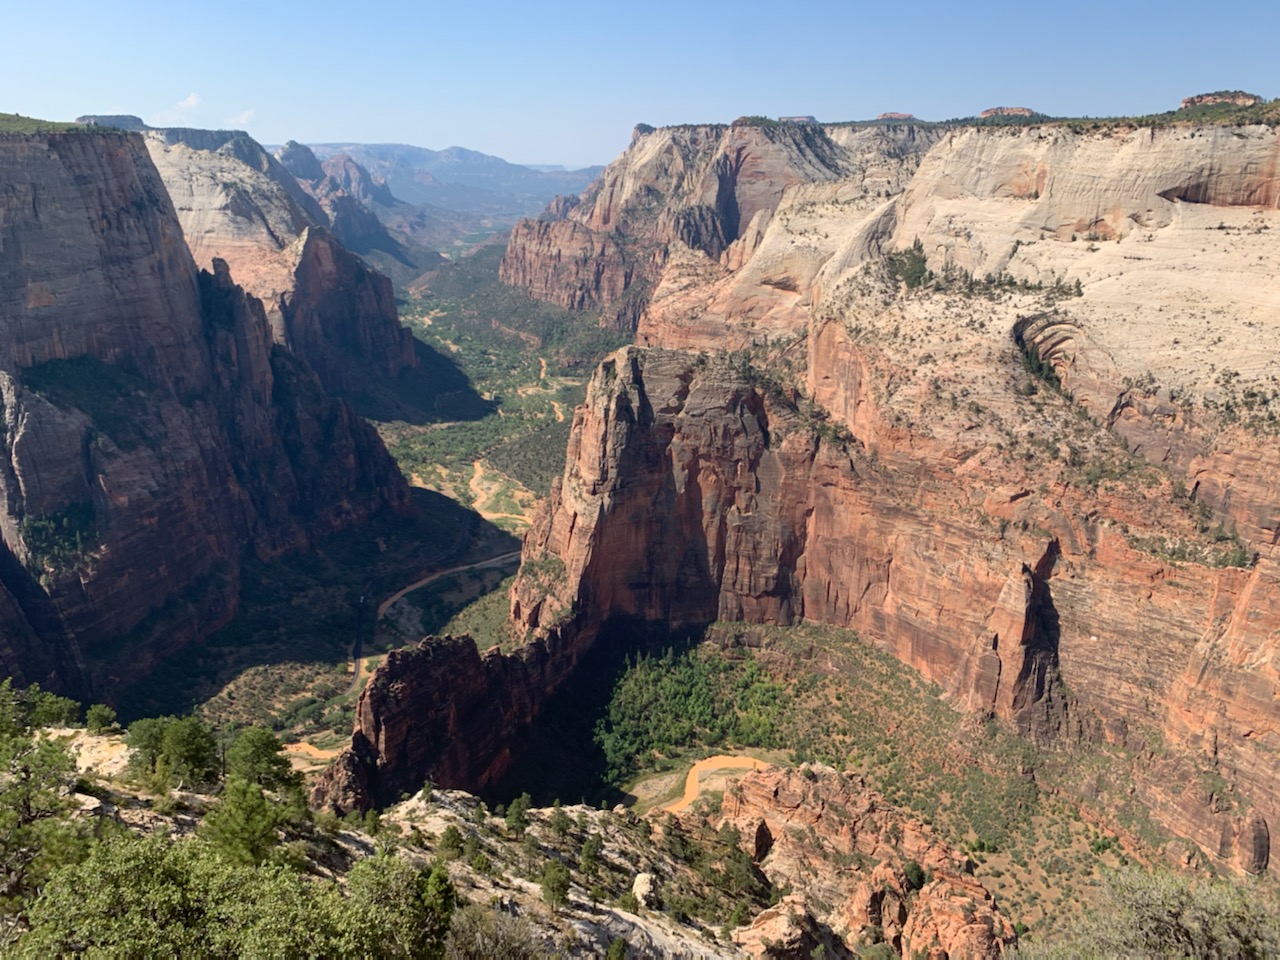
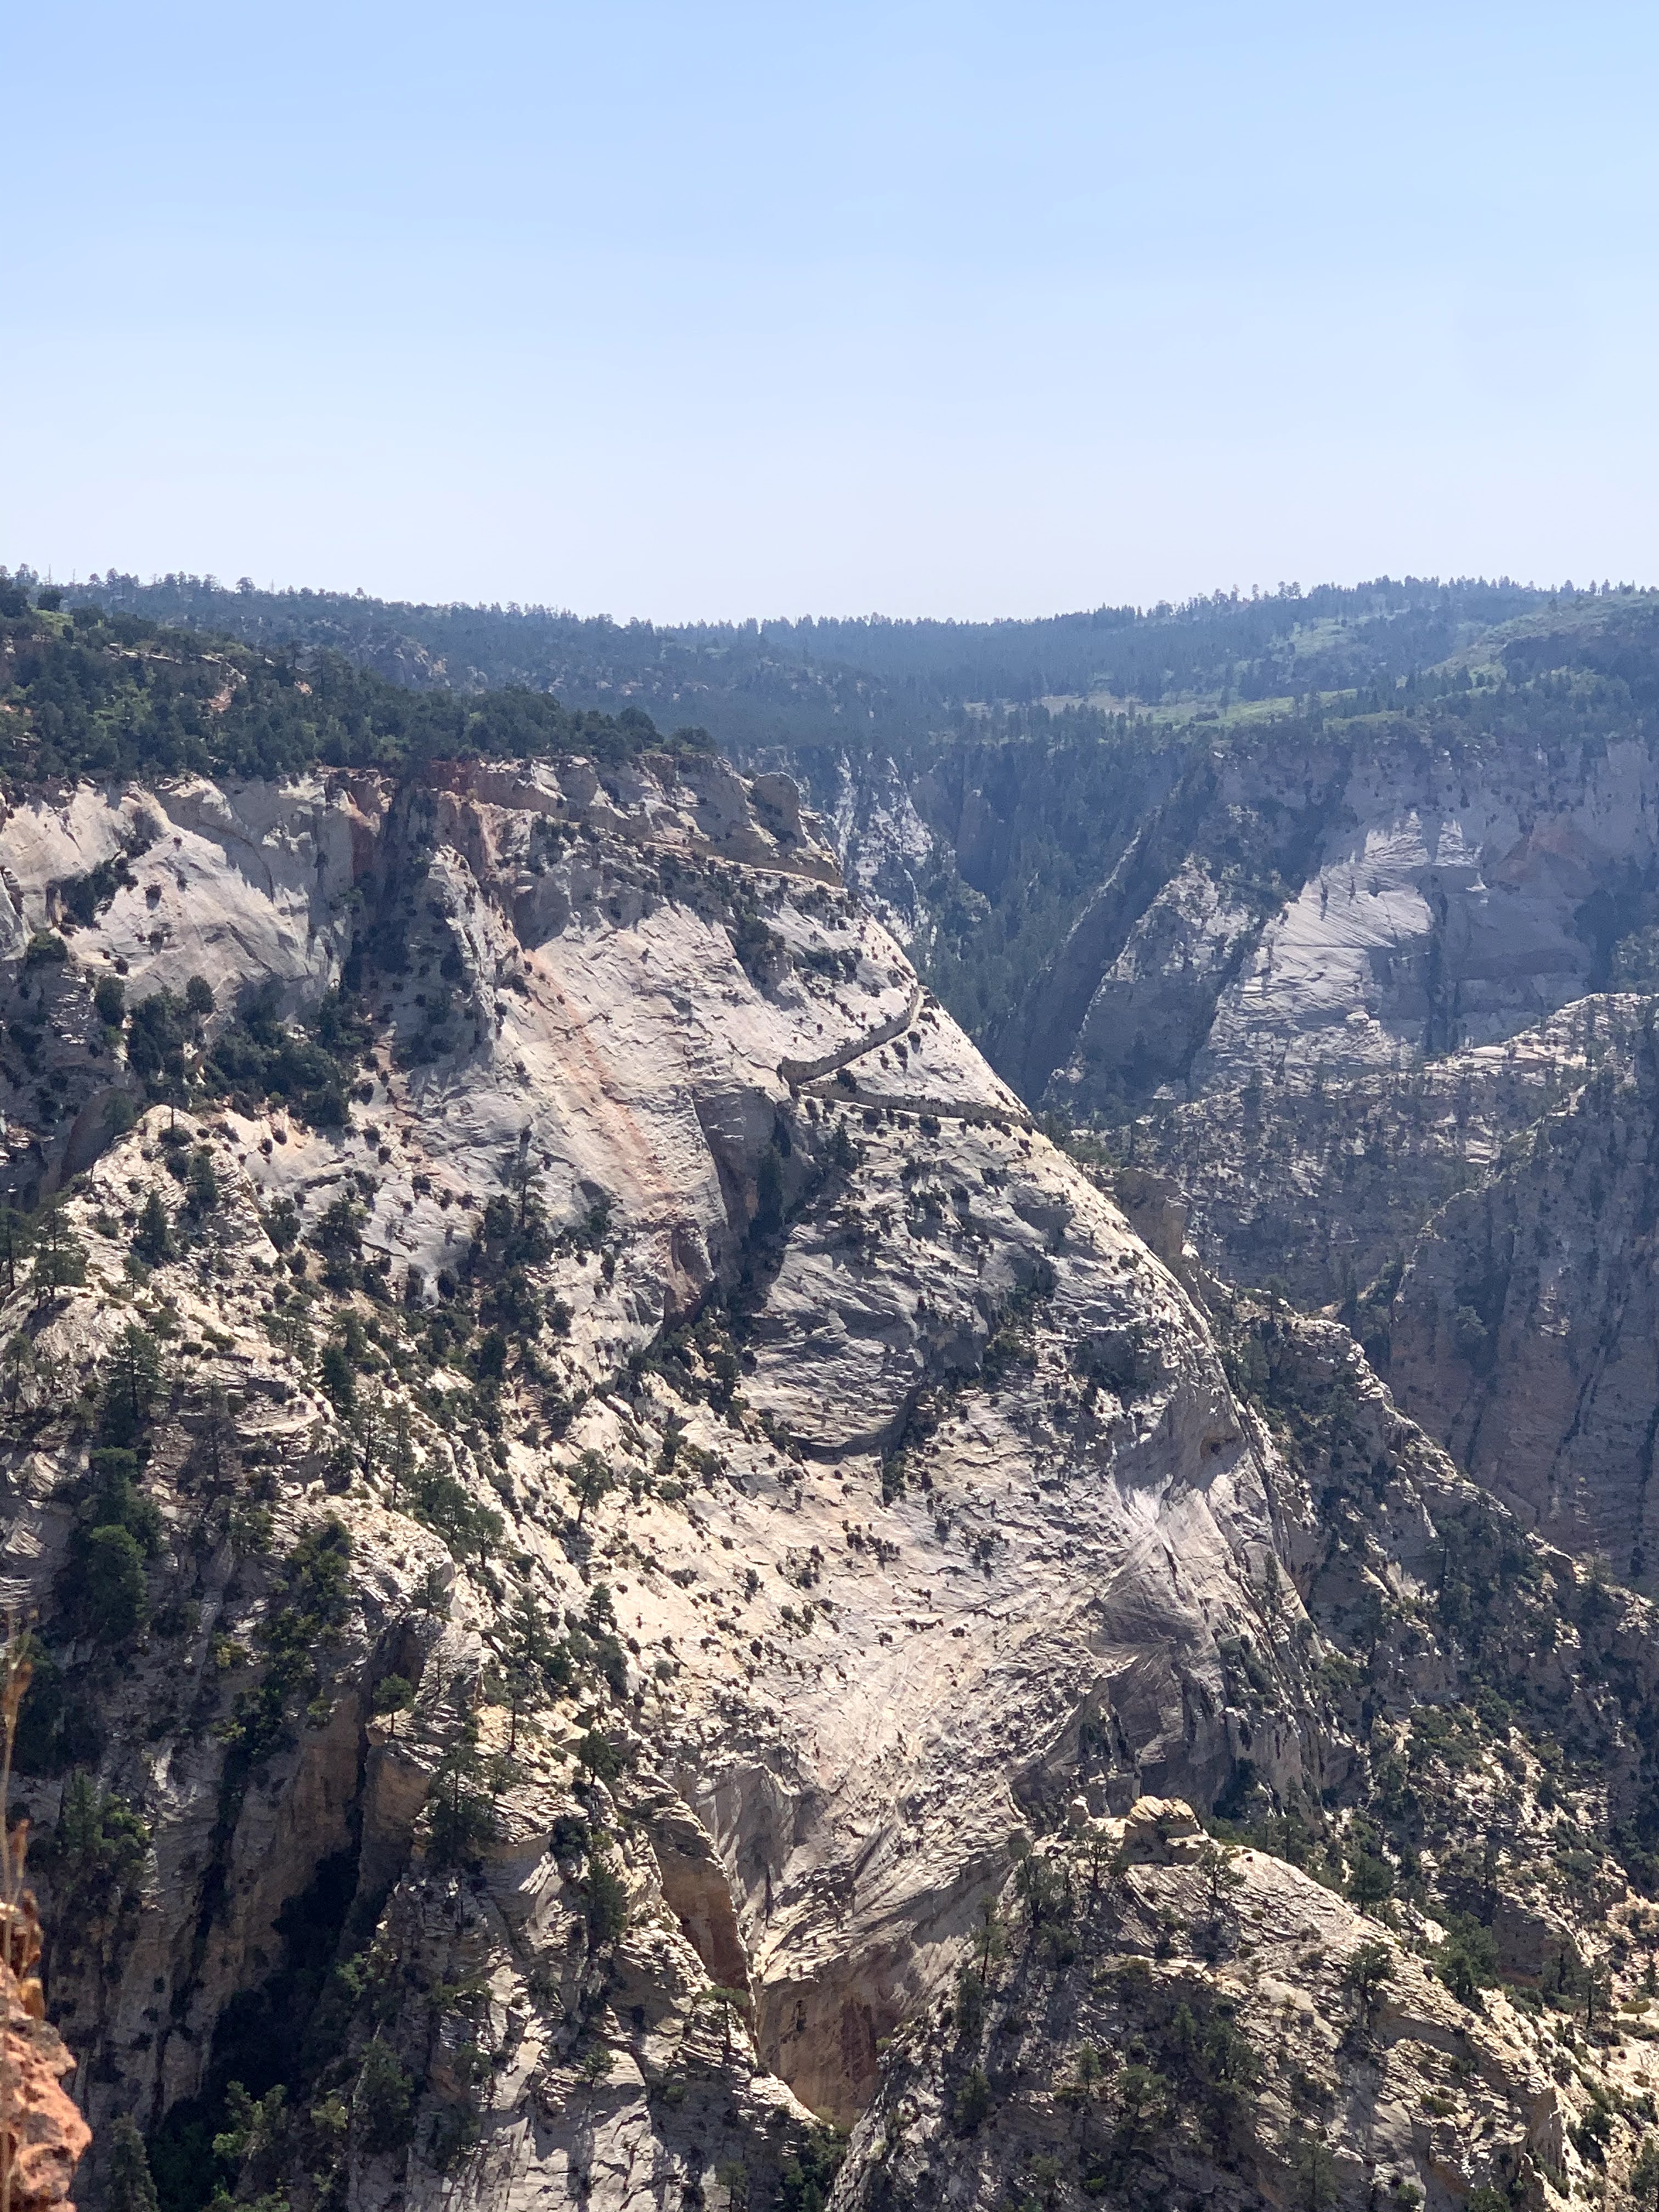
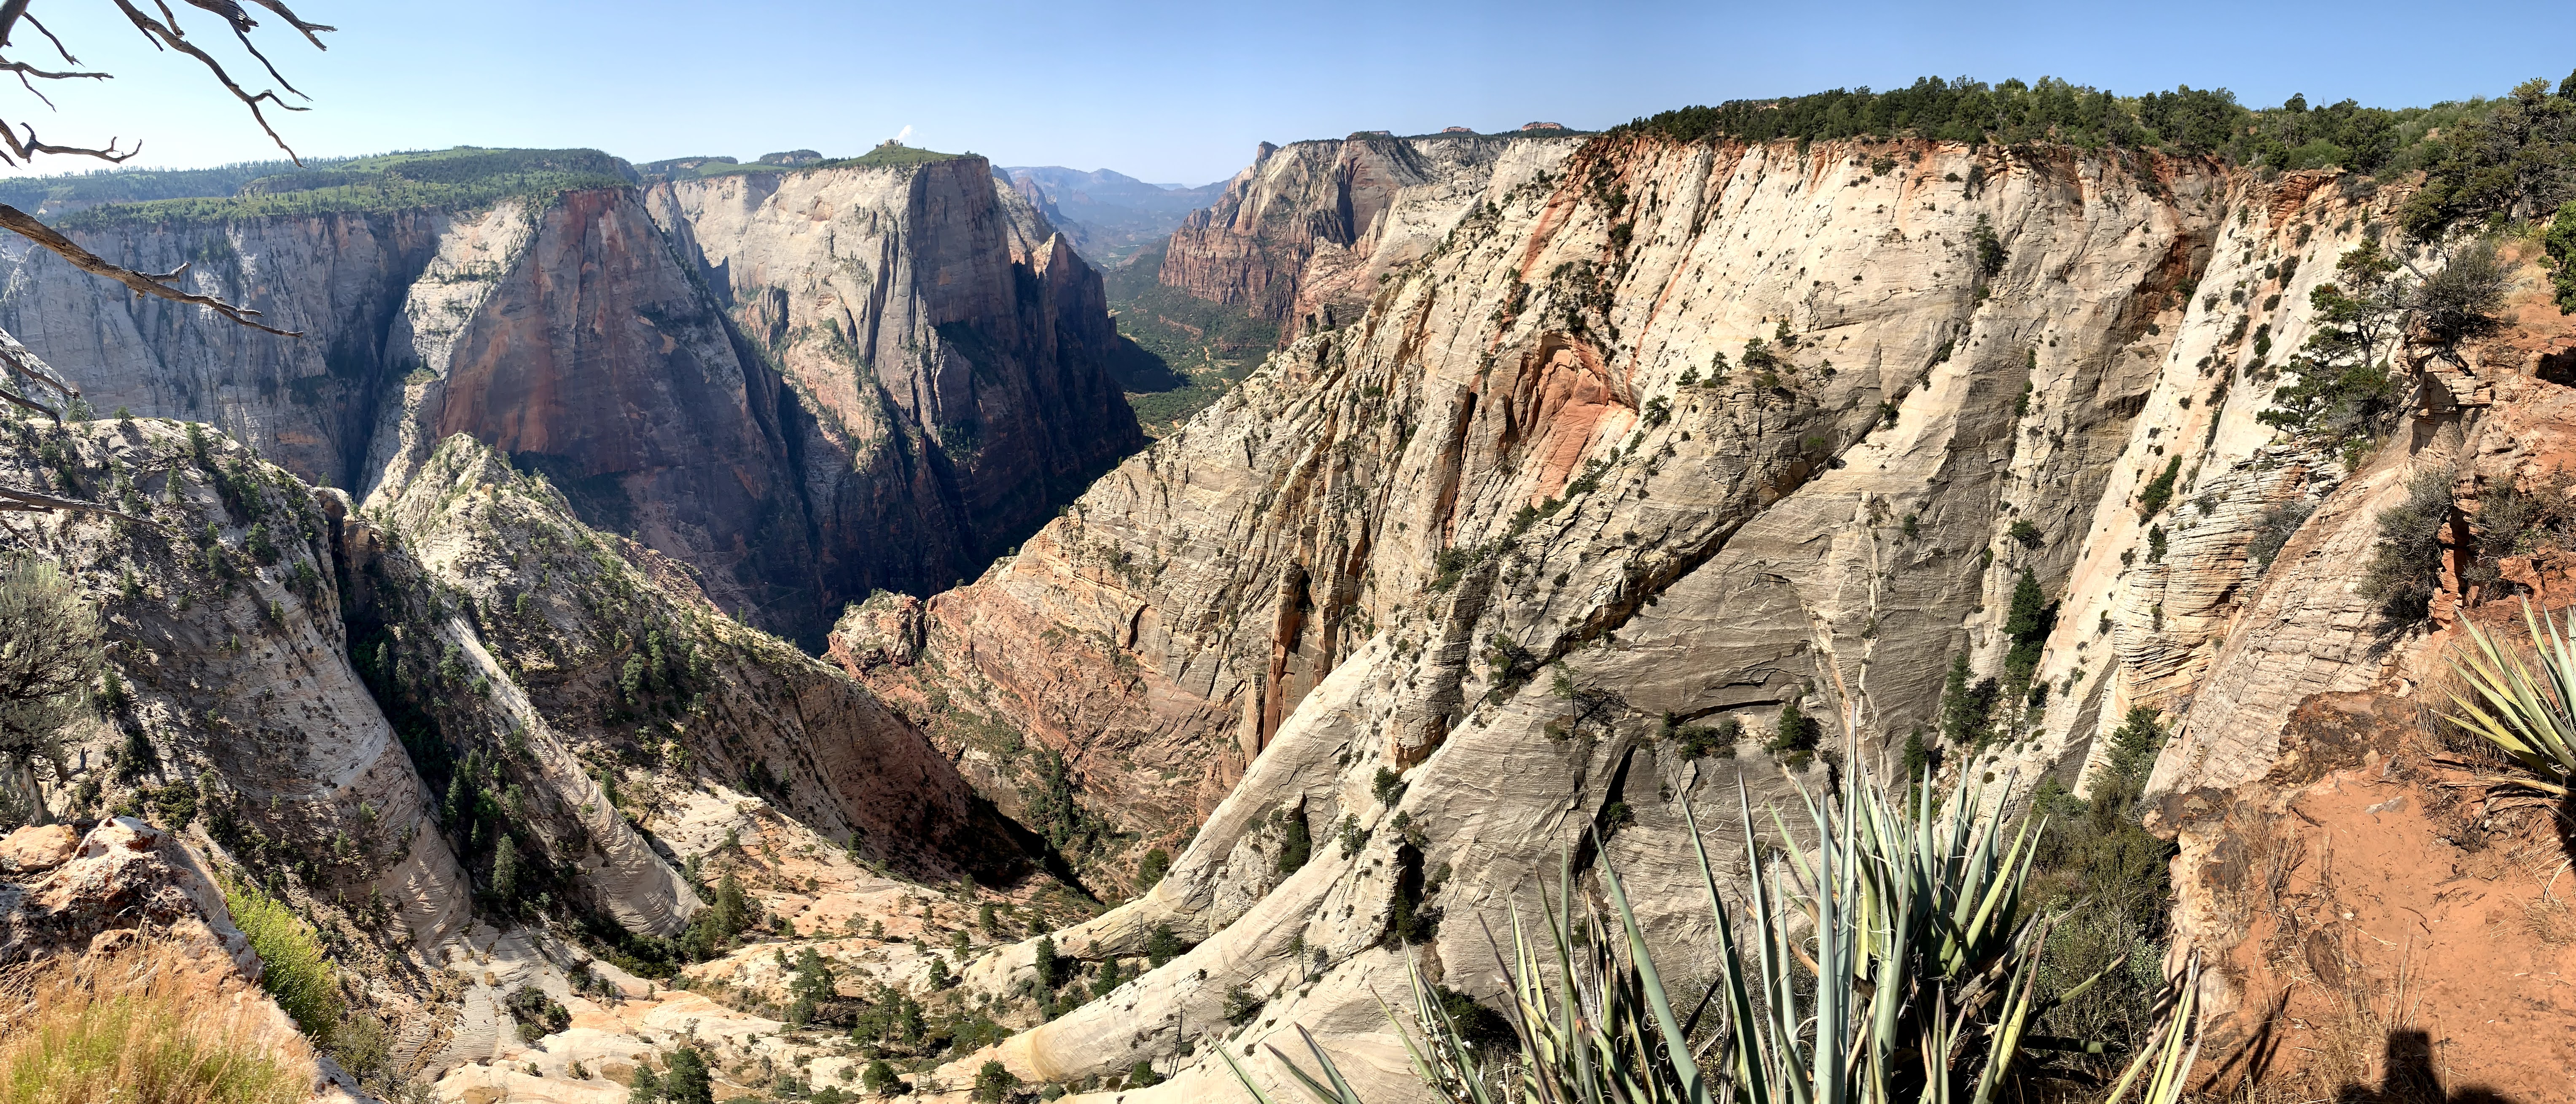
Observation Point via the Stave Spring Trail (11.2 miles in and out) – This was one of the handful of cool hikes that you could do in the park without having to take the shuttle down into the canyon (which we avoided due to COVID). The path was very well maintained, and the views breathtaking. The hike itself was pretty challenging because you hike into the canyon and then back up the other side for the views and then back in and up the original side to get back to your car. We saw a family of rams on this hike which was awesome! The view of the Zion canyon is the same as the one you would see from the famous Angel’s Landing hike (if not better, because you are actually higher up at Observation Point). This was another hike where we relied heavily on cairns to tell us where to go. We can’t wait to come back to this park and explore more – a lot of trails were either closed due to COVID, or other natural causes happening to affect the area at the time. Take a look at the Zion section of my Part 1 post for the list of additional hikes that I will do when I come back to visit Zion!

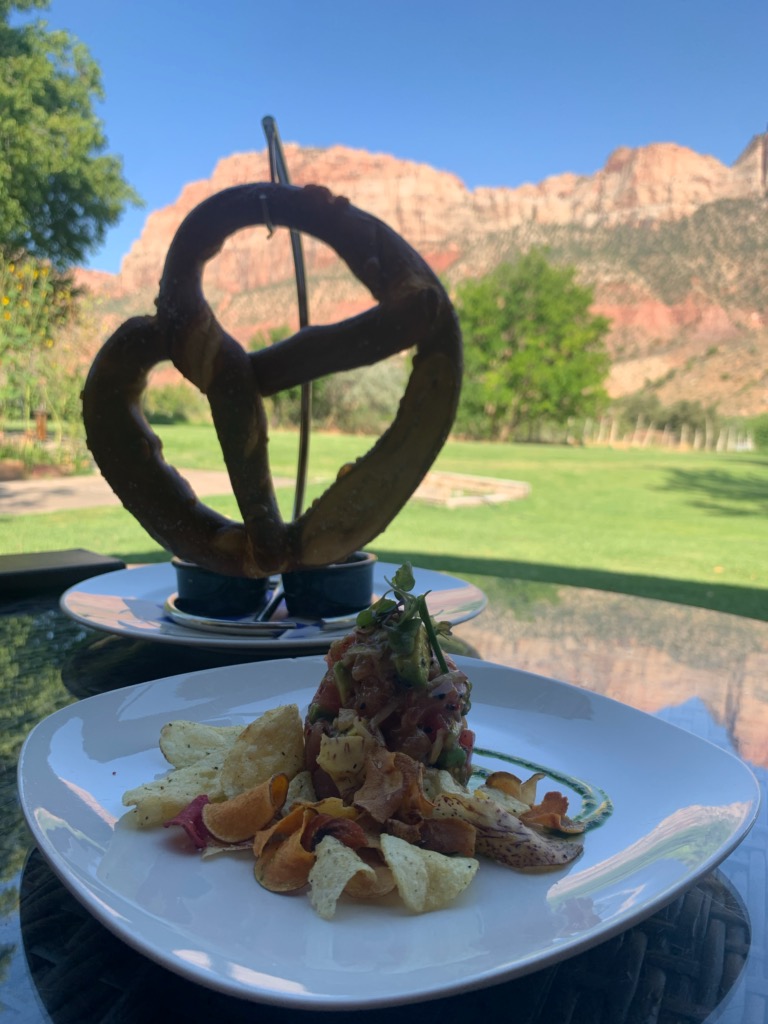
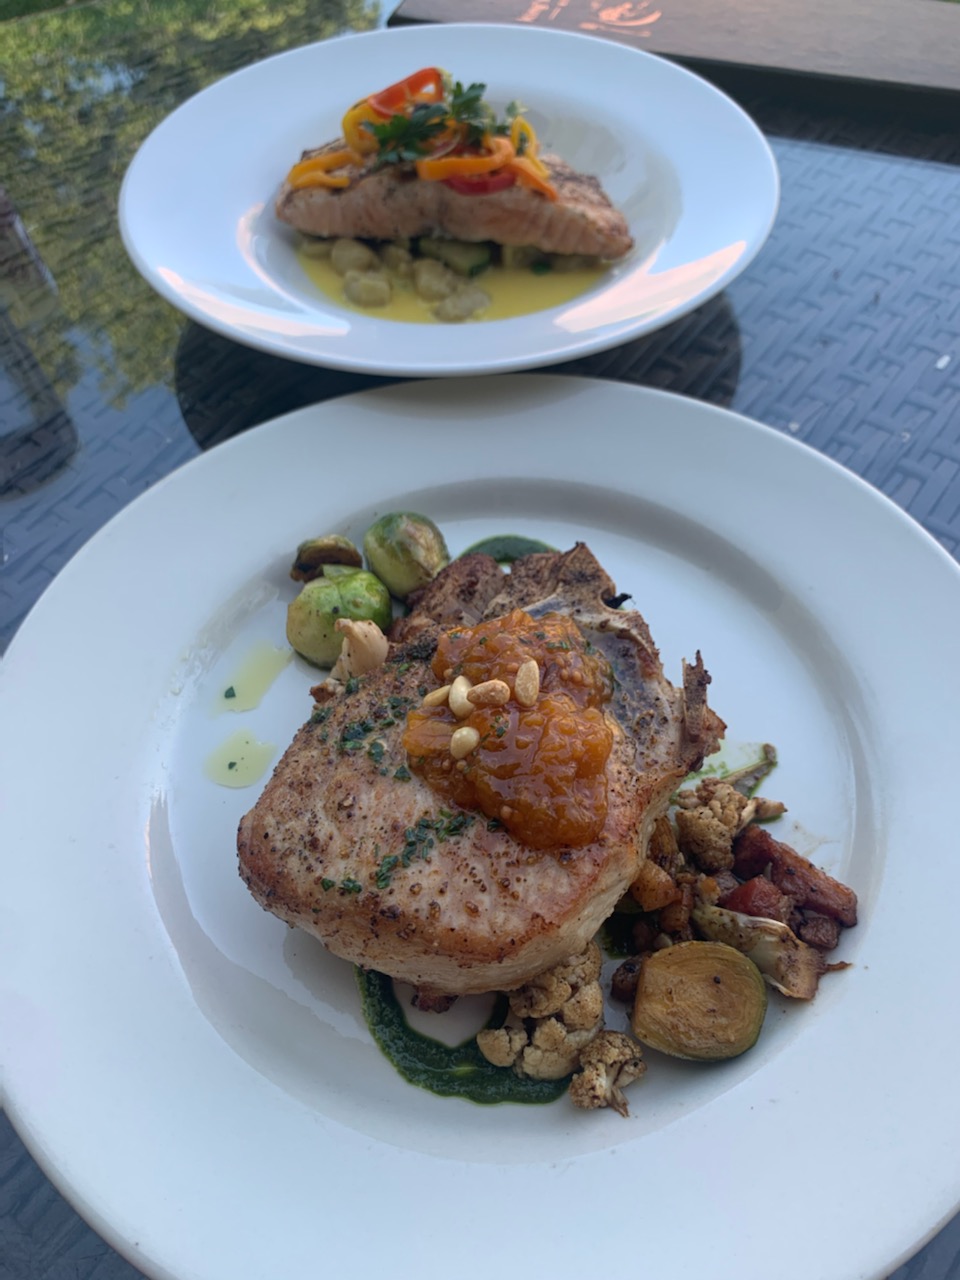
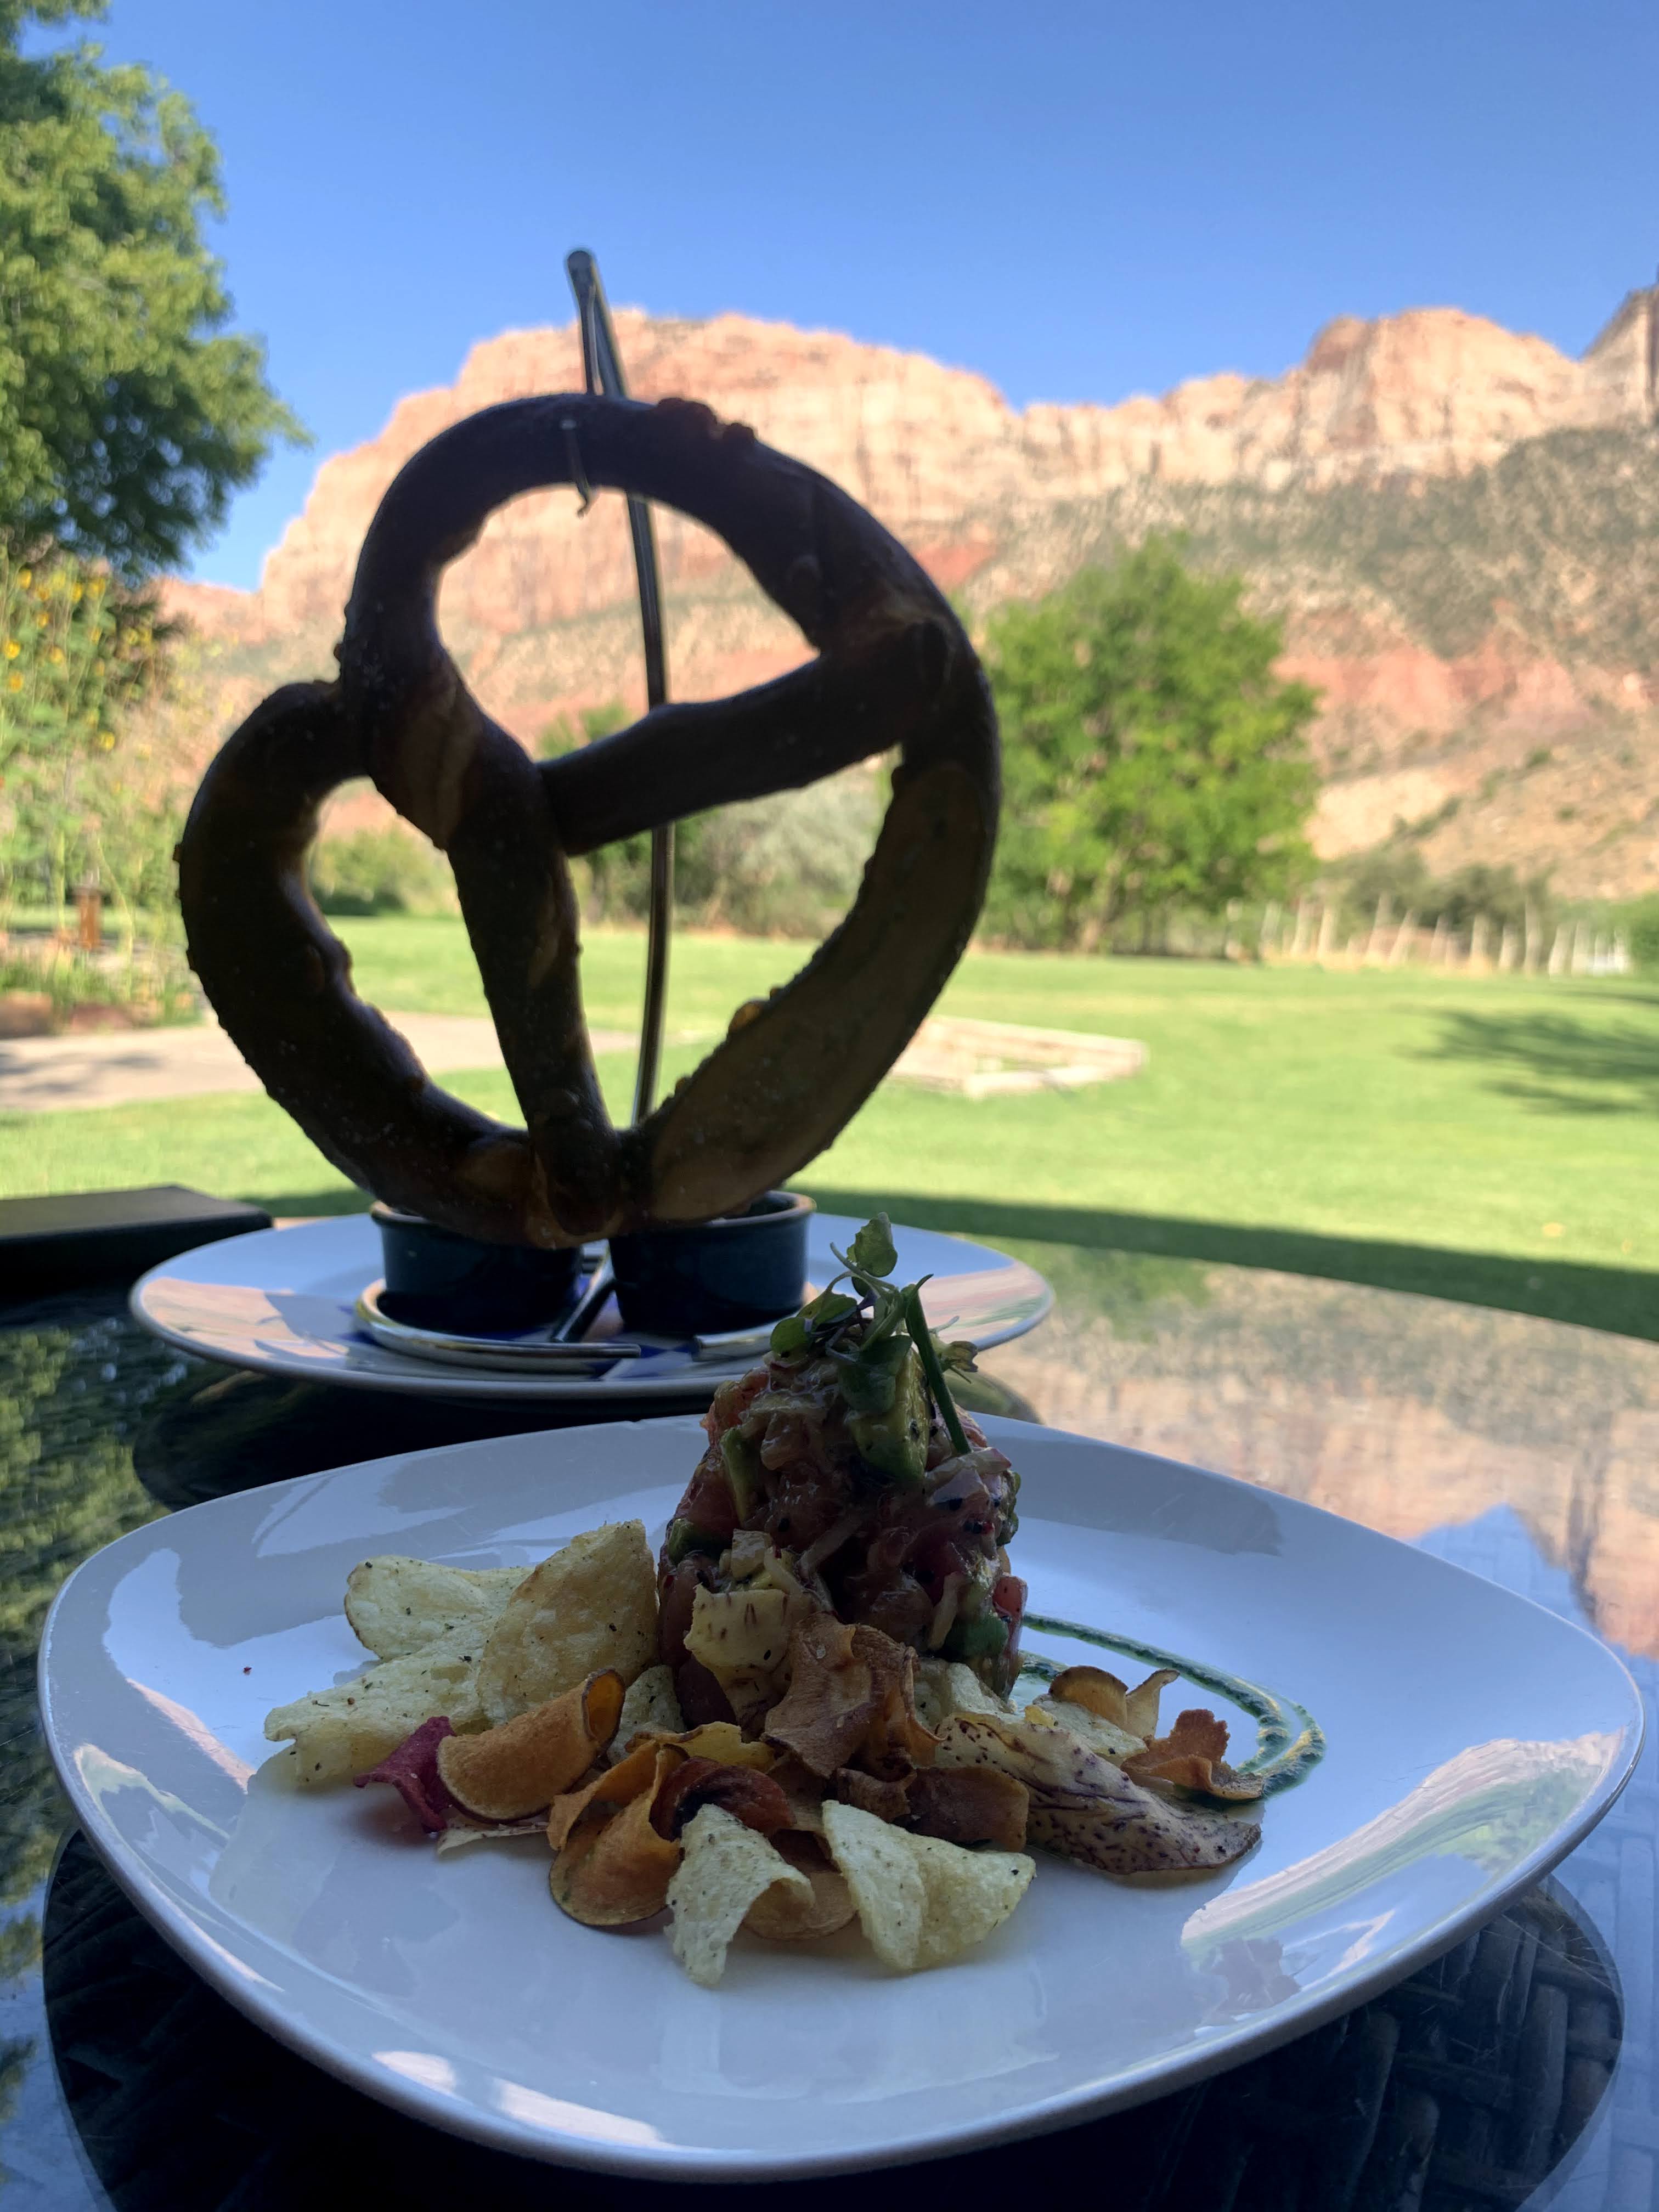
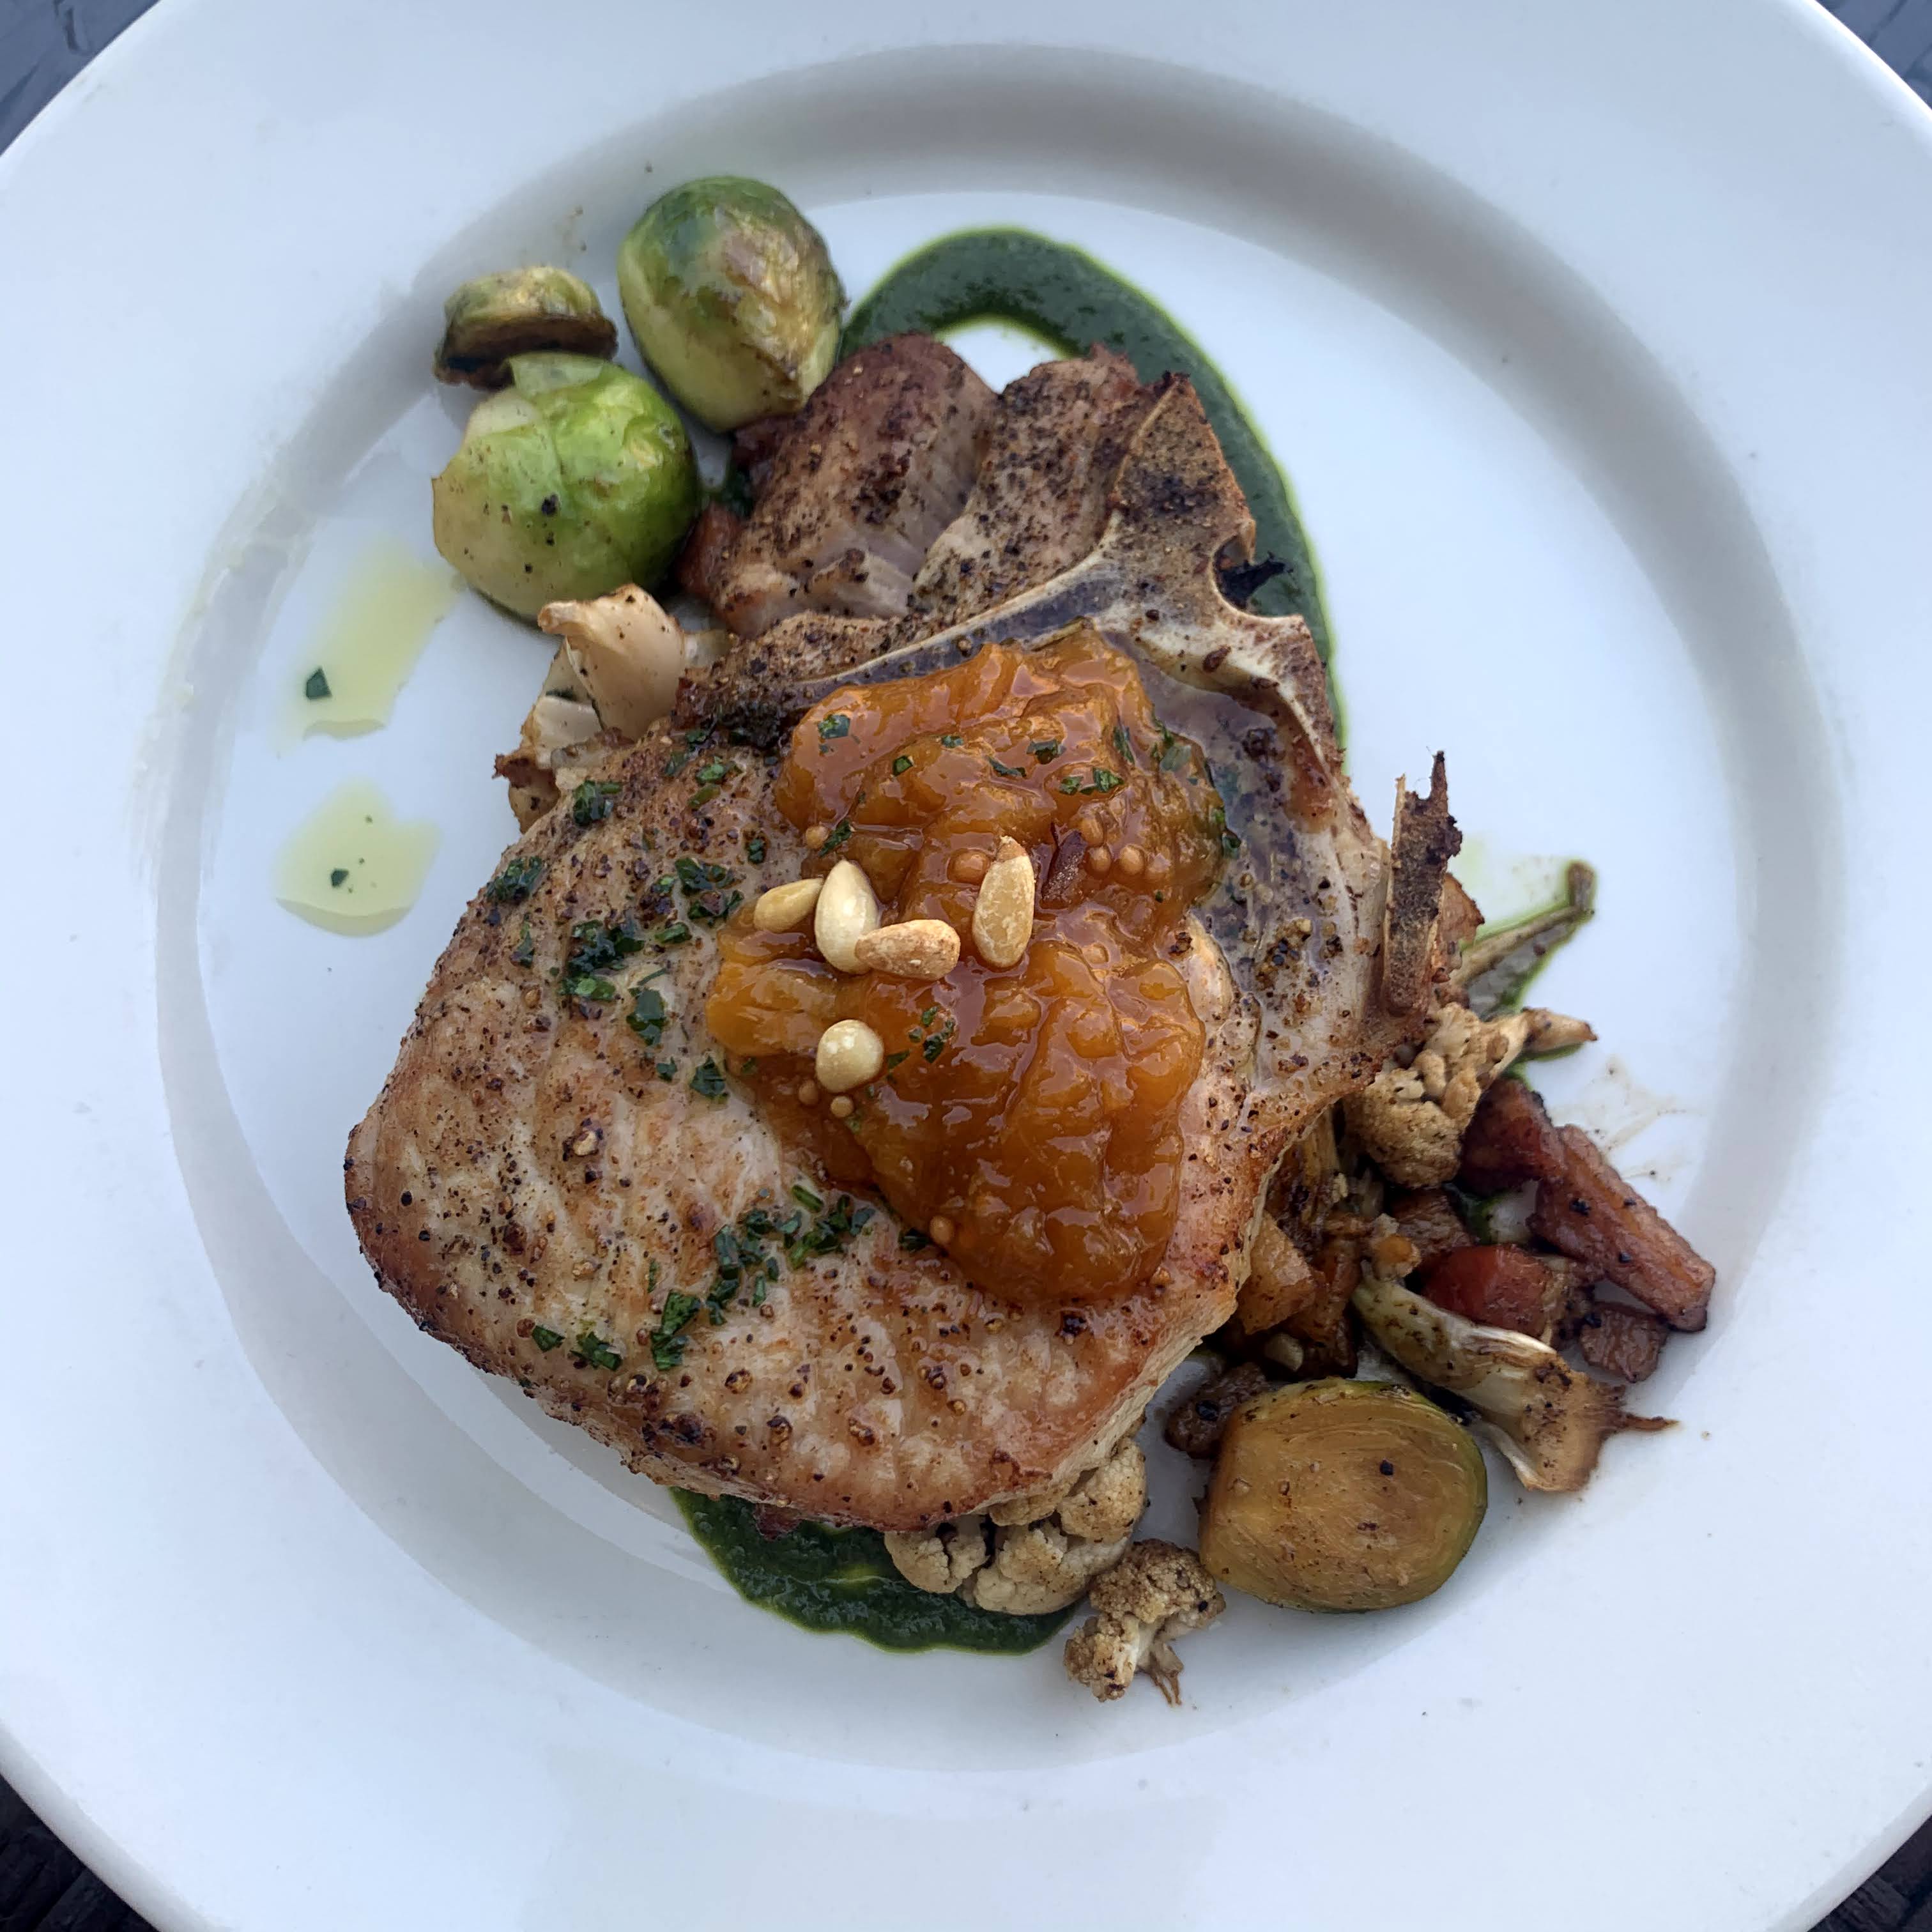
King’s Landing Bistro for dinner. The food, drinks, and desserts here were unique, fresh, and DELICIOUS. We got the huge pretzel and tuna tartar for appetizer, and then the pork chop and salmon entrees. For dessert, we got the cherry cheesecake and peach blueberry cobbler, both made in-house. The cheesecake and pretzel were specials that night, but everything else should be consistent on the menu. Also, the drinks were so unique and amazing!! (Try the heirloom tomato based one. No, it is nothing like a Bloody Mary. You can thank me later). You also have a view of Zion’s incredible mountain range from the outdoor patio.

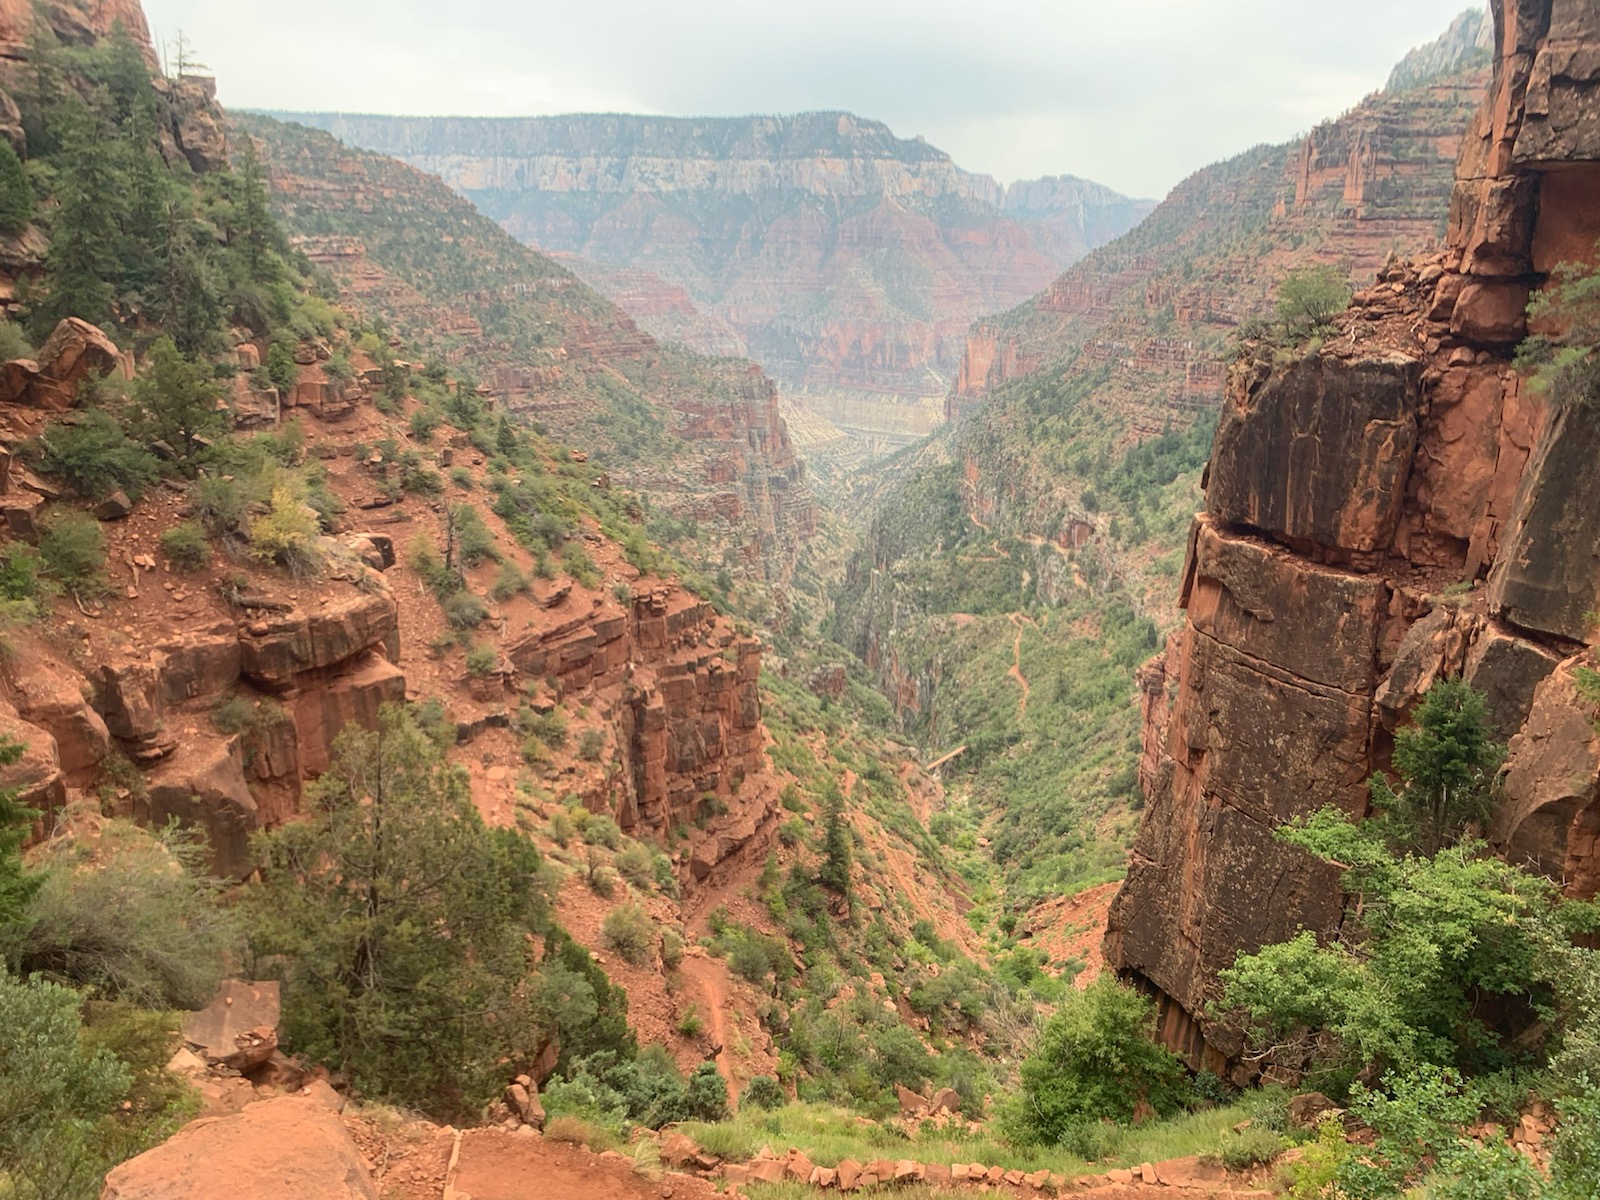
Day 15 (Grand Canyon National Park, Arizona)

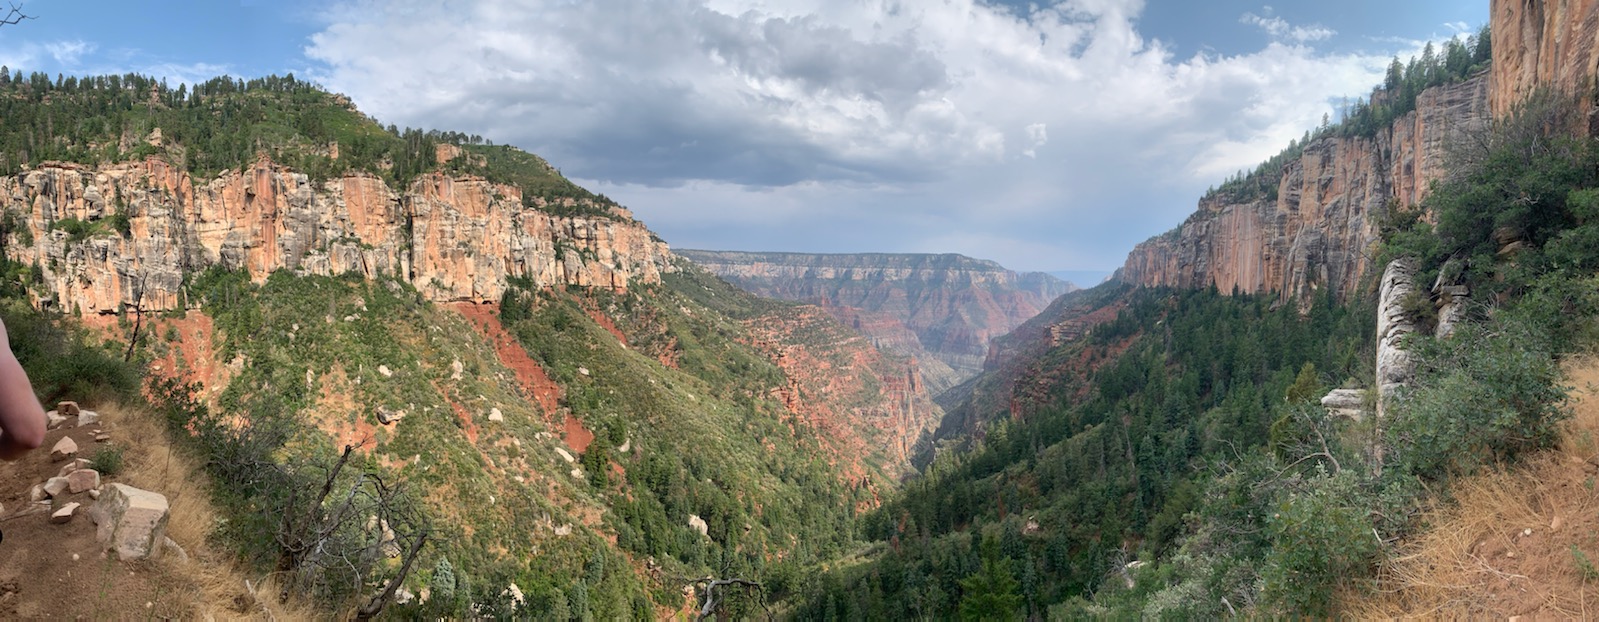
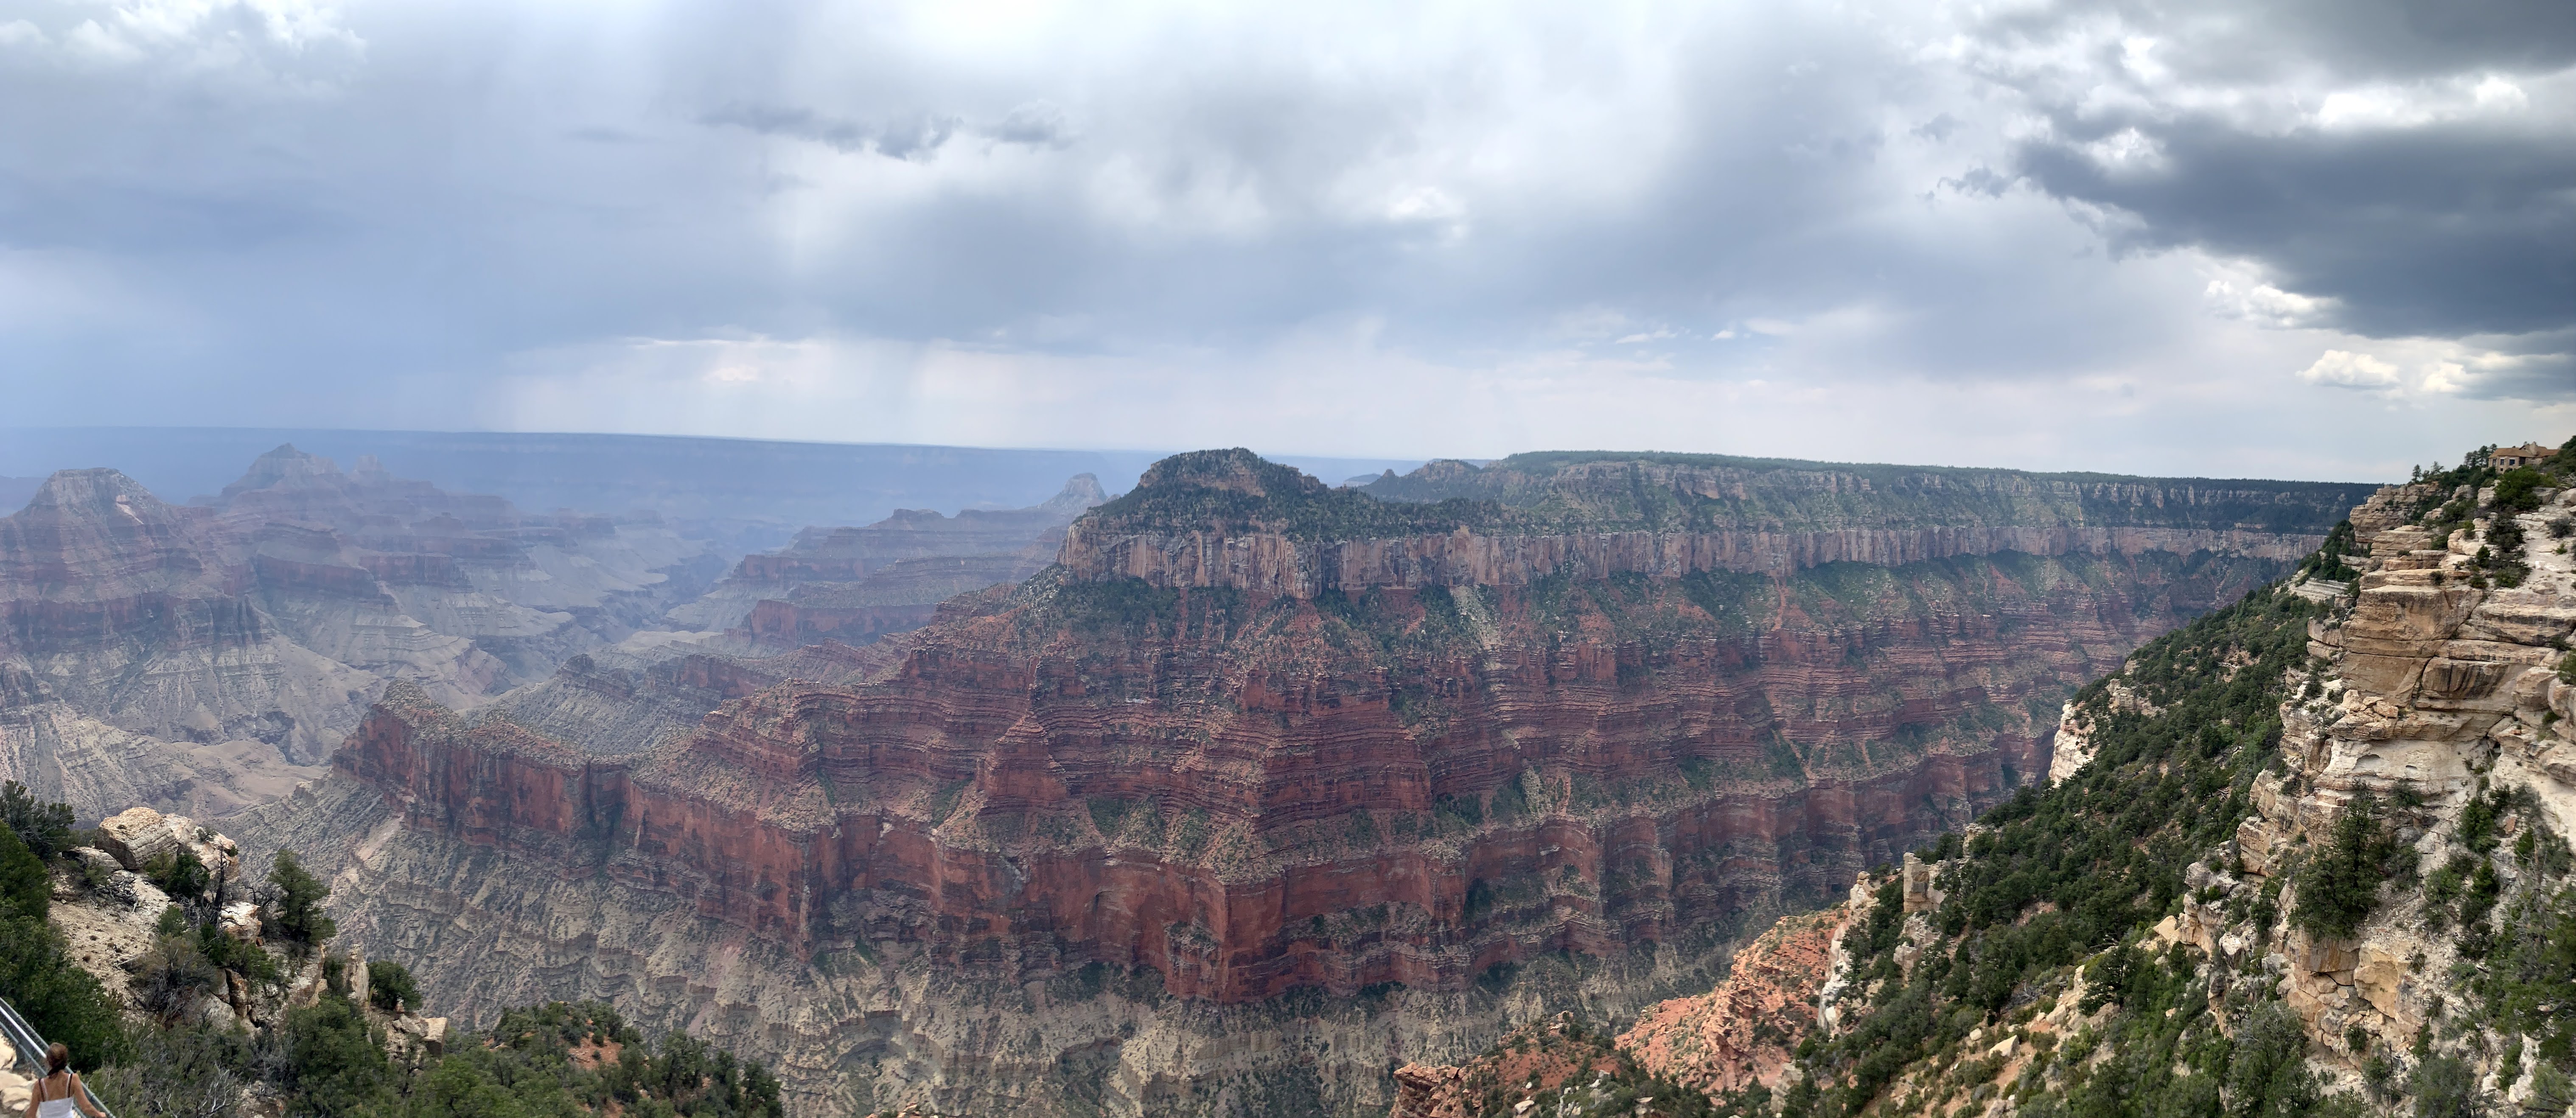
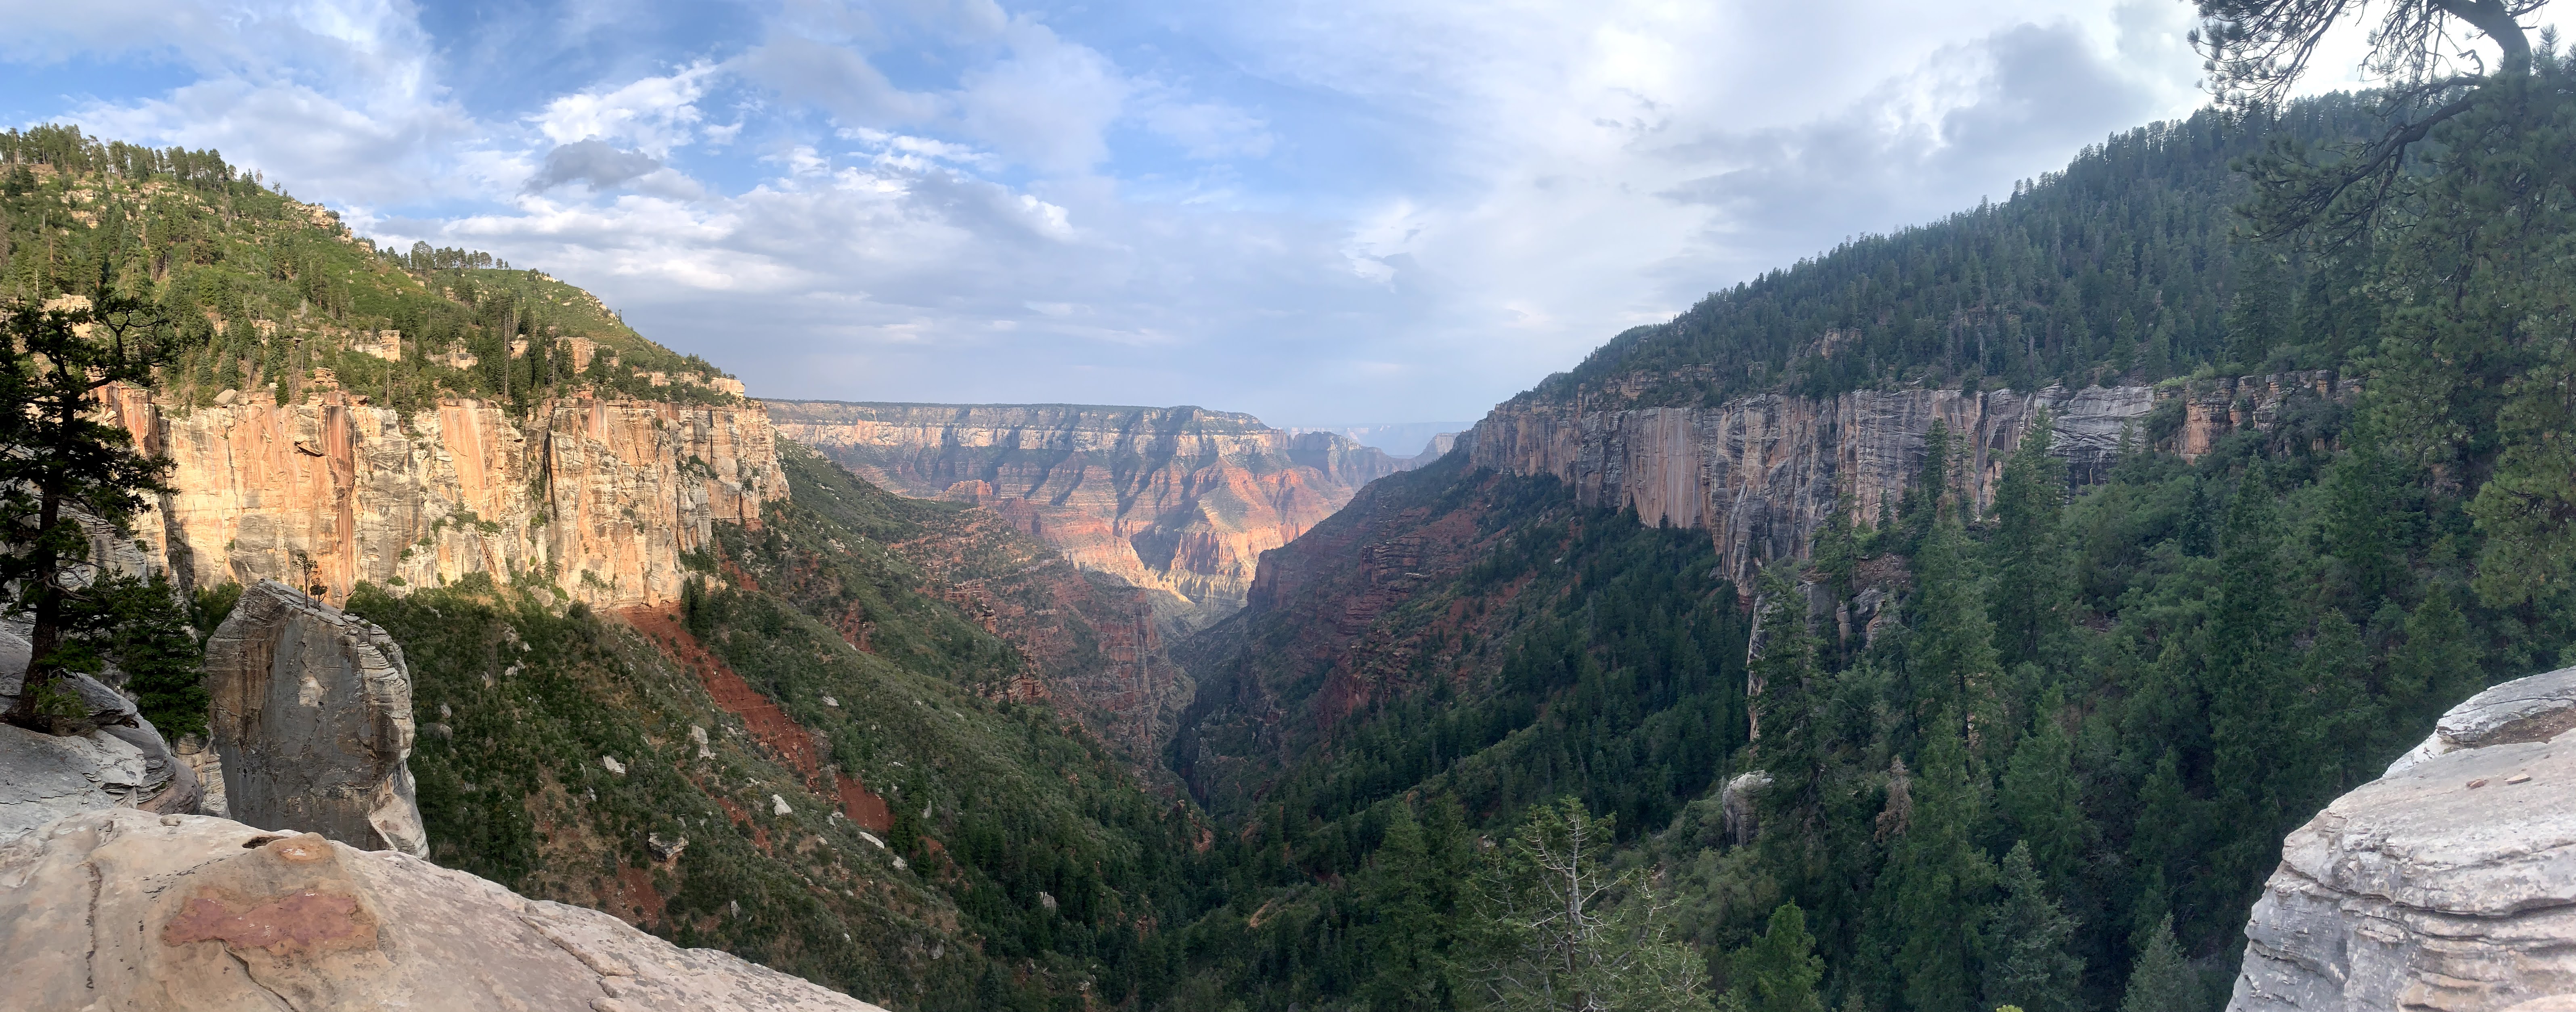
Bright Angel Point for lookout (North Rim) – If you have never seen the Grand Canyon before, in person or in photographs, DO NOT LOOK IT UP, and close your eyes immediately and just continue scrolling through. Resist the urge. Going into this totally blind with no idea of what to expect makes it so much more incredible. Also, do the lookout before any potential hikes for the day into the canyon – you will have the best view of the canyon itself at the lookout. Also, even if you HAVE seen pictures or came to visit as a kid, this is still worth the stop. It is really something else when you see it in person.

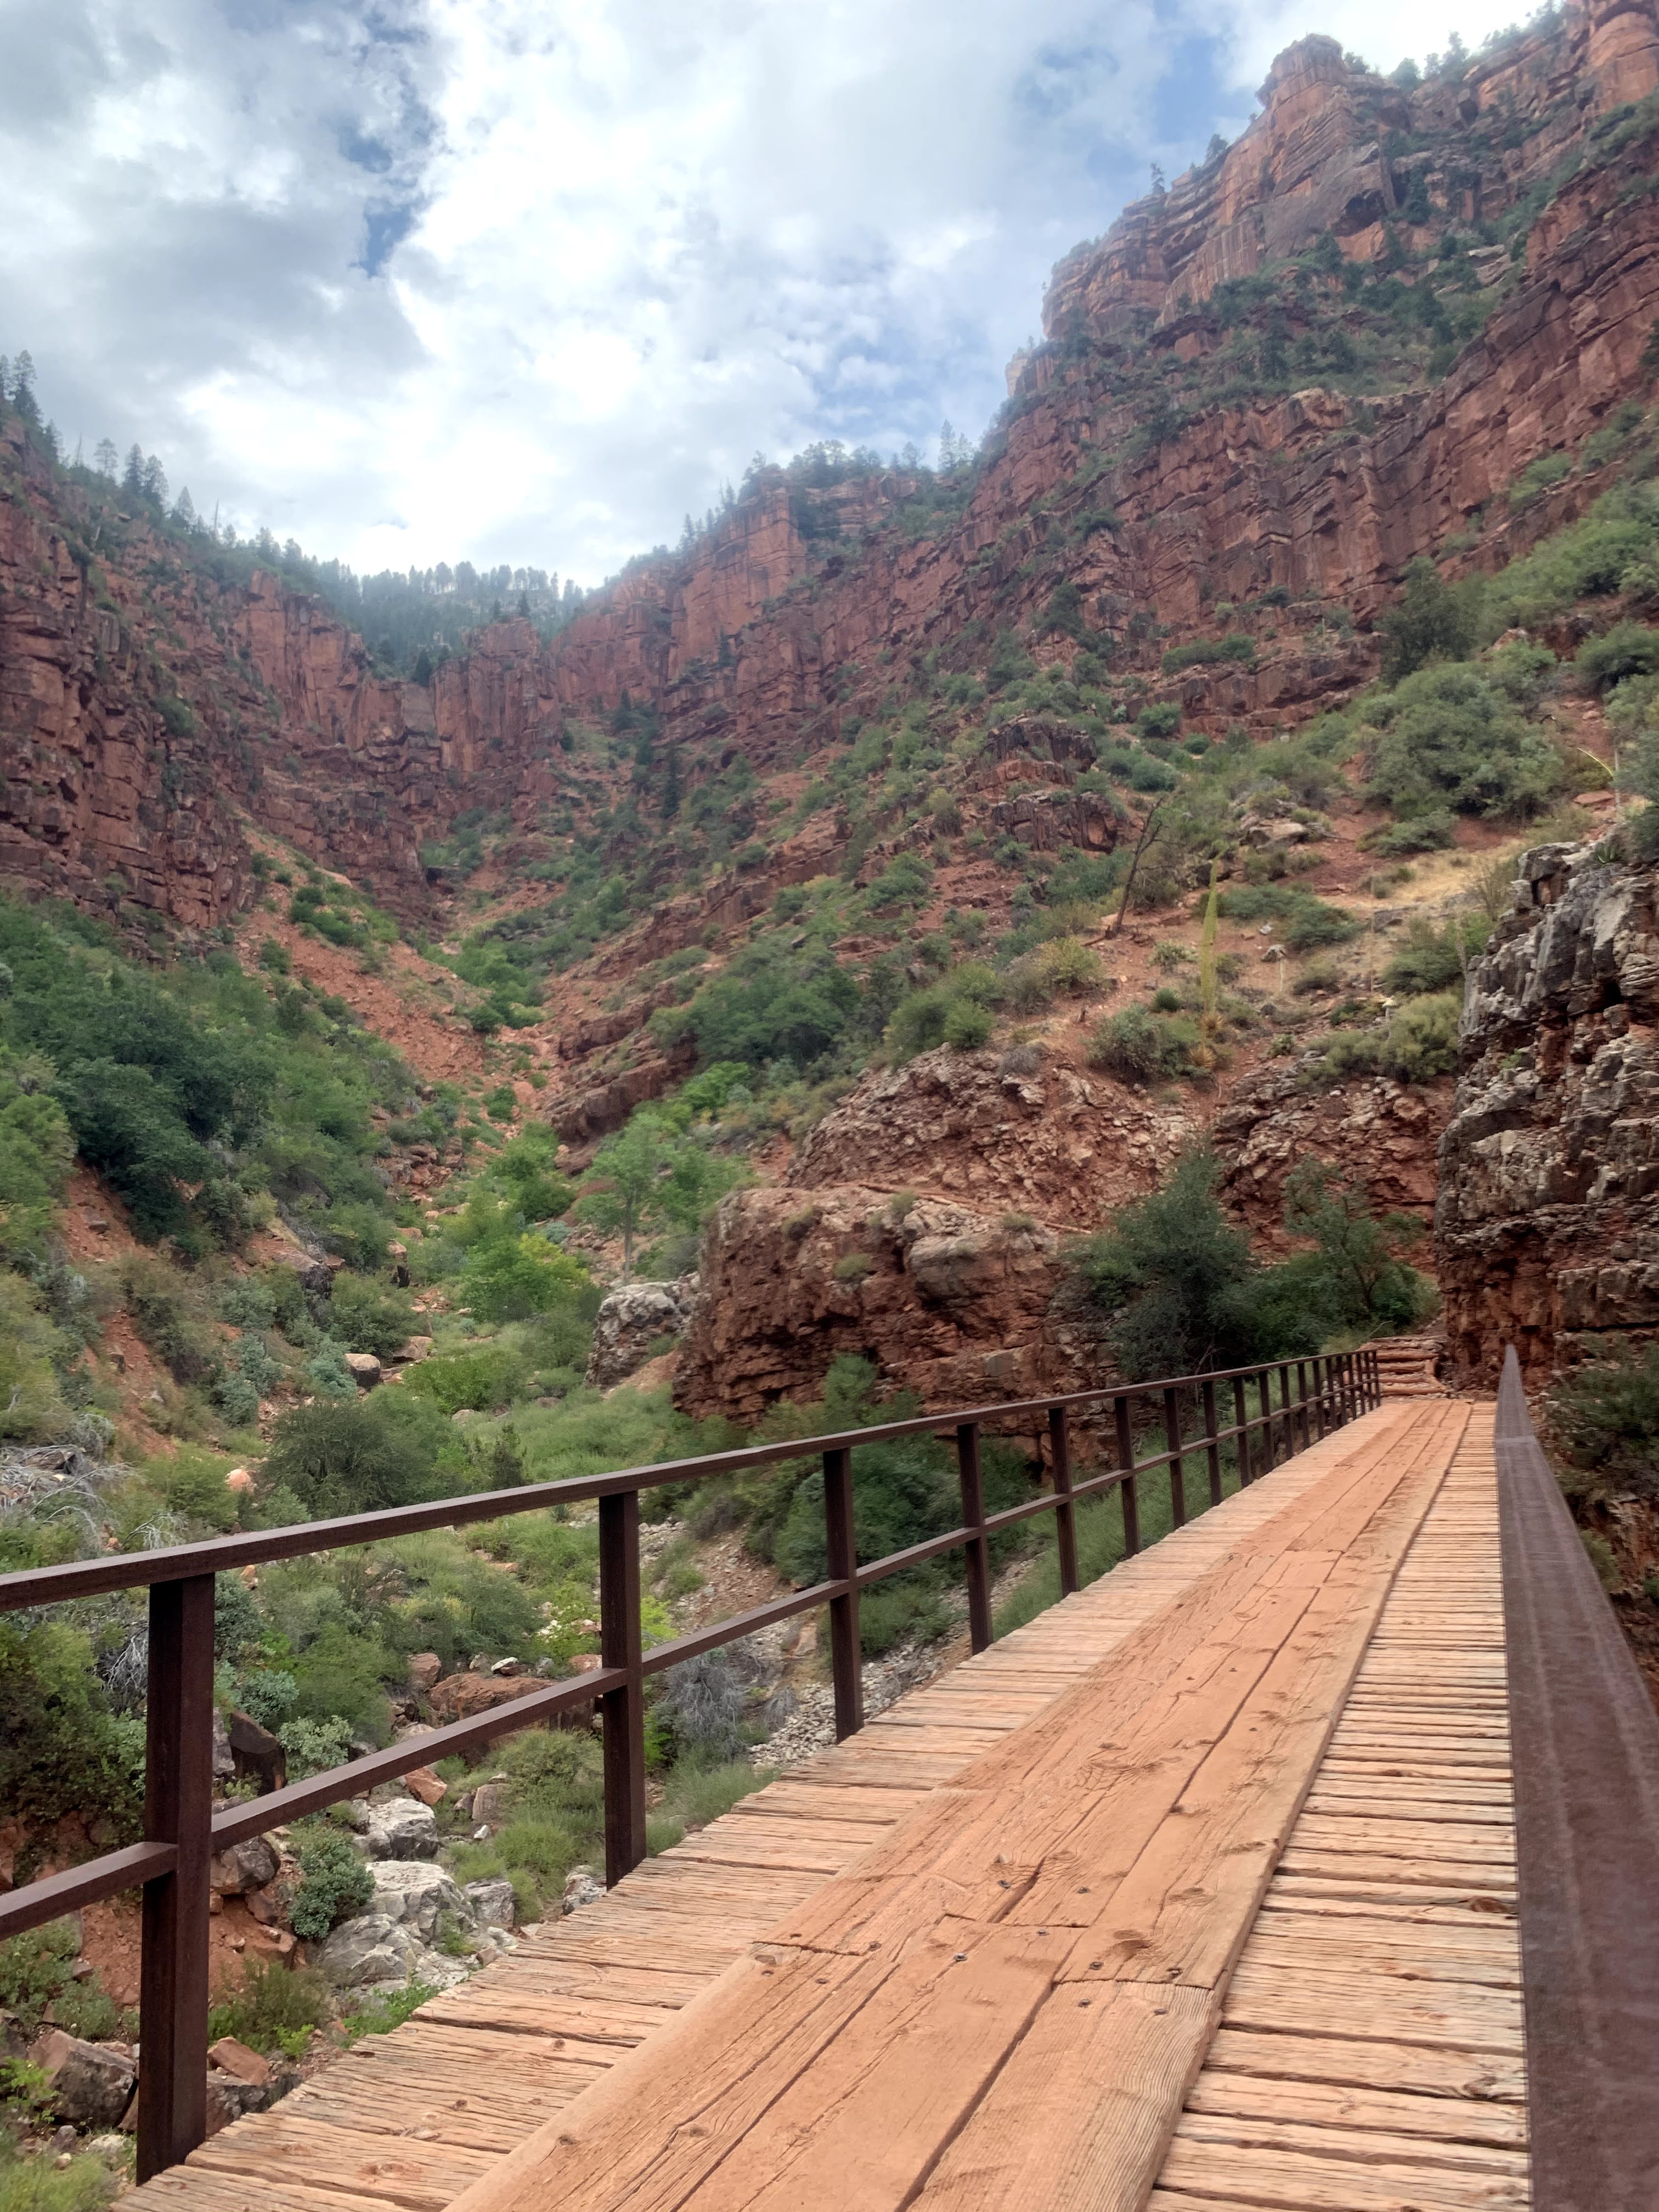
North Rim Kaibab Trail Hike – This is the only hike on the North Rim that takes you into the canyon. You can do as much of it as you want, and once you get to the bottom it connects with the South Rim trail, which is similarly the only trail that takes you in/out of the canyon from the South Rim. The park highly discourages trying to get all the way to the bottom and back up in the same day (they do offer lodge and camping options along the hikes and at the bottom though, if you wanted to make it an overnight experience). We hiked about 3 miles down into the canyon until we got to the bridge before heading back up. The hike back up is challenging – slow and steady will get you there, but it is harder than it seems it will be when you are heading down, so keep that in mind when you are trying to figure out where to stop for the day. Allow yourself 1.5-2x the amount of time (and exponential effort) to get back up as it did to go down.

Jacob Lake Inn for dinner – It was probably the only thing open (again) on the way back to the hotel from the canyon, but the sandwiches here really hit the spot! The grilled chicken club was my favorite. Also, this restaurant is attached to a pretty lit bakery with some high quality cookies – get the chocolate parfait (fat and round chocolate chip cookie base with HUGE chocolate chunks) and cloud cookies (chocolate cookie base covered with marshmallow fluff and covered again with chocolate icing). We also got the raspberry lemon cookies and snickerdoodles, which were both fabulous.

Day 16 (Travel Day)

Meteor Crater Natural Landmark – This is the first confirmed site of a meteor crash in the world! IT might not seem like much, but this thing is HUGE, and has quite a scientific history. This is worth the stop into. Read the brochure for some mindblowing facts!

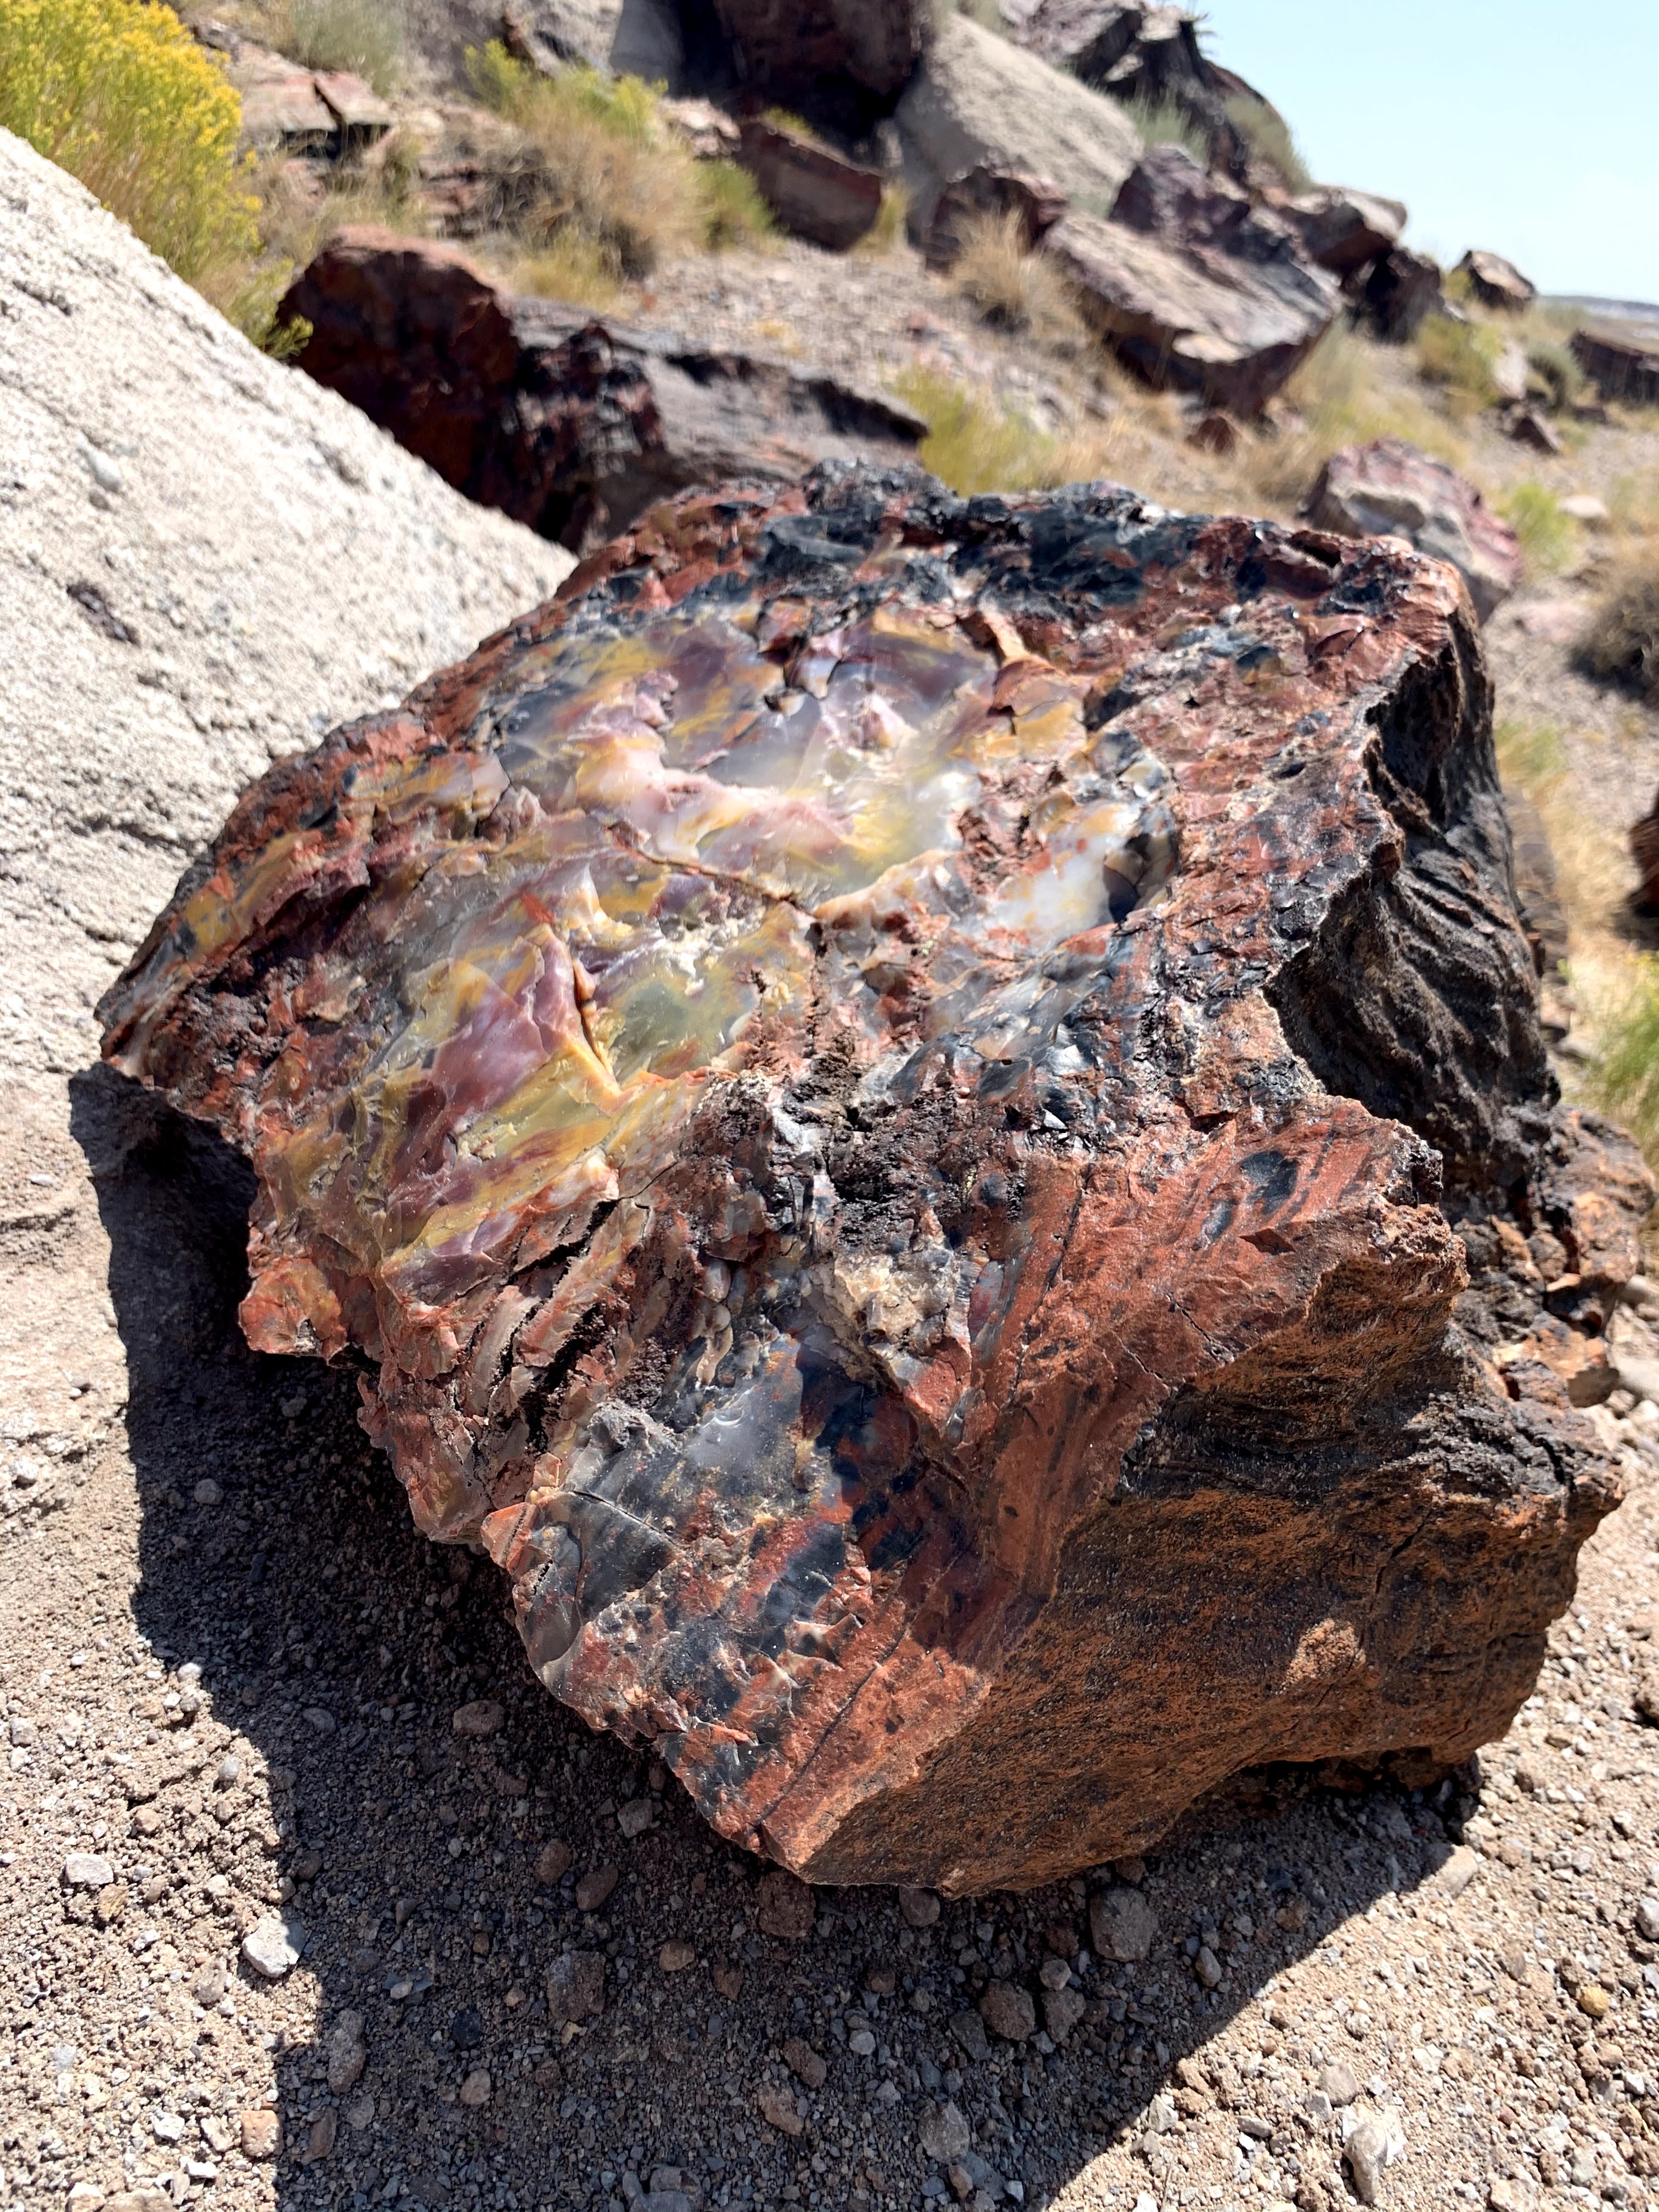
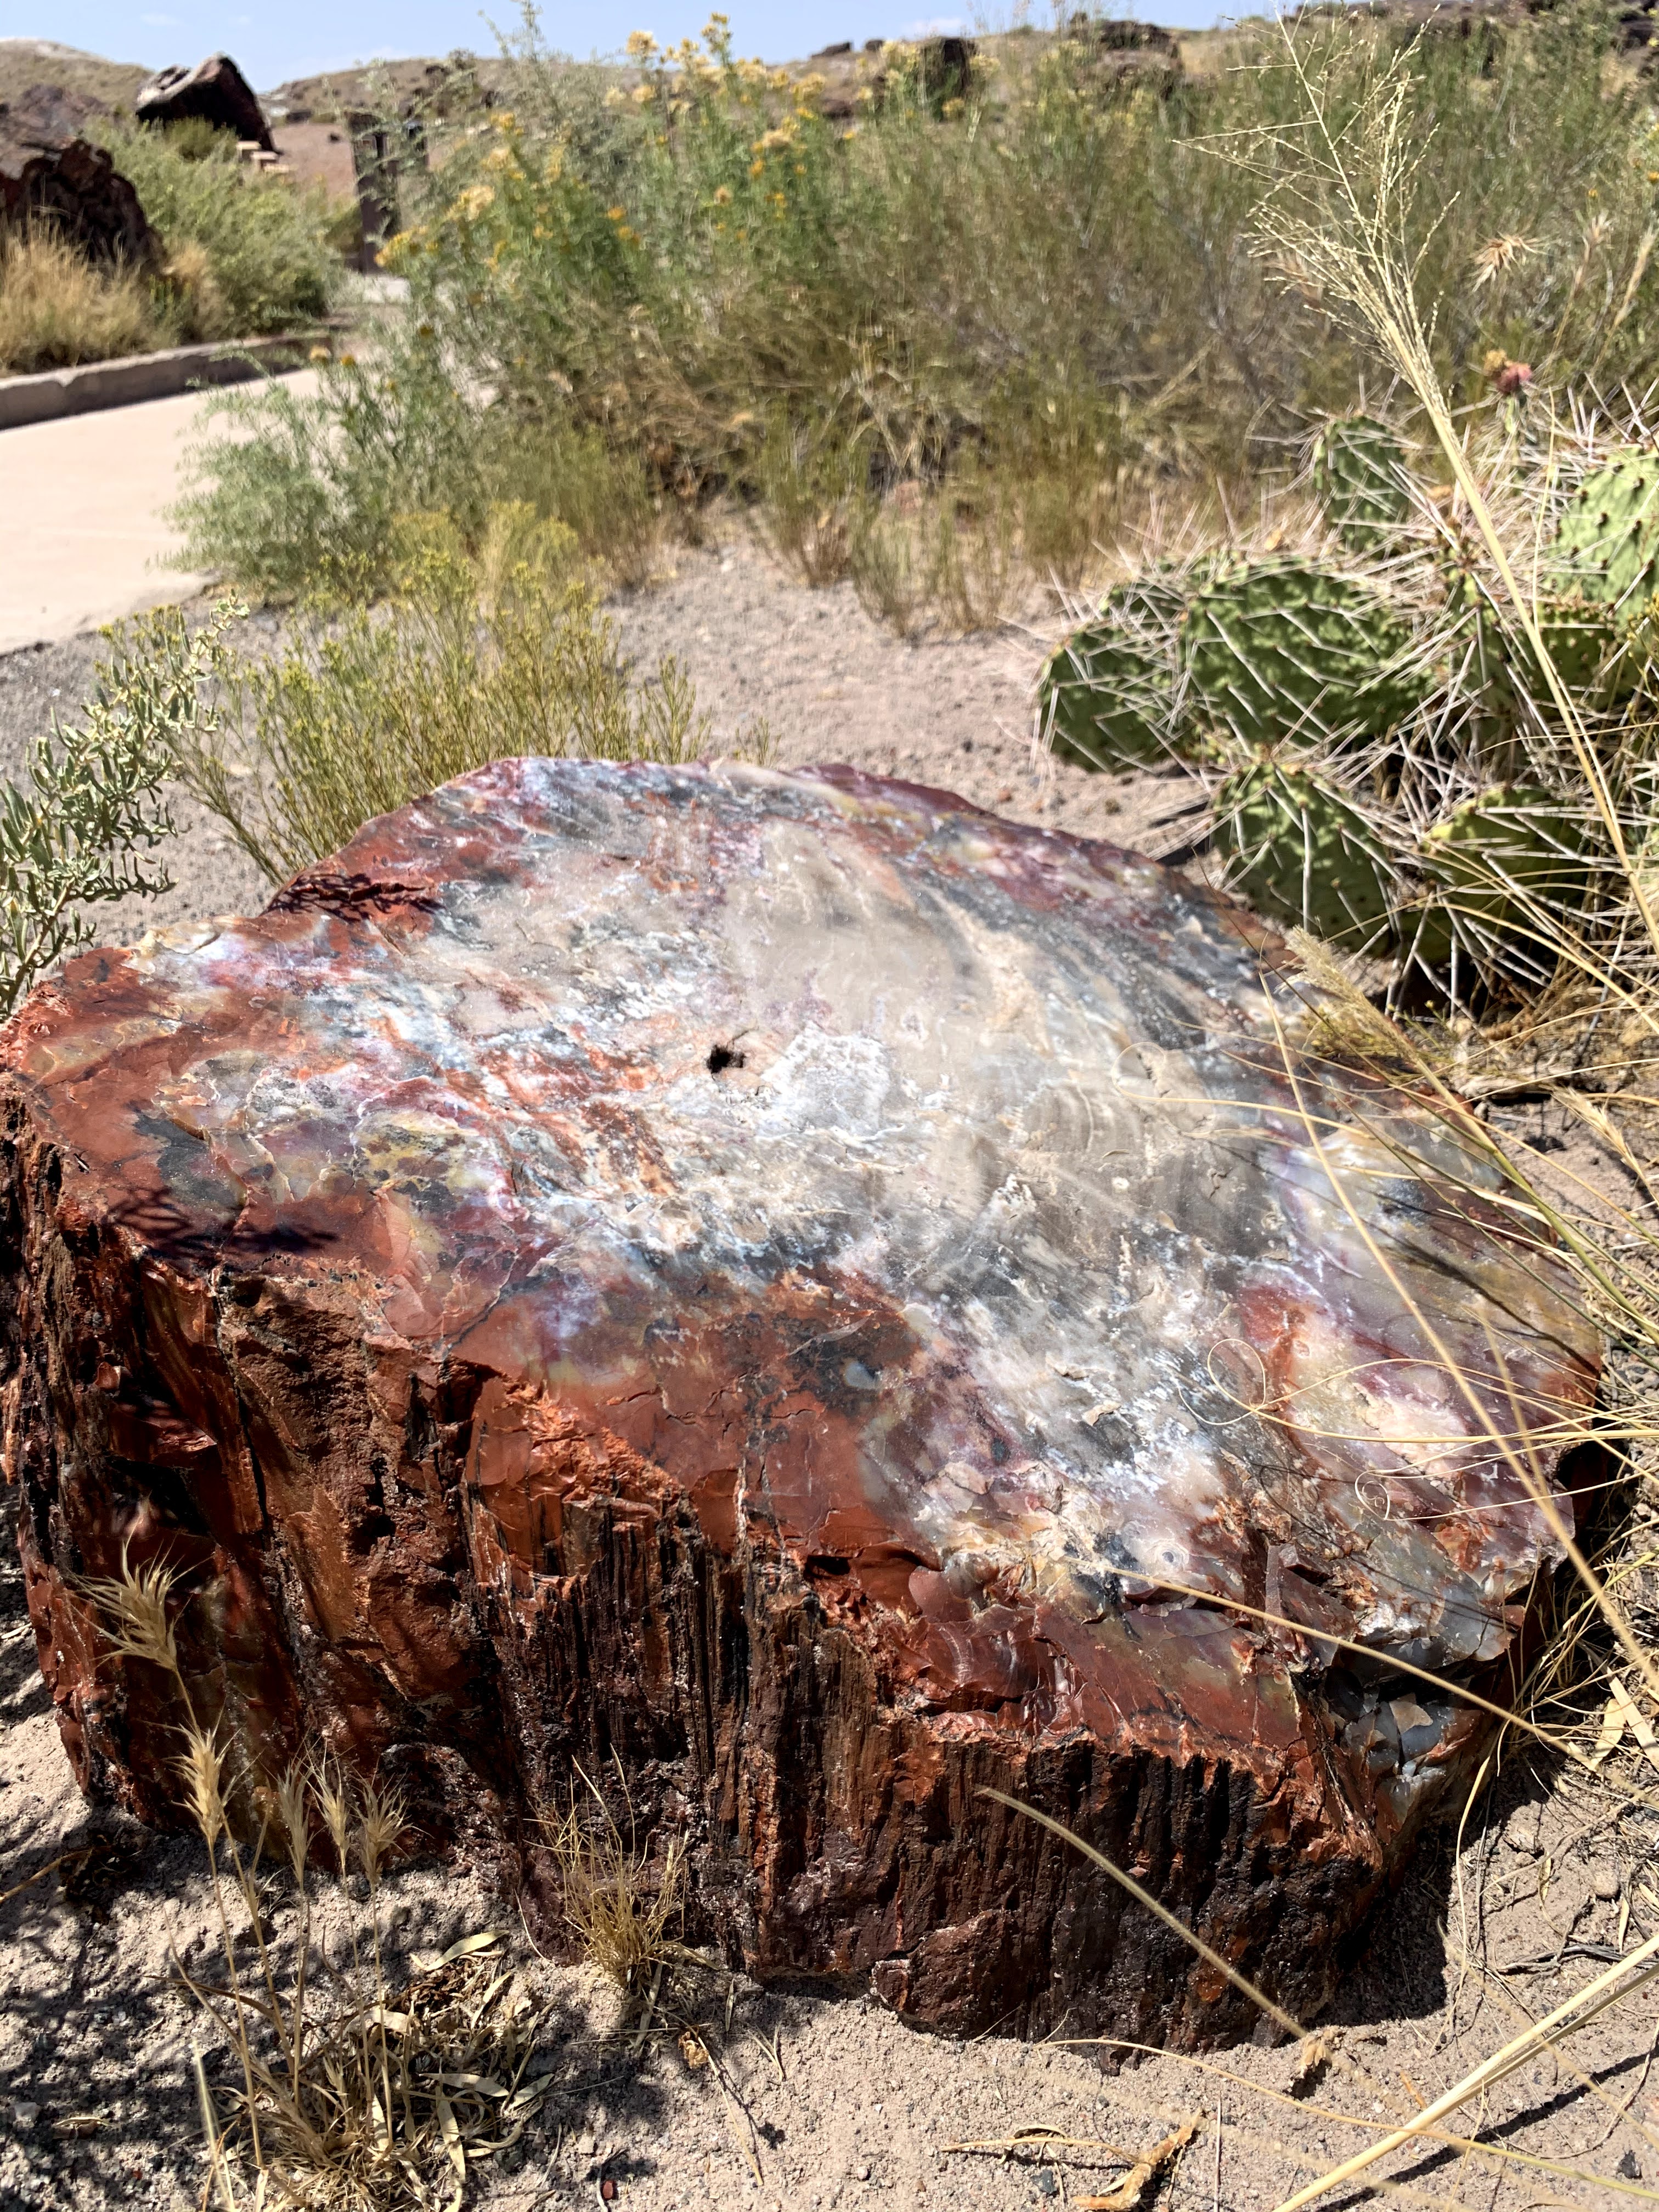
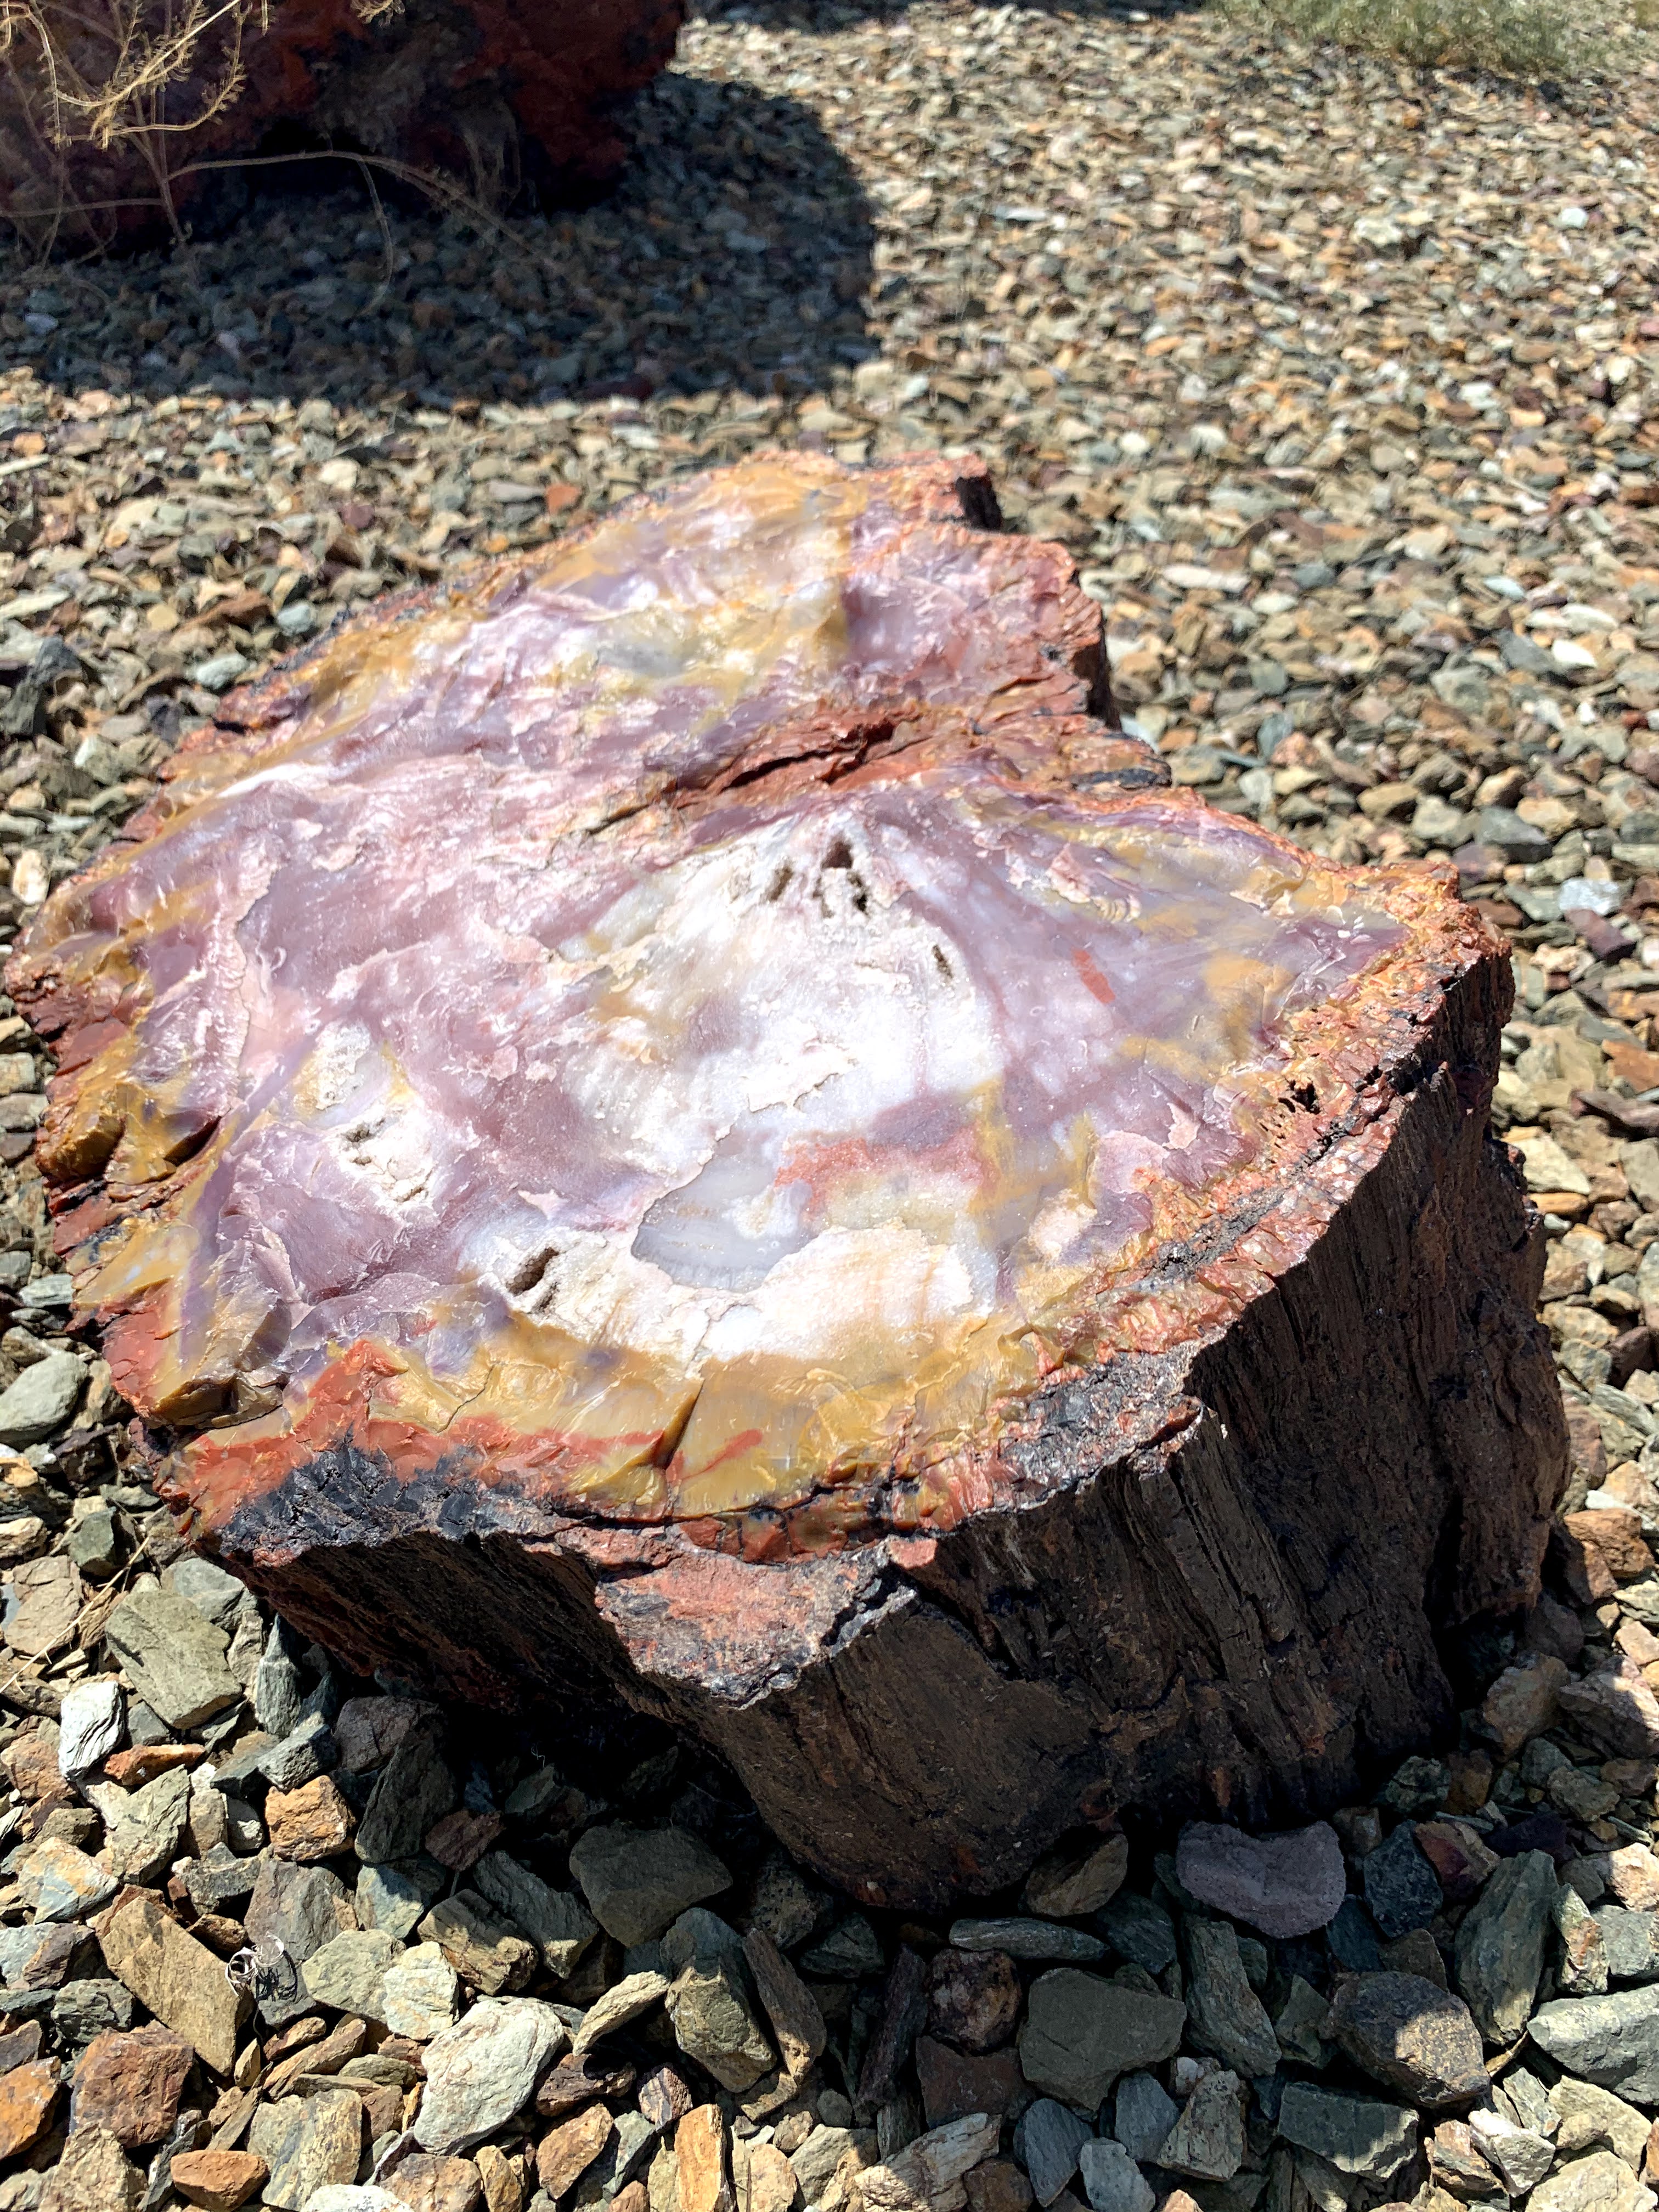
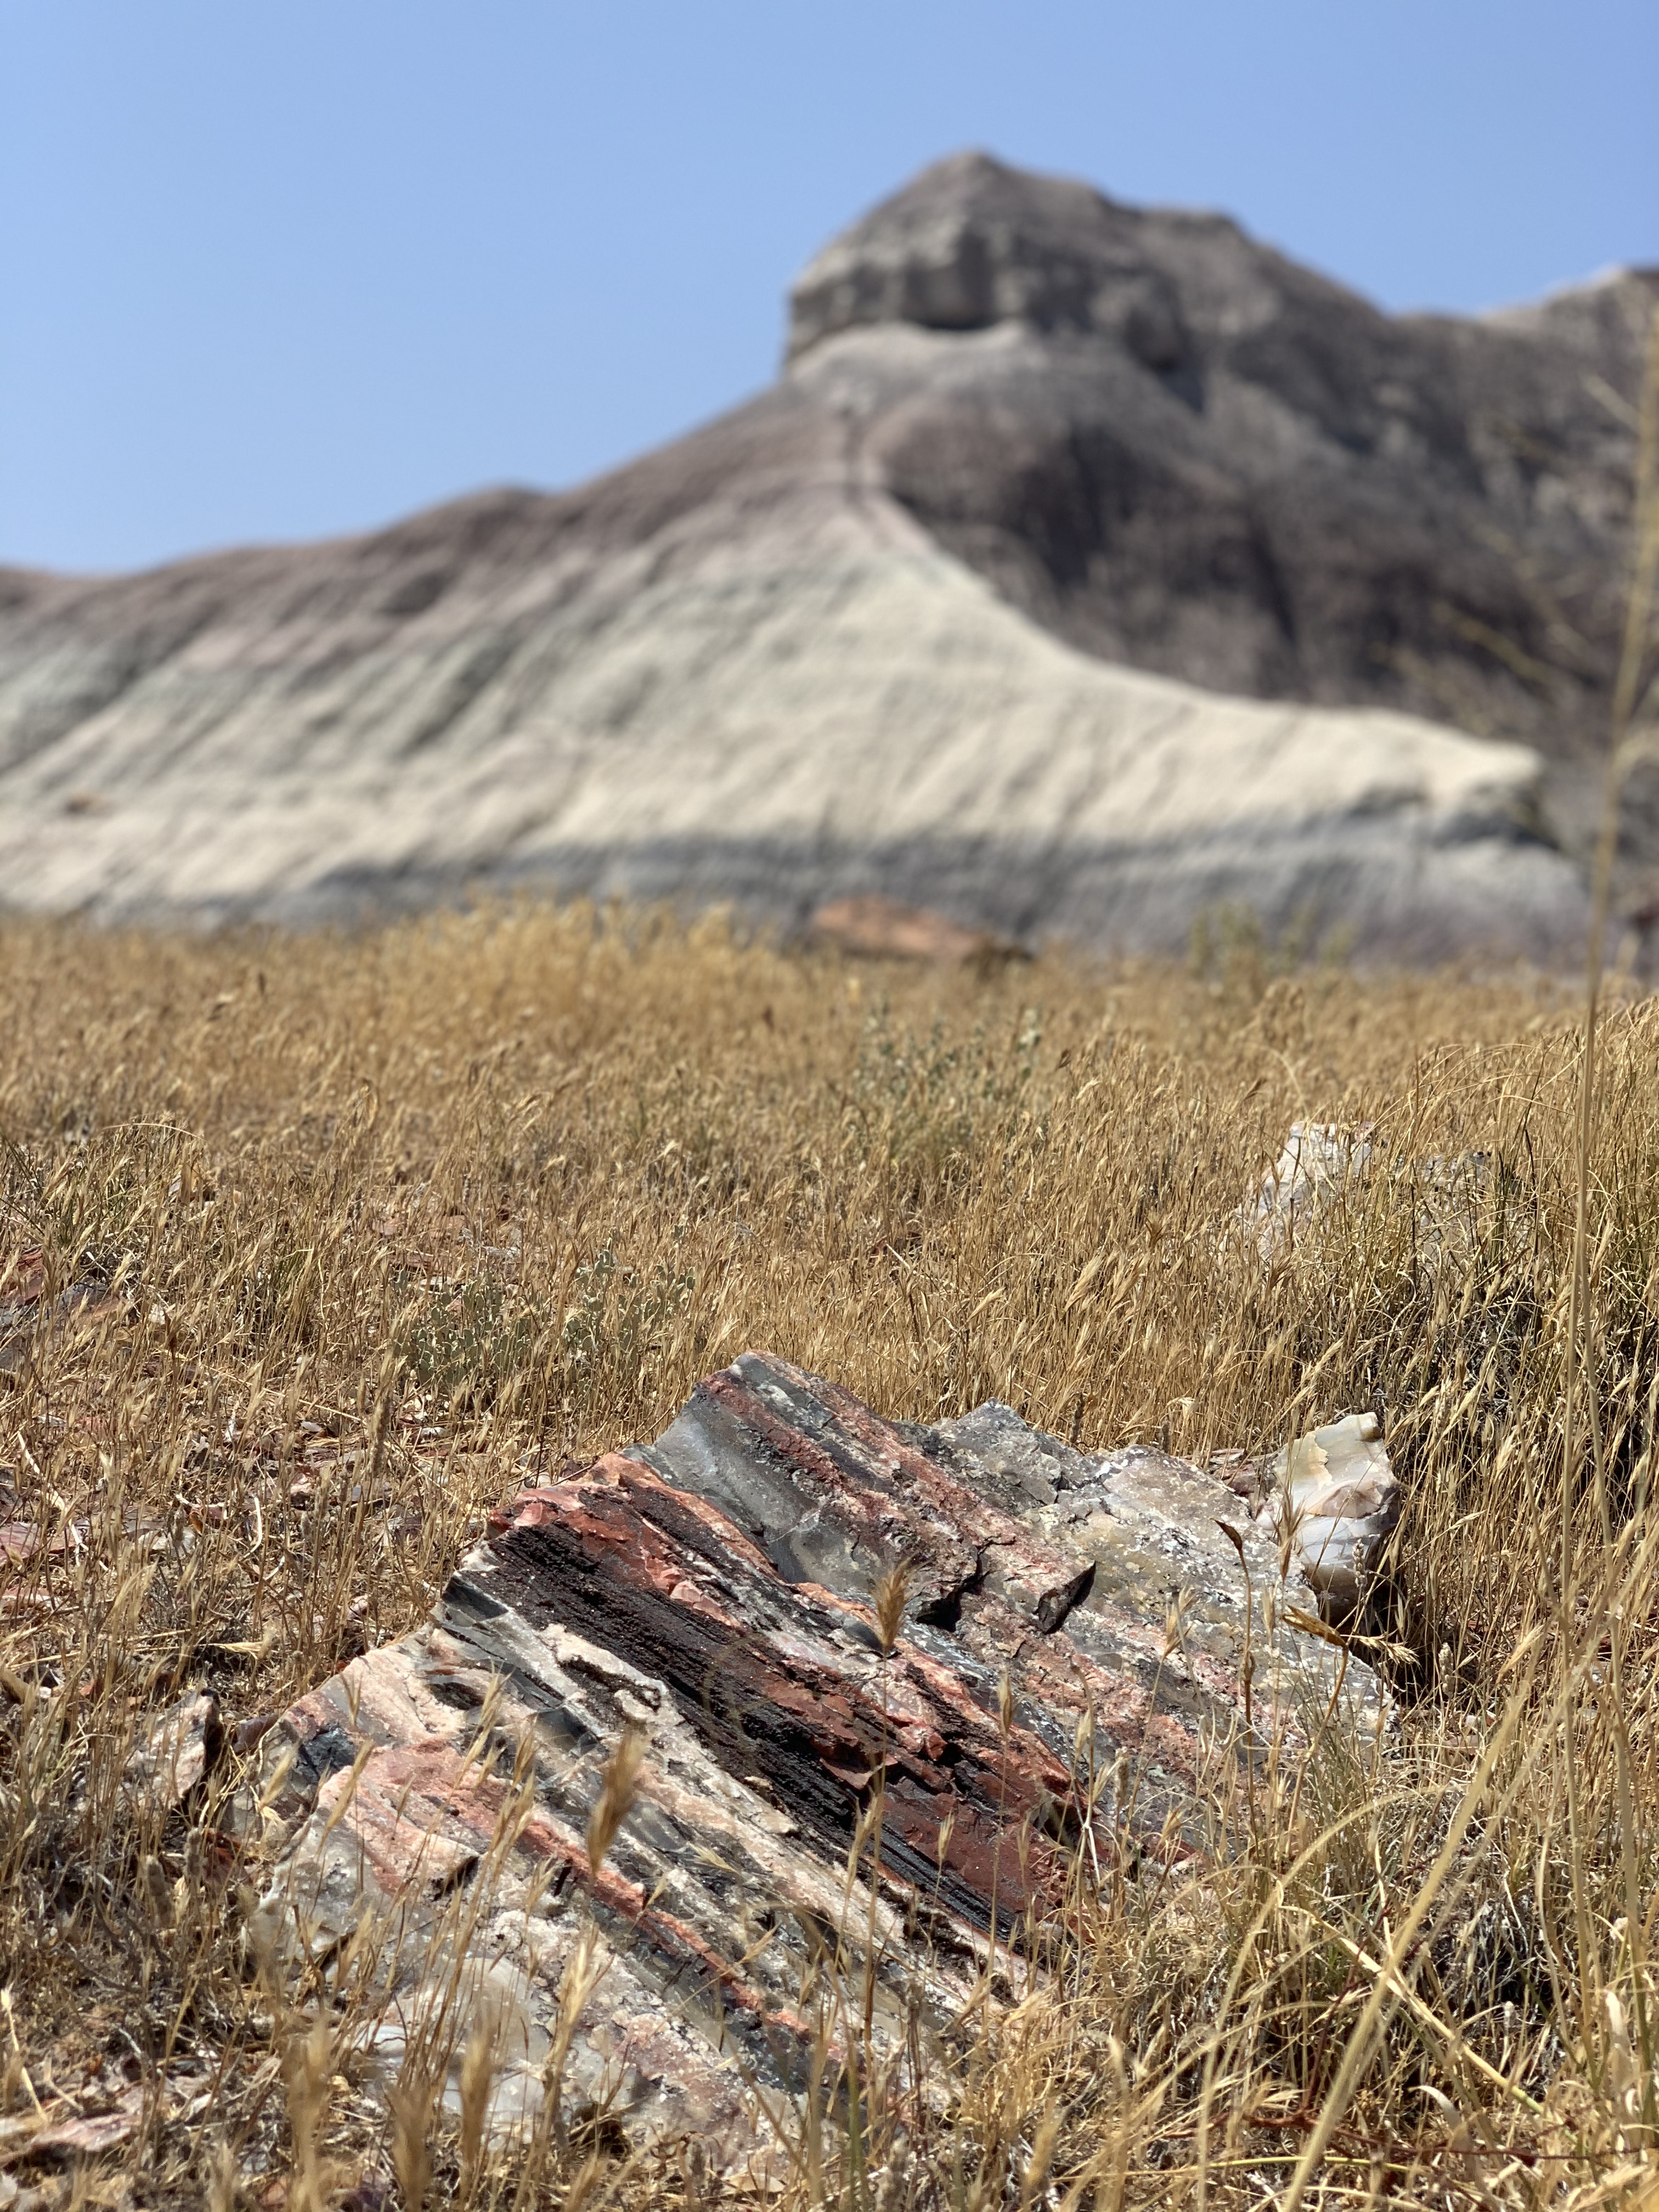
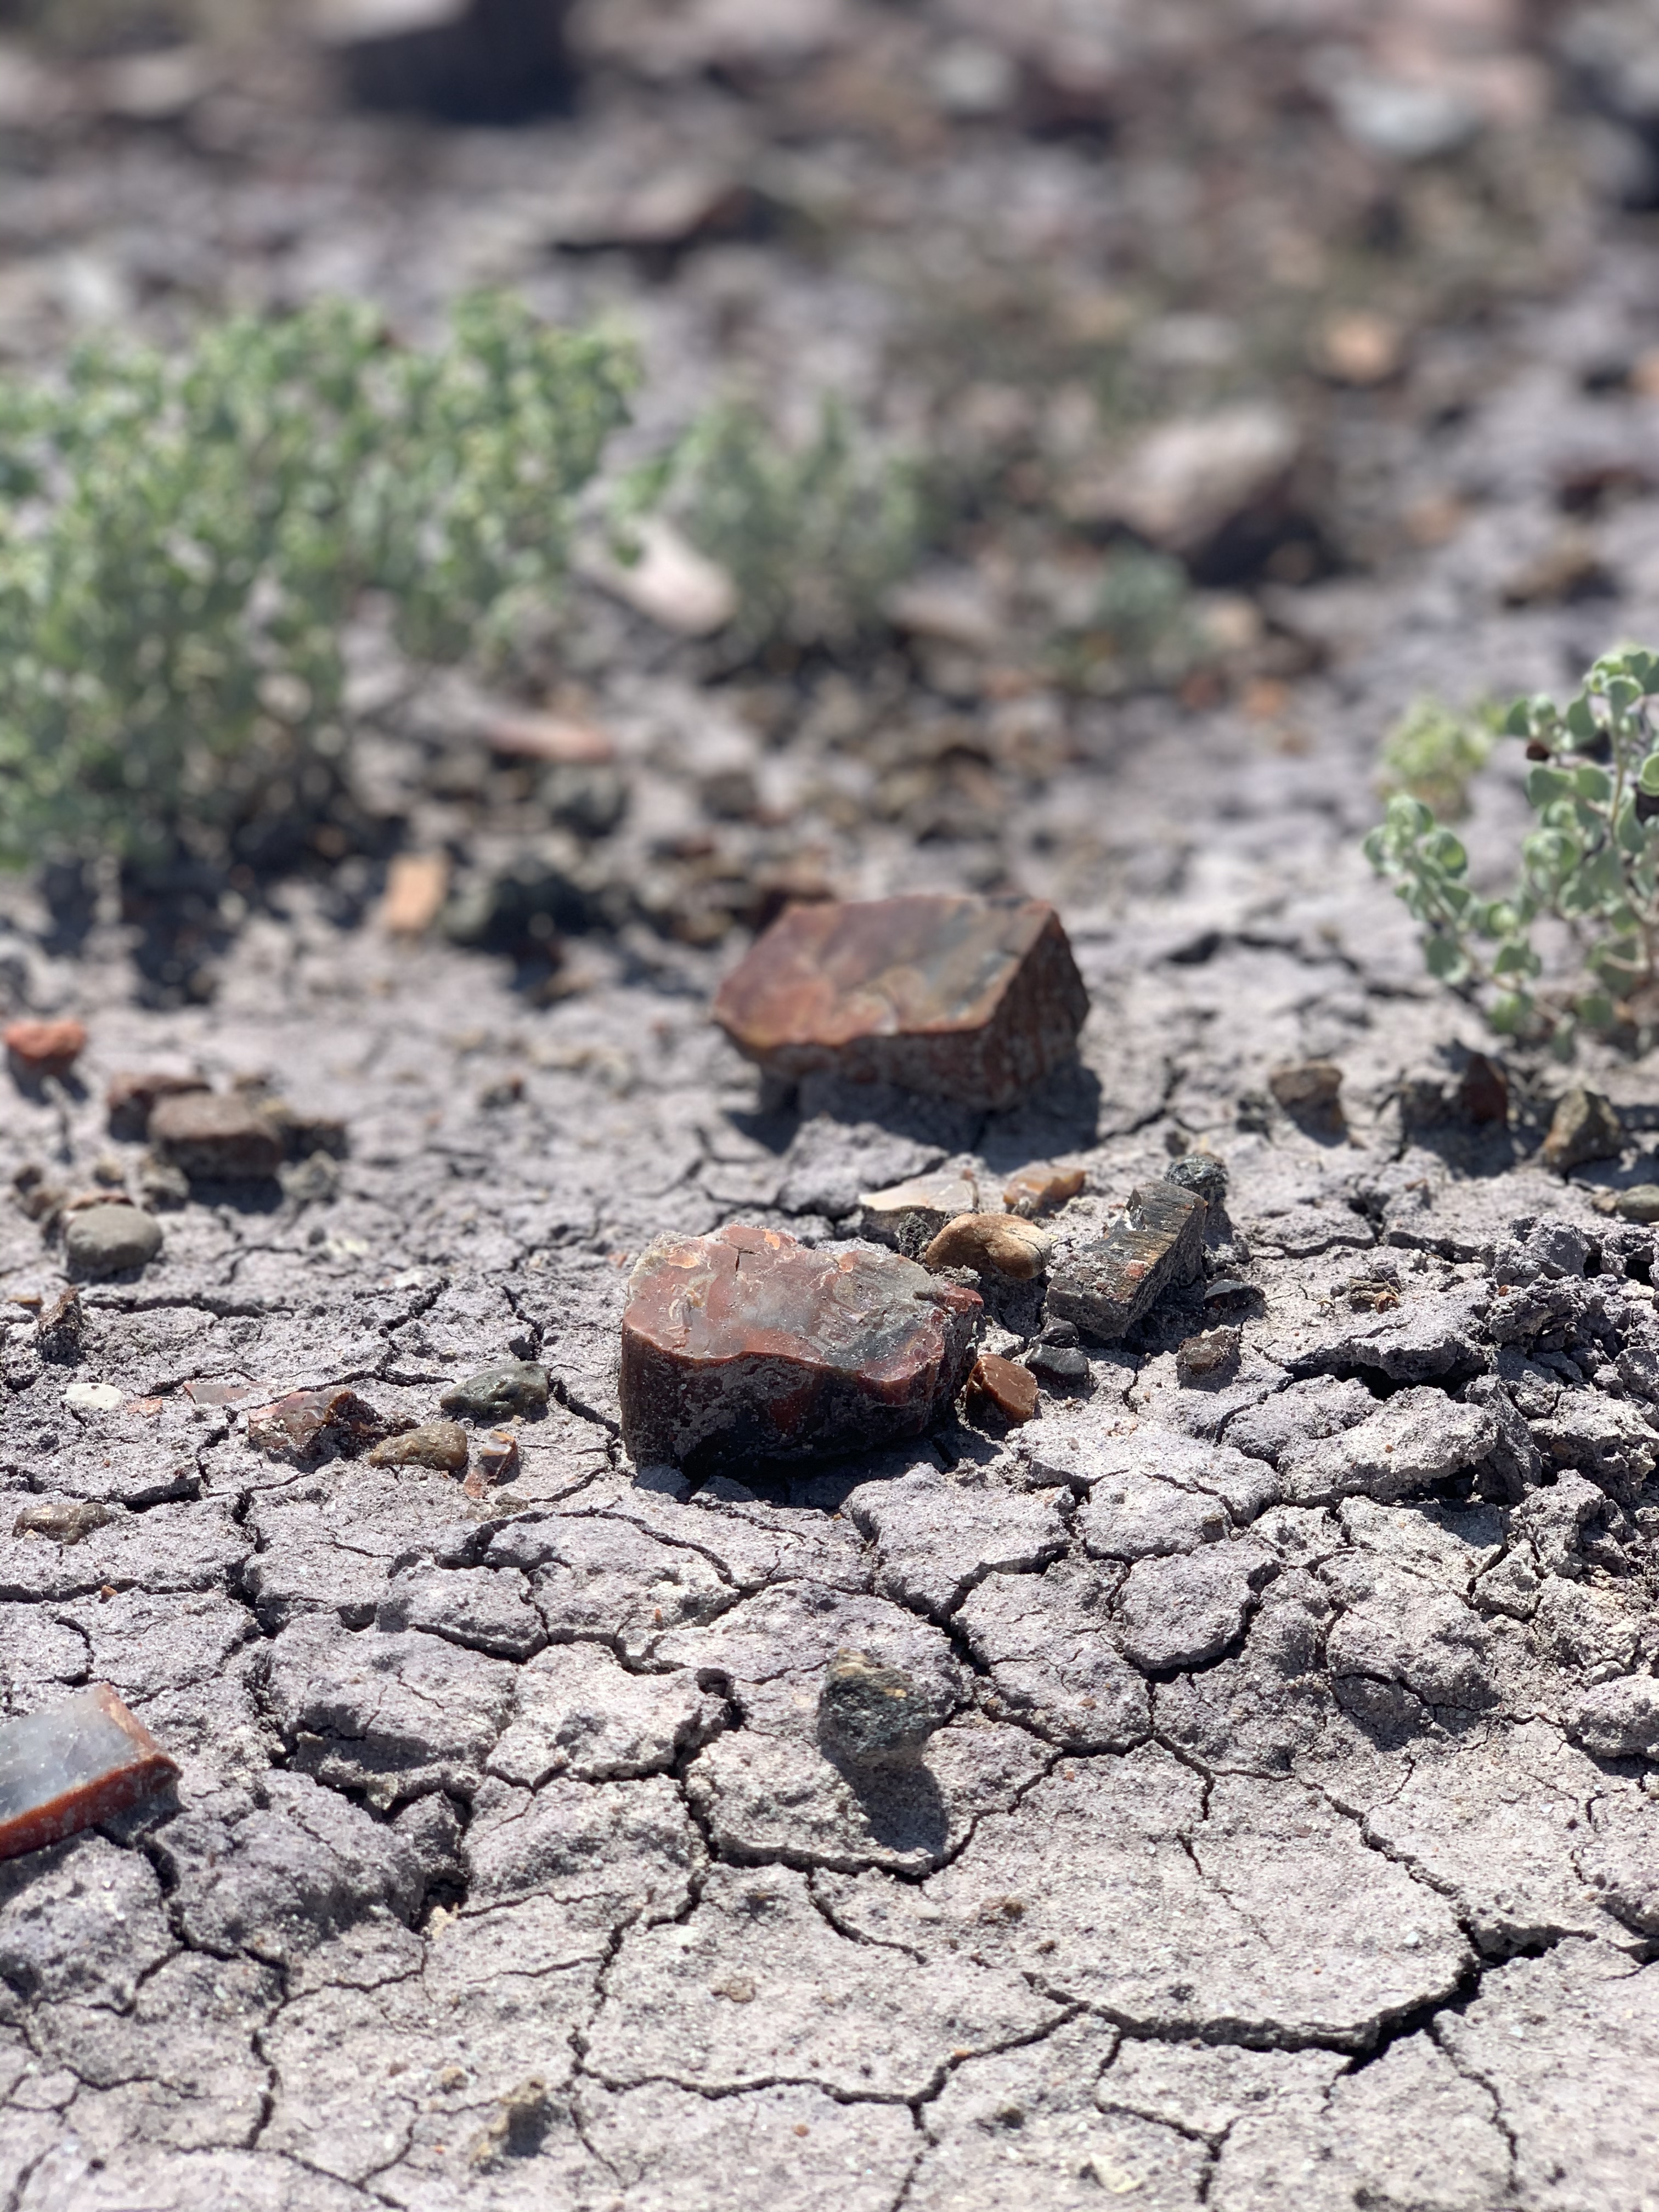
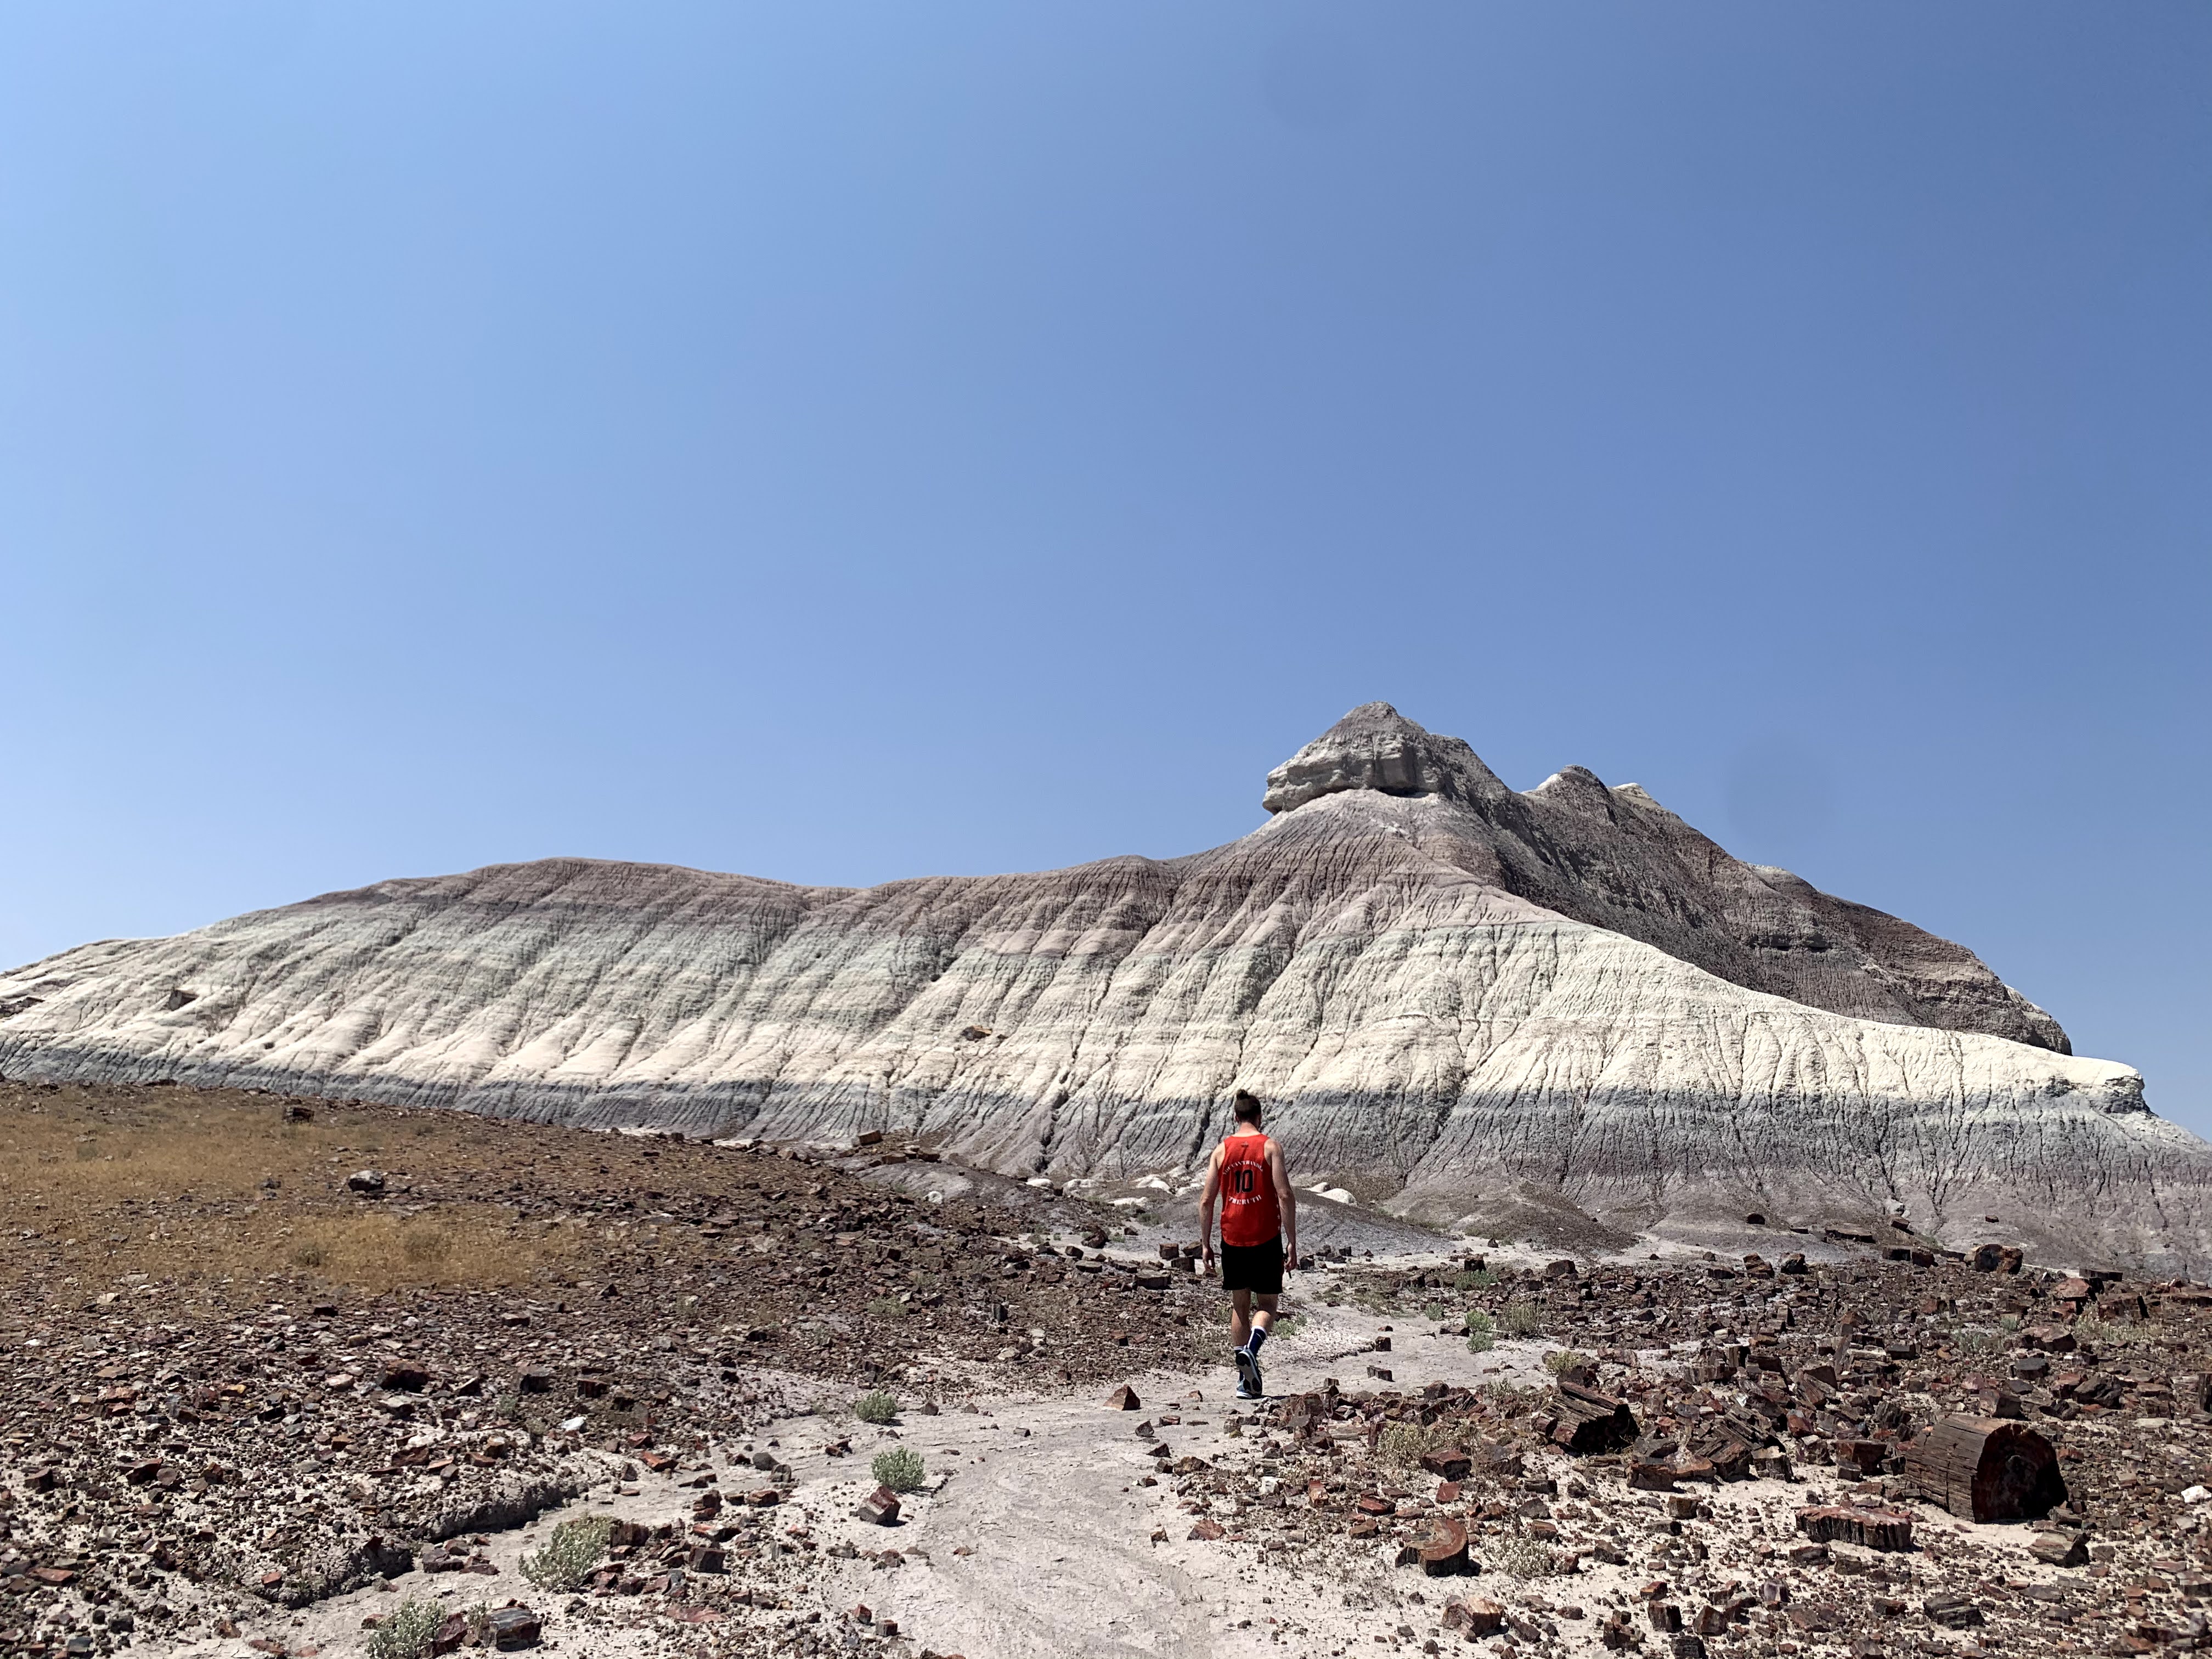
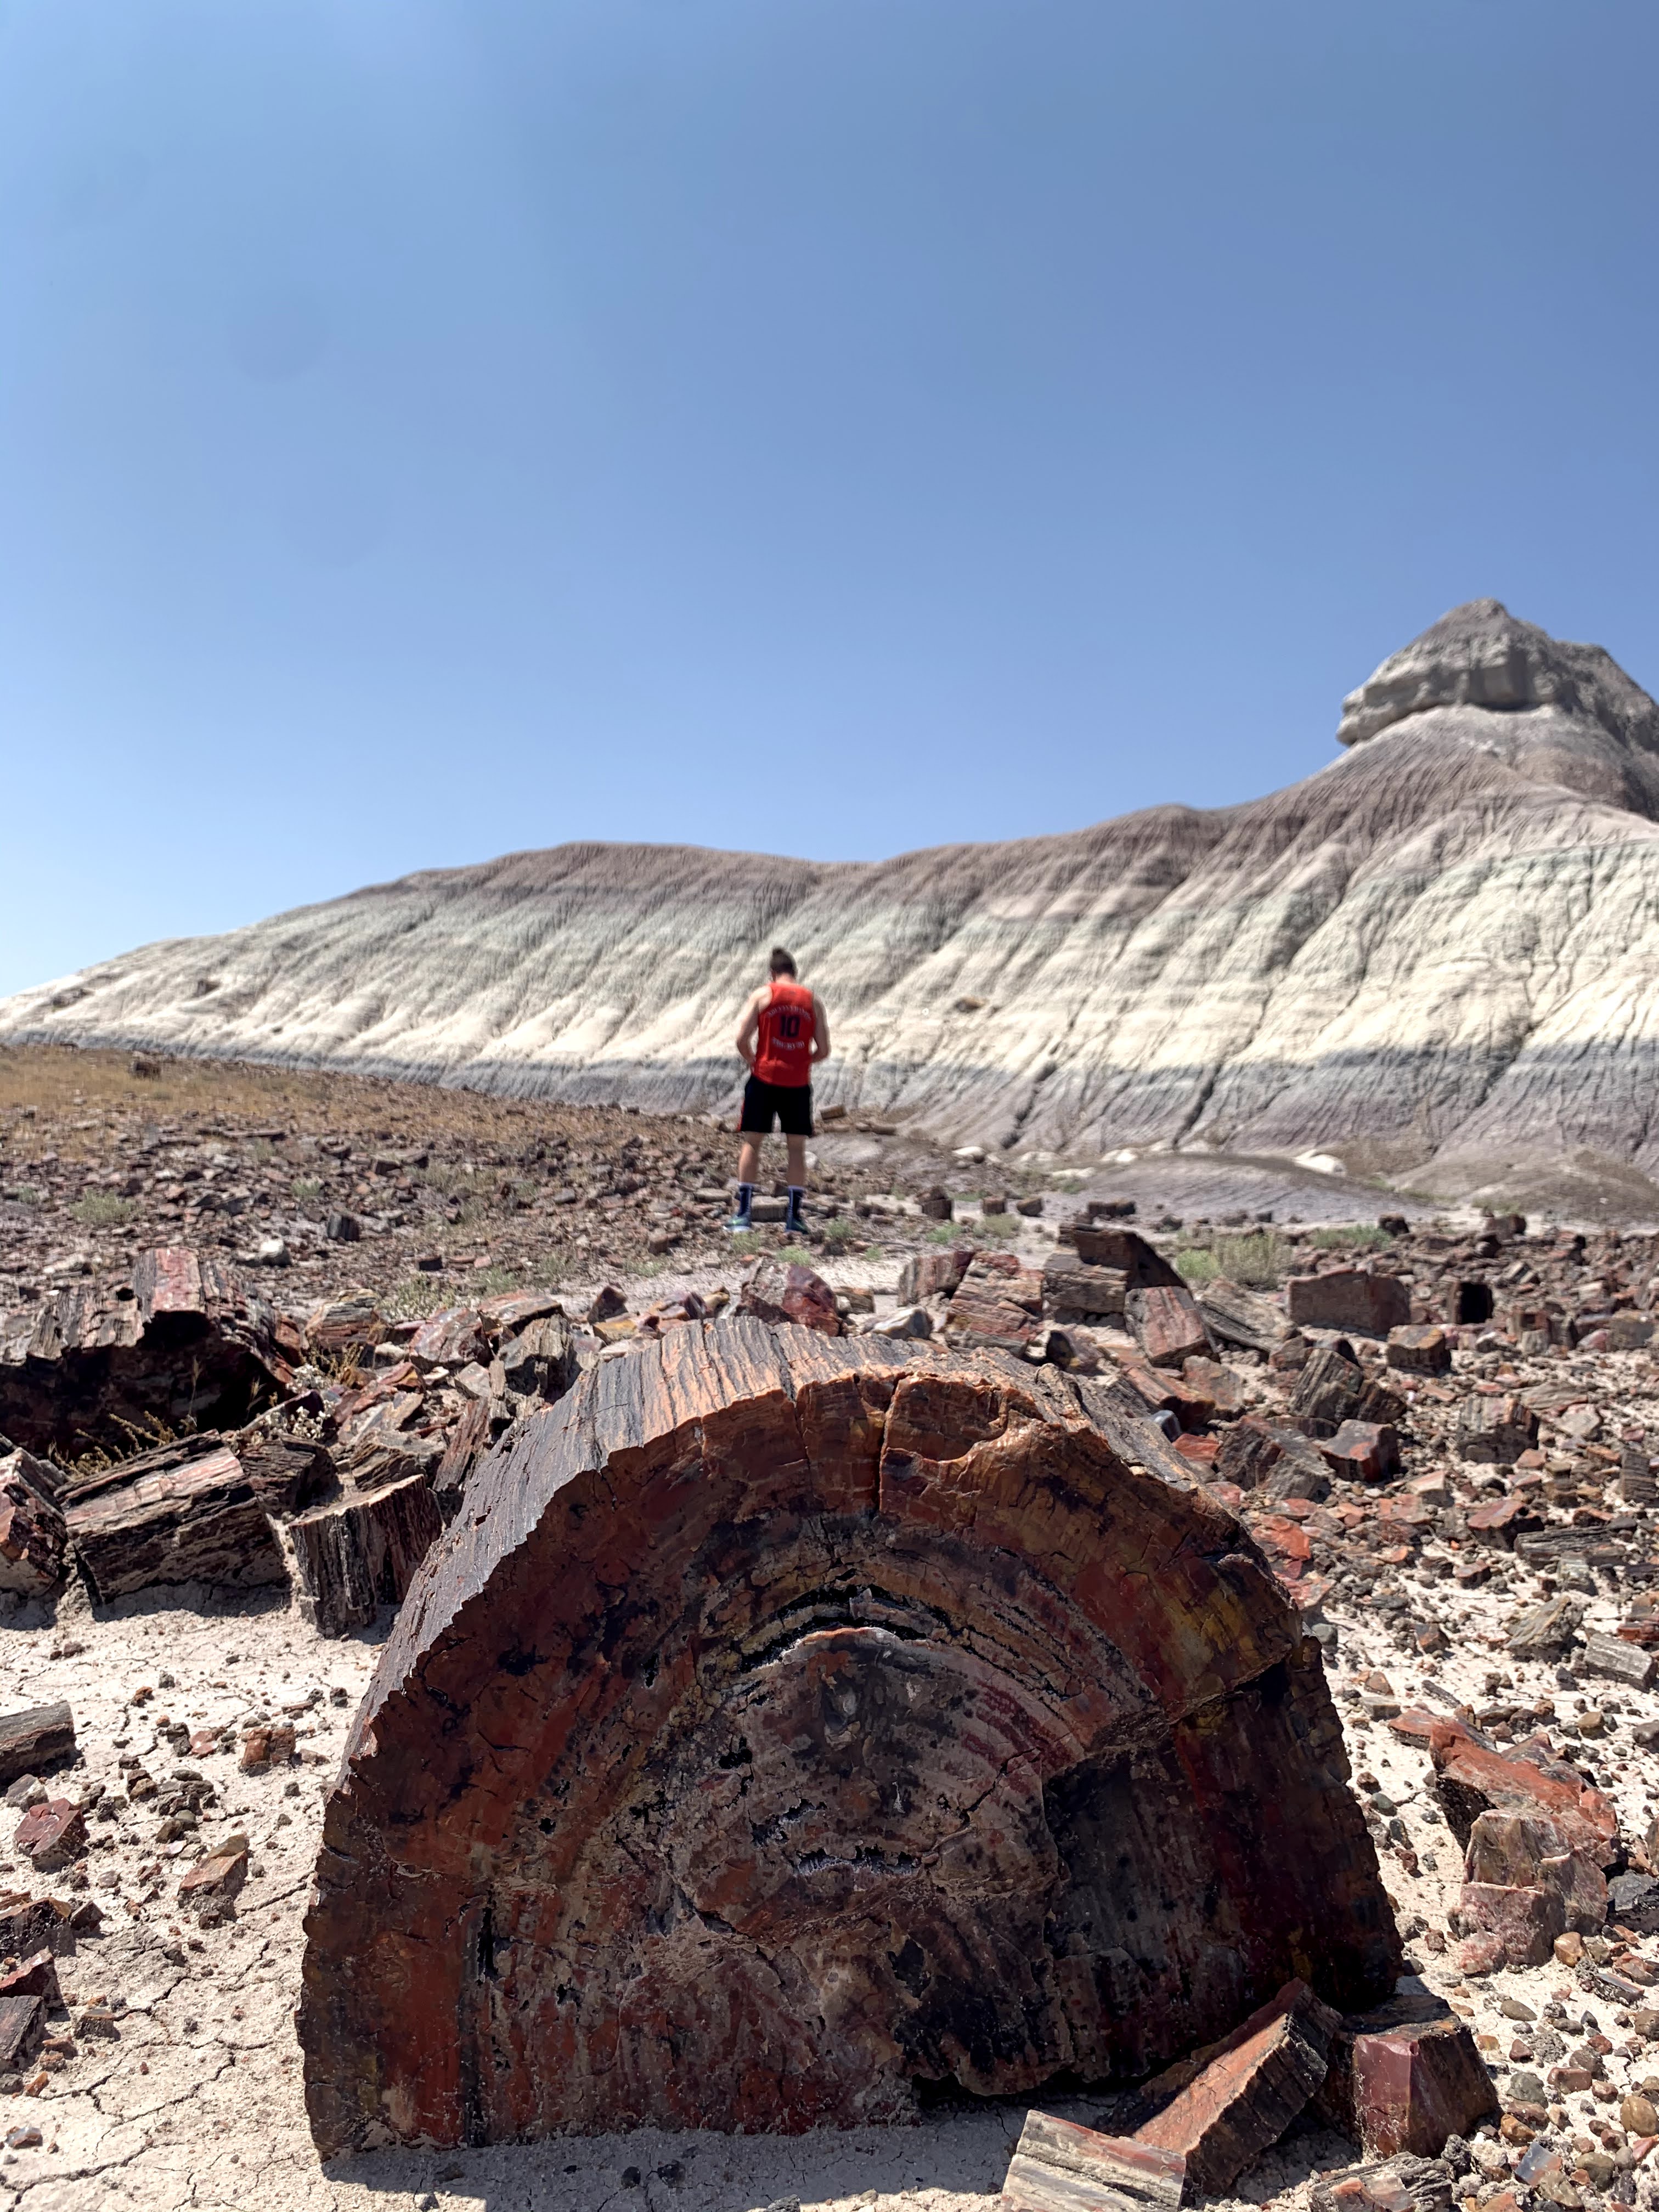
Petrified Forest – I had no idea what to expect going into this, but I am SO happy I wound up stopping here. The “forest” is comprised of old tree trunks that soaked up lava and minerals, and the plant matter was slowly replaced by minerals and the trunks became beautiful colorful fossilized rock. The colors are wild and almost look man-made, and seeing them in the shape of the tree with bark intact is really something else!

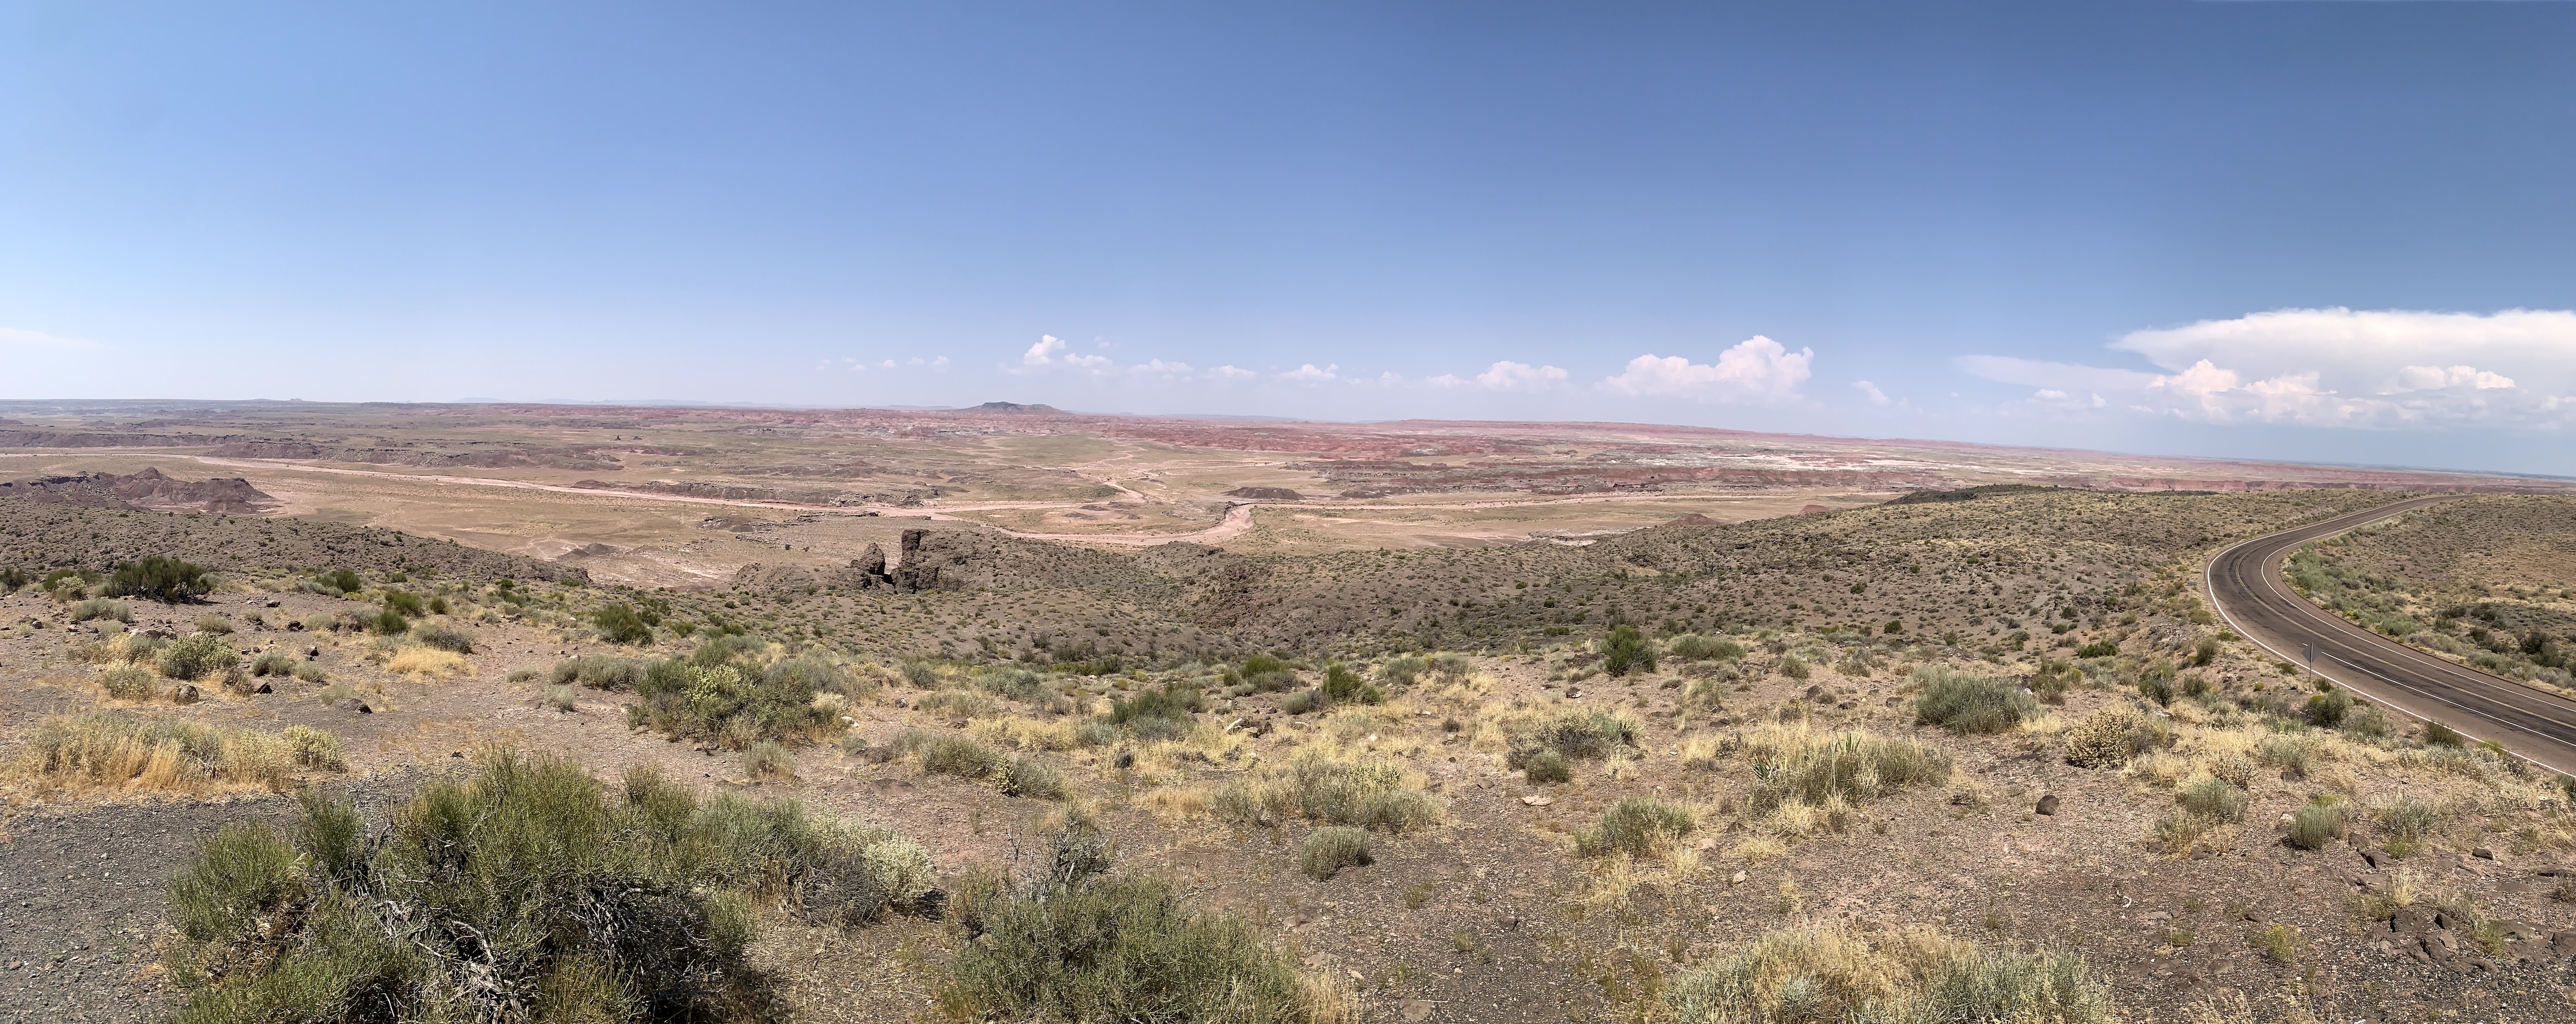
Painted Desert – You can easily drive through this while on your way out of the Petrified Forest, because the two parks are connected. The painted desert portion of the park has beautiful dunes which are made of different rock layers, so they have many different layers of color.

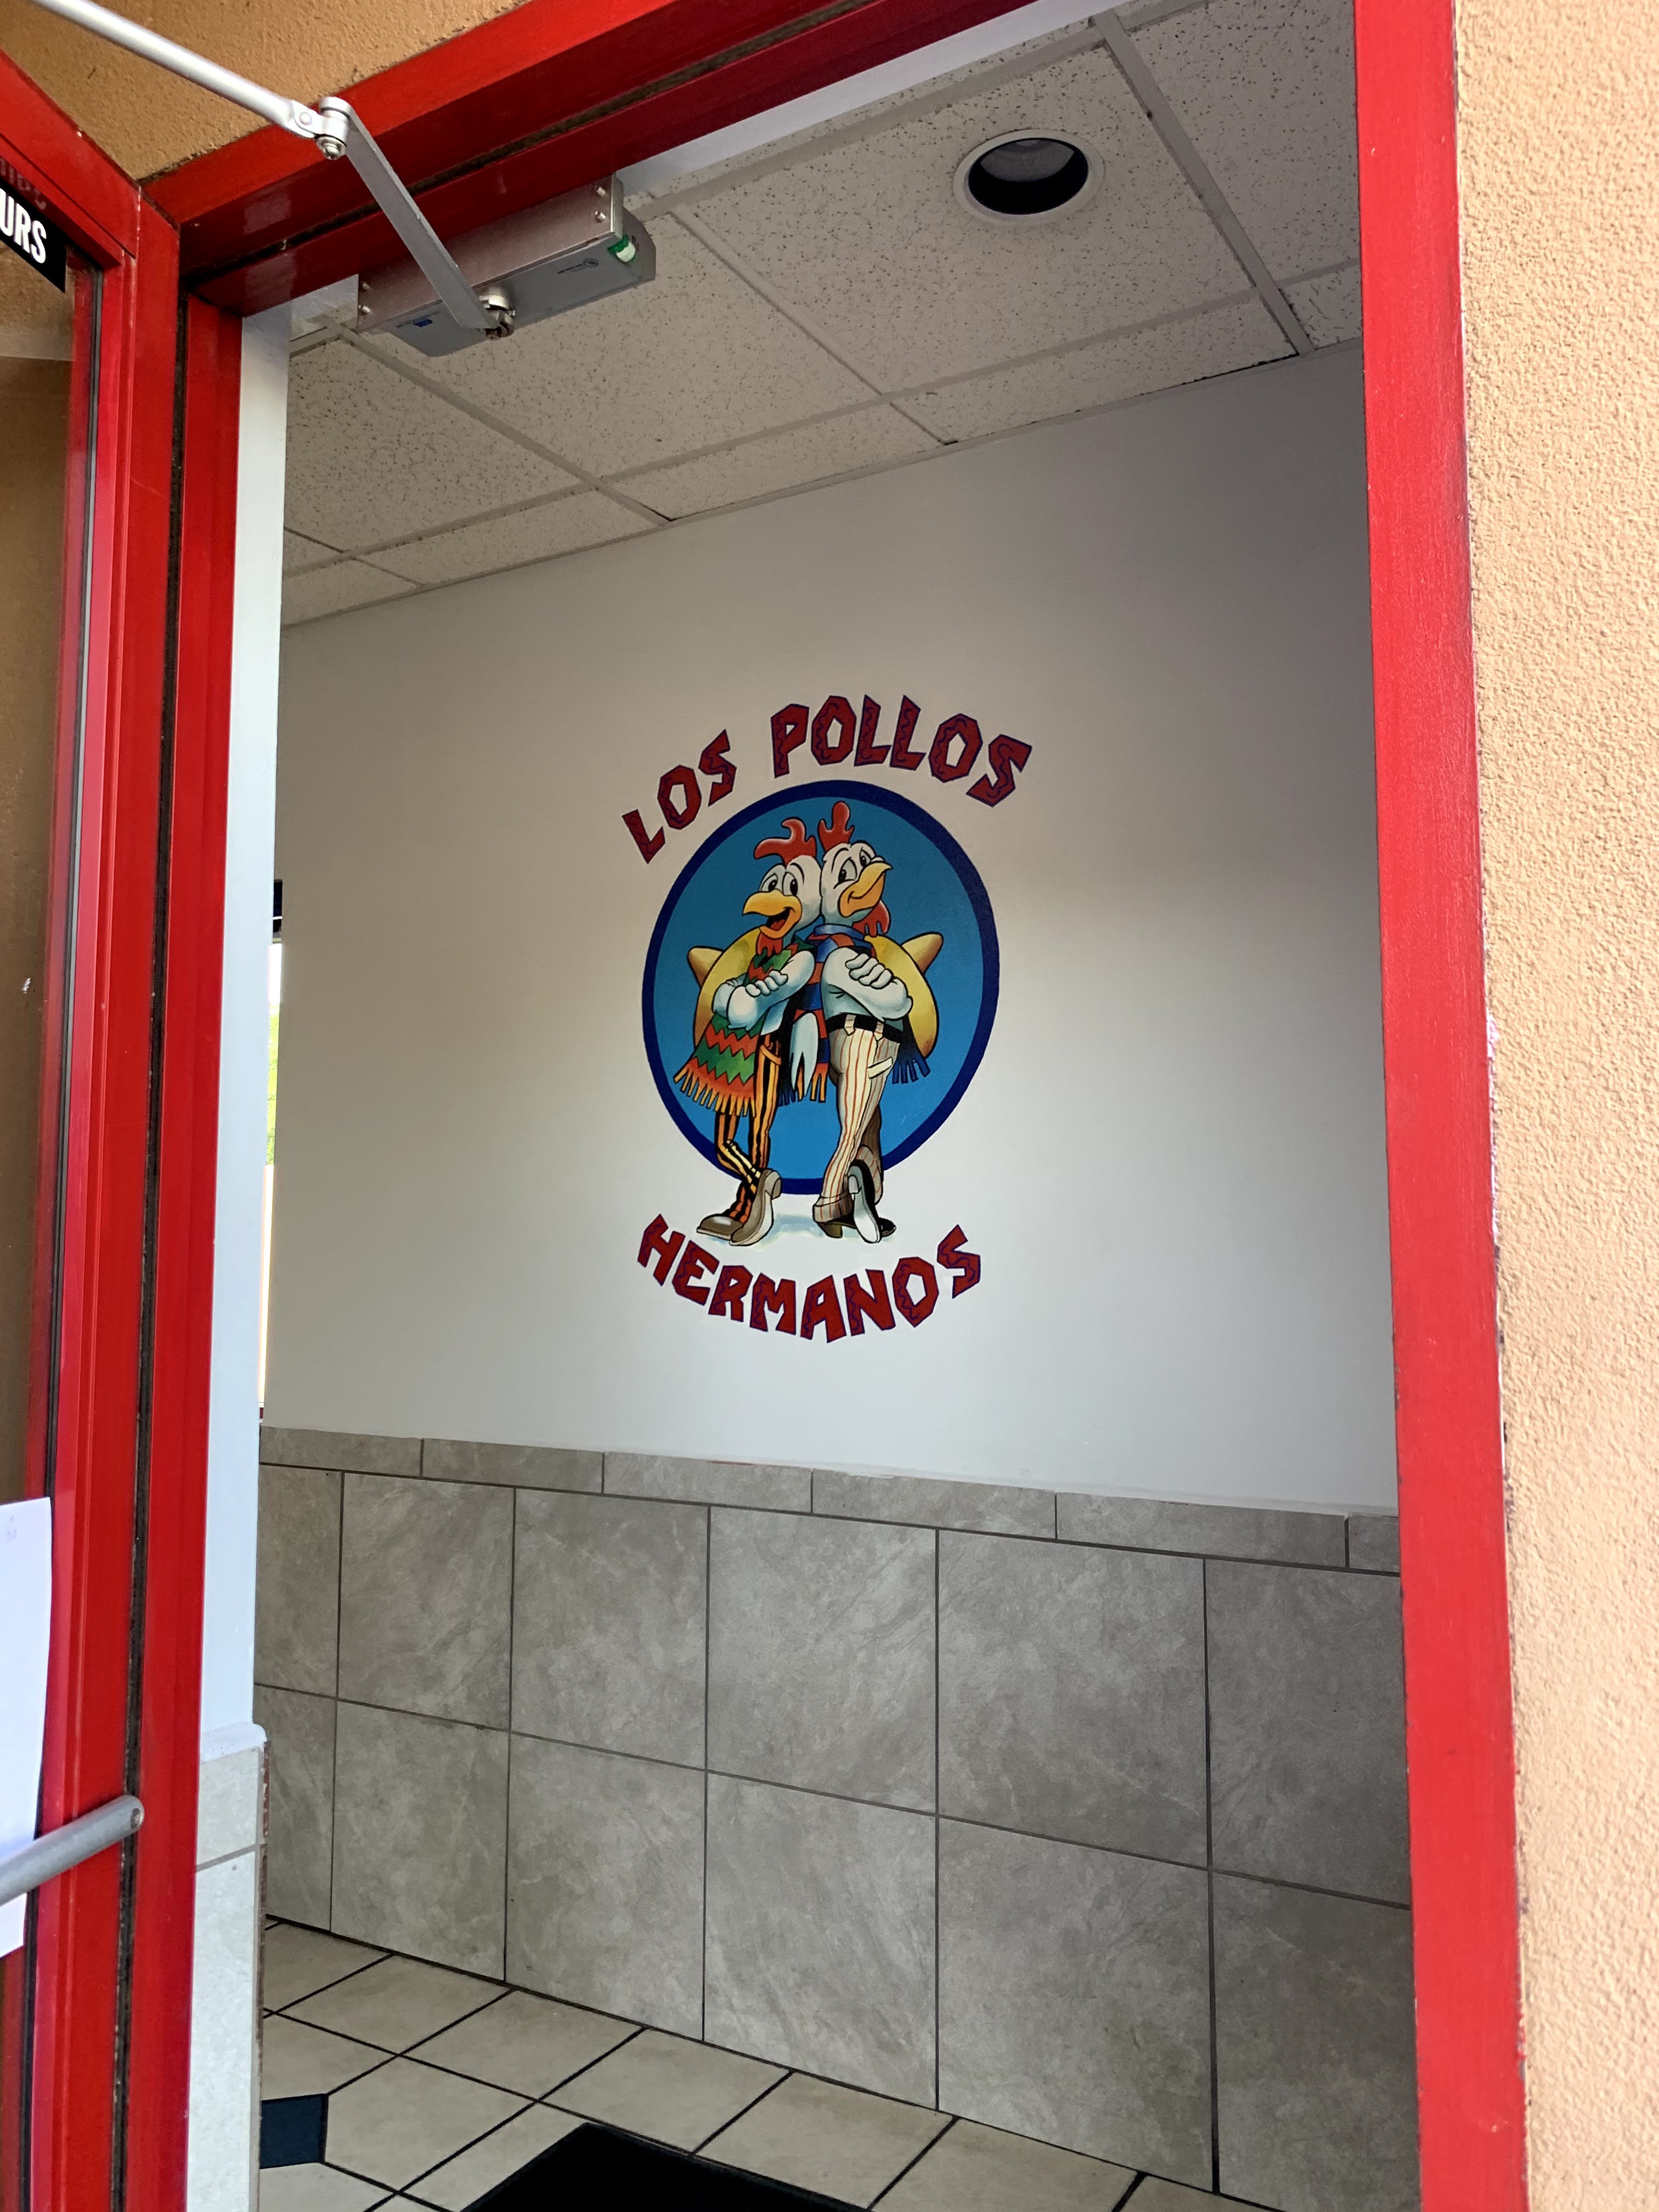
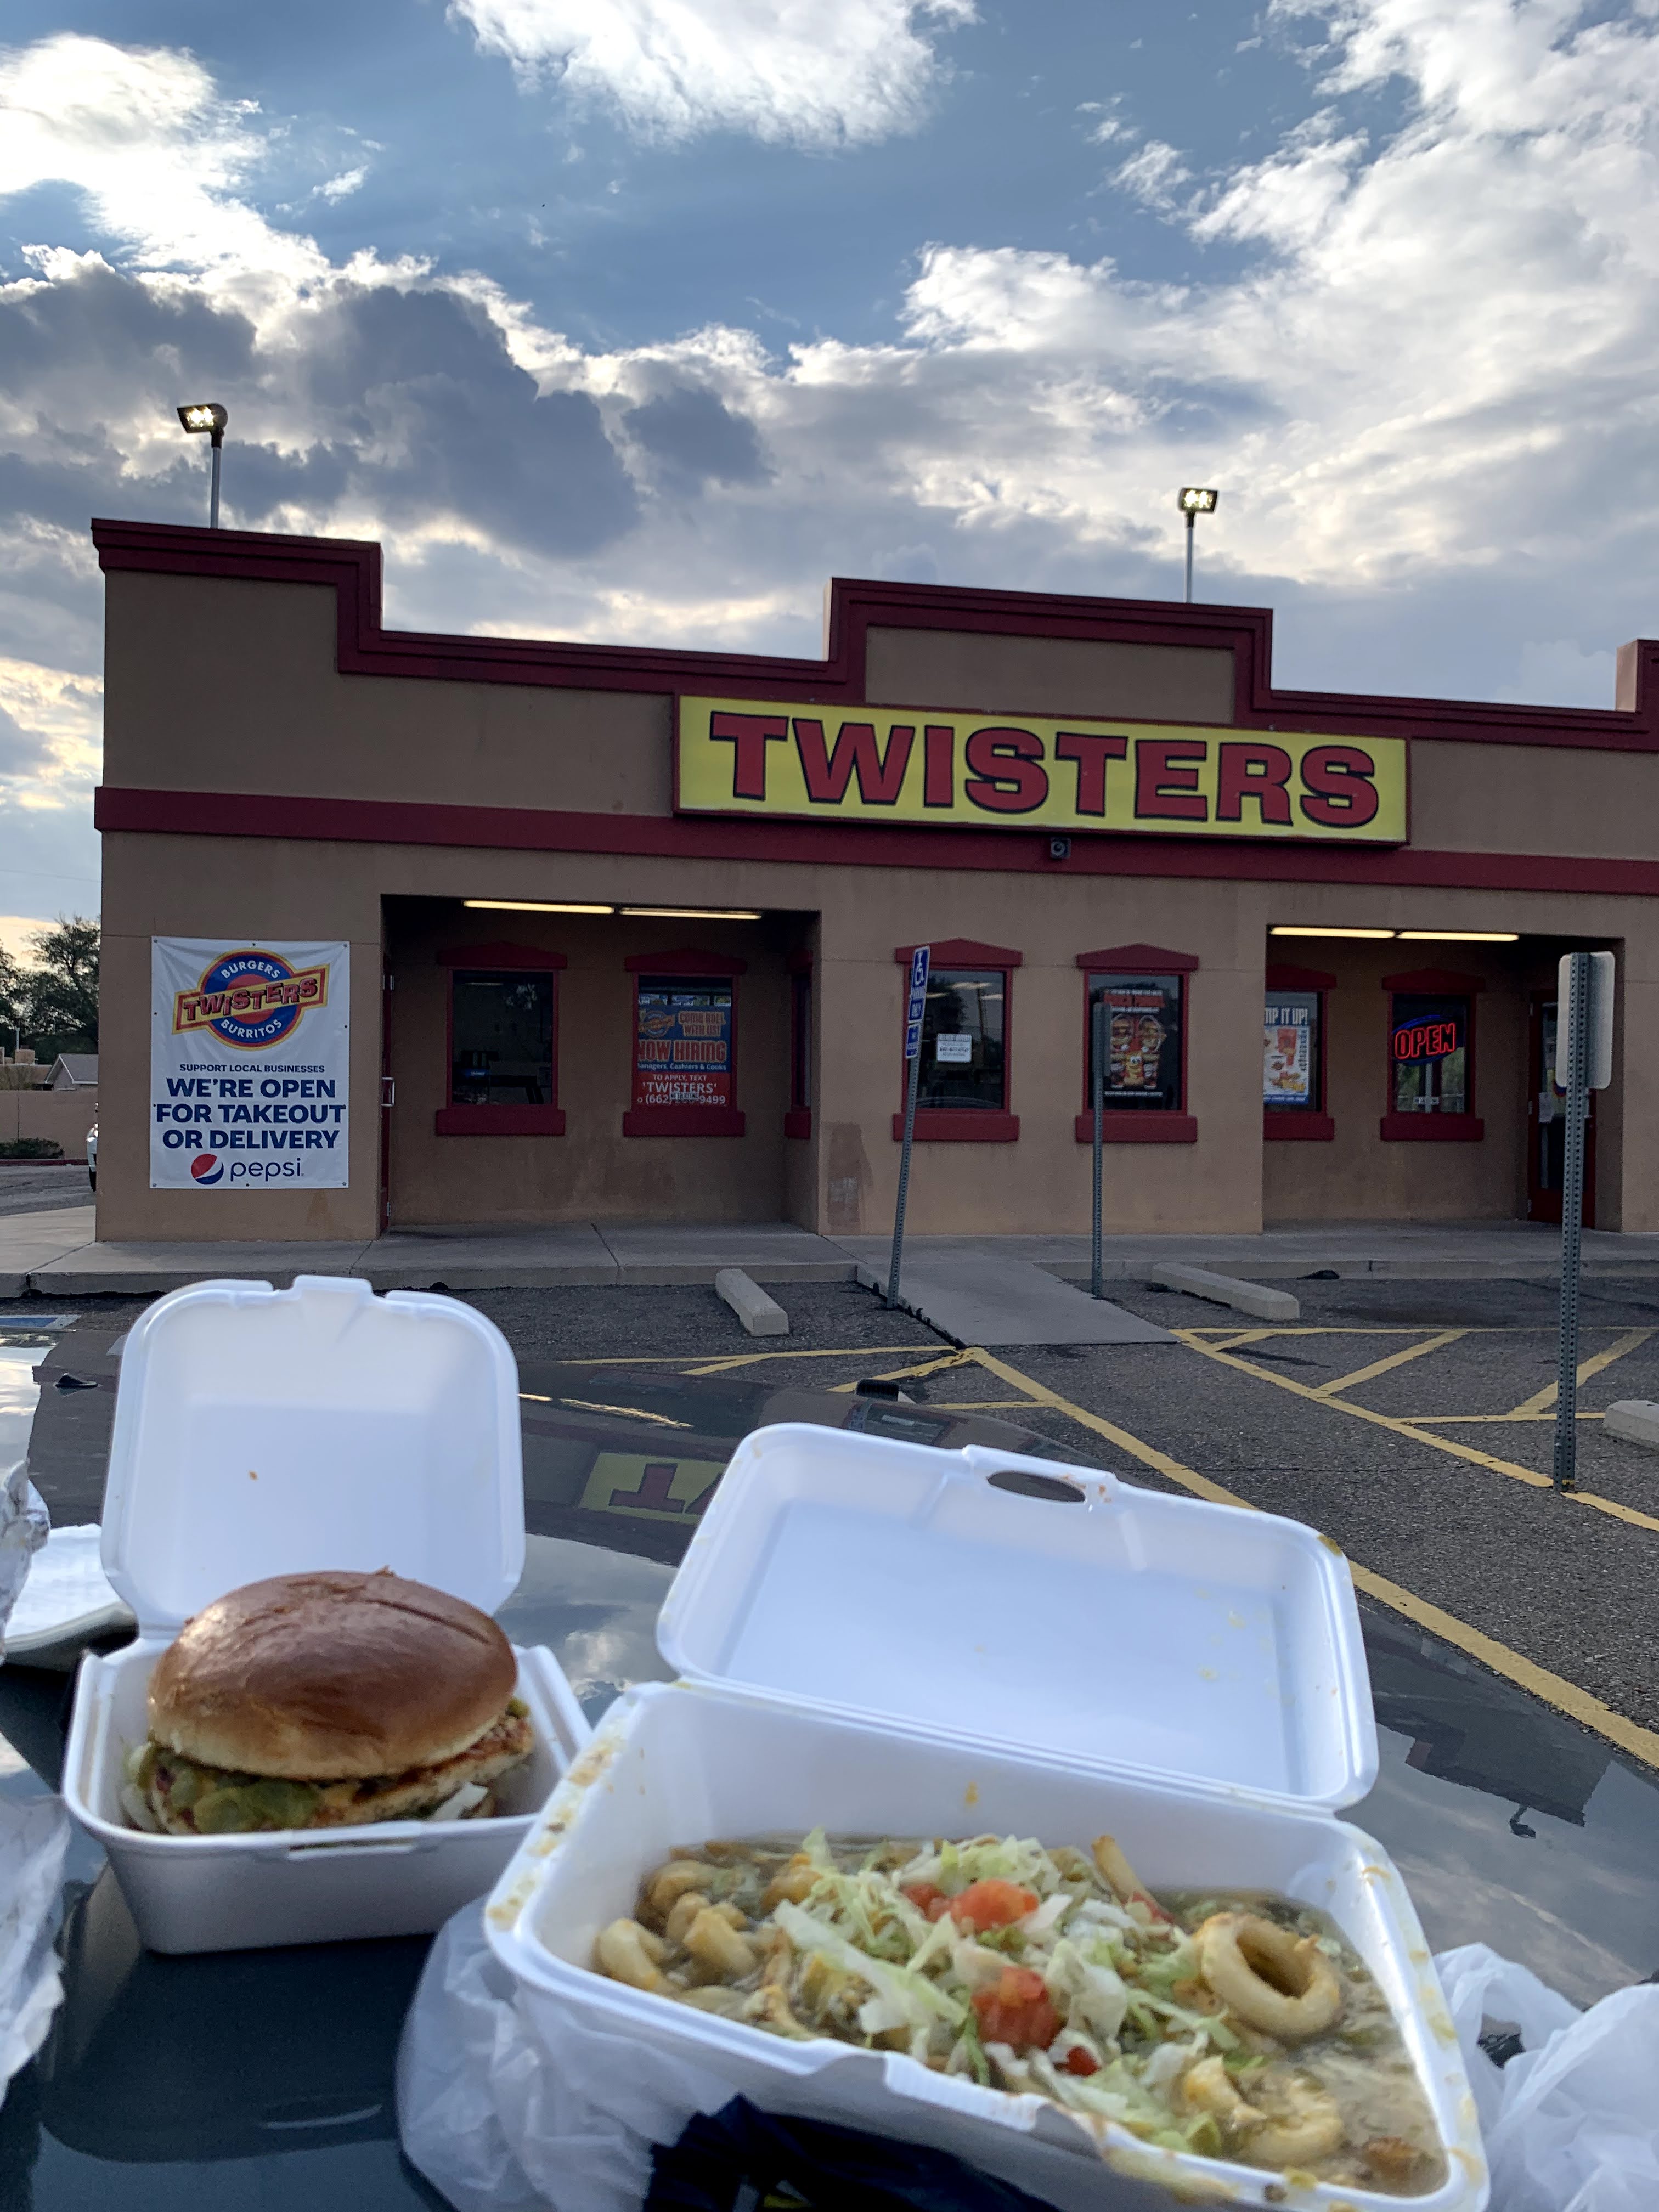
Los Pollos Hermanos – For my fellow Breaking Bad fans, the Los Pollos building is actually a real fast food chain, called Twisters! They serve Mexican food, and it is actually really good. We came in for a photo op and stayed for a burrito 🙂

Walter White’s House – The house that they used in the Breaking Bad show for Walter is actually a real house. The current owners don’t seem to find it amusing that a ton of breaking bad fans frequent their house for photos though, so the front is not longer inviting, but we still did a drive-by just to see it. It still looks pretty much the same!

Day 17 (Travel Day)

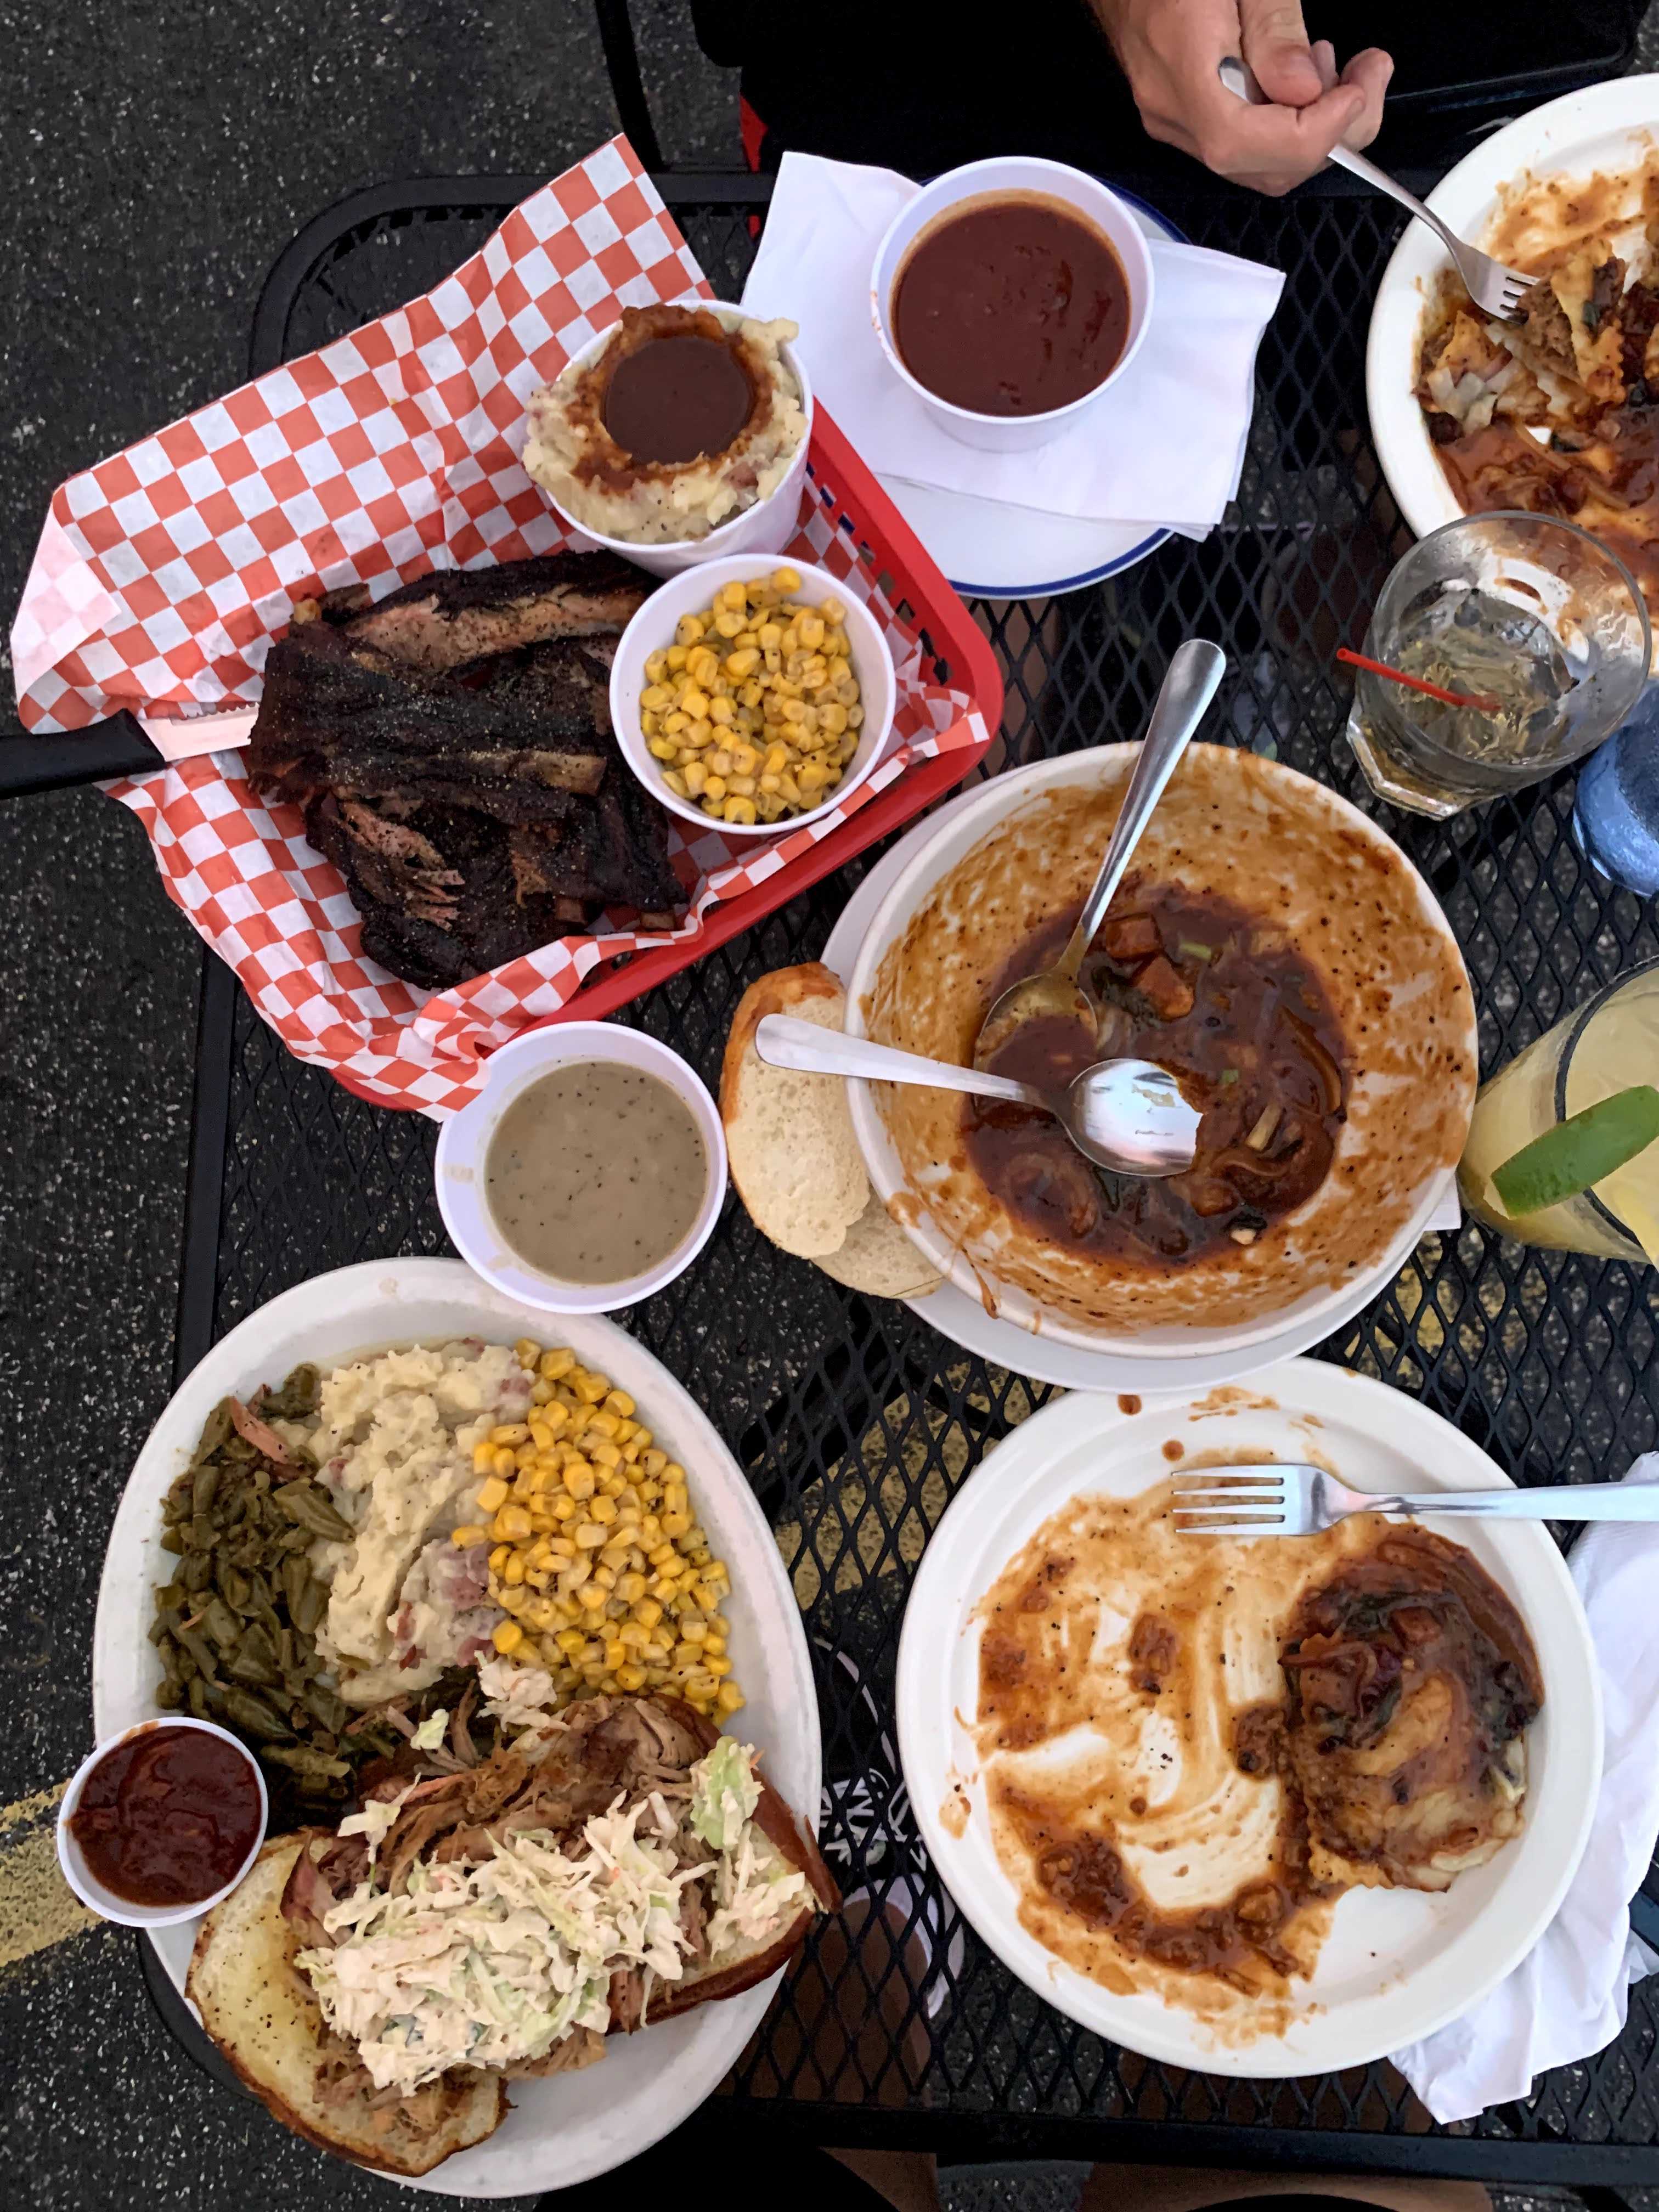
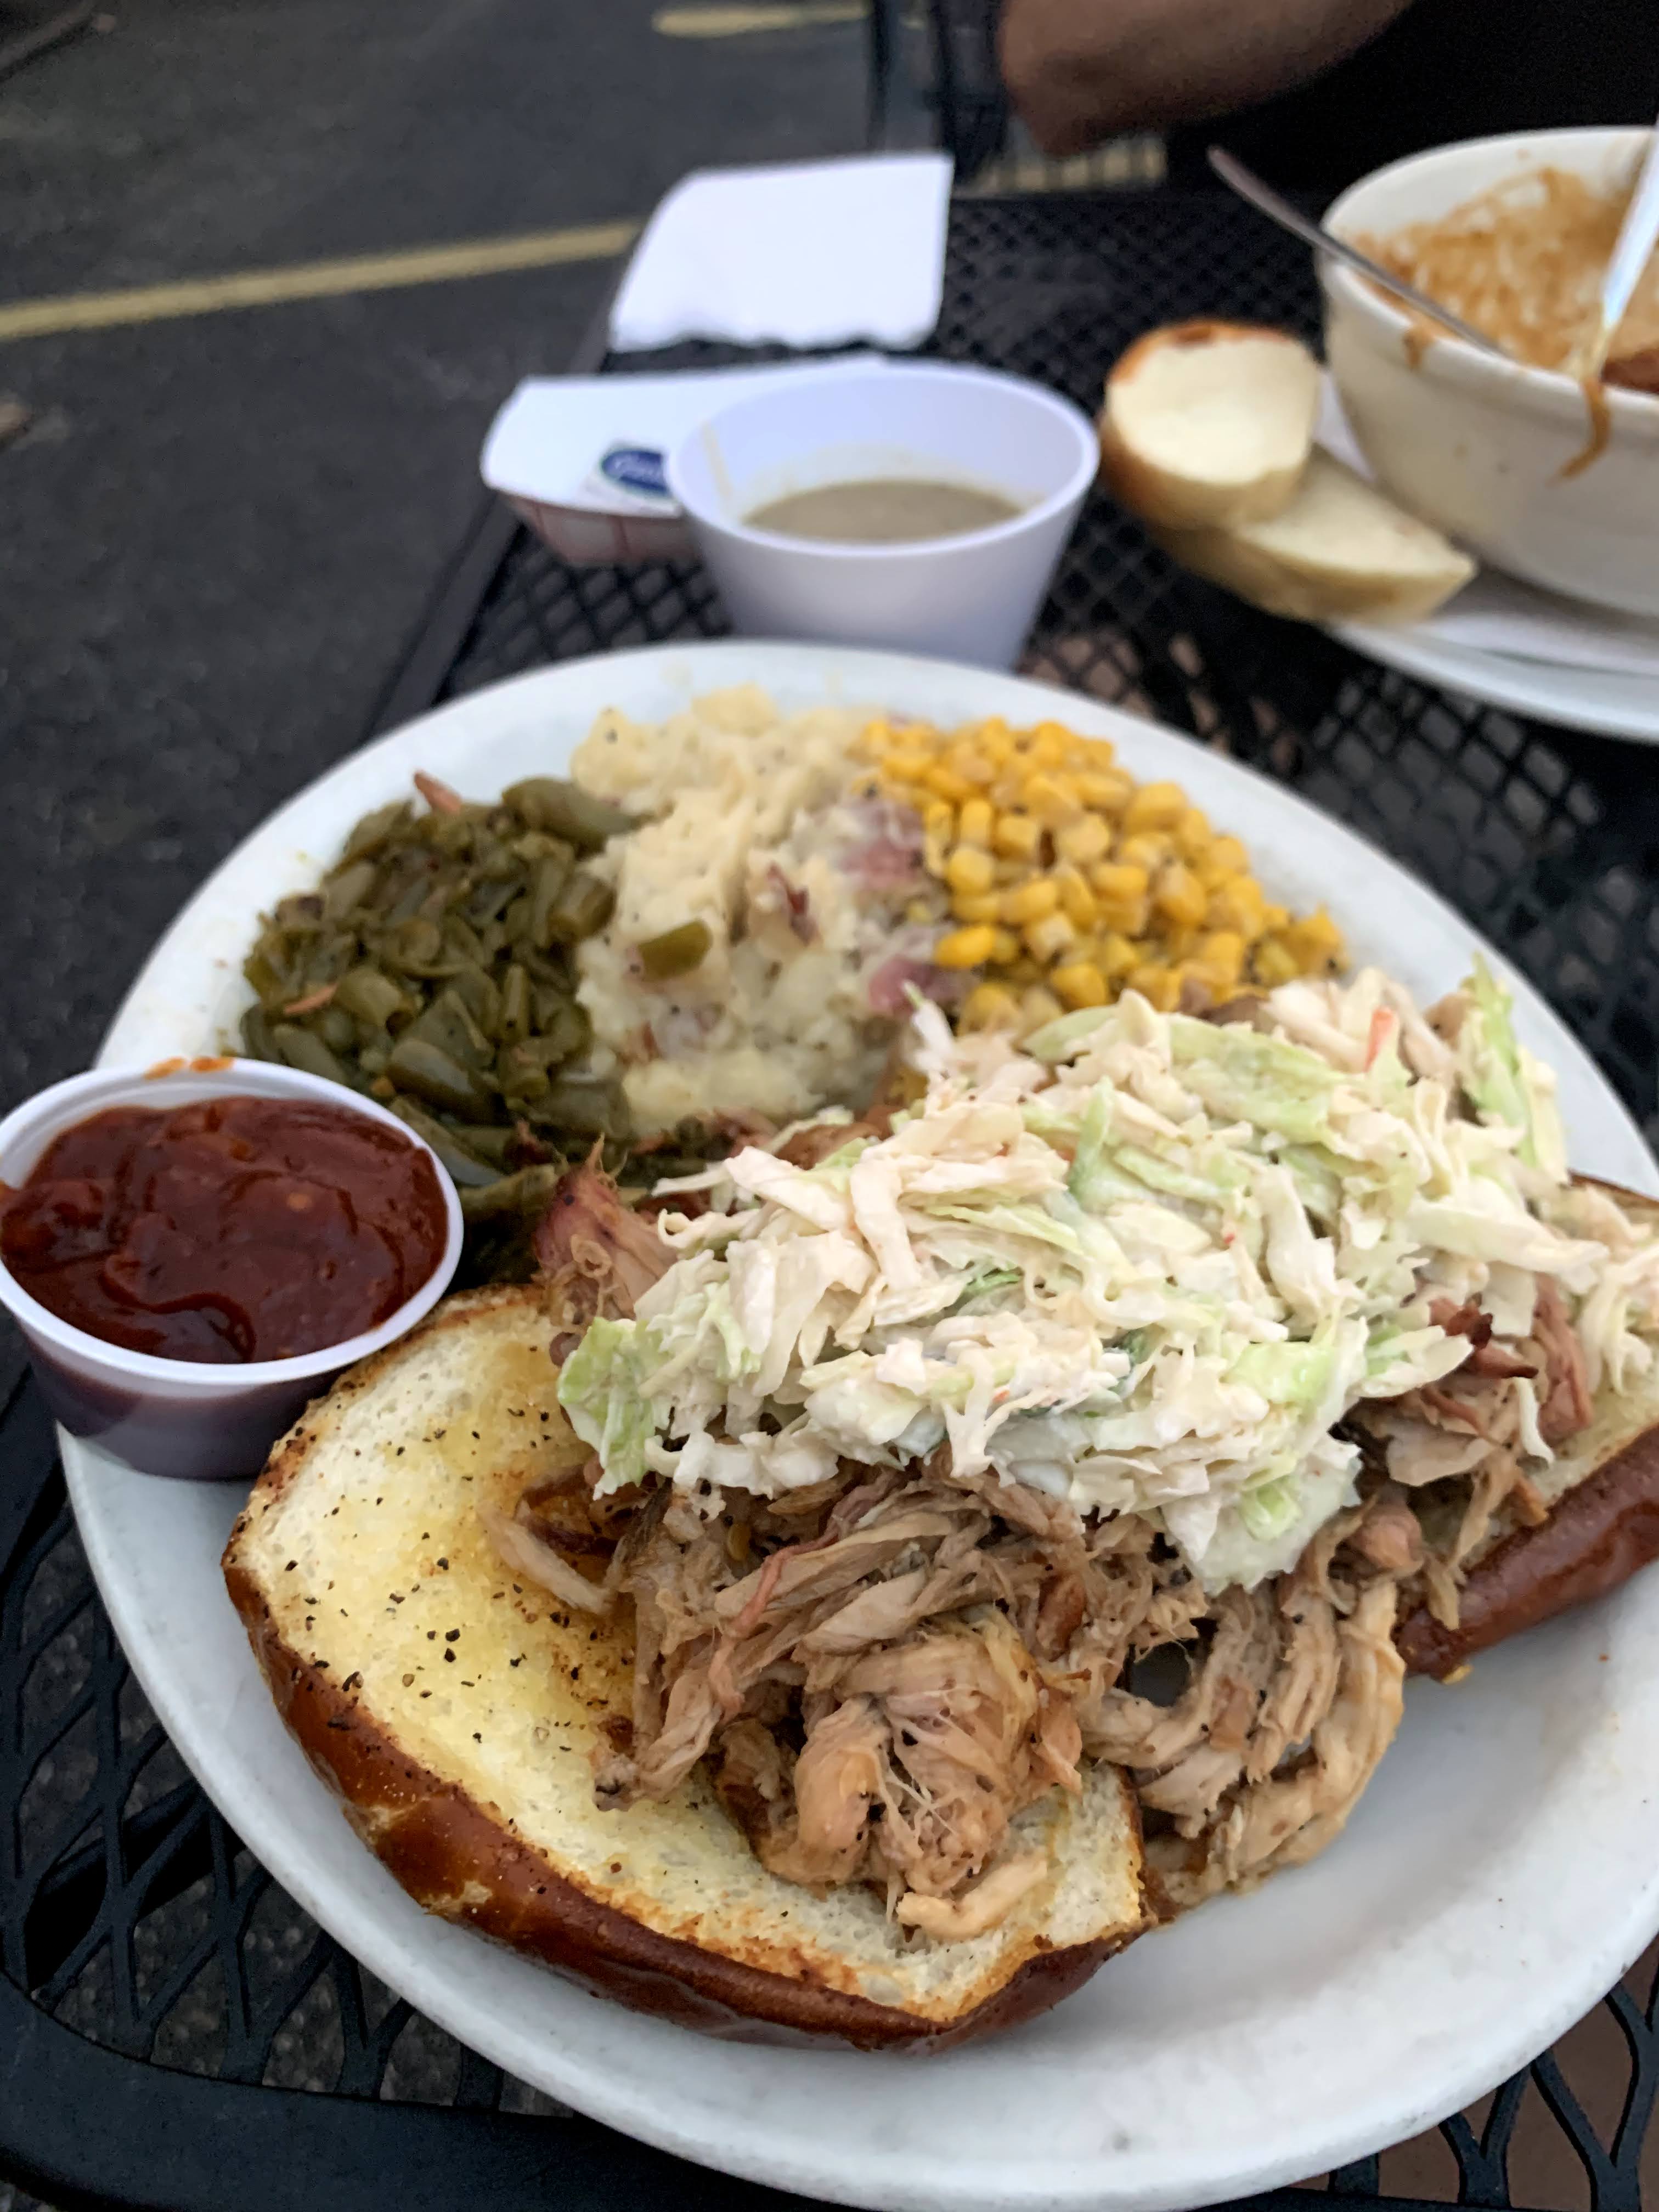
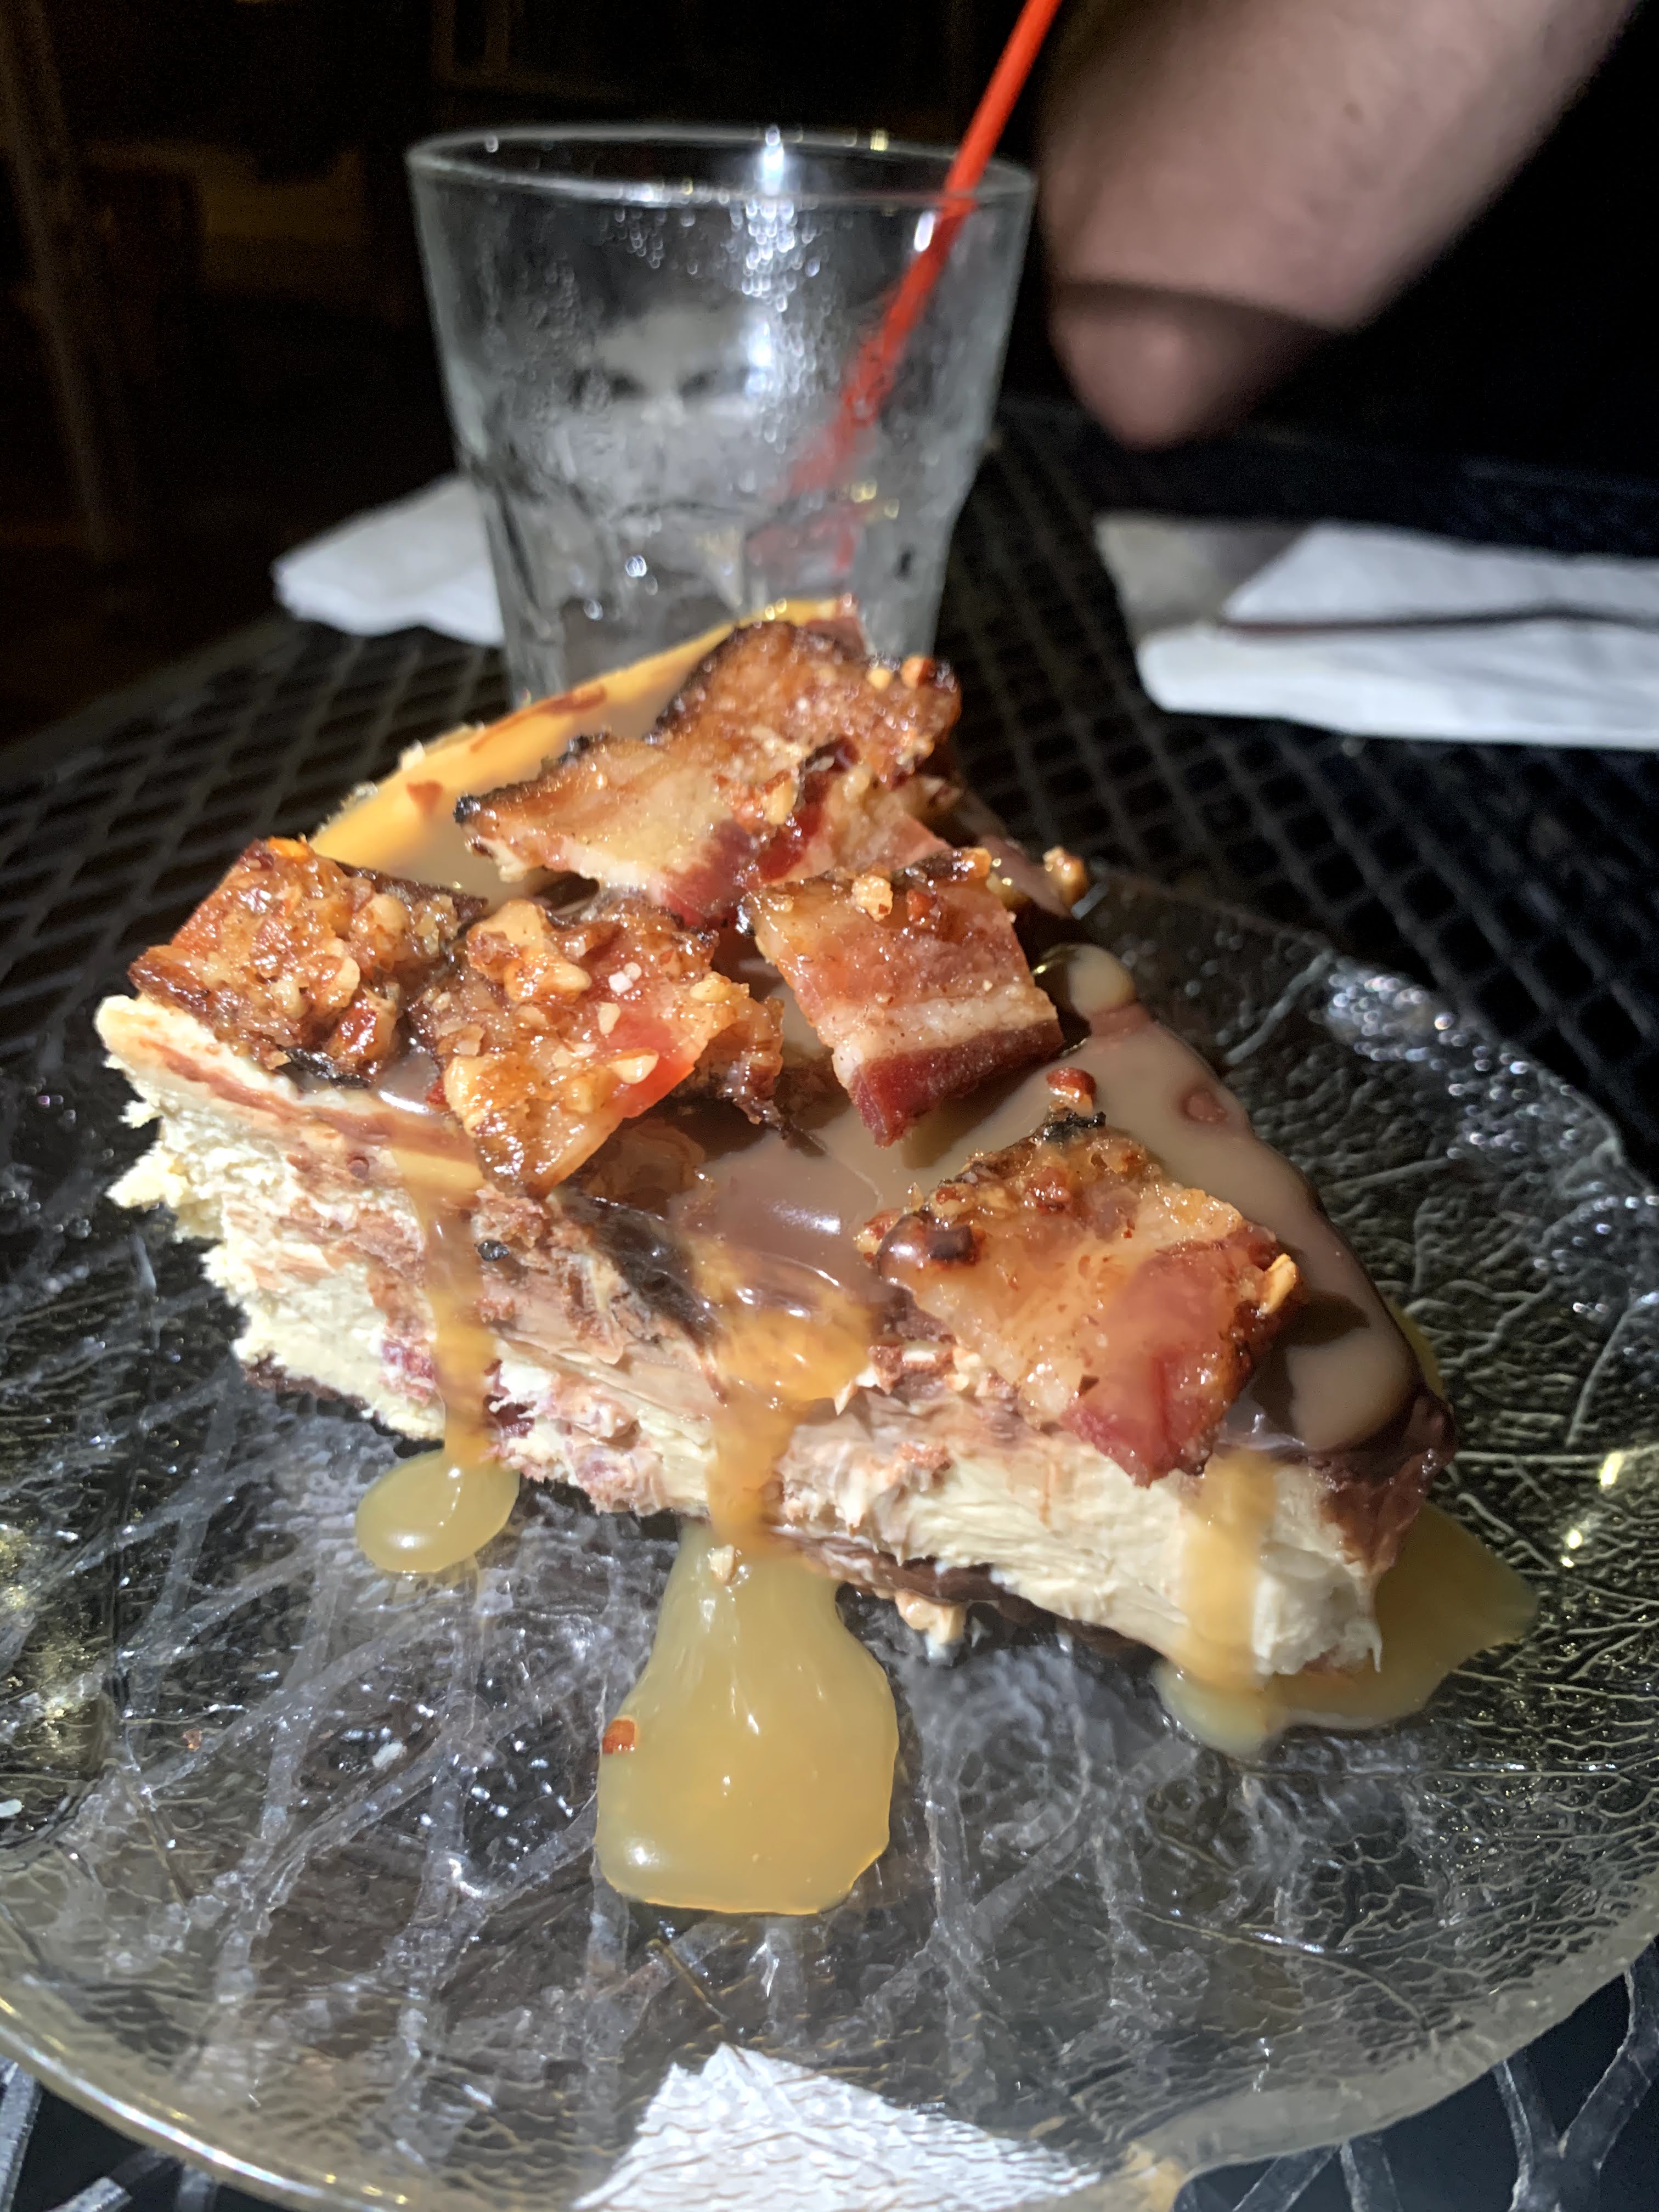
We drove all day and ended up in Amarillo Texas for the night. We stopped in Saunt Louis for some BBQ for dinner at Iron Barley, and were NOT disappointed. The BBQ was delicious, and so were the signature cocktails! If you are in the area, this is definitely worth a stop into. We were really blown away by the pulled pork raviolis – pulled pork filling inside the pasta, smothered with a brown gravy, and covered with melted cheese. We finished our meal with the maple bourbon cheese cake, which was probably one of the best cheesecakes I have ever had. The consistency was so thick and creamy, and the flavor was superb with layers of bacon laced within. The menu is always changing here, which in my opinion is testament to a talented chef and passionate chef/staff.

Day 18 (Travel Day)

Our last day of travel brought us back home to NYC! We stopped into Waffle House for a single waffle, because this is mandatory almost-done-with-your-road-trip food, and we had Cracker Barrel for dinner, to round out the trip correctly.

I really hope that this road trip series was helpful for you in planning your road trip, or plain entertaining if you’re just here for the read! Be sure to check out Part 1 (full review and ranking of each National Park we visited) and Part 2 (tips, tricks, and packing lists) for even more information that might help (or entertain)!

Happy road trippin’!!

Cross Country U.S. Road Trip – Part 2 (Tips, Tricks, and Packing Lists)

Cross Country U.S. Road Trip – Part 2 (Tips, Tricks, and Packing Lists)

In my “Part 1” post, I gave a review of each of the parks I visited on my cross country U.S. road trip this summer. As promised, in this Part 2 post, I will give you all of the COVID precautions I took, all of the hiking and road trip tips and tricks that I have (and learned while on this trip), and a list of EVERYTHING I packed with me – categorized, of course. If you are in it for my full itinerary and a full review of each of the hikes I did and meals I ate, check out Part 3!

Apologies in advance – this post has a lot of words and not a ton of photos! Part 1 and Part 3 are LOADED with pictures, so be sure to check those out as well!

Hiking and Road Tripping Tips

When planning a trip that revolves around driving and hiking, you have to have a good resource to rely on to locate trails, be prepared with food/snacks, and know a little bit about the parks before you arrive. It might require a bit of extra planning up front, but here are the things that helped me a TON when planning and executing my own trip:

  • Download the All Trails app. You can see my itinerary in Part 3 of this series, but everyone hikes and travels different, and enjoys different natural wonders, so I invite you to look at available trails and choose whichever ones suit you best! All Trails was my lifeline on this trip because it is really easy to use and search within, it provides a very reliable map and exact coordinates for trailheads, and the reviews are really accurate and include pictures. I am the kind of person who wants to know EXACTLY what I am getting myself into before I do anything, and all Trails made that 100% possible. I had very few surprises (aside from the beauty of nature itself, of course) while I was on each of the trails.
  • I had gotten the annual pass for National Parks – it’s $80 and was totally worth it for me since I was going to so many. If you are going to only one or a small handful of parks, you can alternatively look into the entrance fee for each park and see what makes the most sense. *Note that the National Park pass does NOT work at State Parks as well, so if you visit any of those you will have to pay a separate entrance fee.
  • Look at the park website before you visit each. Some parks require a timed reservation to enter (I will let you know in the itinerary when this applied for me, but the rules are always subject to change so check ahead of time). Additionally, trail availability is often changing due to natural and biological events, so it is a good idea to make sure the trails you want to do are currently available.
  • I would suggest putting together a shell of an itinerary regarding which trails you want to do before booking hotels. Then, plan your hotels near the trailheads (or near the entrance of the park closest to the trailhead) that you want to hike. Some of the parks are so large that you can drive 1-2 hours once you are inside to get to your trailhead. This will save you a lot of travel time, which actually really adds up in the grand scheme of your trip. It also helps when you are trying to get a good spot in a limited parking lot in the morning.
  • The trip turned into more of an educational excursion than I originally thought it would be. If you are the kind of person who is into wildlife and geological phenomena, you can check out the history of the parks beforehand in order to be able to fully appreciate it while you are there. If you are like me and like to learn in real time, you can hold off. The brochures they hand you upon entrance to the parks makes for great reading to pass the time while driving through.
  • Something that helped a lot on travel days with timing of sunset hikes was planning to arrive at the park first, and checking into the hotel afterwards once it was too dark to be in the park. Call your hotels ahead of time to become familiar with their check in policy.
  • Google Maps will become your best friend. Make sure your phone software is fully updated and test this out before you leave, but my Google Maps works even if I have no cell service, or am on airplane mode – even the little blue dot telling me where I am. This was incredibly helpful on hikes if I was ever confused about where the path was. Check your hikes ahead of time to see if they are programmed into Google – a lot of times they are, as skinny dotted lines! Also, directions will continue to work even if you lose cell service, but it will not be able to re-route you if you go off the original route. Map your long driving stretches ahead of time, including potential rest stops (you will come across large stretches of land with no gas stations, so while you have service, know where your next rest stop will be).
  • Be prepared to have no cellphone service for a lot of the more remote sections of your drive – you will have blips of service when passing through populated towns and cities, but a lot of the midwestern driving was through farms, mountains, and forests, and sell signal was unreliable. Again, program Google Maps ahead of time to ensure you have direction even if you lose service.
  • Keep an eye on time zones. You will be passing through multiple, and in order to time your driving and your subset hikes, you have to know what time it is! Traveling west grants you additional hours of daylight because you literally travel backwards in time, but then coming back east is rough because you lose an hour with each time zone change. Also, Arizona is technically in the Mountain Time Zone, but does not participate in daylight savings… so half the year it follows the other Mountain time states, but half the year it has the same time as Pacific. This made timing in Arizona a bit of a wild card because I didn’t know this going into it.
  • Keep a close eye on your gas gauge. There will likely be stretches of a few solid hours during your trip where there are no gas services, and since cell service is spotty you really don’t want to get caught running out of gas.
  • Get an oil change right before you leave, and try to use synthetic oil if possible. Depending on the length of your trip, you will likely need another while you are on the road. This isn’t too much of a pain, most places are quick!
  • Don’t forget to fill up your windshield wiper fluid right before you leave! bugs exploding on your windshield is real, and if you don’t have enough wiper fluid you might have trouble with visibility. Lots of gas stations off major highways have the windshield washer and squeegee, which helps a lot.
  • Be comfortable eating a peanut butter and jelly sandwich for lunch every day for the duration of your trip. If you can think of a more creative way to eat on the road, please let me know!
  • Don’t underestimate the power of good hiking gear! If you don’t already have good hiking stuff (my full list of hiking-related stuff is below), you will want to make a few purchases.
  • Become familiar with what cairns are, and how they are helpful on a hike. Basically, a cairn is a pile of stacked and balanced rocks, and they are put together by the park in order to guide you in the correct direction of your trail. You are not supposed to tamper with the already existing cairns in the park or create your own. Most hikes do not require you to follow cairns (because they have signs, or the paths are in a cleared section of the forest), but some of the hikes I did required the use of cairns instead of signs or arrows. The hike should warn you up front if this will be the case (always study and take a photo of any information or maps provided at the trailhead so you can reference it during your hike), and you can also check the All Trails reviews ahead of time to see if they mention following cairns as guidelines.
  • Know the things you can prep the night before a hike, and the things you need to make the morning of. I would fill up water bottles and mix up my electrolytes the night before and stick it in the fridge. I would also put Cliff bars, jerky, and pour some cereal in a Ziplock and put it in my hiking backpack the night before. Lastly, I set up the PB&J station the night before – basically line up the PB, the bread, the knife, and the dish (jelly stayed in the fridge). The morning of, I would make my sandwich, grab my water from the fridge, finish packing up my bag, and hit the road.

COVID Precautions

If you plan to take a trip during the pandemic, I am sure you will look to take additional precautions, as I did as well. Remember that I am just a regular person who has NO information aside from what is publicly available, and all of you are perfectly capable of being either more/less cautious than me, depending on your personal preferences and life situation. The following is certainly not a fully exhaustive list, but just the things that I did when planning and executing my trip:

  • Packed aerosol Lysol (any household cleaner with disinfectant would work, but the aerosol spray can made this process so much easier) and sprayed down every hotel room I checked into – including ALL surfaces and the floor. I made sure to not forget light/lamp switches, doorknobs, toilet and flusher, shower and faucet knobs, coffee machine, air conditioner/thermostat, and refrigerator, both inside and out. Again, this is not an exhaustive list – I really just sprayed everything.
  • Packed my own pillow and pillowcases. I didn’t have room in the car for my sheets and blanket, otherwise I probably would have packed that as well. I also avoided using the top layer of blankets provided by hotels (though this isn’t COVID specific for me – I feel like hotels don’t always wash the top decorative layer blanket, so I never use it. A good rule of thumb is to only use things that are white in a hotel, as these are the things they can wash with bleach. Decorative or colorful linens will not be as sanitary).
  • Packed aerosol/spray travel sized alcohol. This was really helpful when outdoor dining, because I would spray down the table/chairs and any communal condiments like ketchup/syrup, etc.
  • I had a strict “no indoor dining” policy, and did takeout probably 2/3 of the time, and sat on a patio the remaining 1/3 of the time. The good news is that 99.9% of restaurants are doing takeout, so many times I selected the restaurant I wanted to go to (without worrying about whether they had outdoor seating), and if there was no option to sit outside I just did the takeout option. I would eat either in the car or at a park bench nearby (using that alcohol spray out here too). This also might have been more so due to the nature of the trip itself, but I only purchased 1 meal per day from an eatery. All of my other meals were snacks that I had brought with me from home (I will get into all of this later), and most of the day I didn’t have access to a restaurant anyway because I was either hiking or driving.
  • Used my mask 100% of the time in public places. It might be a good idea to research ahead of time which states currently maintain a mask policy, especially for the drive, so that you can plan pit stops accordingly, avoiding states that don’t enforce masks. I also brought a box of disposable masks for hiking and switched those out every day, and brought a few real ones for when I wanted to look a bit nicer.
  • Packed a TON of road snacks. This limits the number of times you are eating food prepared by others, and the number of times you are in gas station stores or touching vending machines. As I said before, I bought 1 meal per day, and it was usually dinner. This does not include the occasional coffee.
  • I did a significant bit of research on my hotels before booking. I read recent reviews on multiple different platforms (Google, Hotels.com, Tripadvisor) to make sure I was choosing lodging that was COVID-conscious. I stayed away from anything that had a less than stellar rating, and if any recent reviews mentioned that the hotel was dirty or that the staff didn’t wear masks. I also avoided Airbnb for this trip, and stuck to only hotels and inns.
  • I called some of my hotels ahead of time to get a feel for their capacity policy, and whether they were booking rooms at a lower than 100% capacity to minimize crowding. I also asked them if they could give me a room that hadn’t been inhabited for a few days. Some hotels will be able to make this accommodation for you, and some hotels will not. Regardless, it’s worth the ask.
  • I requested no services once I checked into each hotel and placed the “do not disturb” sign on the door for the entirety of my stay. I didn’t want anyone in my room that wasn’t me, and you can always request additional soaps/shampoos/towels at the front desk.
  • This will be a no-brainer, but I avoided all public places as much as possible. While in the hotel, no pool, gym, or communal recreation areas. In the parks, I frequented mostly restrooms obviously, but I stayed away from visitor centers as much as possible (most of the parks hand you maps on your way in), and cafeterias. In one park (Zion) there was also a public shuttle to get you down into the canyon where there are a number of trailheads – I also avoided this and only did trails I could get to with my car.
  • I planned to be off the typical tourist schedule. For example, I got into the parks either really early in the morning, or just before sundown to avoid the busiest times of the day.
  • I brought way more hand sanitizer than I thought I needed, and it wound up being the exactly perfect amount. I had brought a number of travel sized bottles and kept them in all of my bags and pockets, and then I brought a larger bottle that I kept in my luggage to refill the little ones. I used public hand sanitizer stations if for some reason I didn’t immediately have access to my travel sized one, but I always used my own hand sanitizer afterwards because you never know if the public one is a lower % or watered down.

Packing Lists

Hiking

  1. Backpack (mine is discontinued, but it’s similar to these!)
  2. Boots
  3. Trekking poles (here are mine)
  4. Pocket knife
  5. Hydro bladder (2-3L) (here is mine. The 2L is what fits in my backpack, but Camelbak also has a 3L!)
  6. Additional water bottle (16-32 oz)
  7. Flashlight & headlamp
  8. Batteries (whatever necessary for the flashlights or other electronic devices you pack)
  9. First aid kit
  10. Extra band-aids and Neosporin
  11. Benadryl (you never know when you will get a bug bite that doesn’t agree with you or rub up against a plant that makes you itchy. I wound up not using this, but I felt good having it in my hiking pack)
  12. Ziplock bags (really handy for peanut butter sandwiches, and also as garbage bags for on the trails)
  13. Waterproof case & lanyard for your phone
  14. Sunscreen. I have really sensitive skin and HATE sunscreen, but the zinc based sunscreens worked like a charm! Here’s the spray bottle and cream tube that I used on the trip.

Food

  1. Cliff bars (at least 1 per day of hiking) (any energy/protein bar would work here. I opted for Cliff because they are higher in carbs for sustained energy)
  2. Jerky packets (at least 1 per day of hiking)
  3. Apples (at least 1 per day of hiking)
  4. Peanut butter (2 people killed a jar in about 2 weeks. I packed 2 jars for the whole trip)
  5. Nutella
  6. Jelly
  7. Bread (I brought 4 loaves, and we had tapped into the fourth during the last few days of the trip)
  8. Utensils (I brought a fork, knife, and spoon for each person on the trip. I really only used the knives when making sandwiches)
  9. Plates (these are necessary.)
  10. Paper towels (I wound up only using 1 roll)
  11. Electrolytes (Bought this powder off Amazon so I didn’t have to carry around a case of Gatorade. Definitely recommend a powder! Not married to this brand or flavor though)
  12. Nuts (I wound up not actually eating any of these)
  13. Twizzlers (don’t question this one. They’re necessary.)

Clothes

  1. Hiking outfits (1 per day in the parks)
  2. Pajamas (I planned to rotate these out every few days)
  3. Long sleeve shirts (I didn’t use these, but your decision to bring them should depend on the time of year you go)
  4. Sweatshirts (I packed 1 that remained clean for lounging in the hotel or at dinner and on travel days in the car, and a few in varying thicknesses that I used on my hikes.)
  5. Tall socks
  6. Bathing suit
  7. Poncho
  8. Jacket (I packed my ski jacket just incase but didn’t actually use it. A thin puffer would likely be more appropriate, but it depends on the time of year that you go.)
  9. Beanie and gloves (I didn’t really use these either, but it will depend on the time of year that you go)
  10. Sneakers (for anything we did non-hiking)
  11. Ankle socks
  12. Lounge outfits (for the car rides and hotels)
  13. Real outfit (i.e. jeans) for going out to dinner (I honestly didn’t really use this either, because most of the time we grabbed a quick meal on the way out of the parks so I was still in my hiking clothes).
  14. Long pants/sweats (I didn’t use these, but always pack long pants on a trip just because you never know how cold it will get at night or in the mornings.)
  15. Delicates (duh, right? But if they’re not on my list, I always forget to pack them)

COVID Specific

  1. Masks and filters to put inside (I packed a box of disposables to use on the hikes, and then a few real cloth ones to use on travel days and at dinner)
  2. Hand sanitizer (I packed a number of small travel bottles that I put in every bag, pocket, and cup holder of the car. I also brought a larger bottle to use to refill when the smaller ones ran out.)
  3. Aerosol Lysol
  4. Aerosol/spray travel alcohol spray
  5. Pillows and pillowcases

Miscellaneous

  1. Toiletries (razor, deodorant, toothbrush, toothpaste, headband/hair clips/ponytail holders, hair gel, moisturizer, chapstick, face wash)
  2. Tylenol
  3. Zinc
  4. Daily multivitamin
  5. Toilet paper (to take on hikes just incase. I wound up not needing this at all – the hikes are pretty well-equipped with bathrooms at nearly every trailhead.)
  6. Electronics (computer, computer charger, phone charger, fitbit/activity tracker and charger, camera and charger, speaker and charger)
  7. Sunglasses
  8. Giant Ziplock bags (or garbage bags) – I use this for dirty laundry

Hopefully my tips and tricks and packing lists will help you in planning your trip! To see my reviews for all of the parks, check out Part 1 of this post! For my detailed itinerary, and reviews of each hike I did and meal I ate, check out Part 3!

Happy planning, all!

Cross Country U.S. Road Trip and National Parks Tour – Part 1

Cross Country U.S. Road Trip and National Parks Tour – Part 1

Hello hello! Another hiatus from a blog post broken by travel updates! Before we get started, let me set the scene for you: it is June 2020, you have been in your 700 square foot NYC apartment exclusively for the last four months, and you have long since given up on your plan for a European vacation this summer. Chatter of “should we even try for something this year?’ is entertained, and then the borders close officially for international travel. You are highly discouraged from even thinking about breathing within ten miles of an airport, but your stir-crazy-fueled desire for a new experience is really starting to set in. So, what’s a girl to do?

Disclaimer: a lot of research and deliberation went into the decision to take a trip this year, and I almost threw in the towel and called this year a wash for travel. Please do NOT view this post as a recommendation to take a trip this year, especially if you are on the fence or uncomfortable. The decision to travel during the COVID pandemic is a completely personal decision that depends on your lifestyle, your comfort level, and the comfort level or other people in your life. Please DO view this post as an informative guide if you have already decided to take a trip similar to mine 🙂

So, what’s a girl to do? (Spoiler alert, it’s in the title of this post!) A cross country road trip! It has always been a bucket list item of mine to take my Jeep Wrangler across the country, and to take it on some sweet off-roading trails along the way. I ultimately decided that a road trip was the safest way to go this year, because I am avoiding flying at all costs. Additionally, I wanted to avoid major cities and the allure of highly populated areas with popular restaurants and sight-seeing. The final decision became a cross country road trip to explore the National Parks along the Rocky Mountains. National Parks are a great way to get out and have fun, and are within the recommendations of social distancing, when done smart and correctly.

I want to speak briefly about the concept of a road trip. I personally love them – I love to drive, and I love the car I drive, and I think they are whimsical and inherently fun. I know a lot of people who, in contrast, hate everything about them – from concept to execution. So, going into the trip I was excited for the drive regardless. Coming out of it, I think the drive was absolutely NECESSARY, no exaggeration. Yes, you can fly to the Rockies once it is safe again to save a few days of travel, but I have learned that there is no better way to experience America than to drive through each of the individual states. On the drive alone, I feel like I learned so much about each state I passed through, and I was always surprised at the stark difference from one state to another as soon as you cross the state line. This was an experience completely forfeited by hopping in a plane and zooming across the earth from 30,000 feet in the air. Ultimately, choose a method of travel that works for you, your friends, and/or the family that you are traveling with. However, if you are considering skipping the road trip part of the experience just because you don’t have an affinity for driving, I would invite you to reconsider if you have the time – it might be cooler and more enriching than you think!

In this post, I want to take you through a review of each of the parks I visited, ranked least to most favorite. In my “Part 2” post, I will spell out all of the tips and tricks that I used to help me plan and execute this trip, including detailed COVID precautions that I took, detailed tips that are hiking/road trip vacation specific, and lists of EVERYTHING I packed on my trip. Lastly, in “Part 3” I will give my detailed itinerary with reviews of each trail I hiked and meal I ate. Without further adieu, here are my opinions 🙂

National Parks Reviewed and Ranked

(Least to Most Fave)

Ok, so, I understand that ranking the parks I visited is 100% entirely subjective, and you should take my rankings and even reviews with a single solitary grain of salt. While the rankings here go from least to most favorite, the chronological order of the parks that we visited is in my next post I mentioned, in the itinerary section. Please understand my bias as you read through these reviews, and again, take everything with a grain of salt. While I do give an honest review (which includes negatives), I still think that every park is worth a visit at some point in your life, so don’t take my negative comments as advice to avoid any park in any capacity.

My Bias: I am a NYC gal, so most of my hiking experience is among the mountains of the Catskills north of the city. Each of the parks I visited on this trip offers its own unique natural wonders, but the mountains are something that I see on a regular basis back home. Additionally, each of the parks offers hiking trails of varying degrees of difficulty, but I did notice that each park had a general overall difficulty level. I would say that my personal preference for difficulty level is moderate to hard, so this will impact my rankings. I also have a *crippling* fear of heights and falling, and I consider myself to be generally not very coordinated. I grew up with little to no hiking experience, and really got into hiking in college with my roommate at the time. Over the years, I have built up my hiking skills because I love nature and am a sucker for a good view, but I still get jelly legs when high up or on uncertain ground and narrow paths. I try my very best to not let my fears limit me, but my ambition to push my comfort zone gets me into my own head sometimes. You’ll see.

9. Glacier National Park (Montana)

I will start off by saying that this park has some of the most beautiful and unique scenery that I have ever experienced (where else can you see a legitimate glacier?) The streams and pools in this park have the most beautiful crystal clear blue water that I have ever seen (think real life Glacier Frost Gatorade), and seeing a glacier in real life was pretty awesome. The tops of the peaks are cold and windy (even in the summer), so bring a thick sweatshirt or puffer jacket and maybe even a beanie for when you sit down for a PB&J at the summit!

I am ranking this park last for a couple of reasons, one of which is pretty personal and has to do with my bias. The park is definitely…rugged. I did two of the larger and more popular hikes in the park, and both were very difficult and technical. The first one, Grinnell Overlook, was cliffside for about a mile and a half, and the last 1/4 mile was very steep, narrow, rocky, with not much to hold onto for balance. Having trekking poles would be useful on this one (I didn’t have them at the time, but I bought them later on in the trip). To put it into perspective for you, though, very few people on the trail were really struggling that much. Everyone was taking it slow, but many people were walking through fearlessly. Taking my own drama aside, the views at the top are spectacular and I am really glad I finished the hike, despite the fact that I was afraid. I found that the hiking paths themselves to be a means to an end, but if you’re in it for the views, don’t mind (and are prepared for) a more rugged and technical hike, and don’t fear heights, Glacier will be a lot more enjoyable for you than it was for me.

There was no requirement for a time slot or extra permit to hike in this park – the annual pass got me wherever I wanted to be! Check out my itinerary for a more detailed review of each of the hikes I did, and some food/beer suggestions in Montana!

8. Grand Teton National Park (Wyoming)

The first thing you notice about Grand Teton on the drive in is the imposing nearly 14,000 ft mountains steadily approaching you. You will be amazed, like I was, as they relentlessly get bigger and bigger! The whole mountain range is massive, but the Teton peaks are the tallest in the park and are easily distinguished from the other mountains due to their three individual sharp peaks. The park itself is really well maintained, and the hike I did is an easy one, both beautiful and enjoyable. The sheer existence of the Grand Teton mountain peaks remains to me the most breathtaking aspect of this park.

The only real way to fully experience the Grand Tetons mountain peaks is on a 31 mile loop hike, which requires a tour guide and camping overnight, and would be considered very difficult (though an unforgettable and worth-it experience). There are some other shorter hikes in the park, but none that I could find that would get you onto the Grand Tetons, and most of recommended hikes I saw were on the more challenging side. My next time at the park I would like to try the Surprise Amphitheater Lakes trail – this one is supposedly a more challenging trail than the one I did, with a swimmable lake at the end. You can also continue onto an extension of the trail for an uphill climb to a breathtaking view of the Grand Teton peaks.

If you are in it for either a leisurely day in the valley of an impressively imposing mountain range, or alternatively an extreme overnight hike to 14,000 foot peaks, Grand Teton will have something for you!

There was no requirement for a time slot or extra permit to hike in this park – the annual pass got me wherever I wanted to be! Check out my itinerary for a more detailed review of each of the hikes I did, and some food/beer suggestions in Wyoming!

7. Bryce National Park (Utah)

I feel the way I feel about this park only because I visited it after already visiting Arches, which is also a desert sculpture park. The structure and canyons within Bryce are incredibly unique, and the park itself is fun and interactive. The hikes are easy (more like nature paths than hiking), and it is small enough to really explore in one day. If you are in the area, it is worth a stop into. In my opinion, the park is not a destination in and of itself, as I think you could get through most of it in one day. The park is super kid friendly. If you want to see beautiful canyons and stone sculptures on an easy walking path that could take a few hours or less, this park should definitely be on your list!

There was no requirement for a time slot or extra permit to hike in this park – the annual pass got me wherever I wanted to be! Check out my itinerary for a more detailed review of each of the hikes I did, and some food/beer suggestions in Utah!

6. Estes / Rocky Mountain National Park (Colorado)

The review for this park will be comparable to Grand Teton, however ranked a bit higher because I think there is more accessibility to mountain peaks through more moderate hikes. The park itself is beautiful, the scenery lovely, and the hike I did is well maintained, family and child friendly, and just the right amount of challenging. Again, there was a decent bit of variety in the hikes to choose from at this park, including a 14+ mile trip (with optional guidance and optional camping overnight) to the top of Longs Peak, which seems like a very challenging but also super fun experience. The rock scramble on the Twin Sisters Peak hike that I did is both fun and challenging, and gives the day just the right amount of thrill. I don’t really have any glaring negatives for this park, but it just ranks in the middle for me because the scenery is one note (mountains) and that happens to be the note that I get the most on the east coast. Similar to Grand Teton, if you are in it for a challenging hike and an excellent mountain view, this park will satisfy your needs!

Arrival between the hours of 6 AM and 5 PM required a timed permit that you will have to purchase in advance. You could enter the park and parking lots with no permit anytime before 6 AM and after 5 PM (I didn’t have one, so I got to the parking lot before 6 AM for my hike). Note that the park contains a major road to get you into and out of this state, so if you are trying to drive through and not even stop in the park, you will not be able to access that road during the day without a permit, so plan accordingly!

Check out my itinerary for a more detailed review of the hike I did in Estes / Rocky Mountain National Park, and some food/beer suggestions in Colorado!

5. Zion National Park (Utah)

I have really high hopes for future visits to this park. I was super excited about it coming into the trip, but a lot of the hikes I wanted to do were inaccessible when I got there, for a few reasons. The number one hike that I wanted to do, Angel’s Landing, has a chains section to get you to the final peak (you hold onto the chains for balance as you travel out along a narrow cliffside trail). The chains section was closed due to COVID, so I didn’t want to do this hike without being able to travel the final piece to the views. Second, there was a rock fall on Cable Mountain that knocked out another trail I was looking at, Hidden Canyon. Lastly, there was cyanobacteria found in the Narrows River which made the Narrows Trail largely unwalkable because it takes you through the river, and it was not recommended to walk through the water at the time. Most of the park is only accessible via a park-supplied shuttle, which you did have to purchase a ticket for a time slot (it was $1 per person, and you had to purchase these tickets 1-2 days in advance.

I wound up doing an amazing hike up to the Observation Point, which has the same views of the park that can be seen from Angel’s Landing. The hike is challenging and the path is very well maintained, especially the piece that led you up the mountain to the summit. Never did I feel like I was in danger or that the path was uncomfortably narrow, there was a rock ledge at all times making you feel enclosed on the path, and it was not so steep that it felt unreasonable (though it was steep). Also, the nature in this park is incredibly diverse. In one 11 mile stretch, I was able to hike through a meadow, through a forest, and into a canyon. I am very excited to come back to this park again and do some of the more popular hikes. Honestly, if you go here and are able to do any of the hikes I mentioned that were not available at the time of my visit, this park will absolutely rank higher than it did for me. Until next time, Zion.

Check out my itinerary for a more detailed review of the hike I did in Zion National Park, and some food/beer suggestions in Utah!

4. Grand Canyon National Park (Arizona)

I will start by saying that the Grand Canyon is absolutely worth the hype. There is no way you can understand what this looks like and feels like until you come see it for yourself. Coming into this park, I was torn about whether I wanted to try a hike down into the canyon. I knew that the view was going to be the best at the top, which would have been at the start of the hike anyway. I do recommend going to one of the lookout points before actually starting a hike, because that will be your best view of the canyon. However, the hike down into the canyon is also worth the experience! The hike itself (there is only one trail that gets you down there) is not technical at all – it is a wide dirt path that is shared with mule rides down to the bottom – but there is something to be said about the feeling you get as you hike further and further down into the depths of the canyon. I didn’t make it too far down, because I had been driving earlier that day and only had a few hours before sundown, but it definitely left me wanting more. There are a couple of things you should note about this park:

  • There are two rims – north and south. the North Rim is the one that I visited, but the South Rim is the more touristy one, and the one with arguably better views of the canyon (so I have heard). To drive from the North Rim to the South Rim is a 5 hour drive, as there is no way to travel across the canyon in your car. Plan accordingly – I did the North Rim because it was on the way of the trip, learned once I got there that the South Rim was a worth-it stop, but didn’t actually have time to fit it in.
  • There is one hiking trail that takes you to the bottom of the canyon on each of the rims, and the trails connect at the bottom. Hiking (or taking a mule) is the only way to get to the bottom of the canyon – there are no roads for vehicles! You are highly discouraged from trying to go all the way down and back up in the same day. There is a lodge at the bottom of the canyon, but to get into that you likely have to plan a year in advance. There are some campsites along the way which are more accessible, and would require a few months of planning ahead to be safe.
  • You can absolutely hike either of the trails down to your personal comfort level for the day and then back up There are vista points and milestones to look for at many reasonable intervals along the trails, and even a portion of them is totally worth it for the experience! The trail is STEEP, so just know that it will take 1.5-2x the amount of time (and an exponential amount of effort) for you to get back up as it did to get down. Bring snax and ample water!

I would love to go back to the Grand Canyon very soon and do the hike all the way down to the bottom, spending a night in a campsite. I would even love to hike down to the bottom of one rim, back up the other rim, and then back down and up the original rim. I met a Grand Canyon true vet who had done the hike down to the bottom multiple times, and said that rim to rim to rim (what I just described) would probably take four days of hiking and three nights of camping, but it would be an unforgettable experience!

Check out my itinerary for a more detailed review of the hike I did in The Grand Canyon National Park, and some food/beer suggestions in Arizona!

3. Yellowstone National Park (Wyoming)

This park ranks fairly high for me for a unique reason. It is is not a park that I see myself going back to anytime soon, but I do believe that you need to see it once in your life. The park sits atop a volcano, and the thermal underground activity causes a number of natural wonders that I didn’t even know existed in the world. There are geysers that explode boiling hot water at regular intervals, hot springs that develop the most beautiful colors around their edges, and sulfur mud volcanoes, which are less glamorous and quite smelly, but the science behind them is fascinating. The first time you visit this park, you will feel like you are walking through a giant nature zoo. I recommend the “Lower Loop” itinerary (check out my itinerary for a more detailed look at the “Lower Loop” exhibits), which contains all of the main attractions of the park within a drive able distance from each other – this whole loop can be completed comfortably in one day. There is very minimal hiking on this loop, however there will be a significant amount of walking through each exhibit. Due to the dangers of a very thin layer of the earth’s crust covering piping hot water beneath, there are boardwalks that you are required to walk on in the park. I think that the phenomena of this park is incredible and there is so much to learn and see, but the inability to interact with the nature took away just a little bit from the experience for me. There is apparently more hiking that can be done in the park outside of the Lower Loop, so perhaps that would make for a more interactive and hands-on experience. This park is EXTREMELY kid and family friendly. If you want to see and learn about incredible natural wonders of the earth on easy walking paths, this park will make a perfect stop on your trip!

There was no requirement for a time slot or extra permit to hike in this park – the annual pass got me wherever I wanted to be! Check out my itinerary for a more detailed review of each of the hikes I did, and some food/beer suggestions in Wyoming!

2. Yosemite National Park (California)

I know that I didn’t actually visit this park on this particular trip (I went last year in summer 2019), but it is a National Park, and I believe it deserves a spot in my National Park rankings. I had spent a few days in the park, and on the long hiking day had created a full-day itinerary combining a few trails, including the Mist Trail, the John Muir Trail, and the Nevada Falls trail. It was ambitious, and the last leg of the falls is basically a stone staircase leading straight into the heavens, but the view are absolutely gorgeous the whole entire time. The paths are also VERY well maintained, and though it is cliffside along the waterfalls for a lot of it, I never felt unsafe or that my footing was unreliable. The paths are so much fun to hike, and the surrounding nature is constantly changing, so every thirty minutes of the hike feels like a brand new experience. Stick with me for the rest of this monologue, because I’m going to hit you with a plot twist… I had visited Yosemite in late May, and the area was experiencing uncharacteristic harsh and cold weather for the season. It was consistently rainy all of the days that I was there, and there was snow on the ground in the morning. I would say that during my time in this park, I saw the WORST weather I had ever experienced for hiking. Ready for the plot twist? Despite my awful luck with Mother Nature, this park is still ingrained in my brain as one of the most magical places on earth. The best picture I have ever taken in my whole entire life (so far) has been in this park – during a period when the rain happened to clear, a rainbow appeared right in the waterfall, and the moment was so surreal that I almost expected a unicorn to come trotting out of the forest. There is something about this place that is pure magic, and I would get the annual pass every single year if I lived closer to it.

1. Arches National Park (Utah)

Hands down, the most impressive place I have ever been to in my whole life is Arches National Park. The whole Moab area is incredible, and it was an easy decision making this natural playground #1 on my list.

Arches really blew me away because of the natural structures formed out of the salmon colored sandstone by salt deposits. I knew what they looked like before visiting, and I was most excited for this park going into the whole trip, but seeing them in person is even more breathtaking than I imagined. And there are so MANY of them! Everywhere you look, there is another – it’s like a scavenger hunt walking through the park to see if you can find them all. The Devil’s Garden Loop trail is one of my favorite trails from this trip. It is the perfect balance of thrilling and challenging, but also safe and well maintained. There are plenty of places to lounge around and have a snack, and also plenty of places to play around and just climb on rocks. The sandstone is comparable to sandpaper, which makes for excellent footing – you can play around on steeper grades than you normally would on regular rock. You truly feel like you are on the moon! (or what I imagine that would be like). It would be a shame to travel anywhere near this area and not make time to visit this park. Arches is technically in the desert, so bring a TON of water and sunscreen, as there is really no shade to help you out. Getting in as early as possible is going to make it better, and plan to just relax in the afternoon. There are some lakes you can swim in nearby the park, and a ton of off-roading trails you can explore in the comfort of your own air conditioned car. The latter is what I wound up doing during my afternoon in Moab.

I will caveat my stellar review of the Devil’s Garden hike with the fact that it is rated as “hard” for good reason. It is fairly technical in some portions, requiring you to scramble up or down rock structures, and at some points is high up and cliffside (nothing too narrow though). I will forever defend this hike, though, by reminding you that I am the world’s biggest weenie and I still found this to be one of my favorites. Again, the sandstone makes for such great footing that I never ever felt like I would slip once, even if I was on a very steep grade.

I have to also mention Canyonlands National Park. The Moab area is full of off-roading opportunities, and that is what I did in Canyonlands with my jeep in the afternoon. The Canyonlands park has incredible hiking too, though I did not do any of the hikes in the park. Canyonlands is organized into three sections, and you should view these as three separate parks for planning purposes. It could take hours to drive from one side of Canyonlands to the other, so buffer in driving time if you are trying to hit multiple parts of this park. I got great recommendations from locals about the “Needles” section of the park, which looks like it has moderate to advanced hiking options. Another section, the “Islands in the Sky,” seems the most friendly for beginner and moderate hikers. Lastly, the “Maze” section looks more conducive to very advanced and extreme hiking. Check out the website for more information, and see for yourself which trails will be best for you!

The last thing I will mention about the Moab area is that it is a notable “dark” area, which means that it is excellent for stargazing. I did this in one of the parks one night, and got to see a few shooting stars leftover from the height of the Perseid Meteor Shower. This was the best showing of stars I have ever seen. Just another thing to add to the list of why Moab is a magical place!

If I could have done anything differently on this trip, it would have been to schedule a couple of extra days in Moab to explore more. There was no requirement for a time slot or extra permit to hike in this park – the annual pass got me wherever I wanted to be! Check out my itinerary for a more detailed review of the hikes I did, and some food/beer suggestions in Utah!

Again, I want to say that I would recommend any and all of these parks to anyone who is able to visit! They are absolutely spectacular, and if you have the chance to visit, please do! If you want some more visuals from my trip, check out the reels on my Instagram – I made one every single day on my trip! Now that you have a good general overview for each of the parks, Part 2 details every single item I packed, the COVID precautions I took, and some tips I follow for planning and executing road trips and hiking excursions (some of which I learned on this trip and felt compelled to share), and Part 3 is the full itinerary of my trip, including detailed reviews of each hike I did and meal I ate along the way!

Happy hiking!